Getting Surfaces Ready For Effects, 25 Things You Should Know
Preparing surfaces for various effects can seem like a daunting task, especially when there are countless choices for mediums and treatments available. We’re here to make this process a breeze for you! With a few simple steps and guidelines, you will be able to master the art of getting surfaces ready for any effect you desire.
Getting surfaces for effects:
To properly prepare surfaces for effects, evaluate the surface for damage and existing coatings, clean and degrease thoroughly, and then sand and prime as necessary. Protect surrounding areas with masking tape and sheeting, and inspect the surface before applying the effect. Following these steps, along with adhering to manufacturer guidelines, will yield a professional-quality and durable result.

Unlock the potential of surfaces and create eye-catching effects! Dive into our comprehensive guide on preparing various surfaces for stunning visual impacts. We have expert tips and techniques waiting for you. Keep reading to transform the ordinary into the extraordinary.
Contents
- 1 Preparing Surfaces for Effects: Essential Tips
- 2 Surface Preparation: A Step-by-Step Guide
- 3 Surface Preparation for Painting: Key Techniques
- 4 Bonding Preparation: How to Ready a Surface
- 5 Top Four Surface Preparation Methods for Adhesive Use
Preparing Surfaces for Effects: Essential Tips
Successful application of effects on various surfaces requires proper surface preparation. This article aims to provide a detailed guide on getting surfaces ready for effects, including necessary steps and expert recommendations.
• Importance of Surface Preparation
Surface preparation is a crucial step in ensuring the durability and effectiveness of applied effects. Neglecting this step can lead to poor adhesion, uneven texture, and overall lower-quality results.
• Surface Evaluation
Before considering surface preparation techniques, it is important to assess the surface and identify any issues, such as damage or existing coatings.
– Identifying Surface Damage
Examine the surface for any obvious signs of damage, such as cracks, holes, or dents. It is crucial to repair any damage before proceeding with surface preparation, as this can adversely impact the final outcome.
– Identifying Existing Coatings
If the surface has been previously coated or painted, remove any peeling or flaking material. Assess the remaining coating’s adhesion, as a poor bond could compromise the newly applied effect.
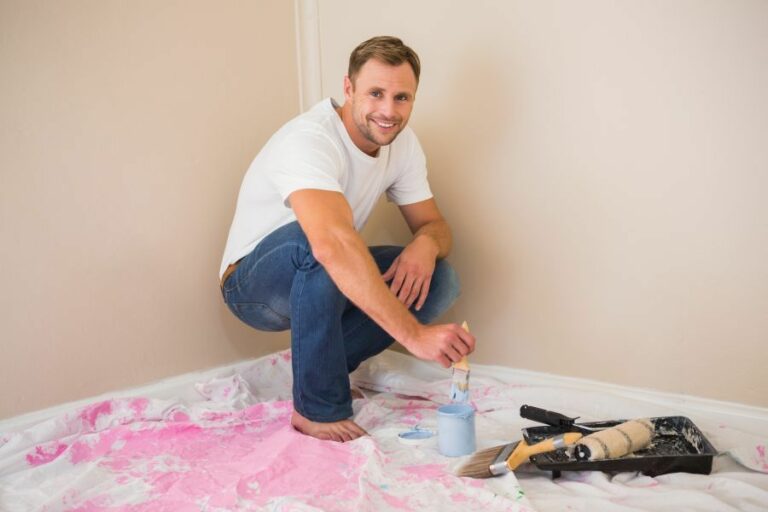
• Cleaning the Surface
The first step in surface preparation is cleaning. This ensures that dirt, dust, and other contaminants do not interfere with adhesion or the final appearance of the effect.
– Dust and Dirt Removal
Use a soft-bristle brush or cloth to gently sweep away loose dust and dirt. For more stubborn dirt, a damp cloth or sponge can be employed. Ensure that the surface is fully dried before moving on to the next step.
– Degreasing
For surfaces stained with grease or oil, a degreaser may be necessary. Apply according to the manufacturer’s instructions, and rinse thoroughly with water. Dry the surface completely before proceeding.
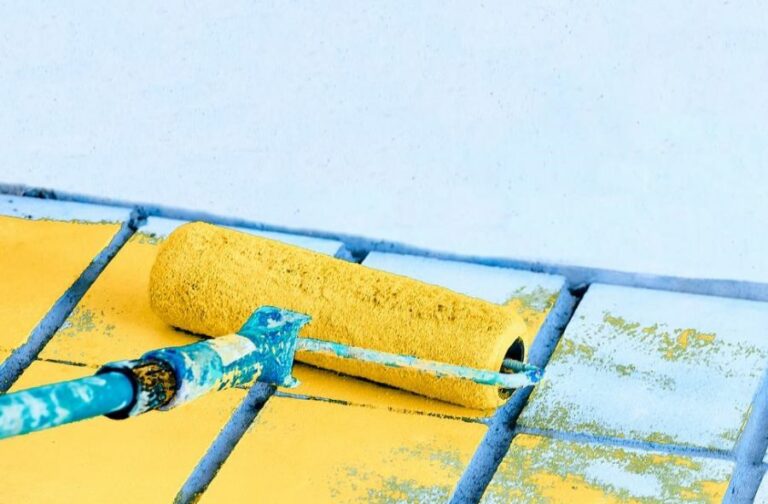
• Sanding
Sanding is a key step in surface preparation for many effects. It helps achieve a smooth surface and promotes adhesion.
– Selecting the Appropriate Sandpaper
Choose appropriate sandpaper for the surface and the desired effect. Coarser grits (like 80 or 100 grit) are ideal for rough surfaces and removing existing coats. Finer grits (like 240 or 320 grit) are suitable for creating a smooth finish.
– Sanding Technique
Using even pressure, sand the surface in the direction of the grain (for wood surfaces). Continuously inspect the surface, ensuring that it is smooth and even.
– Cleanup
After sanding, use a vacuum or dry cloth to remove any residual dust.
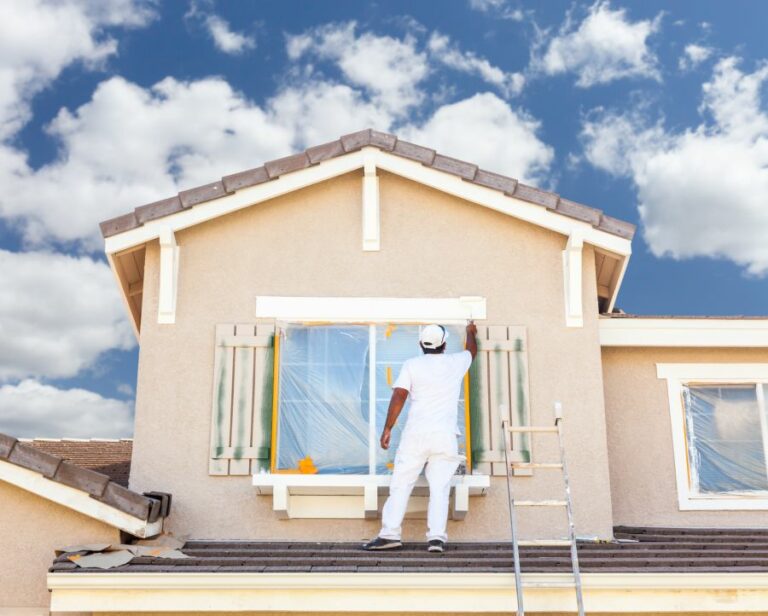
• Masking
Before applying the effect, protect any areas not intended for coating. Use masking tape and plastic or paper sheeting to cover adjacent surfaces, like windows or trim.
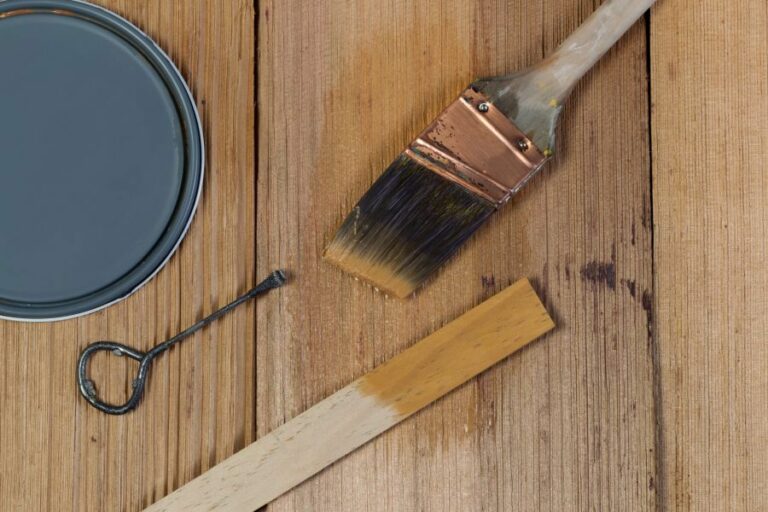
• Primer Application
Priming the surface is critical in promoting adhesion, sealing porous materials, and enhancing the final appearance of the effect.
– Selecting the Right Primer
Choose a primer compatible with both the surface material and the intended effect. Consult manufacturer recommendations or consult with a professional.
– Primer Application Technique
Apply the primer according to manufacturer directions, using even strokes in a consistent pattern. Allow the primer to dry fully before proceeding.
• Final Inspection
Before applying the effect, conduct a final inspection of the prepared surface. Ensure that it is clean, undamaged, and primed.
• Expert Recommendations
In conclusion, proper surface preparation is fundamental in achieving the desired result when applying effects. Always:
- Evaluate the surface for damage and existing coatings
- Clean and degrease the surface thoroughly
- Sand and prime as necessary
- Mask adjacent areas to protect from unintended coating
- Inspect the surface before applying the effect
Following these steps and adhering to manufacturer guidelines will help ensure a professional-quality outcome that is both visually appealing and durable.
Surface Preparation: A Step-by-Step Guide
Surface preparation is a crucial element in the process of applying coatings in order to achieve optimal adhesion and longevity of the protective layer.
Choosing a suitable surface preparation method and executing it meticulously is vital for the durability and performance of coatings in various industries such as construction, manufacturing, and marine environments.
• Identifying the Surface’s Condition
The first step in surface preparation involves assessing the surface’s condition. This includes identifying the type and extent of contamination, deterioration, and presence of existing coatings or other surface layers.
A thorough evaluation reveals the most appropriate cleaning and preparation method required for the given substrate.
– Contaminants
Contaminants may include dust, dirt, grease, oil, or any other substances that can compromise the adhesion of a coating system.
It is crucial to determine the type of contaminants present and their level of severity. Removing contaminants ensures that the surface is clean and ready for further preparation.
– Existing Coatings and Surface Layers
Inspect the surface for existing coatings, paint, or other layers that may need removal before applying a fresh coat. The adhesion and compatibility between the new coating and the existing one play a significant role in the durability of the new protective layer.
– Deterioration
Check for signs of deterioration such as rust, corrosion, or pitting on metal surfaces and cracks, spalling, or efflorescence in concrete surfaces.
Addressing these issues during surface preparation aids in enhancing the bond between the coating and substrate, ultimately resulting in an effective protective layer.
• Choosing the Right Surface Preparation Method
Once the surface condition is identified, selecting the appropriate surface preparation method becomes critical.
There is a wide array of methods available that cater to different substrate materials, contaminants, and coating requirements. Some common techniques to choose from include:
– Abrasive Blasting
SSPC-SP5, the Society for Protective Coatings’ white metal blast cleaning specification, involves the use of abrasive materials such as sand, steel shot, or crushed glass to remove contaminants and create a clean, uniform surface.
This method is effective on metal surfaces and is suitable for the removal of rust, mill scale, or existing coatings that are incompatible with the new coating system.
– Water Jetting
High-pressure water jetting is a popular method for cleaning concrete and steel surfaces. It involves the use of high-velocity water to remove contaminants and weak layers, tapping into the power of water to strip away unwanted elements without causing damage to the substrate.
– Grinding
Grinding employs an abrasive wheel or disc to abrade and remove contaminants or existing coatings. This method is well-suited for concrete surfaces or small, localized areas in need of surface preparation.
– Chemical Cleaning
Chemical cleaning makes use of solvents or chemical agents to dissolve and remove contaminants, such as grease or oil, that are difficult to remove with other methods. This approach is ideal for surfaces where abrasive methods may damage the substrate materials.
• Implementing Surface Preparation Techniques
After selecting the optimal surface preparation method, it is essential to ensure that the technique is executed properly. Adhering to industry standards and following the manufacturer’s recommendations is imperative to ensure optimal results. Proper execution includes:
– Personal Protective Equipment
Ensure all workers involved in this step are equipped with appropriate personal protective equipment, such as respirators, gloves, and safety glasses, to safeguard against potential hazards during the surface preparation process.
– Quality Assurance
Investing in quality assurance measures will help validate the effectiveness of your chosen surface preparation technique.
Conducting tests, such as visual inspections or adhesion tests, to confirm the cleanliness and preparedness of the substrate before the coating application ensures that the bond between the coating and the surface is secure and durable.
• Final Surface Inspection
Before applying the coating, ensure the surface is completely free of contaminants, residue from the chosen surface preparation method, and any other substances that can compromise the coating’s adhesion.
A careful final inspection guarantees that your surface is ready for the subsequent application of the protective layer.
In conclusion, effective surface preparation is the foundation for a successful coating application. By following the steps outlined in this article and complying with industry best practices, project owners can enhance the performance and longevity of their coating systems.
Remember that investing in thorough surface preparation not only safeguards your assets but also minimizes future maintenance costs and downtime.
Step | Description |
|---|---|
1. Clean the surface | The surface needs to be cleaned to remove contaminants such as dust, dirt, grease, and oil. |
2. Remove old paint or coatings | Using a paint scraper, sandpaper, or chemical stripper, remove any old paint or coatings on the surface. |
3. Repair damage or defects | Fill in cracks, holes, and dents with the appropriate filler material, and sand it smooth once it has dried. |
4. Sand and smooth the surface | Use sandpaper or an electric sander to help create a smooth and even surface. |
5. Prime the surface | Apply a primer to help the paint adhere better and to create a smooth finish. |
6. Mask areas you don’t want to paint | Use painter’s tape and/or plastic sheeting to mask off areas that should not receive paint, such as windows, doors, and trim. |
Surface Preparation for Painting: Key Techniques
It is well known that a quality paint job depends heavily on proper surface preparation. To achieve an impeccable finish, every single detail must be taken care of, from removing dirt to repairing walls to sanding, priming, and beyond.
• Importance of Surface Preparation
Proper surface preparation ensures that the paint adheres correctly, providing lasting durability and an aesthetically pleasing result.
Neglecting this critical step can lead to blistering, peeling, and other defects that mar your project’s success. Hence, investing time and effort in preparing the surface before painting is always recommended.
• Removing Dirt and Grime
The very first step in surface preparation is removing any dirt, dust, and grime that has accumulated over time. This is essential, as the presence of these impurities can impair paint adhesion and lead to an uneven finish.
Surfaces can be cleaned using a gentle detergent mixed with water, scrubbing with a soft brush, and rinsing thoroughly. Always allow the surface to dry completely before proceeding.
• Repairing Walls and Ceilings
In a painting project, it is normal to encounter damaged walls or ceilings that need repairing. This process typically involves the following tasks:
– Patching Holes
Holes and dents should be filled with an appropriate patching compound or filler, such as spackle or joint compound.
Apply the filler to the hole or dent using a putty knife, then scrape away any excess. Allow the compound to dry as per the manufacturer’s instructions, after which it can be lightly sanded smooth (see the “Sanding” section below).
– Fixing Cracks
Cracks should be treated by applying a self-adhering fiberglass mesh tape. This will help to reinforce the crack, preventing it from reappearing once painted.
Apply joint compound over the tape using a trowel, feathering the edges for a smooth transition. Again, allow the compound to dry and sand smooth as necessary.
• Sanding Surfaces
Sanding is a critical step in preparing surfaces for painting. It helps to smooth rough spots and ensure proper paint adhesion. The right grit sandpaper should be used, typically starting with a coarse grit (ex. 80 or 100 grit) and progressively moving to finer grits (ex. 180 or 220 grit).
Sandpaper can be attached to a sanding block or pole sander to make the process easier. Always sand in a circular motion and avoid using excessive force. After sanding, remove dust with a tack cloth, vacuum, or damp cloth.
• Addressing Mold and Mildew
Mold and mildew should be treated before painting, as they can compromise paint adhesion and cause health issues. A solution of one part bleach to four parts water can be used to clean the affected areas.
Allow the solution to sit for approximately 10-15 minutes before rinsing thoroughly with water. Allow the surface to dry completely before proceeding. It is also recommended to use a paint that is specifically formulated to inhibit mold and mildew growth like these.
• Priming the Surface
Priming is an essential step in surface preparation, as it creates a uniform base for the paint to adhere to. There are various types of primers available, including oil-based, latex-based, and shellac-based primers. Consider the surface material and painting conditions when selecting an appropriate primer.
- Latex-based primers work well for drywall, plaster, and masonry surfaces. They typically have low odor and dry relatively quickly.
- Oil-based primers are ideal for raw wood (both interior and exterior), as they penetrate deeply into the wood fibers, creating a strong bond. Painters should note that oil-based primers take longer to dry and have higher levels of volatile organic compounds (VOCs).
- Shellac-based primers work well on surfaces exposed to fire or water damage, as they can seal odors and stains effectively. These primers dry quickly but may emit strong odors during the application process.
Always follow the manufacturer’s application instructions for optimal results, and use appropriate personal protective equipment (PPE) when necessary.
• Final Thoughts
Preparing surfaces before painting might seem like a time-consuming and labor-intensive process, but it is crucially important for a successful and lasting paint job.
By following the steps outlined in this guide, you can achieve professional-quality results and ensure the beauty and durability of your paintwork for years to come.
Remember, surface preparation is not a one-size-fits-all process. Tailor your approach to the specific material, condition, and painting environment. In this way, you’ll be well on your way to achieving exceptional results that stand the test of time.
Step | Description |
|---|---|
1 | Remove any loose or peeling paint with a scraper or wire brush. |
2 | Fill any small holes or cracks with filler, then sand smooth when dry. |
3 | Wash the surface with a mild detergent solution to remove dirt and grease, then rinse with clean water. Allow to dry. |
4 | Sand the surface to create a smooth and slightly rough finish for improved paint adhesion. Wipe down with a tack cloth to remove any dust. |
5 | Apply a primer or sealer, if needed, to ensure proper paint adhesion and coverage. |
6 | Allow the primer or sealer to dry according to the manufacturer’s instructions before painting. |
Bonding Preparation: How to Ready a Surface
Surface preparation is a crucial step when it comes to ensuring a strong bond between materials. Whether working with adhesive, paint, or sealant, the right surface treatment is essential for maximizing adhesion and achieving long-lasting results.
• Understanding Surface Contaminants and Cleanliness
Before starting any bonding process, it’s important to understand the types of contaminants that can affect the surface and how to remove them effectively.
Common contaminants include dirt, grease, oil, and rust. In addition to these, the presence of moisture, oxidation, or previous coatings can also interfere with adhesion.
– Removing Contaminants
The first step in surface preparation is to remove any contaminants that may interfere with bonding. Cleaning methods can vary depending on the type and severity of the contamination. Here are some general guidelines for effective contaminant removal:
Solvent Cleaning
Solvent cleaning should be carried out with a clean, lint-free cloth dampened with a suitable solvent, such as isopropyl alcohol or acetone.
It’s essential to avoid leaving any residue behind, as this can compromise the bond. When working with solvents, always ensure proper ventilation and follow the manufacturer’s safety guidelines.
Mechanical Cleaning
For more heavily soiled surfaces or where rust or oxidation is present, mechanical cleaning methods may need to be employed.
These can include abrasive blasting, wire brushing, or sanding. It’s crucial to avoid damaging the underlying material during mechanical cleaning, as this can reduce the bonding strength.
Degreasing
In cases where the surface is contaminated with grease or oil, a commercial degreaser may be required. Follow the manufacturer’s instructions for the specific product being used, ensuring thorough rinsing to remove any residue.
• Roughening the Surface
After contaminants have been removed, it’s time to consider whether the surface needs to be roughened to enhance adhesion. Smooth surfaces can sometimes struggle to form a strong bond with adhesive, as they don’t allow for proper mechanical interlocking.
– Choosing the Right Abrasive
Depending on the material you’re working with and the desired level of surface roughness, there are various abrasive options to choose from. Sandpaper, abrasive pads or brushes, and more aggressive options like sandblasting can all be used to create the ideal surface texture.
– Applying Even Pressure
When roughening a surface, it’s essential to apply even pressure and keep the abrasive moving to avoid gouges or uneven treatment areas. Consistency is key to achieving a successful bond.
• Rinsing and Drying
After the surface has been cleaned and, if necessary, roughened, it’s important to rinse away any debris or residue thoroughly. In some cases, like when using a commercial degreaser or chemical etchant, manufacturers may recommend a specific rinse process.
– Choose the Right Drying Method
Finally, ensure the surface is completely dry before proceeding with the bonding process. Depending on the material, this may involve using a clean, lint-free cloth, air-drying, or even applying gentle heat.
• Applying the Bonding Agent
Once the surface has been meticulously prepared, it’s time to apply the bonding agent. Following the manufacturer’s recommended application method is vital, and allowing appropriate curing time to achieve the best results is vital.
In some cases, additional surface treatments such as primers or adhesion promoters may be required.
• Final Thoughts
To achieve strong, lasting bonds every time, ample attention to surface preparation is essential. Bear in mind that different materials may require varying surface treatment techniques, and always follow manufacturer recommendations for both cleaning and bonding products.
With proper surface preparation, you’ll be well on your way to achieving a bond that will last for years to come.
| How to Prepare a Surface for Bonding | |
|---|---|
| 1. Cleaning | Remove dirt, grease, and other contaminants from the surface using a suitable cleaning solution or solvent. |
| 2. Sanding or Abrading | Use sandpaper or an abrasive pad to remove any roughness, loose material, or oxidation from the surface, creating a uniform, slightly rough texture for improved adhesion. |
| 3. Rinsing | Rinse the surface with clean water or a compatible solvent to remove any remaining debris and cleaning solution. |
| 4. Drying | Allow the surface to air dry, or use a clean cloth to remove excess moisture. Ensure the surface is completely dry before proceeding with bonding. |
| 5. Chemical Treatment (Optional) | Apply a chemical treatment, such as a primer or surface conditioner, to improve bonding strength or enhance the performance of your adhesive. |
Top Four Surface Preparation Methods for Adhesive Use
When using adhesives, proper surface preparation is a crucial step to ensure the most effective bond. We will discuss the four main ways to prepare a surface for adhesive application. These methods include cleaning, abrasion, chemical treatment, and priming.
By following these techniques, you can enhance the overall performance of your adhesive and ensure a successful bond.
• Cleaning: Remove Contaminants for a Better Bond
One of the primary reasons for adhesive failure is the presence of contaminants on the surface. Dirt, dust, grease, and other impurities can interfere with the adhesive’s ability to bond with the surface. It is essential to clean the surface thoroughly before applying the adhesive to enhance the bond strength.
– Recommendations for Effective Cleaning
- Solvent Cleaning: Use a solvent, such as isopropyl alcohol or acetone, to remove grease and other contaminants. Apply the solvent to a clean cloth or tissue and gently wipe the surface, ensuring not to touch the surface with bare hands.
- Degreasing: For surfaces with heavy grease or oil buildup, consider using a degreaser. Degreasers contain chemicals specifically designed to break down and remove oil and grease, providing a clean, oil-free surface.
- Warm, Soapy Water: In some cases, cleaning with warm soapy water and a soft cloth may be sufficient. Rinse the surface thoroughly with fresh water afterward to make sure all residues are removed.
• Abrasion: Increase Surface Roughness for Better Bonding
Adhesives typically bond better to rough surfaces compared to smooth surfaces. Abrasion techniques help to increase surface roughness, which contributes to better adhesive wettability, penetration, and bond strength.
– Recommendations for Effective Abrasion
- Sanding: Sanding the surface with sandpaper is the simplest way of creating a rough surface. Choose sandpaper with a grit size appropriate for the type of material being prepped (e.g., 240-grit for metals, 400-grit for plastics). Sand in a consistent pattern to avoid uneven surface roughness.
- Blasting: For larger and more demanding applications, sandblasting or abrasive blasting can be an effective method to increase surface roughness. Blasting uses compressed air or water to propel small abrasive particles onto the surface, creating a rough profile. Make sure to protect surrounding areas and use proper safety equipment when performing blasting operations.
- Etching: Chemical etching, such as acid etching, helps to roughen surfaces of certain materials like glass, ceramics, and metals. Always follow the instructions provided by the etching solution manufacturer and wear appropriate safety gear.
• Chemical Treatment: Modify Surface Chemistry for Enhanced Adhesion
In some cases, chemical treatments can enhance adhesive bonding by modifying the surface chemistry. Chemical treatment methods should be used in conjunction with cleaning and abrasion techniques for optimal results.
– Recommendations for Chemical Treatment
- Silane Coupling Agents: For materials like glass, ceramics, and metals, silane coupling agents create a chemical bridge between the surface and the adhesive, enhancing bond strength. Consult the adhesive manufacturer for the appropriate silane agent and follow the instructions for application.
- Corona Treatment: Involving the use of high-voltage electrical discharge, corona treatment modifies the surface of plastics and polymers, improving the adhesion properties. This process should be carried out by professionals or in a specialized facility for safety reasons.
- Flame Treating: For thermoplastic materials, flame treating can enhance adhesive bonding by oxidizing the surface. Use a propane torch and move the flame evenly across the surface while maintaining a safe distance to avoid overheating.
• Priming: Improve Adhesion with a Compatible Layer
In some cases, applying a primer prior to adhesive application can improve the bond by forming a compatible intermediate layer between the surface and the adhesive. Primers can also protect the surface from adverse environmental conditions, prolonging the bond’s durability.
– Recommendations for Effective Priming
- Choose the Right Primer: Consult the adhesive manufacturer for recommended primers compatible with your material and adhesive. Compatibility is essential for optimal performance.
- Apply the Primer: Follow the primer manufacturer’s instructions for surface preparation, drying time, and application methods. Typically, primers are applied using a brush or spray in a thin, even layer.
- Timing: Adhesive application should follow as soon as the primer has dried according to the manufacturer’s instructions. Waiting too long may decrease the primer’s effectiveness.
By following these four essential techniques: cleaning, abrasion, chemical treatment, and priming, you can ensure proper surface preparation and achieve a strong, lasting bond with your adhesive.
Always consult adhesive manufacturers for specific recommendations and guidelines related to the surfaces and adhesives in use.