Edge Sealing Tips For A Level Paint Outcome. What Pros Say
Are you tired of uneven paint outcomes after investing endless time and effort into your project? Well, it’s time to put those worries to rest as we reveal some top-notch edge sealing tips for achieving a flawless and level paint finish. Stick with us, as our knowledge and experience will guide you toward mastering the art of sealing edges and attaining the paint results you’ve always desired!
Edge sealing tips for a level paint outcome:
To achieve a level paint outcome with edge sealing, use high-quality painter’s tape, a precision paintbrush or edge sealing tool, and an appropriate sealant or primer. Ensure the surface is clean, dry, and free of debris before applying tape properly and pressing down firmly. Seal edges with paint or primer and remove the tape at the optimal time to maintain a crisp, clean line.

Discover invaluable edge sealing techniques to achieve a perfectly smooth and level paint finish in your projects. Unveil the secrets behind seamless transitions and crisp lines. Read on and let us guide you towards impeccable paintwork results every time. Keep browsing for more!
Contents
- 1 Expert Tips for Sealing Edges for a Smooth Paint Finish
- 2 Secrets to Achieving Flawless Painting Edges Revealed
- 3 Repairing Uneven Edges After the Painting Process
- 4 Mastering Wet Edge Techniques to Prevent Paint Lapping
- 5 Properly Sealing Painter’s Tape Edges for Clean Results
Expert Tips for Sealing Edges for a Smooth Paint Finish
For a seamless and professional-looking paint job, edge sealing plays a crucial role. This article will provide you with helpful tips and techniques to achieve a level of paint outcome on various surfaces. Implementing these strategies can make your painting projects look polished and visually striking.
• Importance of Proper Edge Sealing
Edge sealing is an essential step in any painting task because it prevents the paint from seeping underneath the masking tape, creating a crisp and clean line.
Additionally, it ensures an even color distribution and adherence to the surface, reducing blemishes and preserving the integrity of your paint job.
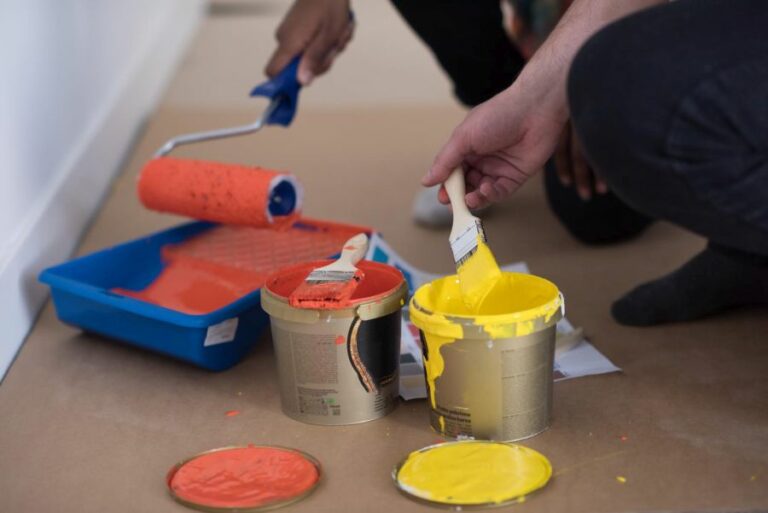
• Select the Right Tools and Materials
– Quality Masking Tape
Opt for a high-quality painter’s tape, which will adhere better to surfaces and remove more easily without leaving residue or damaging paint. Some popular choices include FrogTape and 3M’s ScotchBlue.
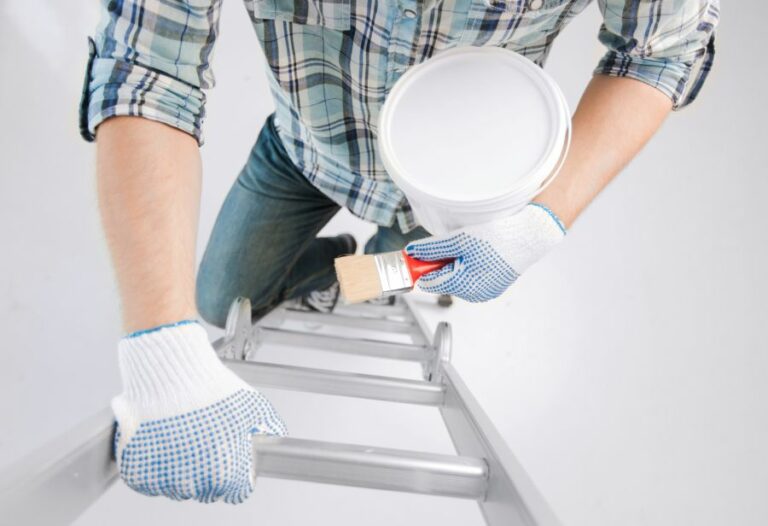
– Paintbrush or Edge Sealing Tool
Select a high-quality paintbrush or edge-sealing tool designed for precision work. Look for features such as smooth bristles or a design that allows for guiding edges and tight spaces.
– Sealant or Primer
An appropriate sealant or primer is important for creating a sealed edge that adheres well to your surface, helping to achieve a level paint outcome. Your choice will depend on factors such as the type of paint you are using or the surface’s texture.
• Prepare the Surface
Before applying any tape or paint, ensure the surface is clean, dry, and free of debris. This ensures proper adherence of tape and paint, and minimizes any unevenness in the final result.
– Clean the Surface
Wipe down the surface with a damp cloth, and use a gentle cleaning solution if necessary. Allow the surface to dry completely before moving forward with your project or applying any tape.
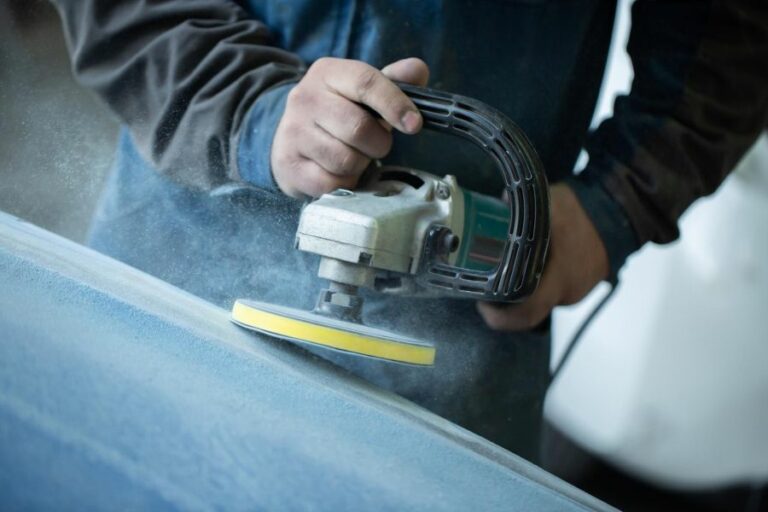
– Lightly Sand and Repair the Surface
If your surface has any imperfections or rough spots, it may be necessary to lightly sand or repair the area. Afterward, use a damp cloth to remove any dust or debris left behind.
• Apply Masking Tape Correctly
Invest time in creating a clean, tightly sealed edge with masking tape. This will prevent paint bleed-through and ensure a level paint outcome.
– Position the Tape Properly
Place the tape directly along the edge of the surface you wish to protect without leaving gaps or overhangs. Instead of stretching the tape to fit a curve, use smaller segments and overlap them to maintain even pressure on the edge.
– Press Down the Edge
Use your fingers or a flat object to press down the edge of the tape against the surface. This will create a tighter seal and prevent paint from seeping underneath the tape.
• Seal the Edges with Paint or Primer
To further prevent paint bleed-through and achieve a level paint outcome, apply a thin layer of paint or primer over the edge of the masking tape.
– Choose the Right Material
Depending on the type of paint being used for your project, you may want to use a sealant, primer or clear coat, or even the same paint that will be used for your final coat.
– Apply the Material Carefully
Using a high-quality paintbrush or edge sealing tool, apply a thin layer of the chosen paint or primer along the edge of the masking tape. This should help to create a clean, sealed edge that prevents any paint bleed through.
• Paint the Surface
Now that your edges are sealed, proceed with painting the surface. Adhere to best practices for your chosen paint type, ensuring full coverage and an even application.
• Remove the Tape at the Optimal Time
The proper timing for tape removal can vary according to factors such as the type of paint, tape, or surface. Removing the tape too early or too late can negatively impact the painting outcome.
– Too Early
Removing the tape before it dries could cause the paint to smudge or create an uneven edge.
– Too Late
Waiting too long to remove the tape could make it difficult to remove it and potentially damage the paint in the process.
• Final Thoughts
By following these edge sealing tips and taking the time to prepare your surfaces correctly, you are well on your way to achieving a level paint outcome. Through patience and practice, your painting projects will look polished and impressively professional.
Secrets to Achieving Flawless Painting Edges Revealed
A crucial aspect of a successful painting job is creating clean, straight edges. Painting perfect edges requires knowledge, technique, and the right tools. This article will provide a thorough examination of how to achieve perfect edges in painting projects.
• Perfect Edges: Preparation is Key
Before painters start their work, they need to ensure the surface is clean, dry, and smooth. This is the foundation of achieving perfect edges.
– Cleaning the Surface
To ensure a clean surface, using a damp cloth, remove any dirt, dust, or grease from the walls. If the walls have mildew or mold, this site provides information on how to safely remove it.
– Repairing Damaged Areas
Check the walls for any imperfections, such as dents, holes, or cracks. To repair these damaged areas, use a premixed patching compound or joint compound. Refrain from using spackle, as it can shrink and lead to uneven surfaces.
– Sanding the Surface
To achieve a smooth surface, sand the wall using medium-grit sandpaper. Sanding removes any existing bumps or imperfections and ensures the best possible adhesion of the paint.
• Taping and Using an Edge Painting Tool
One of the most important aspects of achieving perfect edges is to use the right tools. Taping and edge painting tools are crucial to achieve a clean finish.
– Applying Painter’s Tape
Using high-quality painter’s tape helps to create clean and straight edges. Apply the tape along the edge where you want the paint to stop. Make sure the tape is pressed down firmly, with no bubbles or gaps, to prevent paint from seeping beneath it.
– Using an Edge Painting Tool
An edge painting tool is a carefully designed device that allows for easy painting along edges. This tool helps to create a straight edge without the need for tape. When using an edge painting tool, always ensure that it is clean and free of dried paint.
• Painting Techniques for Perfect Edges
With the surface prepared and the right tools in hand, it’s time to apply the paint. Proper painting techniques result in clean and perfect edges.
– Cutting in Technique
“Cutting in” is the process of painting a straight line along the edge of a wall or other surface. This requires a steady hand and proper brush selection. I recommend using an angled brush, ideally 2 to 2.5 inches in size, for precise control.
When cutting in, dip the bristles about halfway into the paint and tap off the excess paint. Hold the brush at an angle against the edge you’re painting, and maintain a steady hand while moving in smooth, continuous strokes.
– Brushing Tips
Avoid overloading the brush with paint, as this can lead to drips or uneven coverage. In addition, never drag the brush along the edge of the tape, as this can cause paint to seep beneath the tape.
• Removing Painter’s Tape and Retouching
After the painting is complete, removing the tape properly is crucial to maintaining perfect edges. Also, be prepared to retouch any areas that may need correction.
– Removing the Tape
Wait for the paint to dry before removing the painter’s tape. Starting at one end, peel the tape off slowly and at a 45-degree angle. If any paint has seeped beneath the tape, use a small brush and a steady hand to touch up the edge.
– Retouching
Inspect the edges for any imperfections or areas that may need retouching. Use a small, fine-tip brush and a steady hand to make any necessary touch-ups.
• Final Thoughts
Achieving perfect edges in a painting project is a combination of proper preparation, using the right tools, and employing precise techniques. By following the steps outlined in this article, you’ll be well on your way to creating clean, straight edges in your painting endeavors.
Remember, practice makes perfect. As you gain experience, your ability to create perfect edges will only improve. Happy painting!
Repairing Uneven Edges After the Painting Process
• Assessing the Situation
Before diving into the process of fixing the edges after painting, it is essential to assess the situation and understand the extent of the issue. Differences in color, uneven texture, and visible brushstrokes are all common problems that need fixing after painting.
• Gather Necessary Materials
In order to fix the painting edges, gather the following materials:
- A clean, damp rag or sponge
- Painting tape (preferably painter’s tape)
- A small, angled paintbrush
- Sandpaper
- Your original paint color
• Cleaning the Area
Start by using the damp rag or sponge to clean the area around the problem edges. This will remove any dust, dirt, or debris that may interfere with the repair process. Allow the area to dry completely before proceeding.
• Proper Taping Techniques
A professional-looking paint job always starts with proper taping techniques. Taping off the area will ensure clean, sharp edges during repainting. Apply high-quality painter’s tape around the edges, ensuring it adheres properly to the surface.
This is crucial because it prevents the paint from seeping underneath the tape, creating a clean line. You can find painter’s tape at any reputable hardware store.
For more information on taping techniques, visit this link from The Family Handyman.
• Sanding the Area
If the edges are extremely rough or have visible brushstrokes, lightly sand the area with a fine-grit sandpaper. This will help create a smooth and even surface for repainting. Be sure to remove any sanding dust with a clean rag before proceeding.
• Repainting the Edges
It’s time to repaint the problematic edges. Use a small, angled paintbrush, ideally made for “cutting in,” allowing for a precise application of paint. Dip the brush into the original paint color, making sure to tap off any excess paint.
Start by painting the edge with steady, even strokes. Keep the brush at a 45-degree angle to create a clean, sharp line. Continue to paint the entire edge, reloading the brush with paint as necessary. For heavy texture or very uneven edges, a second coat of paint may be necessary.
• Removing the Tape
Once the paint is completely dry (refer to the paint label for the appropriate drying time), carefully remove the painter’s tape. Pull the tape away from the freshly painted edge at a 45-degree angle, ensuring a clean and even line.
• Inspecting the Repaired Edges
After removing the tape, inspect the repaired edges, ensuring the paint is even, and the lines are clean. If any additional touch-ups are necessary, wait until the paint is fully dry before repeating the process.
• Maintaining the Perfect Edges
Now that the edges have been fixed follow these tips to maintain perfect paint edges in the future:
- Use high-quality materials: Investing in good quality paint, brushes, and painter’s tape will ultimately save time and effort, as they will minimize the need for touch-ups and repairs.
- Cut in before rolling: By starting with the edges and corners before using a roller on larger areas, you will achieve smoother transitions between the different surfaces.
- Don’t overload your brush: Using too much paint on your brush can lead to drips and uneven lines. Ensuring that you only have an appropriate amount of paint will prevent these issues.
• Conclusion
Fixing edges after painting may seem daunting, but by following these simple steps and using the proper materials, your paint job will look professionally done in no time. Remember that patience, precision, and attention to detail are key factors in achieving those perfect, clean paint edges.
| How do you fix edges after painting? | |
|---|---|
| Step 1 | Wait for the paint to dry completely before fixing the edges. |
| Step 2 | Use a fine-grit sandpaper or sanding sponge to lightly sand the area where the edge needs fixing. |
| Step 3 | Clean the area with a damp cloth to remove any dust or debris from sanding. |
| Step 4 | Use high-quality masking tape or painter’s tape to create a clean, crisp edge where the paint line should be. |
| Step 5 | Use a small brush or mini roller to carefully apply paint along the taped edge. Be sure to feather the paint out slightly to blend it with the existing paint. |
| Step 6 | Allow the paint to dry before carefully removing the tape. If needed, touch up any remaining imperfections with a small brush and a steady hand. |
Mastering Wet Edge Techniques to Prevent Paint Lapping
• Understanding the Importance of a Wet Edge
When it comes to painting any surface, be it a wall, floor, or any other item, the golden rule is to maintain a wet edge. By achieving and sustaining a wet edge, you will prevent lapping, which refers to coating lines or streaks that form when the paint dries.
These irregular lines can significantly affect the overall aesthetic and quality of your paint job. In essence, a wet edge is the solution for a seamless finish.
• Factors Affecting the Wet Edge
– Temperature and Humidity
It’s crucial to consider the temperature and humidity levels in your painting environment, as they can directly affect the drying time of the paint. High temperatures and low humidity often accelerate paint drying, making it difficult to maintain a wet edge.
Conversely, low temperatures and high humidity can lead to excessive drying times, causing the paint to sag or not adhere properly. (Paint Quality Institute)
– Paint Formulation
Different paint types can have varying drying times, ultimately affecting the ease of maintaining a wet edge. For example, oil-based paints generally have slower drying times compared to water-based or latex paints.
It’s essential to understand the properties of the paint you are using and adjust your techniques accordingly.
– Painting Technique
The painting technique you choose can also impact your ability to maintain a wet edge. Using an inefficient or incorrect method can lead to lapping, uneven coverage, or excessive paint build-up.
• Strategies for Maintaining a Wet Edge
– Prepare Your Working Area
Before you start painting, ensure you’ve adequately prepared the surface and surrounding environment. Clean the surface thoroughly to remove dirt, debris, or contaminants that might affect paint adhesion.
Additionally, protect any adjacent areas or items with drop cloths or painter’s tape to prevent accidental paint spills or splatters.
– Choose the Right Tools
Using the appropriate tools for your painting project is essential. High-quality brushes and rollers can help ensure even coverage and assist in maintaining a wet edge. Select a brush or roller based on the paint type, surface texture, and size of the area you are painting.
For instance, use a 3/8-inch to 1/2-inch nap roller for semi-smooth surfaces and a 1/2-inch to 3/4-inch nap roller for rough or textured surfaces.
– Work in Manageable Sections
Divide your painting project into smaller, more manageable sections. By focusing on one section at a time, you can maintain a wet edge more easily. Typically, a width of 2-3 feet is a good starting point, but adjust the size based on your preferences, skill level, and the specific requirements of your project.
– Paint in the Proper Order
When painting larger areas, like walls or ceilings, start at the top and work your way down. This method allows you to catch any drips or runs as you progress, providing a cleaner and more even finish.
– Apply an Adequate Amount of Paint
Choosing the right amount of paint to apply is crucial. Too little paint on your brush or roller may cause thin coverage, making it difficult to maintain a wet edge.
Conversely, too much paint can lead to runs or sagging. Apply the paint in smooth, even strokes, reloading your brush or roller as needed to maintain a consistent layer of wet paint on the surface.
– Maintain Consistent Pressure
When using a brush or roller, apply consistent pressure to ensure even coverage and help prevent lapping. Uneven pressure can lead to streaks, runs, or build-up of paint in certain areas.
– Avoid Overworking the Paint
One common mistake when trying to maintain a wet edge is overworking the paint. Once you’ve applied the paint to your surface, avoid going back over it multiple times.
Overworking the paint can cause uneven coverage and make it more challenging to maintain a wet edge. If you notice an issue, address it promptly, then move on to the next section.
• In Conclusion
Maintaining a wet edge is an essential skill for achieving a professional, high-quality paint job. Understanding the factors that affect the wet edge and employing appropriate techniques can make all the difference in preventing lapping and ensuring a seamless finish.
Remember that practice makes perfect, so don’t be discouraged if you initially find it challenging to maintain a wet edge. With time, patience, and experience, you will refine your skills and achieve the desired results.
Properly Sealing Painter’s Tape Edges for Clean Results
• The Importance of Sealing the Edges of Painters Tape
When using painter’s tape during any painting project, one of the most crucial steps is ensuring that the edges are sealed.
Sealing the edges of the painter’s tape can help prevent paint from seeping under the tape, resulting in clean, crisp lines upon removal of the tape.
• Choosing the Right Painters Tape
Before embarking on your painting project, it’s essential to choose the right painter’s tape for your particular needs. Different types of tape offer varying levels of adhesion and can cater to specific surfaces.
For instance, delicate surfaces like wallpaper or freshly painted walls require low-tack tape to prevent damage upon removal. On the other hand, medium to high-tack tape is appropriate for surfaces like wood, glass, or metal.
• Prepare the Surface
Before applying painter’s tape, ensure that the surface is clean and dry. Any dirt, dust, or moisture can compromise the adhesion, leading to less effective sealing.
Use a microfiber cloth or a slightly dampened sponge to remove any debris or grease from the surface. Make sure the surface is completely dry before applying the tape.
• Application Techniques
– Straight Lines
- To create a straight line, measure and mark the area you want to cover with tape.
- Carefully apply the painter’s tape along the marked line, frequently pressing down on the edges of the tape using your fingertips.
- For long lines, consider using a taping tool or a straightedge to help maintain a straight and uniform application of the tape.
- Once the tape is in place, use a flexible putty knife or a credit card to press down along the edges, sealing them tightly against the surface.
– Curves and Contours
- When taping curves or contours, use a flexible painter’s tape that can easily adapt to the shape of the surface.
- Apply the tape in short sections, pressing the edges firmly as you go. Ensure that you don’t stretch the tape, as this may cause it to lift during painting.
- Secure the edges with a flexible putty knife or a credit card to create a tight seal.
• Common Pitfalls and Their Solutions
– Lifting or Peeling Edges
Lifting or peeling edges can occur due to poor adhesion or stretching of the painter’s tape during application. Ensure that the surface is clean, dry, and free of debris before applying the tape. Apply gentle pressure to the edges during application and avoid stretching the tape.
– Paint Bleeding
Even when the edges of the painter’s tape are sealed correctly, there is a risk of paint bleeding under the tape. A simple solution is to apply a clear coat or the original color of the surface along the edges of the tape before applying the new paint color.
This seals any gaps and prevents the new paint color from seeping underneath.
• Removal Tips
- When removing the painter’s tape, wait until the paint is dry to touch. Removing the tape before the paint is dry can cause smudging or damage to the newly painted surface.
- Gently pull the tape away from the surface at a 45-degree angle to minimize the risk of paint chipping or peeling.
- If the tape seems stuck or is causing paint to lift, use a utility knife or a sharp-edged tool to score the edge of the tape gently. This can help release the tape without causing damage to the surface.
• Conclusion
In conclusion, sealing the edges of painter’s tape is a critical step in ensuring clean and crisp lines for any painting project.
By choosing the right painter’s tape, preparing the surface, applying the tape correctly, and following the removal tips provided in this guide, you can achieve professional-looking results every time. Happy painting!
| How do you seal the edges of the painter’s tape? | |
|---|---|
| 1. Clean the surface | Ensure the surface where the painter’s tape is to be applied is clean and free of dust, dirt, or grease. |
| 2. Apply the tape | Apply the painter’s tape to the desired location, ensuring that the edge is straight and aligns with the area that needs to be protected. |
| 3. Press firmly | Press down firmly on the tape along its entire edge to create a strong bond to the surface, removing any gaps or air bubbles. |
| 4. Use a putty knife or similar tool | To further seal the edge, run a putty knife, credit card, or similar tool along the edge of the tape to further strengthen the bond with the surface. |
| 5. Double-check the edge | Inspect the edge of the tape to make sure it’s fully adhered to and sealed to the surface. If necessary, reapply pressure or use the putty knife on any areas that are still not fully sealed. |
| 6. Paint | Begin painting, taking care not to paint over the tape or let the paint seep under the edge of the tape. |
| 7. Remove the tape | Remove the painter’s tape while the paint is still slightly wet or after it has dried completely, depending on the manufacturer’s recommendations. Pull the tape back on itself at a 45-degree angle, and be cautious not to peel off any paint with it. |