Avoid Paint Issues: Properly Prep Surfaces. What Pros Say
Are you tired of paint issues, such as peeling, bubbling, or uneven coverage, ruining the look of your walls? You’re not alone! Many homeowners struggle to achieve a professional-looking finish when painting their homes. We have the secrets to help you successfully tackle this common DIY challenge. By properly prepping your surfaces before painting, you can avoid these common problems and achieve a stunning result that will enhance your space and stand the test of time.
Avoid paint issues: properly prep surfaces:
To avoid paint issues, properly prepare surfaces by selecting high-quality materials and tools, inspecting and repairing surface damages, cleaning the surface, sanding and deglossing, and applying a suitable primer. Following these steps ensures proper paint adhesion and a professional-looking paint job that lasts for years.

Read on to discover expert tips and guidance on properly preparing surfaces to avoid paint issues! We have more valuable information to share that will guarantee a smooth and long-lasting paint job. Don’t miss out on these essential steps to achieve professional results.
Contents
- 1 Prevent Painting Troubles: Adequate Surface Preparation
- 2 Optimal Surface Preparation Techniques for Painting
- 3 The Significance of Pre-Painting Surface Preparation
- 4 Primary Reasons for Common Paint Complications
- 5 Top Three Methods for Applying a Smooth Paint Finish
Prevent Painting Troubles: Adequate Surface Preparation
A flawless paint job begins with properly prepping surfaces. Without adequate preparation, even the highest quality paint can experience issues like peeling, bubbling, and uneven application.
• Choose the Right Materials and Tools
The first step in surface preparation is selecting the appropriate materials and tools for the job. Here are some recommendations:
- High-quality paint: Always invest in high-quality paint for any painting project.
- Primer: A suitable primer helps the paint adhere better to the surface.
- Sandpaper: Use fine-grit sandpaper (180-220 grit) for sanding surfaces and coarser grit (80-120) for removing old paint or rough patches.
- Scrapers and putty knives: These tools assist in removing old paint and loose material and filling holes or cracks.
- Filling compounds: Use the appropriate filler for specific surfaces, like wood filler for wooden surfaces and spackle for drywall.
- Cleaning supplies: Use essential cleaning supplies like mild detergent, sponges, and scrub brushes.
• Inspect and Repair Surface Damage
Before starting any painting project, thoroughly inspect the surface for damages, including holes, cracks, peeling paint, or loose materials. Repairing these surface issues is crucial to achieving a professional paint job. Here’s what to do:
- Remove any loose or peeling paint with a scraper or putty knife.
- Fill holes, cracks, or dents with the appropriate filling compound, following the manufacturer’s instructions for application and drying time. Some larger holes or deep cracks may require multiple applications for a smooth finish.
- Sand the filled areas using fine-grit sandpaper to make the surface even and smooth.
• Clean the Surface
Cleaning is a critical step in surface preparation, as dirt, dust, and grime can interfere with the paint’s adhesion to the surface. Follow these guidelines for proper cleaning:
- Use a mild detergent and warm water to gently scrub the surface. This step will remove dirt, grease, and other contaminants that could hinder paint application.
- Rinse the surface with clean water, ensuring that no detergent residue remains.
- Allow the surface to dry completely before moving on to the next step. Drying can take anywhere from a few hours to a full day, depending on the surface and environmental conditions. It is essential to wait until the surface is fully dry, as painting over a damp surface can cause paint adhesion issues.
• Sand and Degloss the Surface
To ensure proper paint adhesion, the surface must be sanded and deglossed before painting. This process creates a slightly rough texture for the paint to grip onto. Here’s how to do it:
- Lightly sand the surface using fine-grit sandpaper, working in a consistent pattern to cover the entire area. Be sure not to over-sand, as this can create uneven surfaces or damage the underlying material.
- If the surface has a glossy finish, use a deglosser to dull the shine. Deglosser is a liquid that can be applied with a cloth or sponge and must be allowed to dry according to the manufacturer’s instructions.
- After sanding and deglossing, wipe down the surface with a clean, damp cloth to remove any dust or debris.
• Apply Primer
Primer is an essential step in surface preparation, as it helps the paint adhere to the surface better and creates a more uniform base for the paint. Here’s how to apply primer:
- Choose the appropriate primer for your surface. Always follow manufacturer recommendations for the best results.
- Use a brush or roller to apply a thin, even coat of primer to the surface.
- Allow the primer to dry fully according to the manufacturer’s instructions. Drying time can vary depending on factors like humidity, temperature, and primer type.
• Final Tips for Prepping Surfaces
- Always follow the manufacturer’s recommendations for specific products, as application techniques and drying times can vary.
- Use proper safety gear, such as gloves, safety glasses, and a respirator, when working with chemicals or sanding materials.
- Consider using a lead paint test kit if you suspect your surface may contain lead paint. Proper handling and disposal of lead-based paint are necessary for preventing health risks.
By following these expert tips and guidelines, you’ll be well on your way to achieving a professional-looking paint job that lasts for years. Proper surface preparation is the key to avoiding paint issues like peeling, bubbling, and uneven application.
So invest some time and effort into preparing your surfaces before you start painting to ensure the best possible results.
Happy painting!
Optimal Surface Preparation Techniques for Painting
• The Importance of Surface Preparation
Achieving a flawless and long-lasting paint job on any surface relies heavily on the preparation method applied. Proper surface preparation is crucial for preventing paint issues like peeling, cracking, and bubbling.
• Assessing the Surface
Before starting the prep work, it’s essential to assess the surface that needs painting. Careful examination of the surface will help you identify the appropriate preparation method and select the right materials and tools for the job. Some common surfaces that require paint preparation include:
- Drywall
- Wood
- Metal
- Brick
- Concrete
• Cleaning the Surface
Regardless of the surface type, the first step in preparing any surface for painting is cleaning. Dust, dirt, and grease can significantly affect paint adhesion and cause an uneven finish. Follow these cleaning recommendations for different surfaces:
- Drywall: Wipe down with a damp cloth or sponge and mild detergent. For heavy dirt, use a soft-bristle brush, being careful not to damage the surface.
- Wood: Vacuum dust and debris using a brush attachment. For greasy spots, use a mild detergent and warm water solution. Rinse the surface thoroughly and allow it to dry completely.
- Metal: Remove grease and oil by wiping down the surface with a cloth soaked in mineral spirits or a degreaser. Rinse with water and allow to dry.
- Brick: Use a stiff brush and a mixture of water and mild detergent to remove loose dirt and debris. For stubborn stains, a wire brush can be used but do so with caution to avoid damaging the surface.
- Concrete: Sweep or vacuum debris, and scrub with a mixture of water and trisodium phosphate (TSP) to remove grease and oil stains. Rinse thoroughly and let the surface completely dry.
Remember to wear protective gear such as gloves and goggles while cleaning surfaces.
• Repairing Surface Imperfections
Once the surface is clean, your next step is to repair any damage or imperfections. This process may vary depending on the surface material, but some common defects that require attention are:
- Cracks
- Holes
- Gaps
- Loose or peeling paint
To repair these imperfections, use the following methods:
- Cracks and holes: Fill them with a suitable patching compound or wood filler, following the manufacturer’s instructions. After the filler dries, sand the area smoothly and level with the surrounding surface.
- Gaps: Caulk any gaps between trim and walls or along seams in wood siding. Use a high-quality caulk and follow the manufacturer’s instructions for application and drying times.
- Loose or peeling paint: Remove any loose or peeling paint with a scraper, putty knife, or wire brush. Sand the edges of the remaining paint to create a smooth transition between the old and new paint layers.
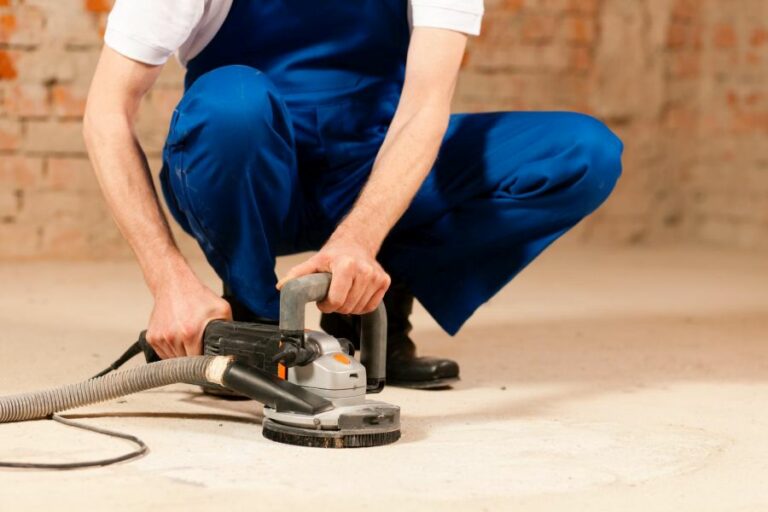
• Sanding the Surface
Sanding is a critical step in preparing the surface for paint, as it helps to create a smooth finish and promotes better paint adhesion. Sanding can be done using sandpaper, a sanding block, or a power sander for large surfaces.
The appropriate sandpaper grit will depend on the surface material and condition, but a general rule of thumb is to start with a medium grit (80-120) and finish with a fine grit (180-220).
Sanding recommendations for different surfaces:
- Drywall: Sand lightly with fine-grit sandpaper to smooth out any rough spots or patches.
- Wood: Sand with the grain to avoid leaving scratches on the surface. Start with a medium grit and progress to a finer grit for a smooth finish.
- Metal: Use fine-grit sandpaper or a sanding sponge to remove minor surface imperfections and rust.
- Brick and Concrete: These surfaces generally don’t require sanding. However, if necessary, use medium to coarse-grit sandpaper or a wire brush to smooth rough areas.
After sanding, vacuum or wipe down the surface to remove any dust or debris.
• Priming the Surface
Priming is an essential step in achieving a professional and durable paint job. Primer helps to seal the surface, hide imperfections, and ensure proper paint adhesion. Consider priming the surface using a high-quality primer that is compatible with your chosen paint. Follow the primer manufacturer’s instructions for application and drying times.
Suggested primer types for different surfaces:
- Drywall: PVA (polyvinyl acetate) primer or latex primer
- Wood: Oil-based or latex primer
- Metal: Metal primer, such as a rust-inhibiting or zinc-chromate primer
- Brick and Concrete: Masonry or concrete primer
• Final Thoughts
Proper surface preparation is the key to achieving a flawless and long-lasting paint job. Taking time to clean, repair, sand, and prime the surface will undoubtedly provide better results and save you time and money in the long run.
Remember to follow the recommendations mentioned above while using personal protective equipment such as gloves, goggles, and a dust mask or respirator when necessary.
Step | Instructions |
|---|---|
1 | Clean the surface thoroughly using a mild detergent or soap, removing dirt and grease. |
2 | Rinse the surface with clean water to remove any soap residue. |
3 | Allow the surface to dry completely. |
4 | Remove any loose or peeling paint using a scraper or sandpaper. |
5 | Sand the surface to create a smooth and even surface, removing any rough spots or imperfections. |
6 | Wipe down the surface with a tack cloth to remove any sanding dust. |
7 | Apply a primer, if necessary, to enhance paint adhesion and coverage. |
8 | Allow the primer to dry completely, following the manufacturer’s instructions. |
9 | Begin painting, using the appropriate tools and techniques for the type of surface and paint. |
The Significance of Pre-Painting Surface Preparation
• Background Knowledge First
Before discussing the importance of prepping before painting, it is crucial to understand what exactly the process entails. When someone uses the term “prepping,” they are typically referring to the essential preparation work needed before applying paint to a surface.
This is important to keep in mind, especially for those who are new to the world of painting, as the outcome of your paint job will only be as good as the prep you’ve put into it.
• The Benefits of a Thoroughly Prepped Surface
– Achieving a Smooth, Professional Finish
The primary reason for proper surface preparation is to create a smooth and even canvas that will allow the paint to adhere well and create a seamless, professional finish. Without thoroughly prepped surfaces, your paint can appear patchy and uneven and may not last as long as you’d hoped.
– Ensuring the Durability and Longevity of Your Paint Job
A well-prepped surface will not only make your paint job look better, but it will also help ensure that it lasts for a longer period of time. By removing dirt, grease, and loose particles from the surface, you can minimize the risk of premature paint failure, peeling, or flaking due to poor adhesion.
– Saving Time, Money, and Effort in the Long Run
While it may seem like additional work now, investing time and effort on the prep work can save you a lot of hassles down the line. A paint job that lasts longer and looks better means you won’t have to repaint as often, saving both time and money.
• Essential Steps to Properly Prep Your Surface
– Cleaning and Removing Dirt
The first step in surface preparation is to clean the area thoroughly. Begin by removing any loose dirt, dust, and debris with a broom, cloth, or duster. If the surface is particularly dirty or greasy, consider using a mild detergent and warm water to help cut through the grime.
– Fixing Surface Imperfections
Examine the surface for any imperfections such as cracks, holes, or dents. Fill these in with the appropriate repair product, such as a wood filler for wooden surfaces or a spackling compound for walls. Allow the filler to dry according to the manufacturer’s instructions before sanding it smoothly.
– Sanding and Smoothing
Sanding the surface is ideal for both smoothing and promoting better paint adhesion. Use fine-grit sandpaper for this process. Be sure to remove any residual dust particles with a vacuum or tack cloth after sanding.
– Priming the Surface
Applying a primer is another essential step in the prepping process, as it helps create a barrier between the surface and the paint, allowing for more consistent paint coverage. Choose the right type of primer based on the surface you’re working with. There are oil-based and water-based primers available, as well as primers specifically designed for surfaces like wood, metal, or masonry.
– Protecting Adjacent Areas
Use masking tape to protect adjacent surfaces that shouldn’t be painted, such as trim, door frames, or light fixtures. Additionally, lay down drop cloths or plastic sheets to protect the flooring and furniture from paint splatters.
• The Importance of Prepping Before Painting: A Summary
In conclusion, thorough surface preparation is paramount when it comes to achieving a professional, long-lasting paint job. The time and effort spent on cleaning, repairing, sanding, and priming the surface will pay off by providing an even, durable, and aesthetically pleasing end result.
Remember, a good paint job is only as strong as the foundation it is built upon. Invest in that foundation by prepping your work surface the right way.
Primary Reasons for Common Paint Complications
Paint problems can arise due to a variety of reasons. Understanding these root causes can help homeowners and professionals alike to avoid them and maintain the aesthetic and functional longevity of painted surfaces.
• Poor Surface Preparation
One of the most common causes of paint problems is inadequate surface preparation. This may include improper cleaning, sanding, priming, or masking. Without the right preparation, the paint may not adhere correctly, leading to issues such as peeling, blistering, and uneven finishes.
– Recommendations
- Clean surfaces thoroughly, removing dirt, dust, grease, and mildew. Use appropriate cleaning agents, such as trisodium phosphate (TSP) or mild detergent.
- Sand surfaces to remove loose or peeling paint and ensure the surface is smooth, clean, and dry.
- Prime surfaces properly with a suitable primer, especially for porous or stained surfaces. Consult paint manufacturers or retailers for the appropriate primer to use.
- Mask off adjacent areas to avoid paint spillovers and ensure well-defined borders.
• Incorrect Paint Type or Material
Using the wrong type of paint or incompatible materials can also result in myriad paint issues. For example, oil-based paints may not adhere well to surfaces previously painted with latex-based paints. Unsupported paint combinations could cause bleeding, blistering, or wrinkling.
– Recommendations
- Determine the type of paint used previously. If unsure, consult paint retailers or hire professionals to assess the coats.
- For surfaces previously painted with oil-based paint, using a primer specifically for this purpose is essential before applying latex-based paint.
- Check paint labels and consult manufacturers or retailers to ensure compatibility between paint types, primers, and substrates.
• Moisture and Humidity
Excessive moisture and humidity can lead to several paint problems, such as peeling, blistering, or mildew growth. Both interior and exterior painted surfaces can be negatively affected by these conditions.
– Recommendations
- Address underlying causes of moisture, such as leaks, poor ventilation, or condensation issues.
- Apply paint only when the surface is completely dry, with relative humidity below 85%. Check paint labels or consult manufacturers for recommendations specific to the product.
- Ventilate interior spaces; properly open windows and doors, or use exhaust fans while painting.
- Use mildew-resistant paint formulations in high-moisture areas, such as bathrooms and basements.
• Application Errors
Mistakes during application can lead to a host of paint problems. Examples include applying paint too thinly, thickly, or inconsistently; using incorrect tools or techniques; or painting during extreme temperatures.
– Recommendations
- Apply multiple thin paint layers rather than a single thick coat. This technique promotes proper adhesion and prevents the paint from sagging or blistering.
- Use appropriate application tools, such as brushes, rollers, or sprayers, and follow manufacturers’ guidelines for usage.
- Avoid painting when the temperature is too high or too low. Ideally, air and surface temperatures should be between 50F and 90F. Check paint labels for specific temperature tolerances.
• Aging of Paint and Surfaces
Painted surfaces can deteriorate naturally over time due to environmental exposure, aging paint, and normal wear and tear. Chalking, fading, or cracking are some issues that might arise from painterly aging.
– Recommendations
- Periodically inspect painted surfaces and address any minor problems before they escalate.
- Maintain painted surfaces by periodically cleaning them with mild soap and water.
- Consult paint manufacturers or retailers for recommendations on the appropriate paint type, quality, and application for greater durability.
- Repaint surfaces when necessary, following appropriate surface preparation and application techniques.
In conclusion, numerous factors contribute to paint problems. By understanding these causes and implementing the recommendations provided, both homeowners and professionals can prevent or address a myriad of paint issues, keeping their surfaces looking pristine and functional for years to come.
Top Three Methods for Applying a Smooth Paint Finish
A beautiful and durable paint finish can significantly enhance the appearance and longevity of various objects, ranging from furniture to vehicles. To achieve a high-quality paint finish, it is essential to select the right method for a specific project.
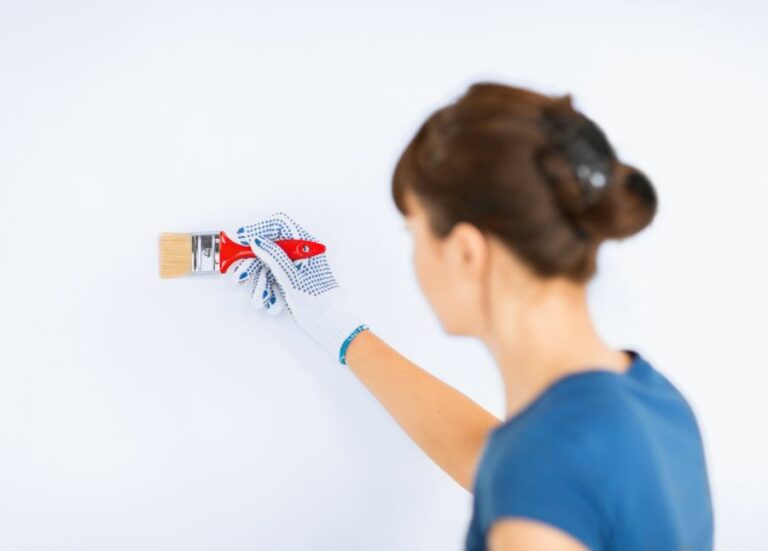
• Brush Painting: Precision and Control
Brush painting is a traditional method that utilizes a paintbrush to apply paint to a surface. This method is well-suited for small-scale and intricate projects, offering greater precision and control than other methods. Brush painting is popular among artists, hobbyists, and DIY enthusiasts.
– Types of Brushes
- Natural Bristle Brushes: Made from animal hair, natural bristle brushes are suitable for oil-based paint, varnish, and lacquer. These brushes usually provide a smoother finish due to their soft and flexible bristles.
- Synthetic Bristle Brushes: Composed of nylon or polyester, synthetic bristle brushes are ideal for water-based paint. These brushes are less prone to damage from exposure to water and generally maintain their shape better than natural bristle brushes.
I recommend using a high-quality brush that is appropriate for the type of paint you are using. A good brush will have tightly packed bristles, allowing for better paint application and fewer brush marks.
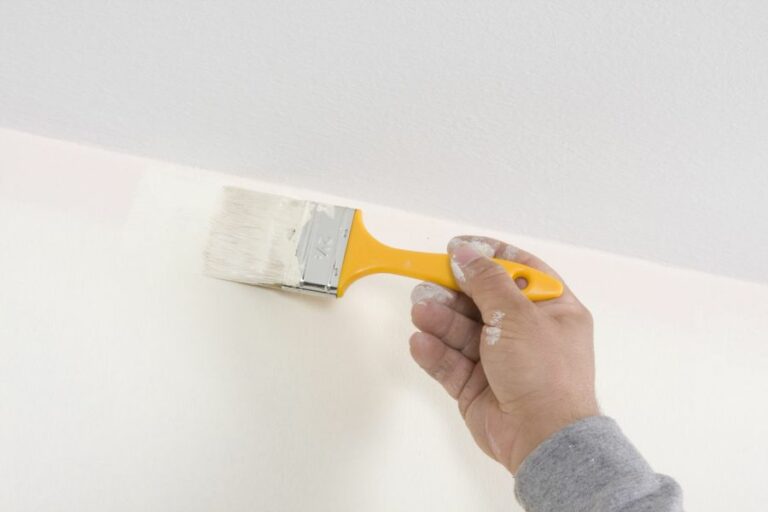
– Brush Painting Technique
To ensure a smooth and consistent finish, follow these steps when brush painting:
- Dip the brush about halfway into the paint and gently tap off the excess paint.
- Hold the brush at a slight angle to the surface and apply the paint using long, even strokes.
- Use multiple thin coats of paint rather than a single thick coat. Allow each coat to dry as per the manufacturer’s instructions before applying the next layer.
• Spray Painting: Speed and Efficiency
Spray painting involves using a device, typically a spray gun or aerosol can, to apply paint in a fine mist onto the surface. This method allows for fast and even paint application over large areas, making it ideal for painting furniture, walls, and automobiles.
– Types of Spray Painting Equipment
- Aerosol Spray Paints: These are ready-to-use spray cans that offer convenient and cost-effective solutions for small DIY projects and touch-ups.
- Airless Spray Guns: Operated by a high-pressure system, airless spray guns deliver a consistent and controlled spray pattern, resulting in fewer runs and sags. They are ideal for heavy-duty projects requiring high-quality finishes.
- HVLP (High Volume, Low-Pressure) Spray Guns: These air-powered spray guns use low pressure to atomize the paint, reducing overspray and paint wastage. HVLP spray guns are suitable for detailed and precise work, such as automotive refinishing.
When selecting the appropriate spray painting equipment, consider the size and complexity of your project as well as the type of paint being used.
– Spray Painting Technique
To achieve a professional spray-painted finish, follow these steps:
- Prepare the surface by cleaning, sanding, and priming as needed.
- Set up a well-ventilated workspace and wear appropriate safety gear.
- Hold the spray gun or aerosol can perpendicular to the surface, maintaining a consistent distance of 6-12 inches.
- Apply the paint using overlapping, parallel strokes, moving from side to side.
- Similar to brush painting, apply multiple thin coats, allowing each coat to dry as per the manufacturer’s instructions before proceeding.
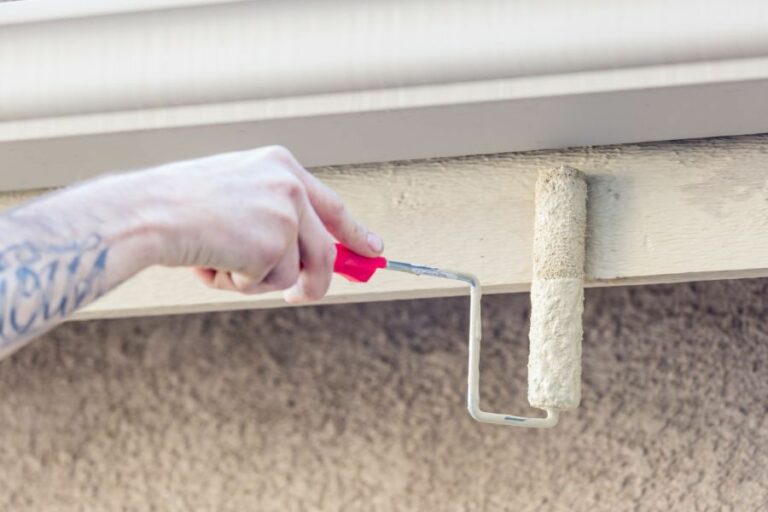
• Roller Painting: Coverage and Consistency
Roller painting is the preferred method for painting large, flat surfaces, such as walls and ceilings. A paint roller is a cylindrical tool that is used to apply paint onto surfaces, offering fast and consistent coverage.
– Types of Paint Rollers
- Nap Rollers: These common rollers have a synthetic or natural fiber cover that can hold more paint than a foam roller, reducing the need to reload the roller frequently. Choose the nap material and thickness based on the surface texture and paint type.
- Foam Rollers: Foam rollers are typically used for applying specific finishes, such as smooth or high-gloss, and are best suited for flat surfaces.
When choosing a paint roller, also consider the type of handle, roller frame, and extension pole required for your project.
– Roller Painting Technique
Follow these steps to achieve an even and consistent paint finish using a roller:
- Prepare the surface by cleaning, sanding, and priming as needed.
- Load the roller by submerging it in paint and rolling it back and forth in the paint pan until it is evenly coated.
- Apply the paint using long, even strokes, first applying a “W” pattern and then filling in the gaps. This ensures an even distribution of paint across the surface.
- Apply additional coats as necessary, following the same technique and allowing each coat to dry as per the manufacturer’s instructions.
In conclusion, brush painting, spray painting, and roller painting are the most common methods used to apply a paint finish. Each method has its advantages and limitations, making it essential to select the right method based on the requirements of the specific project.
By mastering these techniques and selecting the appropriate tools, you can achieve professional, high-quality paint finishes on a wide array of surfaces.