Materials Needed For Efficient Surface Prep. What Pros Say
Preparing a surface for a new coat of paint or a fresh layer of wallpaper is crucial to ensure that the final product looks clean, smooth, and professional. Having the right materials for efficient surface prep can make the difference between a simple DIY project and a frustrating, time-consuming task. Luckily, we’re here to help you with all the essential tools and materials needed, making the surface preparation process as efficient and hassle-free as possible.
Materials needed for efficient surface prep:
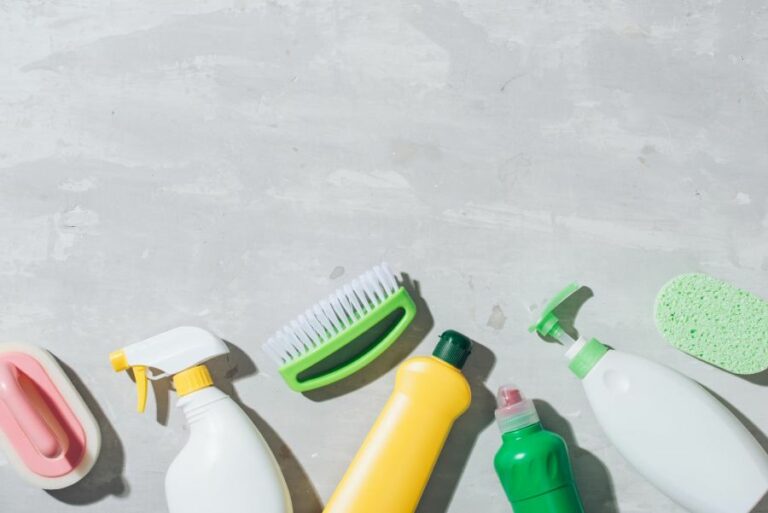
Efficient surface preparation requires cleaning agents (soap and water, TSP, degreasers), abrasive materials (sandpaper, steel wool, wire brushes), scrapers and putty knives, protective materials (gloves, safety goggles, respirators), and application tools (brushes, rollers, sprayers). These materials ensure clean, well-prepped surfaces for painting or coating projects.

Are you ready to dive into the world of surface preparation? From essential tools to useful techniques, our in-depth guide will help you master the art of efficient surface prep. Read on, and let’s embark on this transformative journey together!
Contents
- 1 Efficient Surface Preparation: A Comprehensive Guide to Essential Materials
- 2 Equipment Utilized in Surface Prep Processes
- 3 The Importance of Proper Surface Preparation
- 4 Steps for Pre-Coating Surface Preparation
- 5 Top Four Methods for Adhesive Surface Preparation
Efficient Surface Preparation: A Comprehensive Guide to Essential Materials
Surface preparation is a critical aspect of any painting or coating project. If you want a flawless, durable, and long-lasting finish, you need to properly prepare the surfaces you’ll be working with.
• Cleaning Agents and Solutions
Before you can get started on any surface prep project, you need to ensure that the surfaces you’re working with are clean and free from dirt, grease, and other contaminants. These cleaning agents and solutions will help you achieve the desired results.
– Soap and Water
A combination of warm water and a mild detergent is often sufficient to clean most surfaces in preparation for painting or applying a finish.
– TSP (Trisodium Phosphate)
TSP is a powerful cleaning agent that can dissolve strong grease and grime, making it an excellent choice for preparing surfaces that have been exposed to heavy dirt or grease buildup.
TSP should be used with caution and in compliance with safety guidelines, as it can be harmful when inhaled or absorbed through the skin.
– Degreasers
Commercial degreasers are specifically designed to remove oil and grease from surfaces. They can be particularly useful when dealing with automotive or industrial surfaces that have been impacted by heavy grease contamination.
• Abrasive Materials
In addition to cleaning agents, you’ll need abrasive materials to remove old paint, rust, or other surface imperfections.
– Sandpaper
Sandpaper is a widely used abrasive material that removes imperfections from surfaces by scratching the surface with tiny particles. Sandpaper is available in various grit sizes, which determine the level of abrasion.
Coarser grits are ideal for removing layers of old paint or rust, while finer grits can be used for finishing touches.
– Steel Wool
Steel wool is another abrasive material commonly used for surface preparation. It is particularly helpful when dealing with rusted or corroded surfaces. Be sure to choose the appropriate grade of steel wool for your project to avoid damaging the surface.
– Wire Brushes
Wire brushes work similarly to steel wool in removing rust, scale, and old paint from surfaces. They come in various sizes and shapes to fit into tight spaces and accommodate different surface materials.
• Scrapers and Putty Knives
In some cases, you might need to remove old paint or coatings manually. Scrapers and putty knives are invaluable tools for this purpose, often making the job easier and more efficient.
– Straight-Edge Scrapers
Straight-edge scrapers have a broad, flat blade that’s perfect for scraping paint, wallpaper, or other coatings from flat surfaces.
– Putty Knives
Putty knives are similar to straight-edge scrapers but tend to have a more flexible and narrow blade. They’re ideal for reaching small or tight spaces or working on projects that require precision.
• Protective Materials
Your safety is paramount when working on surface preparation projects. These materials will help protect you from harm.
– Gloves
Gloves are essential when handling chemicals and abrasive materials. Rubber, nitrile, or latex gloves are typically recommended for most surface prep tasks as they provide both protection and dexterity.
– Safety Goggles
Protective eyewear is essential when working with chemicals, abrasive materials, or performing tasks that may generate dust or debris. Safety goggles fit securely around your eyes and keep these hazards at bay.
– Respirator or Dust Mask
Respirators and dust masks protect against inhalation of harmful substances, such as sanding dust or chemical fumes. Choose a respirator or dust mask designed for your specific surface preparation tasks.
• Application Tools
Once your surface is clean and prepared, you’ll need the appropriate tools to apply your chosen finish, such as paint, stain, or sealer.
– Brushes
High-quality paintbrushes are crucial for achieving a smooth, professional-looking finish. The type and size of the brush you’ll need will depend on what material you’re applying and the size of the project.
– Rollers
Paint rollers allow for quick and even application, making them ideal for larger projects. Like brushes, the type of roller you choose should be tailored to your specific project and application material.
– Sprayers
Paint sprayers are efficient for large projects, affording a smooth, even application. As with brushes and rollers, select a sprayer compatible with your chosen finish material.
Ultimately, the key to efficient surface preparation lies in ensuring you have the right materials for your specific project. With these essential materials in your toolkit, you’ll be well-equipped to tackle any surface prep job successfully.
Equipment Utilized in Surface Prep Processes
Surface preparation is a critical step in any construction or renovation project. It ensures that surfaces are clean, smooth, and ready for the application of paints, coatings, or other finishes.
• Mechanical Surface Preparation Equipment
– Shot Blasters
Shot blasting is a technique that involves propelling steel shots at high speeds onto the surface, which results in the removal of contaminants and roughens the surface to promote adhesion. Shot blasters are commonly used to clean concrete floors, steel structures, and other industrial surfaces.
Recommendation: Choose a shot blaster with adjustable settings to accommodate different surface conditions and sizes of steel shot for flexibility in your projects.
– Grinding Machines
Grinding machines use abrasive wheels or discs to remove surface contaminants, smooth rough surfaces, or create specific surface patterns. These machines are available in various sizes, from handheld options to large, walk-behind models.
Recommendation: Opt for grinders with dust collection systems to minimize the amount of dust generated during surface preparation. This will help maintain a safer and cleaner work environment.
– Scarifiers
Scarifiers are used to remove contaminants, such as paint, coatings, and adhesives, by cutting or scraping the surface with tungsten carbide or steel cutting teeth. They are effective on concrete and asphalt surfaces, creating a rough texture that promotes adhesion.
Recommendation: Look for scarifiers with adjustable cutting depths to maximize their versatility and ensure the right level of surface profiling is achieved.
– Sandblasters
Sandblasters, also known as abrasive blasters, work by propelling abrasive materials at high pressure onto a surface to remove contaminants, create smooth or rough textures, and etch patterns. They are often used on metal, concrete, or masonry surfaces.
Recommendation: Choose a sandblaster with adjustable pressure settings and the ability to accommodate various types of abrasive media, including sand, glass beads, and slag, for expanded applications.
• Chemical Surface Preparation Equipment
– Pressure Washers
Pressure washers remove dirt, grease, and grime from various surfaces using concentrated, high-pressure water streams. They are suitable for cleaning exterior concrete, brick, wood, or metal surfaces.
Recommendation: Select a pressure washer with enough power (measured in pounds per square inch or PSI) to tackle your specific surface preparation needs. Keep in mind that overheating and excessive pressure can damage the surface being cleaned.
– Concrete Etchers and Cleaners
Concrete etchers and cleaners are chemical solutions that react with the surface to remove contaminants, roughen the surface, or neutralize pH levels. They are particularly useful in preparing new concrete surfaces for paint or coating applications.
Recommendation: Follow the manufacturer’s guidelines for diluting etchers and cleaners, as well as the recommended application and rinsing procedures, to achieve optimal results.
• Miscellaneous Equipment for Surface Preparation
– Hand Tools
Various hand tools, such as wire brushes, scrapers, chippers, and sanding blocks, are often required for manual surface preparation. These tools are suitable for reaching small or difficult-to-reach areas where larger equipment may not be efficient or effective.
Recommendation: Invest in good-quality hand tools made from durable materials to ensure their longevity and effectiveness.
– Protective Equipment
Working with mechanical or chemical surface preparation equipment can expose workers to various hazards, including dust, noise, and chemical exposure.
It is essential to provide workers with appropriate personal protective equipment (PPE), such as respirators, goggles, ear protection, gloves, and protective clothing.
Recommendation: Consult safety guidelines and standard practices to determine the proper PPE required for your specific surface preparation needs.
• In Summary
Surface preparation is a crucial part of any construction or renovation project, and having the right equipment is essential to achieve the desired results.
By considering various factors, such as your project’s size, surface material, and desired outcome, you can select the most appropriate tools and equipment for effective and efficient surface preparation. Additionally, always prioritize worker safety by providing the necessary protective equipment.
The Importance of Proper Surface Preparation
Surface preparation is a crucial process in various industries, such as construction, painting, and maintenance. It refers to the process of cleaning, repairing, and treating surfaces before the application of any coating, adhesive, or other materials.
• The Requirement for Surface Preparation
Proper surface preparation is necessary for numerous reasons that impact the quality, durability, and longevity of any surface treatment. Some of the main reasons for the requirement of surface preparation are:
– Ensuring Optimal Adhesion
To achieve the best bond between the substrate (the surface being treated) and the applied material, surface preparation is necessary. It helps in removing dirt, dust, grease, or any other contaminants that may interfere with the adhesion process.
As a result, a smoother, better-looking finish is achieved, ensuring the coating’s long-term performance.
– Preventing Premature Failure
If the surface is not adequately prepared, it might lead to premature failure of the applied material, which can be both time-consuming and costly.
Surface preparation is crucial for preventing problems such as chipping, peeling, or blistering, which may occur if foreign particles or contaminants remain on the surface.
– Enhancing Surface Properties
Surface preparation can modify or improve the surface’s properties, which can benefit the end product. For example, etching can increase the surface area, allowing for better adhesion, while cleaning can remove imperfections, providing a more uniform and smooth surface.
– Complying with Standards and Regulations
Many industries, including construction and maintenance, have to adhere to specific standards and regulations for surface preparation. These standards ensure that the surface is appropriately prepared for its intended application, ensuring the safety and durability of the project.
• Common Methods of Surface Preparation
There is a wide range of surface preparation methods and techniques which are chosen depending on the material, surface conditions, and the end goal. Some of the most commonly used surface preparation methods are:
– Cleaning
Cleaning is the most basic form of surface preparation and involves removing contaminants such as dirt, oil, grease, and loose particles from the surface. Methods may include sweeping, vacuuming, washing with soap and water, or using solvents or degreasers for more stubborn contaminants.
– Abrasive Blasting
Abrasive blasting, also known as sandblasting, is a process that involves forcibly propelling a stream of abrasive materials against the surface to remove contaminants, roughen the surface, or shape the surface. Common abrasive materials include sand, glass beads, steel shot, or crushed walnut shells.
– Grinding and Sanding
Grinding and sanding are mechanical surface preparation methods that involve the use of abrasive tools, such as sandpaper, grinding wheels, or wire brushes, to remove contaminants, level the surface, or create a specific surface profile.
– Chemical Treatments
Chemical treatments, such as acid etching or pickling, involve the application of chemicals to the surface to remove contaminants, improve adhesion, or alter surface properties. This method is commonly used in cleaning metal surfaces before painting or coating.
– Power Tool Cleaning
Power tool cleaning involves the use of power-driven tools, such as rotary wire brushes, needle guns, or grinders, to remove contaminants, rust, or scale from a surface. This method is often used for metal surfaces experiencing moderate corrosion before the application of a protective coating.
• Best Practices for Surface Preparation
To achieve the best results and ensure the longevity and durability of the applied materials, it is essential to follow some best practices for surface preparation:
- Always begin with a thorough inspection of the surface to identify areas that require repair or cleaning.
- Select the most appropriate surface preparation method for the specific surface condition and end goal. This may involve consulting industry standards or consulting with an expert, such as a NACE-certified professional, for guidance.
- Follow safety guidelines and wear appropriate personal protective equipment (PPE) when working, especially while using abrasive or chemical methods.
- Double-check that the surface is free from contaminants and has the desired profile before applying any coatings or adhesives.
- Maintain detailed records of the surface preparation process, including the methods used, equipment settings, and inspection results, to confirm compliance with industry standards and regulations.
In conclusion, surface preparation is a critical process that should not be overlooked. Regardless of the industry, proper surface preparation plays a vital role in ensuring the success and longevity of any project.
Through a thorough understanding of surface preparation requirements, methods, and best practices, professionals can ensure high-quality results while adhering to standards and regulations.
Steps for Pre-Coating Surface Preparation
Proper surface preparation is the key to achieving a high-quality, long-lasting, and durable coating. In this article, we will discuss the essential steps and guidelines to efficiently prepare a pre-coating surface, ensuring that the coating adheres appropriately and provides the desired level of performance.
Keep reading to get valuable recommendations and tips based on experience.
• Understand the Type of Surface
Before starting the preparation process, it is crucial to understand the type of surface and its specific characteristics. There are various types of substrates, like concrete, wood, metal, and plastic, amongst others. Each of these materials requires a tailored surface preparation process to yield optimal results.
• Assess the Surface Condition
It is essential to thoroughly inspect and assess the surface for any pre-existing conditions, such as rust, mold, or existing coatings. Recognize structural issues or damaged patches that need to be addressed before starting the surface preparation.
– Removing Existing Coatings
In the case of surfaces with pre-existing coatings, it is vital to consider the compatibility of the new coating material. Incompatible coatings may result in poor adhesion and compromised performance.
In such instances, it is recommended to remove the old coating using appropriate methods like sandblasting, grinding, or chemical stripping.
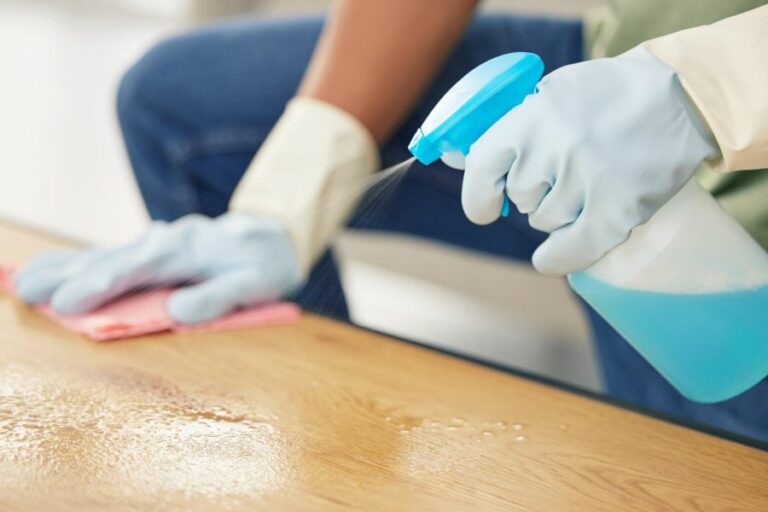
– Cleaning the Surface
A clean surface is necessary to ensure proper adhesion of the new coating. Remove any dust, dirt, grease, or other contaminants from the surface using suitable cleaning agents.
For instance, use solvents or degreasers on metal surfaces, while mild detergents suffice for cleaning concrete surfaces. Be sure to rinse and allow the surface to dry thoroughly after cleaning.
– Repair Work
Any cracks, holes, or structural damages must be dealt with prior to the coating process. Repair processes differ according to the substrate material and may involve filling, sealing, patching, or welding. The repaired areas must be allowed to cure properly before moving forward.
• Surface Profile and Roughness
Creating an appropriate surface profile is vital for ensuring adherence to the coating material. The surface must have a certain level of roughness to provide an anchor for the coating. Depending on the substrate and coating materials, various methods can be employed to achieve the desired surface profile.
– Abrasive Blasting
Abrasive blasting is a common technique used for surface profiling and removing contaminants. It involves the use of high-pressure air to propel abrasive particles like sand, glass beads, steel shots, or walnut shells against the surface.
The choice of abrasive material depends on the hardness and characteristics of the substrate.
– Grinding
Grinding is another method used to create a surface profile, particularly suitable for hard substrates like steel and concrete. This method involves the use of grinding tools, like diamond grinding wheels, to create a uniform surface roughness.
– Chemical Etching
Chemical etching is used to create a surface profile on concrete substrates. It involves the application of acid solutions that react with the concrete, resulting in a slightly roughened surface.
Follow the manufacturer’s guidelines while using chemical etching agents, and ensure that the surface is neutralized and rinsed thoroughly.
• Choose the Right Coating Material
The success of a painting project lies in selecting the right coating material for the substrate at hand. Be sure to consider factors such as adhesion, flexibility, and chemical resistance, while selecting the appropriate coating system.
Consult the manufacturer’s guidelines for specific instructions on coating material requirements and application techniques.
• Environmental Factors
It is equally important to consider the environmental variables that can affect the performance of the coating, such as temperature, humidity, and air quality. These factors play a significant role in the coating’s drying, curing, and adhesion.
Performing the coating process under controlled environmental conditions or during favorable weather is recommended to achieve the best results.
• Safety Measures
Last but not least, ensure that all necessary safety measures are in place while performing surface preparation and coating application. This includes the use of personal protective equipment like gloves, goggles, and masks, as well as adhering to local, state, or federal guidelines and regulations.
In conclusion, appropriate surface preparation is crucial to ensure the success of a painting or coating project. By carefully considering the factors stated above, you can achieve a durable, long-lasting coating that performs optimally.
For further guidance and information, refer to professional resources like the Society for Protective Coatings (SSPC) and NACE International, which provide standards and guidelines on corrosion protection and surface preparation.
Step | Description |
|---|---|
1 | Clean the surface: Remove all dirt, dust, and debris from the surface by sweeping or vacuuming, followed by washing down the surface with a suitable cleaner. |
2 | Repair damaged areas: Fill any cracks, holes or uneven areas with a suitable repair material, and smooth it out with a trowel or putty knife. Allow the repair material to cure according to the manufacturer’s instructions. |
3 | Sand the surface: Sand the entire surface using a suitable abrasive material, such as sandpaper or a sanding block, to create a smooth surface and remove any imperfections. |
4 | Remove sanding residue: Vacuum or wipe down the surface to remove any dust or residue from the sanding process. |
5 | Prime the surface: Apply a suitable primer to the surface, following the manufacturer’s instructions for application and dry time. |
6 | Final inspection: Once the primer has dried, inspect the surface for any remaining imperfections or areas that need additional repairs. Fix any issues before proceeding with the coating application. |
Top Four Methods for Adhesive Surface Preparation
Proper surface preparation is a critical step in ensuring the effective bonding of adhesives to substrates.
• 1. Cleaning and Degreasing
Before applying an adhesive to a surface, it is essential to remove contaminants such as dirt, dust, grease, and oils to achieve a strong bond. The process includes cleaning with a suitable solvent or degreaser, followed by rinsing with clean water or a second solvent to remove any residues.
– Recommended degreasing solvents:
- Isopropyl alcohol (IPA): A versatile and widely used cleaning agent, IPA is suitable for most substrates, including plastics, metals, and glass.
- Acetone: A powerful degreaser ideal for cleaning metals and glass surfaces but may cause damage to some plastics.
- Heptane: A milder solvent suitable for cleaning plastics but not as effective on metals.
Always refer to the adhesive manufacturer’s recommendations for selecting an appropriate solvent for the specific materials being bonded.
After cleaning, wait for the surface to dry completely before applying the adhesive.
• 2. Abrading
Abrading or roughening the surface is a technique used to increase the surface area and create microscopic interlocking channels, thereby improving the mechanical bond between the adhesive and the substrate. Common methods for abrading surfaces include sanding, grinding, and abrasive blasting.
– Recommendations for abrading:
- Use abrasives that are compatible with the substrate material to prevent damage.
- Grind or sand in a uniform and consistent pattern, creating a surface roughness of approximately 60 to 120 grit.
- Clean the abraded surface to remove loose particles and debris using a brush, clean cloth, or compressed air.
Note: Abrading may not be suitable for some materials, such as thin plastics or fragile substrates, as it may cause damage or deformation.
• 3. Priming
Priming is the application of a thin layer of a liquid substance to the substrate to improve the bond between the adhesive and the surface. Primers work by increasing the surface energy of the substrate, creating a more compatible surface for the adhesive.
– Primer selection:
- Choose a primer that is compatible with both the substrate material and the adhesive being used.
- Consult the adhesive manufacturer’s recommendations to determine if a primer is necessary or beneficial for your specific application.
When applying the primer, follow the manufacturer’s instructions regarding the correct application method, curing time, and recommended adhesive application timeline.
• 4. Chemical Surface Treatments
Chemical surface treatments modify the substrate surface to improve the adhesive bond by increasing surface energy, roughness, or functionality. These treatments include etching, anodizing, and plasma or corona treatment.
– Chemical surface treatment options:
- Acid etching: Suitable for metals and glass, this method involves applying an acid solution to the surface to create microscopic etchings. Clean and rinse the surface thoroughly after etching to remove any remaining acid residues.
- Anodizing: An electrochemical process used primarily on aluminum surfaces to grow an oxide layer, increasing the surface area and providing improved adhesive bonding.
- Plasma or corona treatment: These methods use an electric discharge to activate and modify the surface of plastics, making them more receptive to adhesives. Consult an expert when considering these treatments, as they require specialized equipment and technical expertise.
Remember to exercise caution when using chemical treatments, as they may pose safety hazards or potential damage to the substrate materials. Always refer to the manufacturer’s guidelines and follow proper safety procedures.
• Conclusion
In conclusion, surface preparation is a crucial step in achieving strong and long-lasting adhesive bonds.
Adopting one or more of the four main surface preparation techniques cleaning and degreasing, abrading, priming, and chemical treatments, will significantly improve the performance and reliability of your adhesive applications.
Additionally, consider the specific materials and adhesive being used, and consult the manufacturer’s recommendations to ensure optimal results.