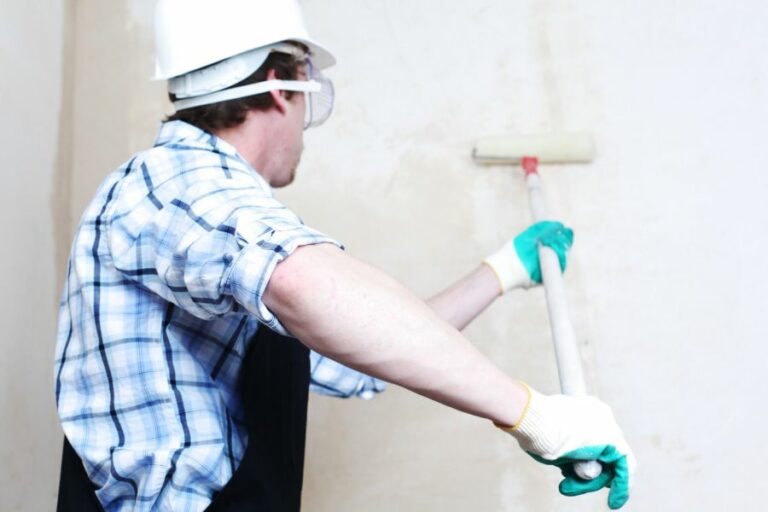
Material-Appropriate Techniques For Surface Prep
When it comes to achieving the perfect finish, whether it be for painting, coating, or any other application, surface preparation is a key determining factor in the overall success of the project. With a wealth of experience under our belt, we’re here to guide you through the various techniques for surface prep, ensuring the highest quality results.
Material-appropriate techniques for surface prep:
Surface preparation is vital for the success of various projects, as it ensures proper bonding and increases durability. Key material-appropriate techniques include: identifying the surface material and employing appropriate methods such as grinding, shot blasting, scarifying, or acid-etching for concrete; sanding and cleaning for wood; abrasive blasting, grinding, or chemical cleaning for metal; abrasive methods or chemical pretreatments for plastic; cleaning with detergents or glass cleaners for glass; and sanding and cleaning with acetone for fiberglass.

Discover the world of surface preparation and learn how the right techniques can greatly influence the lifespan and appearance of your materials. Keep reading to uncover the best methods and tips to ensure success in your next project.
Contents
- 1 Optimal Methods for Effective Surface Preparation
- 2 Exploring Various Surface Prep Techniques
- 3 Popular Techniques in Surface Preparation
- 4 Prepping Surfaces for Painting: Techniques to Know
- 5 Key Considerations for Effective Surface Preparation
Optimal Methods for Effective Surface Preparation
Surface preparation plays a crucial role in the overall success of various projects, ranging from painting and flooring to adhesive applications and building maintenance.
It ensures the appropriate bonding of materials, increases the durability of surfaces, and prevents potential failures.
• Identify the Surface Material
Before diving into various surface prep techniques, it is essential to identify the type of surface material you are working on. Common surface materials include:
- Concrete
- Wood
- Metal
- Plastic
- Glass
- Fiberglass
Each material requires a unique approach to surface preparation, ensuring optimum results are achieved.
• Concrete Surface Preparation
Concrete surfaces must be clean, sound, and free of contaminants prior to any application. To achieve this, consider using the following methods:
– Mechanical Methods
- Grinding: Suitable for leveling and smoothing the concrete surface, grinding machines often come with various grit options to achieve the desired finish.
- Shot Blasting: A preferred method for surface profiling, shot blasting propels steel shots onto the concrete surface, removing the top layers and contaminants.
- Scarifying: Aggressively removes the surface layer, making it ideal for removing coatings and leveling uneven concrete.
– Chemical Methods
- Acid Etching: Using a mixture of water and muriatic acid, acid etching effectively opens up the pores of the concrete, resulting in better bonding. However, use caution and always wear appropriate personal protective equipment (PPE) when handling acids.
• Wood Surface Preparation
Prior to applying any coatings or adhesives to wood surfaces, they must be free of dirt, grease, and previous finishes. Use the following methods:
– Sanding
- Start with coarse-grit sandpaper (60-80 grit) and progress to medium (100-150 grit) and fine-grit (180-220 grit) sandpaper for a smooth finish.
- Always sand in the direction of the wood grain to avoid scratches and surface imperfections.
– Cleaning
- Remove all sanding dust and debris using a vacuum or tack cloth.
- If necessary, use a mild detergent solution to clean the surface, ensuring all residue is rinsed off and the wood is dry prior to application.
• Metal Surface Preparation
Metal surfaces typically require the removal of rust, corrosion, oxides, and existing coatings. Appropriate methods include:
– Abrasive Blasting
- Ideal for removing rust, mill scale, and coatings, abrasive blasting can range from sandblasting to using other media, such as glass beads and steel grit.
– Grinding
- Hand-held or stationary grinding tools can remove surface irregularities, rust, and old coatings effectively, but care must be taken not to overheat and damage the metal.
– Chemical Cleaning
- Acid-based cleaners or rust converters can effectively remove rust and mill scale from metal surfaces. Always follow the manufacturer’s instructions and wear proper PPE.
• Plastic Surface Preparation
Proper surface preparation is critical for the adhesion of adhesives, paints, or coatings to plastic surfaces. Key methods include:
– Abrasive Methods
- Using fine-grit sandpaper (400-600 grit) to lightly abrade the plastic surface, it is then essential to remove all dust and debris before applying a coating.
– Chemical Pretreatments
- Various chemical pretreatments, such as adhesion promoters or solvents, can improve the bonding of coatings or adhesives to plastic surfaces.
• Glass Surface Preparation
To prepare glass surfaces for coatings, it is crucial to ensure the surface is clean and free of contaminants. Use the following:
- Mild detergent solution: Use a clean sponge or cloth, along with a mild detergent solution, to clean the surface, then rinse with clean water and dry.
- Glass cleaners: Commercial glass cleaners can also be used to remove contaminants and ensure a clean, dust-free surface.
• Fiberglass Surface Preparation
Fiberglass surfaces often require cleaning and sanding prior to any coating or adhesive application. Recommended methods include:
- Use medium to fine-grit sandpaper to roughen the surface, ensure even sanding and avoid over-sanding any one area.
- Clean the surface with a cloth dampened with acetone, ensuring all contaminants and dust are removed before proceeding with your project.
• Conclusion
Understanding and implementing material-appropriate techniques for surface prep is essential to the overall success and durability of coatings, adhesives, and surface treatments.
By following these recommendations and considering the specific requirements of each surface material, you are well on your way to achieving the best possible results for any project.
Exploring Various Surface Prep Techniques
Surface preparation techniques play a crucial role in ensuring that coatings, platings, or other surface finishes adhere properly and effectively to a surface.
Without proper surface preparation, a coating or finish may not adhere correctly, leading to substandard performance, reduced durability, and premature failure of the material or part.
• Mechanical Surface Preparation Techniques
Mechanical surface preparation techniques involve physically removing contaminants or altering the surface to create an ideal profile for adhesion.
– Abrasive Blasting
Abrasive blasting, also known as sandblasting or grit blasting, employs high-pressure air or water to propel abrasive particles against a surface. This process is widely used to clean and roughen surfaces, remove paint, corrosion, or scale, and achieve certain visual or aesthetic effects.
There are different types of abrasive media available for blasting, such as:
- Silica sand
- Steel grit
- Glass beads
- Aluminum oxide
- Walnut shells
- Plastic particles
The choice of abrasive media depends on factors like the surface material, the desired surface profile, and environmental considerations.
– Grinding
Grinding is another mechanical surface preparation technique that uses abrasive wheels or discs to remove contaminants, flatten or level surfaces, and create the desired surface profile. Common types of grinders include:
- Angle grinders
- Bench grinders
- Walk-behind grinders
I recommend using diamond-impregnated grinding wheels for efficient and effective surface preparation on materials like metal, concrete, masonry, and stone.
– Scraping and Wire Brushing
Scraping and wire brushing are manual or machine-assisted techniques to remove loose contaminants such as rust, paint, scale, or dirt. These techniques are often used for initial cleaning and can be followed by other surface preparation methods for better results.
– Needle Scaling
Needle scalers, or needle guns, are pneumatic or electric-powered tools that use steel needles to remove scale, rust, or old coatings from surfaces.
Needle scaling can achieve a rough surface profile suitable for adhesion while preserving the integrity of the base material.
• Chemical Surface Preparation Techniques
Chemical surface preparation techniques involve using solvents or other reactive agents to remove contaminants or modify surfaces at a molecular level.
– Degreasing and Cleaning
Degreasing and cleaning are essential steps in surface preparation to ensure contaminants like oil, grease, dirt, or foreign substances do not interfere with adhesion. These processes usually involve:
- Wipe cleaning with solvents, such as acetone or isopropyl alcohol
- Emulsion cleaning using alkaline, acidic, or detergent-based solutions
- Vapor degreasing in which solvent vapors dissolve and remove contaminants
– Pickling and Etching
Pickling and etching refer to chemical processes that use acidic or other reactive solutions to remove scale, rust, or previous coatings from a surface.
These techniques can also dissolve a thin layer of the base material to create a fresh and reactive surface for adhesion.
Mild pickling can be performed using solutions like phosphoric acid or citric acid, while stronger pickling may require hydrochloric or sulfuric acid. For passivating stainless steel, nitric acid or citric acid-based solutions are widely used.
Remember that pickling and etching can be hazardous, and appropriate safety and environmental precautions must be taken.
– Conversion Coatings
Conversion coatings are formed by applying a chemical solution that reacts with the surface material to produce an adherent layer of corrosion-resistant compounds, such as phosphates, chromates, or oxide films.
These coatings serve as an excellent base for paint adhesion and improve overall corrosion resistance.
Common conversion coatings include:
- Phosphate coatings for ferrous metals
- Chromate coatings for aluminum and zinc surfaces
- Black oxide coatings for ferrous metals
• Recommendations and Best Practices
From my personal experience, successful surface preparation should take into consideration factors like the material type, the intended coating or finish, application requirements, and environmental concerns. A combination of mechanical and chemical techniques can often provide optimal outcomes.
When choosing and performing surface preparation techniques, always prioritize safety and comply with relevant industry standards or regulations.
It is also essential to educate and train personnel, inspect equipment and processes regularly, and follow recommended best practices provided by manufacturers or industry experts.
Lastly, for further information and guidelines, consult resources from organizations like the National Institute for Occupational Safety and Health (NIOSH) and the Society for Protective Coatings (SSPC) to ensure safe and effective surface preparation practices.
| Surface Preparation Techniques | |
|---|---|
| 1. | Cleaning with solvents |
| 2. | Power washing with water |
| 3. | Acid etching |
| 4. | Abrasive blasting |
| 5. | Power Tool cleaning |
| 6. | Dry sanding and vacuuming |
| 7. | Flame cleaning |
| 8. | Brush-off blast cleaning |
Popular Techniques in Surface Preparation
Surface preparation plays a crucial role in ensuring the longevity and effectiveness of various coatings, paints, and treatments.
There are several methods employed for surface preparation, but one technique stands out as the most commonly used across multiple industries: abrasive blasting.
• Understanding Abrasive Blasting
Abrasive blasting, also known as sandblasting, grit blasting, or shot blasting, involves using a high-pressure system to propel abrasive particles against a surface.
This process not only removes contaminants like rust, paint, and scale but also creates a uniform surface profile that significantly improves the adhesion of coatings and overall durability.
– Types of Abrasive Blasting Media
A variety of abrasive media can be used in the blasting process, each with its unique properties and purposes. Some popular ones include:
- Steel grit and shot: Ideal for aggressive cleaning and creating rough, angular profiles on metals.
- Glass beads: Suited for gentle cleaning and polishing, providing a smooth and satin finish.
- Aluminum oxide: Highly versatile, used for aggressive cleaning, etching, and surface finishing.
- Walnut shells and corn cobs: Used for non-aggressive cleaning, particularly on softer materials like wood and plastic.
- Garnet: Offers high cutting speed and recyclability, appropriate for a variety of applications, including aluminum and stainless steel.
• Advantages of Abrasive Blasting
Numerous perks come along with the wide use of abrasive blasting in surface preparation, such as:
– Efficiency and Time-Saving
The high-pressure nature of abrasive blasting allows for quick coverage, making it a time-efficient method for cleaning and preparing surfaces.
– Versatility
Abrasive blasting is adaptable to a vast range of materials and applications. It can select specific media types based on the desired results, making it suitable for various industries, including automotive, aerospace, construction, and shipbuilding.
– Environmental Friendliness
Many abrasive media options are environmentally friendly and recyclable. By employing proper containment and dust collection systems, it minimizes environmental impact.
• Key Considerations for Abrasive Blasting
When using abrasive blasting for surface preparation, it is essential to keep several factors in mind to ensure the best possible results.
– Properly Selecting Media
Choosing the appropriate media for the application is crucial, as it can significantly impact the results. Factors to consider include the hardness, shape, size, and density of the abrasive particles, as well as the finish required and the type of substance being removed.
– Equipment Maintenance
Routine maintenance of the blasting equipment, such as inspecting the blast pot, hoses, and nozzles, is vital in order to maintain efficiency and prolong the lifespan of the system.
– Operator Safety
Workers must be well-trained in the use of abrasive blasting equipment, and appropriate personal protective equipment (PPE) should always be worn, including respiratory protection, hearing protection, and suitable clothing.
– Environmental Compliance
Adhering to local, state, and federal environmental regulations is critical. Proper containment measures and dust collection systems, as well as the responsible disposal of used media, are essential to ensure compliance.
• Tips on Using Abrasive Blasting Effectively
Outlined below are some recommendations, based on personal experience, in order to achieve optimal results while using abrasive blasting:
- Hold the nozzle at an appropriate distance: Too close may damage the surface, and too far will reduce the effectiveness of the process. Recommended distances typically range from 6 to 12 inches.
- Use the correct blast angle: Generally, it is advised to hold the nozzle at a 45-degree angle to the surface for optimal cleaning and profiling.
- Move the nozzle in a sweeping motion: Maintain consistent and smooth movement, being careful not to dwell in one area for too long, which can lead to uneven results or surface damage.
- Consider using a test patch: Testing the chosen media and equipment settings on a small, inconspicuous section of the surface can help ensure proper results on the full project.
In conclusion, abrasive blasting serves as the most common technique in surface preparation due to its versatility, efficiency, and adaptability to a wide range of applications.
By understanding the various abrasive media types, equipment, and considerations involved in this technique, users can achieve optimal results for their surface preparation needs.
Technique | Description |
|---|---|
Most Common Technique | Surface preparation techniques can vary depending on the desired outcome and material being worked on. Some common techniques include abrasive blasting, sanding, and chemical stripping. It’s important to choose the appropriate technique for the specific project to ensure the best results. |
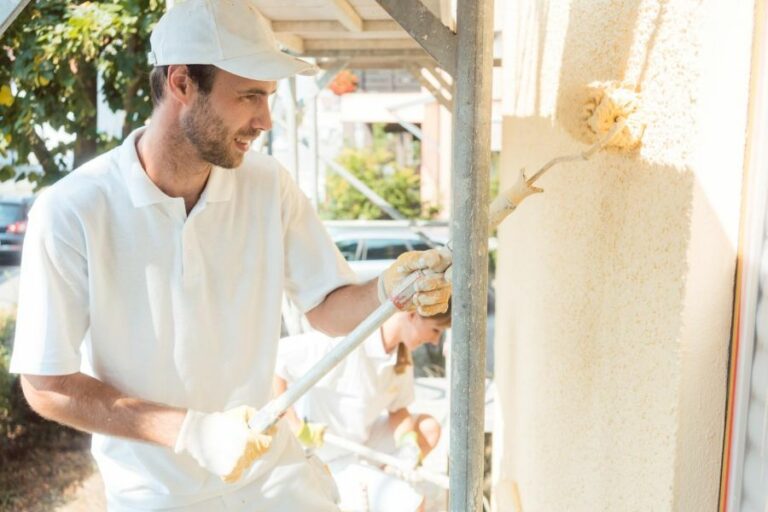
Prepping Surfaces for Painting: Techniques to Know
Surface preparation is a crucial step in the painting process, as it ensures the paint adheres properly and lasts for an extended period.
• Cleaning the Surface
Before starting any painting job, it is essential to clean the surface thoroughly. A clean surface ensures better paint adhesion and prevents problems like peeling, blistering, or staining.
– Removing Dust and Debris
First, remove any dust, dirt, and other debris from the surface using a soft-bristle brush or a cloth. For stubborn grime, it may be necessary to use a detergent or a mild cleaner.
Rinse the surface with water afterward and allow it to dry completely before proceeding.
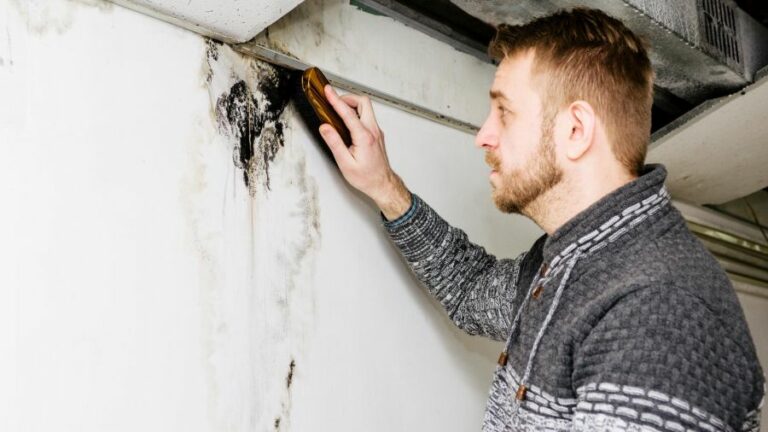
– Removing Mold and Mildew
Mold and mildew can cause serious issues if not addressed before painting. The EPA recommends using a mixture of water and household bleach to clean any affected areas. Ensure adequate ventilation when working with bleach, and always wear protective gloves and eyewear.
• Repairing Surface Imperfections
Damaged or uneven surfaces can lead to a subpar finished product. Before painting, examine the surface for any cracks, holes, or other imperfections and repair them using the appropriate materials.
– Patching Holes and Cracks
To patch small holes or cracks, use a putty knife and apply a high-quality filler. For larger holes or damaged areas, it might be necessary to use a patching compound or joint compound. After the repair material dries, sand the area smoothly using fine-grit sandpaper.
– Smoothing Uneven Surfaces
For surfaces with noticeable unevenness, sand them down with coarse-grit sandpaper first, followed by medium-grit sandpaper. Finish with fine-grit sandpaper to achieve a smooth finish.
• Sanding the Surface
Sanding improves paint adhesion and promotes a smoother final appearance. Proper sanding techniques vary depending on the surface material and condition.
– Wood Surfaces
For new or bare wood surfaces, start with medium-grit sandpaper (80-120 grit) and finish with fine-grit sandpaper (180-220 grit). For previously painted or varnished wood, gently sand the surface with fine-grit sandpaper to roughen it up for better paint adherence.
– Metal Surfaces
For metal surfaces, use medium to fine-grit sandpaper or steel wool to remove any rust or oxidization. After sanding, wipe the surface with a tack cloth to remove any remaining dust or debris.
– Masonry and Concrete Surfaces
Masonry and concrete surfaces may require using a wire brush or a masonry abrasive to remove any loose or flaking material. Once the surface is clean and free of loose particles, use a high-quality masonry primer to promote better paint adhesion.
• Applying a Primer
Priming is an essential step in surface preparation, as it provides a smooth base for the paint to adhere to and enhances the paint’s richness and durability.
– Choosing the Right Primer
Different surfaces require specific types of primers. For instance:
- Latex primer: Suitable for most surfaces, including drywall, plaster, and bricks.
- Oil-based primer: Ideal for bare or unfinished wood surfaces.
- Shellac primer: Works well on surfaces with severe stains or for sealing in odors.
When in doubt, consult the paint manufacturer’s recommendations for the appropriate primer.
– Primer Application Tips
- Stir the primer well before applying.
- Use a brush, roller, or paint sprayer for application, depending on the surface size and intricacy.
- Apply one or two coats, allowing each coat to dry according to the manufacturer’s instructions before applying the next.
• Final Preparation and Cleanup
Before beginning the actual painting process, take a few final preparatory steps:
- Remove any remaining dust or debris using a tack cloth or a damp cloth.
- Ensure there are no visible signs of mold, mildew, or moisture on the surface.
- If masking off certain areas, use high-quality painter’s tape to protect them.
By following these comprehensive surface preparation techniques, you can ensure a professional-quality paint job that lasts for years to come.
Remember, investing time and effort in surface preparation is the key to achieving a beautiful and durable painted surface.
Key Considerations for Effective Surface Preparation
• Assessing the Surface
Before preparing a surface for any application, it is crucial to assess the existing condition of the substrate. This can include:
- Determining the type of substrate: Identifying the kind of material (e.g., concrete, wood, or metal) is the first step in understanding the appropriate preparation methods.
- Inspecting the substrate for defects: Check for cracks, dents, peeling paint, or other issues that may affect the final outcome. Read more about substrates and their compatibility here.
- Measuring surface roughness: For certain applications, the roughness of the surface needs to be within a specific range. Tools like surface profilometers can quantify this factor.
- Testing for contaminants: Chemical contaminants, such as oil, grease, or rust, can affect the binding of the coating or adhesive. Cleaning agents may be necessary to remove these contaminants.
• Cleaning the Surface
After the initial assessment, surface cleaning is often required. Here is a list of commonly used cleaning methods:
- Sweeping and vacuuming: This initial step helps remove loose debris, which might interfere with the adhesion of any applied coatings, paint, or adhesives.
- Chemical cleaning: Chemical agents varying in pH can clean stubborn contaminants such as oil, grease, or adhesive residue.
- Pressure washing: High-pressure water jets remove dirt, grime, and loose material.
- Steam cleaning: Steam cleaning is an environmentally friendly option for surface cleaning and contaminant removal.
- Abrasive blasting: Also known as sandblasting or shot blasting, this method uses high-pressure air to propel abrasive media onto the surface, removing contaminants and creating a specific surface profile.
Remember to adhere to local and federal environmental regulations when using specific cleaning methods.
• Surface Roughening
Roughening the surface can improve the adhesion of coatings or adhesives. Here are some popular roughening methods:
- Acid etching: Applying a diluted acid solution chemically etches the surface, creating a rougher profile.
- Abrasive blasting: As mentioned above, abrasive blasting not only cleans the surface but also creates an ideal profile for adhesion.
- Grinding: Mechanical grinding using rotating abrasive wheels removes surface contaminants and creates a smoother or rougher surface, depending on the grinding tool used.
- Scarifying: In this method, multi-tipped cutting wheels scratch the surface, producing a rough profile.
- Brushing or scuffing: The use of wire brushes or abrasive pads creates a rough texture on the surface.
• Repairing Surface Defects
Surface defects can hinder adhesion, promote premature coating failure or lead to unwanted visual appearances. Effective repair methods include:
- Filling or patching: For small surface defects, such as cracks or dents, use fillers or patches compatible with the substrate material.
- Resurfacing or overlaying: To address larger sections of damaged substrate or to achieve a uniform appearance, apply a resurfacer or overlay material. This step creates a new layer or “skin” on the surface.
- Sealing: In cases where a substrate may be porous, applying a sealer can help prevent penetration by liquids or dampness, which may affect adhesion.
For more detailed advice on repairing surface defects, consult a professional in your specific industry or refer to NACE International for guidance.
• Choosing the Right Coating or Adhesive
The choice of coating or adhesive depends on various factors, such as:
- Materials compatibility: Both the substrate and the coating or adhesive need to have a proper bond.
- Working conditions: Select a coating or adhesive suitable for the temperature, humidity, and other environmental factors present during application and service life.
- Surface preparation time and costs: Certain coatings may require more labor-intensive preparation or longer curing times, which can affect the overall project timeline and budget.
- Performance requirements: Evaluate the physical and chemical resistance properties necessary for the coating or adhesive based on the intended use of the surface.
• Quality Assurance and Testing
A common recommendation is to conduct various tests to verify the quality of surface preparation and the applied coating or adhesive. Some key tests include:
- Adhesion testing: Peel or pull-off tests determine the coating or adhesive’s overall bond strength.
- Visual inspection: Verify surface cleanliness, defect repair, and proper coatings application using visual inspection techniques.
- Compatibility tests: Before the actual application, perform a test to ensure compatibility between substrate and coating or adhesive.
By considering these essential factors in surface preparation, you can optimize the performance, appearance, and longevity of applied coatings or adhesives, ensuring the success of your project.