Strip Paint Effectively For Surface Prep. What Pros Say
Are you tired of struggling with stubborn paint on surfaces that must be repainted or refinished? Fret no more! We’re here to help you learn the most effective ways to strip paint, ensuring a smooth and clean surface for your next project. Our expert tips and techniques will simplify your paint removal process, making surface prep a breeze.
Strip paint effectively for surface prep:
Choose chemical, heat-based, or mechanical paint stripping techniques to strip paint effectively for surface preparation. Consider the surface, paint type, and safety precautions in selecting the best method. Ensure proper surface prep by sanding, cleaning, and applying primer before repainting.

Ready to strip paint for surface prep like a pro? Keep reading to discover efficient techniques and helpful tips to make this task easier, faster, and more effective. Let’s dive in and get that surface prepped!
Contents
- 1 Efficient Paint Removal for Surface Preparation
- 2 Best Methods for Effective Paint Stripping
- 2.1 • Understanding Paint Types and Their Removal Methods
- 2.2 • Scrapping Paint: A Simple Yet Effective Method
- 2.3 • Sanding Paint: Smooth and Ready for a Fresh Coat
- 2.4 • Chemical Paint Removal: When You Need Some Extra Help
- 2.5 • Heat Guns and Infrared Paint Removers: Applying Heat for Efficient Paint Removal
- 2.6 • Final Thoughts: Paint Stripping Done Right
- 3 Strip Paint Prior to Sanding: Pros and Cons
- 4 Learn the Top 3 Paint Stripping Techniques
- 5 Benefits of Paint Stripping Before Repainting
Efficient Paint Removal for Surface Preparation
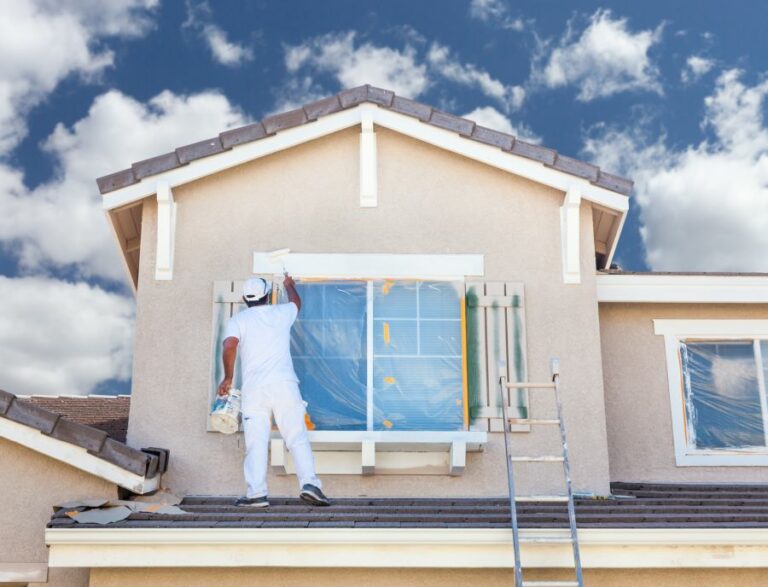
Preparing a surface for painting or refinishing is a crucial step in ensuring the final outcome looks professional and lasts for a long time. One of the essential aspects of surface preparation is stripping the old paint effectively.
• Safety Precautions Before Stripping Paint
Before diving into the different paint stripping techniques, it is important to ensure safety precautions are in place. Remember, some old paints contain lead, which can be hazardous if inhaled or ingested. Use a lead paint test kit to identify if the existing paint contains lead.
If it does, consider hiring a professional, as removing lead-based paint requires special precautions to avoid health risks.
- Wear protective gear, including gloves, goggles, and a respiratory mask.
- Ensure proper ventilation in the working area.
- Dispose of paint waste according to local regulations.
• Chemical Paint Strippers
Chemical paint strippers are a popular method for removing paint, as they can soften and dissolve multiple layers of paint with ease.
Various types of chemical paint strippers are available, including solvent-based, caustic-based, and bio-based paint strippers. Always follow the manufacturer’s instructions carefully.
– Application and Removal
- Use a paintbrush to apply a generous layer of paint stripper over the surface.
- Allow the chemical stripper to penetrate the paint layers for the recommended time.
- Use a paint scraper or putty knife to remove the softened paint.
- Repeat the process for stubborn paint layers.
- Clean the surface with a chemical stripper cleaner or mineral spirits to remove any residue.
– Pros and Cons
Pros:
- Effective in removing multiple paint layers.
- Works well on intricate surfaces.
Cons:
- May pose health risks if not used correctly.
- Can be time-consuming.
- May damage the underlying surface if not used properly.
• Heat-Based Paint Stripping
Using heat to strip paint is another effective technique, as heat softens and loosens the paint, making it easier to remove. Heat guns and infrared paint strippers are the two main tools used for this method.
– Heat Guns
- Hold the heat gun several inches away from the surface and move it in a sweeping motion.
- Scrape off the softened paint using a paint scraper or putty knife.
- Adjust the temperature and distance to find the optimal heat setting for the paint.
- Be cautious not to overheat or scorch the underlying material.
– Infrared Paint Strippers
- Place the infrared paint stripper over a small area of the surface.
- Allow the heat to penetrate the paint layers for the recommended time.
- Use a paint scraper or putty knife to remove the softened paint.
- Repeat the process, moving over the entire surface.
– Pros and Cons
Pros:
- No chemicals involved.
- Removes paint effectively and quickly if used correctly.
Cons:
- Requires caution to avoid burns or surface damage.
- May not work as effectively on uneven or curved surfaces.
• Mechanical Paint Stripping
Mechanical paint stripping involves using power tools or manual methods to scrape or sand the paint off the surface. This method works well for flat surfaces and is often used for materials that can handle aggressive scraping or sanding.
– Power Tools
- Use a power sander or oscillating tool with a paint removal attachment.
- Gradually sand the surface, applying light pressure.
- Use lower grit sandpaper to remove rough paint layers, then switch to higher grit sandpaper to smooth the surface.
- Take care to avoid gouging or damaging the material.
– Manual Methods
- Utilize paint scrapers, putty knives, or wire brushes to remove the paint.
- Apply consistent pressure while working in a systematic manner.
- This method is labor-intensive and time-consuming but can be effective for small or localized areas.
– Pros and Cons
Pros:
- Can be more environmentally friendly than chemical methods.
- Works well on flat surfaces.
Cons:
- Can be labor-intensive and time-consuming.
- May damage the underlying material if not done carefully.
• Choosing the Right Technique
Each paint stripping technique has its benefits and drawbacks, and selecting the best method depends on the specific surface, type of paint, and personal preference. For intricate surfaces or stubborn paint layers, chemical paint strippers are often most efficient.
Heat-based paint strippers work well for many surface types, while mechanical paint stripping is ideal for flat surfaces and materials that can withstand aggressive sanding.
• Final Touches
Once the paint has been removed, ensure proper surface prep by:
- Sanding the surface with fine-grit sandpaper to create a smooth base.
- Cleaning the surface with a tack cloth or vacuum to remove dust and debris.
- Applying a suitable primer or sealer before repainting.
Following these recommendations will ensure the new paint adheres properly and provides a long-lasting, professional finish. Consult the Environmental Protection Agency’s website for more information on safely handling lead paint removal projects.
Best Methods for Effective Paint Stripping
Stripping paint is an essential task for many home improvement projects, especially when you need to prepare surfaces for painting or refinishing.
• Understanding Paint Types and Their Removal Methods
Before you start stripping paint, it is important to understand that different types of paint require different removal techniques. Let’s explore some common paint types and their corresponding removal methods.
– Oil-Based Paints
Oil-based paints are typically more difficult to remove than water-based paints. To strip oil-based paint, you may need to use a combination of techniques, including scraping, sanding, and the use of chemical paint removers like paint stripper or caustic soda.
– Water-Based Paints
Water-based paints, also known as latex or acrylic paints, are easier to remove than oil-based paints. You can often remove them with a mixture of warm water and mild soap, or use a chemical paint remover specifically designed for water-based paints.
– Lead-Based Paints
Lead-based paints pose a serious health risk, especially if they are disturbed during paint removal. If you suspect that your painted surface may contain lead, it is important to first test the paint using a lead testing kit.
If lead is present, you should consider hiring a certified lead abatement professional to safely remove the paint.
The United States Environmental Protection Agency provides further information on lead-based paint and how to safely deal with it.
• Scrapping Paint: A Simple Yet Effective Method
Scraping is a very simple and effective way to strip paint. Before you start scraping, make sure that you’re using a high-quality paint scraper, as this will help to ensure that the paint is removed efficiently and without causing any damage to the underlying surface.
To begin, hold the scraper at a 30-degree angle against the surface you’d like to strip. Apply pressure, and gently push the scraper along the surface, peeling away layers of paint as you go.
Remember to periodically clean your scraper of accumulated paint. And be cautious of applying too much pressure, as this can gouge or damage the surface beneath the paint.
• Sanding Paint: Smooth and Ready for a Fresh Coat
Sanding is an essential step in paint removal and surface preparation. It smooths out any imperfections and makes the surface ready for a new paint job or refinishing. You can either sand surfaces by hand or use a power sander for larger projects.
– Sanding by Hand
Sanding by hand is relatively simple. You’ll need to gather sandpaper in several different grits (start with a lower grit and work your way up), a sanding block, and a dust mask.
With your dust mask in place, put a sheet of sandpaper around your sanding block and apply even pressure as you sand the surface. Start with the lower grit sandpaper and move up to higher grits as desired.
– Using a Power Sander
A power sander is useful for larger paint removal projects. Orbital sanders and random orbit sanders are both good choices for sanding paint, as they provide a variety of grit options and operate at a high speed for efficient paint removal.
When using a power sander, always follow safety precautions and wear appropriate safety gear, like eye protection and a dust mask. Just like with hand sanding, start with a low grit sandpaper and work your way up as needed.
• Chemical Paint Removal: When You Need Some Extra Help
Sometimes, scraping and sanding are not enough to remove paint, especially when dealing with multiple layers or stubborn coatings. In such cases, chemical paint removers can provide an extra level of assistance.
Chemical paint removers work by breaking down the bonds between the paint and the surface, allowing you to easily scrape or wipe away the paint.
Always read and follow the manufacturer’s instructions and safety precautions when using chemical paint removers, as some can be toxic or caustic and may cause severe skin or eye irritation.
Examples of chemical paint removers include:
- Paint strippers (e.g., methylene chloride-based products)
- Caustic soda (sodium hydroxide)
- Bio-based and eco-friendly paint removers
Apply the chemical paint remover according to the instructions and let it sit for the recommended time. You should then be able to remove the paint easily using a scraper or by simply wiping it away.
• Heat Guns and Infrared Paint Removers: Applying Heat for Efficient Paint Removal
Heat guns and infrared paint removers are also effective tools for stripping paint. These devices work by applying heat to the paint, causing it to soften and eventually peel away from the surface.
Heat guns typically require more skill to use than infrared paint removers, as they can heat the paint to very high temperatures and may cause fire hazards if not used carefully.
Infrared paint removers, on the other hand, are considered safer and more user-friendly, as they heat the paint evenly at a lower temperature.
When using either a heat gun or an infrared paint remover, make sure to follow all safety guidelines and precautions outlined by the manufacturer.
• Final Thoughts: Paint Stripping Done Right
Stripping paint effectively is a crucial step in many home improvement projects.
By understanding the types of paint and their removal methods, using proper techniques like scraping, sanding, and applying chemical paint removers or heat, and following safety guidelines throughout the process, you will be well-prepared to tackle even the most challenging paint removal tasks.
Step | Description |
|---|---|
1 | Choose the right paint stripper for the paint type and surface. |
2 | Prepare the work area by covering it with plastic or a drop cloth. |
3 | Put on safety equipment, such as gloves, goggles, and a face mask. |
4 | Apply the paint stripper to the painted surface using a brush or roller. |
5 | Let the paint stripper sit on the surface for the recommended time. |
6 | Use a scraper, putty knife, or wire brush to scrape off the loosened paint. |
7 | Repeat steps 4-6 if necessary until the paint is completely removed. |
8 | Wipe down or clean the surface to remove any remaining paint stripper residue. |
9 | Allow the surface to dry completely before applying new paint or finish. |
Strip Paint Prior to Sanding: Pros and Cons
When it comes to refinishing a surface, the two main steps often involved are stripping and sanding. However, an important question arises: should you strip paint before sanding? The answer is yes, and this article will explain the reasons and benefits behind this approach.
The following topics will be covered:
- The differences between stripping and sanding.
- Reasons to strip paint before sanding.
- Steps to properly strip and sand a surface.
• Stripping vs. Sanding: Understanding the Two Processes
First, let’s explore the differences between stripping and sanding. Although they might sound similar, they serve distinct purposes in surface preparation.
- Stripping refers to the process of removing the existing paint, varnish, or stain from a surface. This is typically done using a chemical paint stripper, a gel, or a liquid solution that dissolves the old finish, making it easier to scrape off.
- Sanding is a mechanical process that involves using abrasive materials, like sandpaper, to roughen or smooth a surface. It helps with removing small imperfections and preparing the surface for a new coat of paint, varnish, or stain.
• Reasons to Strip Paint Before Sanding
There are several reasons why stripping paint prior to sanding is highly recommended:
1. Easier Sanding Process
Stripping paint before sanding results in less work during the sanding process. With fewer layers of paint to sand down, the task becomes much easier and quicker. This can save you both time and effort.
2. Better Surface Preparation
Stripping paint ensures that loose and peeling paint is removed, providing a cleaner surface for sanding. This results in a smoother, more uniform surface that is better prepared for a fresh coat of paint, stain, or varnish.
3. Improved Adhesion of New Finish
A smooth, properly prepared surface promotes better adhesion of a new finish. This helps prevent future issues such as peeling, bubbling, or uneven application, ultimately ensuring a more professional-looking result.
4. Reduced Dust and Debris
By stripping paint before sanding, there will be less dust and debris generated during the sanding process. This not only makes for a cleaner workspace but also helps to protect your respiratory system and overall health.
• Steps to Properly Strip and Sand a Surface
Now that we understand the benefits of stripping paint before sanding, let’s explore the steps involved in doing so:
1. Choose the Right Stripping Product
Select a suitable chemical paint stripper based on the type of paint, varnish, or stain being removed. There are a variety of products available on the market, so it is essential to choose one specifically formulated for your project’s needs.
2. Apply the Paint Stripper
Carefully follow the manufacturer’s instructions for applying the paint stripper to the surface. It is generally recommended to use a brush or roller for even coverage.
Be sure to wear appropriate protective gear, such as gloves, goggles, and a mask, to protect your skin, eyes, and lungs from harmful chemicals.
3. Allow the Stripper to Work
Allow the stripping product to sit on the surface for the specified amount of time, as detailed in the manufacturer’s instructions.
This could range from a few minutes to several hours, depending on the product and the thickness of the paint layers.
4. Scrape and Clean the Surface
After the appropriate dwell time, use a scraper or putty knife to remove the softened paint. Be sure to work carefully and methodically, taking care not to damage the underlying surface.
After scraping, use a soft cloth or sponge with warm water to thoroughly clean the surface, removing any remaining stripper residue.
5. Begin the Sanding Process
Once the surface has been stripped and cleaned, it is time to start sanding. Choose the appropriate grit sandpaper based on the surface type and condition. As a general rule, start with a coarser grit and gradually progress to finer grits for a smooth, even finish.
Remember to use proper safety equipment, such as a dust mask, goggles, and gloves during this process.
6. Clean and Inspect the Surface
After sanding, clean the surface once more to remove any dust or debris. Inspect the surface for any remaining imperfections, and re-sand as needed to achieve the desired finish.
In conclusion, it is clear that stripping paint before sanding is a crucial step in achieving a professional, long-lasting finish. By following the steps outlined in this article, you will be well on your way to a successful refinishing project.
Learn the Top 3 Paint Stripping Techniques
Whether you’re repainting a piece of furniture, refurbishing an old home, or simply removing old and unsightly paint from a surface, one of the first tasks to tackle is stripping the paint.
Removing paint effectively can be a time-consuming and labor-intensive process, but knowing the appropriate technique for the specific surface and type of paint is crucial.
• 1. Chemical Paint Strippers
Chemical paint strippers are solvents that break the bond between the paint and the surface. These products can be highly effective, but it’s important to choose the right type for the job, as well as follow proper safety precautions.
– Types of Chemical Strippers
- Solvent-based paint strippers are effective in removing multiple layers of paint. They work on a wide variety of surfaces and types of paint, including oil-based, latex, and acrylic. Common solvents include methylene chloride, acetone, and toluene, which may have different levels of effectiveness based on the specific paint and surface. They can, however, be highly toxic, so the user must take the necessary precautions, such as using gloves, goggles, and proper ventilation.
- Bio-based paint strippers are derived from organic materials like soybeans, corn, and other plants, making them more environmentally friendly and less hazardous compared to solvent-based paint strippers. They are particularly useful for removing latex paints and less toxic surfaces. Since they can be slower-acting, patience and time may be required for optimal results.
– How to Use Chemical Paint Strippers
- Prepare the surface by cleaning and protecting adjacent areas from the chemicals.
- Apply a generous and even layer of paint stripper onto the surface with a brush.
- Allow the stripper to sit for the recommended time on the product label.
- Scrape away the softened paint with a plastic putty knife or scraper, taking care not to damage the surface.
- If necessary, repeat the process for multiple paint layers.
- Clean the stripped surface with mineral spirits or water, depending on the stripper’s instructions.
Recommendation: Use chemical paint strippers when dealing with multiple layers of paint or when needing to strip paint from intricate details or curved surfaces.
• 2. Mechanical Paint Stripping
Mechanical paint stripping involves physically removing paint through abrasion or scraping. This method is practical for smooth surfaces and small-scale projects but may not be suitable for delicate or ornate surfaces.
– Types of Mechanical Stripping Tools
- Sanding: This is a common technique that involves using sandpaper or an electric sander to abrade the paint from the surface. It is ideal for flat surfaces and preparing surfaces for a new coat of paint. However, care must be taken not to create uneven surfaces or damage the underlying material.
- Scraping: Using a putty knife or scraper, paint can be manually removed. This technique is ideal for peeling or flaking paint. It is essential to select the correct scraper for the material and to work carefully to avoid gouging the surface.
- Power Tools: There are power tools specifically designed for paint removal, such as rotary tools with abrasive attachments or paint shavers. These tools can be highly effective but may cause damage to the surface if not used carefully and correctly.
Recommendation: Employ mechanical paint stripping methods for small to medium-sized projects, especially when dealing with flat surfaces or dealing with paint that is already peeling or flaking.
• 3. Heat-Based Paint Stripping
Heat-based paint stripping uses high temperatures to soften the paint, allowing for easier removal. This method is particularly effective on oil-based paints and varnishes.
– Tools for Heat-Based Paint Stripping
- Heat Guns: These are similar in appearance to a hairdryer but produce much higher temperatures. They work by softening the paint, allowing it to be scraped off with a putty knife.
- Infrared Paint Removers: Using infrared heat, these devices do not produce any open flame, which can make them safer than heat guns or torches. They soften the paint enough for easy scraping.
– How to Use Heat-Based Paint Stripping Tools
- Prepare the area and have the appropriate scraping tools at hand.
- Turn on the heat gun or infrared paint remover and allow it to heat up.
- Apply the heat evenly over the desired area until the paint softens.
- While the paint is still soft, scrape it off with a putty knife or scraper.
- Repeat the process as necessary for multiple layers of paint.
Recommendation: Use heat-based paint stripping techniques for oil-based paints, varnishes, or stubborn coatings.
It is worth noting that while these are the three basic techniques for stripping paint, they can be used in combination based on the specific project’s needs.
By understanding the individual characteristics and uses of these three methods, one can successfully and efficiently remove paint from virtually any surface.
Benefits of Paint Stripping Before Repainting
• The Importance of Proper Preparation
In the world of painting, whether it be for home interiors or exteriors, proper preparation is crucial for ensuring a flawless and long-lasting result. One key aspect of this preparation process is determining whether or not to strip existing paint before repainting.
Stripping paint can be time-consuming and labor-intensive, but can ultimately lead to a better final product.
• Benefits of Stripping Paint
– Increased Adhesion
The primary reason for stripping paint is to ensure that the new paint layer adheres properly to the surface. A rough or uneven surface can compromise the adhesion and lifespan of the new paint. By stripping paint and exposing the original surface, new paint can better bond and adhere to the material.
– Smooth Finish
Another advantage of stripping paint is achieving a smooth and consistent finish. Multiple layers of paint can lead to visible seams, peeling, or even bubbling, which can detract from the overall appearance of the painted surface.
Stripping paint allows for a smooth and even application of the new coat, enhancing the final result.
– Proper Inspection and Repair
Finally, stripping paint can unveil any underlying damage or areas in need of repair. In some cases, issues such as rot or mold may be hidden beneath layers of paint, and can be more effectively addressed after stripping the paint and exposing the problem area.
This helps to maintain the integrity of the surface and ensure the success and longevity of the new paint job.
• When Stripping Paint is Necessary
– Chipped or Flaking Paint
If the existing paint is peeling, chipping, or flaking off, its essential to strip it away before repainting. Applying new paint on top of a damaged or compromised surface is counterproductive, as the new paint will likely suffer from the same issues and not adhere properly.
– Lead-Based Paint
If the surface was previously painted with lead-based paint, it is crucial to remove it before applying new paint. Not only can lead paint pose serious health risks, but new paint will not adhere well to a lead-based paint surface.
In this case, it is vital to follow proper safety procedures for lead paint removal, or consult with a trained professional. The United States Environmental Protection Agency offers guidance for safely handling lead paint.
– Multiple Layers of Paint
Paint buildup can occur when numerous coats have been applied over time. In this case, stripping the paint can lead to a smoother and more consistent surface for the new paint. Also, by removing excess layers, you reduce the chances of future paint issues such as peeling or bubbling.
• Techniques for Stripping Paint
– Manual Scraping
Using a paint scraper, putty knife, or wire brush, you can manually remove loose and chipping paint. While this method can be labor-intensive, it is effective for small areas or touch-up work.
– Chemical Strippers
Chemical paint strippers are solvent-based products that soften and break down paint layers, making them easier to remove. This method can be more effective than manual scraping for stubborn or thick paint layers.
However, care must be taken when using chemical strippers, as they can be hazardous to your health and the environment. Always follow the manufacturer’s instructions and safety precautions.
– Heat Guns
Heat guns or infrared paint strippers can be used to soften and loosen paint layers, making them easier to scrape away. This method can be particularly effective for removing paint from wood surfaces, as it will not damage underlying materials as some chemical strippers might.
However, care must be taken to avoid overheating or damaging the surface, and proper safety precautions should be followed.
– Power Washing
For exterior surfaces, power washing can be a useful method for stripping paint. The pressure of the water can remove loose and chipping paint without causing damage to the underlying surface.
However, it’s essential to adjust the pressure appropriately to avoid causing harm to the material or creating additional damage.
• Conclusion
In summary, stripping paint before repainting is highly recommended for various situations, and can lead to a better final result. Increased adhesion, a smooth and consistent finish, and the ability to inspect and repair underlying issues are all benefits of paint stripping.
By assessing the surface condition and choosing the appropriate paint removal method, you can ultimately achieve a successful and long-lasting paint job.