Prep Process Evaluate Surface Conditions, What Pros Say
Navigating the complexities of surface conditions can be quite challenging, especially when it comes to the preparation process. Fortunately, we’re here to provide you with valuable insights to get you on the right track. In this discussion, we’ll be evaluating how to effectively assess surface conditions, ensuring that all factors contributing to the success of your project are properly addressed.
Prep process: evaluate surface conditions:
Evaluating surface conditions for a painting or coating project involves identifying the substrate material, assessing contaminants, examining the surface texture, identifying existing coatings, determining moisture levels, and addressing surface imperfections. The proper assessment ensures a high-quality, long-lasting result and effective surface preparation.

Curious about evaluating surface conditions in the prep process? You’ve come to the right place! Dive into this comprehensive guide to discover expert insights, practical tips, and foolproof methods that will guarantee pristine results. Read on to unlock the secrets of surface perfection!
Contents
- 1 Assessing Surface Conditions for Preparation
- 2 Understanding Surface Preparation Techniques
- 3 Methods for Examining Surface Readiness
- 4 Crucial Factors in Surface Preparation Planning
- 5 Paint Surface Preparation: Key Steps to Follow
Assessing Surface Conditions for Preparation
Properly evaluating surface conditions is a critical step in the preparation process for any painting or coating project. Accurate assessment will ensure that the final product is high-quality and long-lasting.
• Identifying the Substrate Material
The first step in evaluating surface conditions is identifying the substrate material. The substrate is the underlying material that will be painted or coated, and it plays a significant role in determining the appropriate preparation process and coating choice. Some common substrate materials include:
- Wood
- Concrete
- Metal
- Drywall
- Plastics
Different substrates have unique characteristics that can impact the adhesion and performance of a coating. For example, wood is prone to moisture absorption, while metal surfaces can be susceptible to rust and corrosion.
As such, it is essential to tailor your preparation and coating approach to the specific substrate material involved in your project.
• Assessing Surface Contaminants
Contaminants on the surface can prevent proper adhesion of coatings and may lead to poor results. It is critical to identify and remove any contaminants before proceeding with the project. Some common surface contaminants to look out for include:
- Dirt and debris
- Grease and oil
- Rust and corrosion
- Chalkiness or deteriorating paint
- Mold and mildew
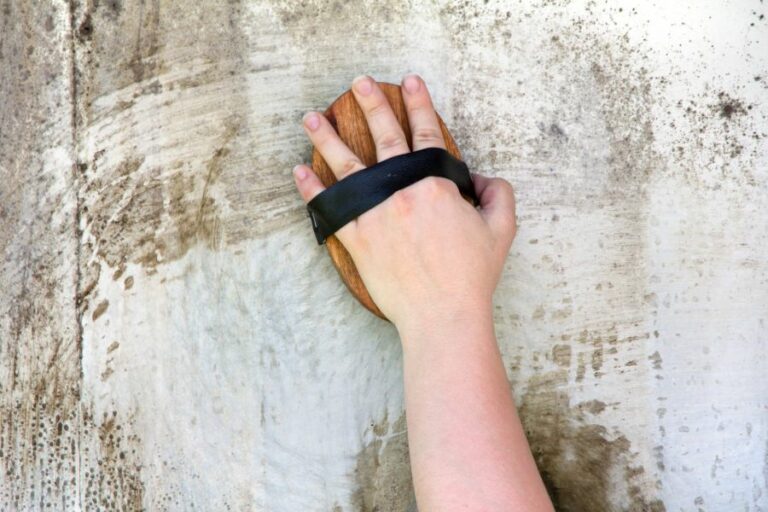
– Expert Tip: Use the Wet Sponge Test
To test for chalkiness or deteriorating paint on an existing painted surface, rub a wet sponge or cloth over the surface. If the paint color transfers to the sponge or cloth, the surface will be chalky and will need to be thoroughly cleaned and possibly primed before repainting.
• Examining Surface Texture
Surface texture can have a direct effect on the performance of a coating or paint. A rough or uneven texture can reduce the overall coverage area of a product and negatively impact its appearance.
Conversely, a smooth surface may create challenges for proper adhesion. Evaluate the texture of the surface and prepare it accordingly through methods such as sanding or roughening, depending on the specific substrate and project requirements.
• Identifying Existing Coatings
If you are working on a project that involves an already coated surface, identifying the existing coating is essential. This will help you determine the compatibility of the new coating with the old one, ensuring a successful outcome.
Additionally, it will help you identify and address any potential issues associated with the existing coating, such as peeling or bubbling.
• Determining Moisture Levels
Moisture levels in the substrate can significantly affect the adhesion, curing, and performance of a coating. For materials like wood and concrete, it is crucial to measure and assess moisture content before proceeding with the application process.
Use a moisture meter to obtain accurate readings and consult the manufacturer’s guidelines for the recommended moisture levels with your chosen coating.
• Addressing Surface Imperfections
Surface imperfections, such as cracks, holes, and dents, can lead to uneven coating and an unappealing finish.
Inspect the substrate for any visible imperfections and address them accordingly. You may need to use fillers, patching materials, or additional preparation techniques to ensure a smooth, even surface for the coating.
– Expert Tip: Use a Flashlight
When inspecting a surface for imperfections, a flashlight can be a valuable tool. Hold the flashlight at a low angle to the surface, allowing the light to “rake” across it. This will highlight any irregularities that may not be immediately apparent in normal lighting conditions.
• Properly Preparing the Surface
Once you have thoroughly evaluated the surface conditions, it’s time to take the necessary steps for proper preparation. This may involve:
- Cleaning the surface to remove all dirt, debris, and contaminants
- Sanding or roughening the surface to create an appropriate texture
- Priming the surface to create a uniform base for the new coating
By conducting a comprehensive evaluation of your project’s surface conditions, you’ll be better equipped to select the appropriate preparation methods and coating products and ultimately achieve a successful outcome.
Understanding Surface Preparation Techniques
Surface preparation processes are essential steps in the application of various coatings or treatments to an object or surface. These processes aim to create an ideal surface condition to ensure the maximum adhesion, durability, and effectiveness of the applied coating or treatment.
• Types of Surface Preparation Processes
1. Cleaning
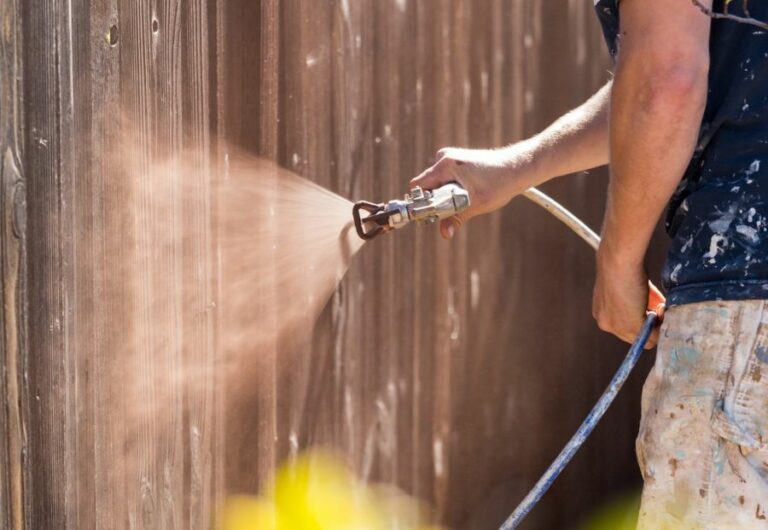
Cleaning is a basic yet crucial step in surface preparation. It involves the removal of any contaminants, such as dirt, dust, grease, or rust, that may hinder the performance of the applied coating or treatment.
There are various methods to clean a surface, including:
- Washing: Using water, detergents, or other cleaning agents, the surface is scrubbed or sprayed to remove contaminants.
- Solvent cleaning: Solvents are used to dissolve grease, oil, or other organic contaminants from the surface.
- Vapor degreasing: A solvent is heated and converted into vapor, which then condenses on the surface, dissolving contaminants and leaving behind a clean surface.
2. Abrasive Blasting
Abrasive blasting, also known as sandblasting, involves propelling a stream of abrasive particles against a surface at high velocity. This process removes surface contaminants, roughens the surface, and creates a profile ideal for coating adhesion.
There are several abrasive blasting methods, such as:
- Dry abrasive blasting: Uses compressed air to propel dry abrasive particles against the surface.
- Wet abrasive blasting: Mixes water with abrasive particles to create a slurry, which is then propelled against the surface.
- Vacuum blasting: Incorporates an enclosed system that collects the abrasive particles and removed contaminants, allowing for a cleaner workspace.
When selecting the appropriate abrasive material, factors such as hardness, size, and shape should be considered for optimal results. Common abrasive materials include aluminum oxide, garnet, and steel shot.
3. Chemical Treatment
Chemical treatments involve the use of acids or other chemicals to modify the surface, improving the adhesion and performance of coatings. These processes include:
- Acid etching: Applying an acid solution to the surface dissolves contaminants and creates a micro-textured profile.
- Conversion coating: The application of a chemical solution modifies the surface, forming a protective layer that enhances adhesion and provides corrosion resistance. Examples of conversion coatings are chromate, phosphate, and oxide coatings.
4. Mechanical Surface Preparation
Mechanical surface preparation involves the use of various tools and equipment to manipulate the surface, creating an ideal surface profile. Methods for mechanical surface preparation include:
- Grinding: The removal of surface contaminants and creation of a smooth surface using rotating abrasive discs or wheels.
- Scarifying: The use of a machine with rotating cutting blades to remove layers of contaminated or damaged material from the surface.
- Brushing: Using wire or nylon brushes to remove debris, rust, and other contaminants from the surface.
• Importance of Surface Preparation Processes
Proper surface preparation is crucial for the success and longevity of any coating or treatment application. Some benefits of thorough surface preparation include:
- Improved adhesion: A clean, roughened surface ensures maximum contact between the surface and the applied coating or treatment.
- Enhanced durability: A well-prepared surface reduces the risk of coating failure due to factors such as poor adhesion, peeling, or corrosion.
- Optimized performance: A clean, properly treated surface allows for optimal functioning and performance of the applied coating or treatment.
• Applications of Surface Preparation Processes
Surface preparation processes are employed in various industries and applications, such as:
- Automotive: Preparation of parts and components for painting or the application of protective coatings.
- Marine: Removal of marine fouling, rust, and contaminants from ship hulls and structures.
- Petrochemical: Surface preparation of pipes, tanks, and structures for corrosion-resistant coatings.
- Aerospace: Preparation of aircraft components for the application of protective coatings, paints, and other treatments.
In conclusion, surface preparation processes play a vital role in ensuring the success of applied coatings and treatments. By effectively cleaning, modifying, and creating an ideal surface profile, these processes help maximize adhesion, durability, and performance of the applied materials.
Methods for Examining Surface Readiness
Surface preparation is a crucial step in the coating or painting process, as it ensures the proper adhesion of paint or coating to the underlying surface. Inadequate surface preparation can lead to a variety of problems, such as poor adhesion, blistering, and peeling.
• The Process of Surface Preparation
The process of surface preparation involves cleaning and treating surfaces to remove contaminants, such as oil, grease, dirt, and rust. Additionally, it can include methods to create a roughened profile on the surface for improved adhesion.
There are various methods of surface preparation, depending on the type of substrate and the required degree of cleanliness.
– Cleaning Methods
Some common cleaning methods include:
- Solvent cleaning, which involves the use of solvents to dissolve and remove surface contaminants.
- Detergent or alkaline cleaning, which relies on solutions to emulsify and remove contaminants.
- Abrasive blasting employs the use of compressed air to propel abrasive material onto a surface, effectively removing any contaminants and roughening the substrate.
– Surface Profiling Methods
For improved paint or coating adhesion, the surface profile may need to be treated through one of the following methods:
- Acid etching, which utilizes a chemical reaction to create a rough surface profile.
- Grinding or sanding, which mechanically abrades the surface.
- Abrasive blasting, which can also be used to achieve a desired profile.
• Visual Inspection
The first step in checking surface preparation is to visually inspect the surface for any remaining contaminants, defects, or inconsistencies. Carefully examine the entire surface and look for any signs of dirt, grease, rust, or other imperfections.
Additionally, pay attention to the surface profile and ensure it meets the requirements for the paint or coating being applied. Consult the coating manufacturer’s guidelines for specific surface preparation recommendations.
• Wipe Testing
Wipe testing involves using a clean, white, lint-free cloth or cotton swab moistened with a solvent (such as isopropyl alcohol) to gently wipe the prepared surface.
The cloth or swab should be observed for any visible evidence of contaminants, such as staining or discoloration. If contaminants are still present, additional cleaning may be necessary.
• Surface Roughness Testing
To measure the surface roughness or profile, several methods can be employed:
- Testex tape: A specialized tape that is applied to the surface and then removed, leaving behind an imprint of the surface profile. The tape is then measured using a spring micrometer to determine the surface roughness.
- Replica putty: A moldable material that is applied to the surface and allowed to harden, creating a replica of the surface profile. The replica is then examined using a suitable measuring instrument (e.g., a surface roughness tester) to determine the roughness.
- Direct methods: Instruments such as profilometers or stylus roughness testers can be used to directly measure surface roughness.
• Conductivity Testing
Conductivity testing is a method used to assess the effectiveness of cleaning processes, particularly on metal surfaces. It involves testing the surface’s conductivity or resistance to an electrical charge and comparing it to the manufacturer’s specifications.
A surface with low conductivity or high resistance indicates that the cleaning process has been effective in removing contaminants. Conductivity meters can be used to perform this test.
In addition to these testing methods, it’s crucial to continuously monitor and maintain the cleanliness of equipment, surfaces, and the work environment to ensure optimal surface preparation.
• Final Thoughts
Proper surface preparation is essential for achieving a long-lasting and durable paint or coating application. You can ensure a successful result by following the manufacturer’s recommendations and conducting thorough inspections and testing throughout the process.
To further enhance your knowledge of surface preparation, consider visiting the NACE International website, a globally recognized organization specializing in corrosion control and surface preparation best practices.
Step | Description |
|---|---|
1 | Inspect the surface for cleanliness and remove any dirt, debris, grease, or oils. |
2 | Determine the proper surface profile required for your coating system (smooth, medium, or rough). |
3 | Choose a surface preparation method (abrasive blasting, power tool cleaning, etc.) appropriate for your desired surface profile and coating system. |
4 | Perform the chosen surface preparation method, ensuring that it effectively achieves the desired surface profile and removes any surface contamination. |
5 | Inspect the prepared surface using visual inspection and appropriate testing methods (surface profile gauge, surface contamination testing kits, etc.) to ensure that it meets the requirements of your coating system. |
6 | If needed, repeat surface preparation steps and perform additional inspections until the surface is properly prepared. |
Crucial Factors in Surface Preparation Planning
Surface preparation is crucial in ensuring the longevity and effectiveness of coatings, adhesives, or other treatments. The cleanliness and suitability of a surface significantly affect the final product’s quality and performance.
• Identifying the Surface Material
Before starting the preparation process, it is essential to identify the surface material. A common mistake is to apply the same preparation method to all materials without considering their differences.
Understanding the material’s composition and properties will enable you to choose appropriate cleaning or treatment methods. Here are some common surface materials:
- Concrete
- Metal
- Wood
- Plastic
- Glass
Each material will require a specific approach to ensure proper adhesion and performance of the chosen coating or adhesive.
• Evaluating Surface Contamination
All surfaces can be affected by various contaminants, which can disrupt the bond between the surface and the coating or adhesive. Consequently, it is crucial to assess the nature and extent of the contamination to determine the appropriate cleaning method. Some common contaminants include:
- Dust and dirt
- Grease and oil
- Rust and oxidation
- Old paint and coatings
- Mold and mildew
I recommend testing the surface for contamination using simple water droplet tests, for example. If the water beads on the surface, it indicates that oil or similar contaminants could be present. Evaluating the surface contamination will help you make an informed decision on how best to proceed with cleaning.
• Choosing the Right Cleaning Method
Selecting the right cleaning method is essential to ensure that contaminants are removed effectively without causing harm to the surface. Various cleaning methods exist, and each has its strengths and weaknesses. Some common cleaning methods include:
– Mechanical Cleaning
Mechanical cleaning involves equipment that physically abrades or removes contaminants from the surface. Methods include:
- Sandblasting
- Grinding
- Wire brushing
- Shot blasting
These methods are useful for heavily contaminated or rough surfaces, such as concrete or metal. However, they may not be suitable for delicate materials like wood, plastic, or glass.
– Chemical Cleaning
Chemical cleaning uses solvents or other chemicals to dissolve or loosen contaminants from the surface. This method can be effective for surfaces with oils, greases, or old coatings.
It is important to select the appropriate chemical for the specific contaminant and material and follow the manufacturer’s instructions for proper use.
– Water-based Cleaning
Water-based cleaning involves using water, optionally combined with detergents or other cleaning agents, to remove contaminants.
This method is widely used for environmental and safety reasons but may not be effective for removing stubborn or heavy contaminants. Hot water or steam cleaning can enhance the effectiveness of water-based cleaning methods.
When choosing a cleaning method, I recommend weighing factors such as cost, safety, environmental impact, and material compatibility.
• Achieving the Proper Surface Profile
In many cases, especially for coatings, a specific surface profile is required for optimal adhesion and performance.
Surface roughness refers to variations in the height of the surface material, which can affect the contact area and bond strength between the surface and the coating or adhesive. Common surface profiling methods include:
- Abrasion (e.g. sanding, grinding)
- Chemical etching
- Mechanical profiling (e.g., metal brushes, shot blasting)
The appropriate surface profile will depend on the specific coating or adhesive and the surface material. Always consult the manufacturer’s instructions or guidelines for recommendations on the desired surface profile.
• Confirming Surface Cleanliness
After completing the cleaning and profiling process, it is essential to confirm that the surface is adequately prepared.
This often involves the use of inspection equipment or simple visual inspection to ensure that contaminants have been effectively removed and that the surface profile meets the required specifications.
Additionally, ASTM International publishes standards for surface cleanliness and preparation, which can be useful for guiding and validating the process.
• Proper Timing and Sequencing
Finally, consider the timing of surface preparation in the overall project schedule. Clean and properly prepared surfaces can become contaminated if left unprotected or exposed for lengthy periods.
Ensure that subsequent operations, such as the application of coatings or adhesives, occur promptly after the preparation process to minimize the risk of recontamination.
In conclusion, surface preparation is a critical aspect of ensuring the quality and performance of applied coatings, adhesives, or other treatments.
Identifying the surface material, evaluating contamination, choosing the appropriate cleaning method, achieving a suitable surface profile, confirming cleanliness and proper timing and sequencing are all essential factors in ensuring successful surface preparation.
Adequate attention to each of these elements will contribute to the longevity and effectiveness of your chosen coating or adhesive.
Paint Surface Preparation: Key Steps to Follow
Proper surface preparation is essential for the success of any painting project. A well-prepared surface ensures the paint will adhere correctly, leading to a long-lasting and professional finish.
• Cleaning the Surface
The first step in surface preparation is cleaning the area that will be painted. Dirt, dust, and other contaminants could negatively impact the paint’s ability to adhere to the surface, leading to uneven coverage, peeling, or other issues.
- Regular cleaning: Start by using a soft brush, vacuum, or cloth to remove any loose dirt and dust from the surface. This step is essential, especially for exterior surfaces that may have been exposed to harsh weather conditions.
- Degreasing: If the surface is greasy or oily common in kitchens or industrial areas, use a degreaser or detergent to break down and remove that residue. This step is crucial, as even a small amount of grease can significantly affect the paint’s ability to bond with the surface.
- Mold and mildew removal: It’s important to address any mold or mildew before applying new paint. Use a cleaning solution containing bleach or a specialized mold and mildew remover to treat the affected areas. Once the area is clean, let it dry thoroughly.
• Repairing Imperfections
The next step in surface preparation is addressing any imperfections in the surface, such as cracks, holes, or irregularities.
- Filling holes: Use a suitable filler or putty to fill small holes and cracks in the surface. For larger holes, it may be necessary to use a patching compound or even replace a piece of the wall or ceiling.
- Sanding: Once the filler has dried, sand the area to create a smooth, even surface. It’s crucial to choose the correct grit sandpaper for the job; using sandpaper that’s too coarse will leave scratches, while sandpaper that’s too fine may not effectively remove the imperfections. Start with medium-grit sandpaper, such as 100 or 120 grit, and move to a finer grit if needed.
- Caulking: Seal any gaps or seams around doors, windows, and baseboards with paintable latex caulk. This helps create a seamless appearance once the area is painted and also reduces heat loss and drafts in the room.
• Priming the Surface
Applying a primer before painting is an essential step in the surface preparation process. Primers help in achieving better paint adhesion, coverage, and durability.
- Choosing the right primer: Different surfaces and paint types require specific primers. For example, a wood surface may need an oil-based primer, while a metal surface may require a rust-inhibiting primer. Consult the paint manufacturer’s instructions or speak to a knowledgeable salesperson to help you choose the right primer.
- Applying the primer: Before applying the primer, make sure the surface is clean, dry, and free from any dust and debris. Use a brush, roller, or sprayer to apply a thin, even coat of primer to the surface. Be sure to cover the entire surface, feathering the edges to ensure a smooth transition between the primed and unprimed areas.
- Sanding again: Once the primer has dried, lightly sand the surface to remove any brush marks, drips, or imperfections. Use fine-grit sandpaper (approximately 220 grit) for this step to avoid damaging the primer layer. After sanding, vacuum or wipe down the surface to remove any sanding dust.
• General Recommendations
- When painting a surface that has been previously painted, pay close attention to the compatibility of the new paint with the existing paint. If the existing paint is oil-based, you may need to use a specific type of primer or paint to ensure proper adhesion.
- Always allow the recommended drying times between coats of primer, paint, or other surface treatments. Rushing the process can lead to problems, such as improper adhesion or the need for additional coats.
- Consider using a paint with an anti-microbial additive to help prevent mold and mildew growth, especially in humid or damp environments.
- Always follow manufacturer guidelines for application techniques, temperatures, and humidity levels to achieve the best results.
In conclusion, proper surface preparation is crucial for a successful painting project. By following these steps: cleaning, repairing, and priming the surface, you will increase the longevity and improve the appearance of the finished paint job.
Step | Description |
|---|---|
1 | Cleaning the surface: Remove dirt, grease, and other contaminants that can prevent proper paint adhesion. |
2 | Removing old paint: If the existing paint is cracked, peeling, or chipping, remove it before applying new paint. |
3 | Repairing surface imperfections: Fill in holes, cracks, and dents, and sand the surface to create a smooth, even surface for painting. |
4 | Priming: Apply a primer to seal the surface and provide a cohesive base for the paint. |
5 | Sanding: Lightly sand the primed surface to remove any imperfections and to improve paint adhesion. |
6 | Cleaning the surface again: Remove any dust created from sanding before painting. |