How To Strip Wallpaper Before Painting Walls, What Pros Say
Are you ready to transform your living space with fresh paint but first need to deal with that outdated wallpaper? Fear not, because we’re here to guide you through the process of stripping wallpaper like a pro, ensuring a smooth and clean canvas for your upcoming painting project. With our step-by-step instructions, you’ll be well on your way to giving your walls a well-deserved rejuvenation.
How to strip wallpaper before painting walls:>
To strip wallpaper before painting walls, gather necessary materials such as a putty knife, scorer, remover solution, hot water, and spray bottle. Protect floors and furniture, turn off electrical power, and test a small area for removal method. Score wallpaper if needed, apply remover solution, and allow 15-20 minutes for soaking. Scrape off wallpaper, remove adhesive residue, rinse walls, and repair any wall damage.

Ready to give your walls a fresh new look by stripping the old wallpaper? We’ve got you covered with tips and techniques that’ll make the process easier, ensuring a smooth and clean surface for a beautiful paint job. Keep reading to unveil the secrets to efficient wallpaper removal!
Contents
- 1 Stripping Wallpaper Prior to Wall Painting: A Guide
- 2 Top Methods for Wallpaper Removal Before Painting
- 3 Painting Walls Post Wallpaper Removal: Best Practices
- 4 Quickest Techniques for Wallpaper Stripping
- 5 Simplest Approach to Old Wallpaper Removal
- 6 Importance of Wallpaper Stripping Before Painting
- 7 Why Sanding After Stripping Wallpaper is Important
Stripping Wallpaper Prior to Wall Painting: A Guide
Stripping wallpaper can be a challenging and time-consuming task, but it is essential for creating a smooth surface for painting.
• Materials and Tools Needed
Before starting, gather the necessary materials and tools:
- Plastic drop cloths
- Painter’s tape
- Putty knife or scraper
- Wallpaper scoring tool (optional)
- Wallpaper remover solution or a homemade mixture
- Hot water
- Spray bottle or garden sprayer
- Large sponge or cloth
- Ladder (if working in high areas)
- Trash bags
• Preparing the Room and Work Area
1. Protect Your Floors and Furniture
Before starting, remove all furniture and wall fixtures from the room. Cover the floor with plastic drop cloths to avoid damaging it during the process. Secure the drop cloths with painter’s tape to prevent slipping.
2. Turn Off the Electrical Power
To avoid electrical shock when working near outlets and switches, turn off the power to the room. You can also cover the outlets and switches with painter’s tape for added protection.
• Stripping the Wallpaper
3. Test a Small Area
Before tackling the entire wall, conduct a small test to determine the best removal method for your wallpaper. Scrape a small section with a putty knife to see if it comes off easily. If not, proceed to the following steps.
4. Score the Wallpaper (If Necessary)
If the wallpaper does not come off easily, use a wallpaper scoring tool to pierce small holes in the surface. This will allow the wallpaper remover solution to penetrate the paper and adhesive more effectively. Apply gentle pressure when scoring to avoid damaging the wall underneath.
5. Apply Wallpaper Remover Solution
Fill a spray bottle or garden sprayer with hot water and a wallpaper remover solution, or create a homemade mixture with equal parts hot water and white vinegar.
Apply the solution generously to the wallpaper, starting at the top of the wall and working your way down. Wait 15 to 20 minutes for the solution to soak in and soften the wallpaper adhesive.
In my experience, using a garden sprayer can make this step more manageable, as it covers a large area more quickly and evenly.
6. Scrape Off the Wallpaper
After waiting for the solution to soak in, use a putty knife or scraper to gently remove the wallpaper. Start at a seam or scored area and work your way across the wall, keeping the blade at a low angle to avoid damaging the surface underneath.
7. Remove the Adhesive Residue
Once you have removed all the wallpaper, there may still be adhesive residue on the walls. Use a large sponge or cloth to wipe down the walls with the wallpaper remover solution, ensuring that all traces of adhesive are removed.
8. Rinse the Walls
After removing the adhesive residue, rinse the walls with clean water and a large sponge. This step is crucial to remove any remaining wallpaper remover solution before painting.
9. Dispose of the Waste
Place the removed wallpaper and adhesive in trash bags, making sure to properly dispose of the waste according to local regulations.
10. Repair Any Wall Damage (If Necessary)
If there are any scratches or gouges in the walls after removing the wallpaper, repair them with a joint compound and a putty knife. Allow the compound to dry, then sand it smooth with fine-grit sandpaper.
• Final Thoughts
Stripping wallpaper can be a challenging process, but following these steps and tips ensures professional results. Remember, always use caution when working with sharp tools or near electrical outlets, and take your time to avoid causing any damage to the walls.
With proper preparation and patience, you will have a smooth and clean surface ready for painting.
Step | Description |
|---|---|
1 | Prepare the room by covering furniture, removing decorations from walls, and protecting floors with drop cloths. |
2 | Turn off power at the circuit breaker or fuse box to protect yourself from electrical hazards. |
3 | Score the wallpaper using a wallpaper scoring tool to create small perforations for the stripping solution to penetrate. |
4 | Mix a wallpaper stripping solution according to the manufacturer’s instructions and apply it to the wallpaper using a spray bottle or sponge. |
5 | Allow the solution to soak into the wallpaper for the specified time, usually between 10 to 15 minutes. |
6 | Use a wallpaper scraper or putty knife to gently remove the wallpaper, starting at the edges and working your way inward. |
7 | Continue applying the stripping solution and scraping off wallpaper until all wallpaper is removed. |
8 | Wash the walls with a sponge or cloth and warm soapy water to remove any leftover wallpaper adhesive. |
9 | Repair any damage to the walls, such as holes, cracks, or peeled paint, with spackling compound and sandpaper. |
10 | Prime the walls with a high-quality primer to ensure proper paint adhesion and an even finish. |
11 | Proceed with painting the walls following your chosen paint manufacturer’s instructions. |
12 | Clean-up the work area, disposing of any debris and removing protective coverings from furniture and floors. |
Top Methods for Wallpaper Removal Before Painting
Removing wallpaper can be a tedious task, but it is necessary if you want to create a smooth and clean surface for painting.
• Using the Right Tools for the Job
Start by gathering the necessary tools for successful wallpaper removal. The following list of tools and supplies will make your job easier:
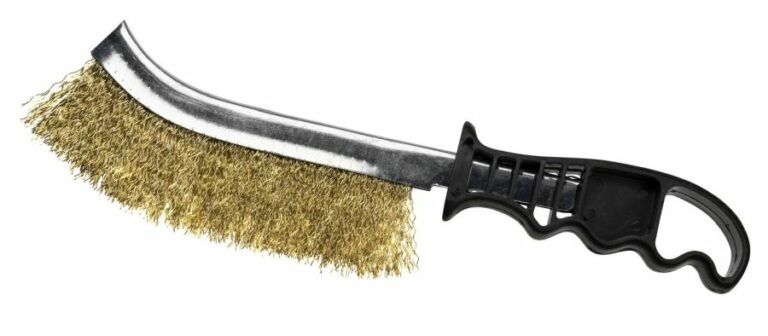
- Putty knife or scraper: A wide putty knife or scraper is essential for removing wallpaper. It helps to lift and peel away the wallpaper from the wall. Choose a tool that has a non-slip handle and a sharp edge for maximum efficiency.
- Spray bottle or garden sprayer: Filling a spray bottle or garden sprayer with water or a wallpaper removal solution will help you moisten the wallpaper, making it easier to remove.
- Wallpaper steamer: If you’re working with large areas or stubborn wallpaper, consider investing in a wallpaper steamer. This tool can be rented at most home improvement stores and will significantly speed up the removal process.
- Rubber gloves and protective clothing: Protect yourself from any potential skin irritation by wearing rubber gloves, long sleeves, and pants during the removal process.
- Drop cloth: Use a drop cloth to protect the floor from any debris or wallpaper removal solution.
• Methods for Removing Wallpaper
There are three primary methods for removing wallpaper: peeling, scoring, and steaming. Depending on the type of wallpaper and the condition of the wall, you may need to use a combination of these methods.
– Peeling Method
Start by attempting to peel the wallpaper off the wall by hand. If the wallpaper is easily peeled away, you may not need to use any other removal methods. Follow these steps for the peeling method:
- Use your putty knife or scraper to gently lift a corner of the wallpaper.
- Slowly pull the wallpaper away from the wall, keeping the angle low to avoid tearing the paper.
- If the wallpaper is difficult to remove, move on to the scoring method.
– Scoring Method
If the wallpaper does not peel away easily, use a wallpaper scoring tool to create small holes in the wallpaper. This will allow water or wallpaper removal solution to penetrate the paper, making it easier to peel away. Follow these steps for the scoring method:
- Apply light pressure and roll the scoring tool over the wallpaper in a circular motion.
- After scoring, spray the wallpaper with water or a wallpaper removal solution, ensuring that the solution penetrates the holes created by the scoring tool.
- Wait about 10-15 minutes for the solution to soften the wallpaper adhesive.
- Use your putty knife or scraper to gently lift and peel away the wallpaper.
- If the wallpaper is still difficult to remove, move on to the steaming method.
– Steaming Method
A wallpaper steamer is your best option for removing stubborn or multiple layers of wallpaper. The steam penetrates the wallpaper and softens the adhesive for easier removal. Follow these steps for the steaming method:
- Fill the wallpaper steamer with water and plug it in. Wait for the steamer to heat up (this may take several minutes).
- Hold the steamer plate against the wall for about 30 seconds to soften the adhesive.
- Immediately use your putty knife or scraper to lift the wallpaper, working quickly before the adhesive cools.
- Continue to alternate between steaming and scraping until all wallpaper has been removed.
• Final Clean-Up and Preparation for Painting
After removing the wallpaper, there may be residual adhesive on the wall. Follow these steps to clean and prepare the wall for painting:
- Mix a solution of warm water and dish soap in a bucket or spray bottle.
- Apply the solution to the adhesive on the wall and let it sit for a few minutes.
- Use your putty knife, scraper, or sponge to remove the adhesive from the wall.
- Rinse the wall thoroughly with clean water.
- Allow the wall to dry completely before painting.
- Before painting, apply a high-quality primer to the wall. This will create a smooth and even surface for paint application.
By following these expert recommendations, you’ll be able to efficiently and effectively remove wallpaper before painting.
Step | Description |
|---|---|
1 | Remove any items on the walls and move furniture away from the walls. |
2 | Turn off the power to electrical outlets and switches in the room. |
3 | Protect the floors with drop cloths or plastic sheets. |
4 | Score the wallpaper using a wallpaper scoring tool. |
5 | Apply a wallpaper removal solution, either a premixed liquid or a mixture of hot water and wallpaper remover powder or vinegar. |
6 | Allow the solution to soak into the wallpaper for about 15 to 20 minutes. |
7 | Use a wallpaper scraper or a putty knife to gently scrape away the wallpaper, working from the top down. |
8 | Wipe down the walls to remove excess wallpaper adhesive and allow them to dry. |
9 | Repair any wall damages with patching compound and sand down any rough spots. |
10 | Prime the walls with a good-quality primer to prevent the paint from peeling or chipping. |
11 | Paint the walls with the desired color and finish. |
Painting Walls Post Wallpaper Removal: Best Practices
After removing old wallpaper, it’s essential to prepare the walls properly before applying fresh paint. This process may seem time-consuming, but taking the necessary steps ensures a professional-looking finish that will last for years.
• Removing Old Adhesive Residue
One of the critical steps in preparing walls for painting is removing any leftover adhesive. Adhesive residue can negatively impact the paint’s appearance and longevity, so it’s crucial to thoroughly clean the walls.
– Tools and Materials You’ll Need
- Warm water
- Mild dish SOAP
- Soft sponge
- Clean, dry towels or rags
- Wallpaper adhesive remover (optional)
Start by mixing a solution of warm water and mild dish soap to clean off the residual glue. Gently scrub the walls with a soft sponge, ensuring that all traces of adhesive are gone. Rinse the surface with clean water and wipe it down with a dry towel.
If stubborn spots of glue remain, consider using a chemical wallpaper adhesive remover. Follow the manufacturer’s instructions when applying these products, and always wear appropriate protective gear.
• Repairing Wall Damage
After removing the glue, inspect the walls for any damage, such as holes, cracks, or loose joint compounds. Repairing these imperfections ensures a smooth, consistent finish when you paint.
– Tools and Materials You’ll Need
- Drywall compound
- Putty knife
- Sandpaper
- Primer
To repair small holes or cracks, apply a thin layer of drywall compound with a putty knife. Several applications may be necessary, allowing the product to dry between each one.
For more extensive damage, consider consulting a professional for the best repair options.
After the repairs have dried, sand the area smooth with a fine-grit sandpaper. Wipe away any dust with a clean, damp cloth.
• Priming the Walls
Using a high-quality primer ensures proper paint adhesion, covers any remaining wallpaper residue or stains, and promotes a more even finish when applying the paint.
– Tools and Materials You’ll Need
- Primer (oil-based or acrylic)
- Paint roller or brush
- Paint tray
- Painter’s tape
- Protective drop cloths
Choose a primer that works well with your chosen paint type. Oil-based primers are generally recommended for their ability to block out stains, but acrylic primers may be more environmentally friendly and easier to clean.
Before priming, protect your floors and trim with drop cloths and painter’s tape. Apply the primer generously with a paint roller or brush, ensuring that you cover the entire surface evenly.
Allow the primer to dry according to the manufacturer’s instructions. This step is typically 24 hours, but drying times may vary depending on the product and environmental factors.
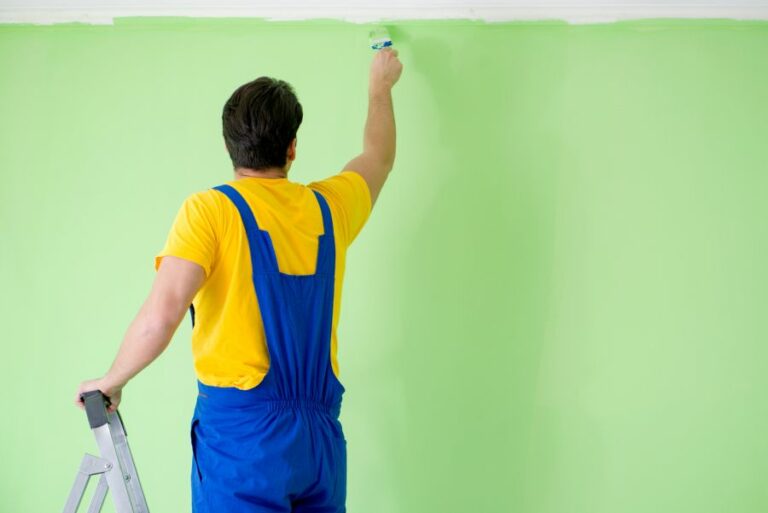
• Painting the Walls
Once the primer is dry, it’s time to choose your paint and apply it to the walls. A high-quality paint will provide a durable and long-lasting finish.
– Tools and Materials You’ll Need
- Paint (latex or oil-based)
- Paint roller or brush
- Paint tray
- Painter’s tape
- Protective drop cloths
Select a paint type that complements your primer choice. Latex paints are water-based and easy to clean, while oil-based paints offer better stain resistance and durability.
Apply the paint in two to three coats, ensuring even coverage with each application. Allow each coat to dry according to the manufacturer’s instructions before applying the next one.
A popular painting technique for a smooth finish is the “W” method. To do this, roll the paint onto the wall in a series of “W” shapes, then blend the paint evenly with horizontal and vertical strokes. This technique can prevent streaking and ensure consistent coverage.
Once the final coat of paint is dry, carefully remove the painter’s tape and dispose of the protective drop cloths.
• Final Thoughts
Taking the time to properly prepare your walls after removing the wallpaper will go a long way in ensuring a professional-quality paint job. By following these steps, you’ll achieve a beautifully painted surface that adds value and charm to your home.
Step | Description |
|---|---|
1. Remove wallpaper | Completely remove the wallpaper using a wallpaper steamer or stripping solution, and then scrape off any remaining adhesive. |
2. Repair wall damage | Fill in any holes or cracks with joint compound, and then sand the walls smooth. |
3. Clean the walls | Remove any dust and residue by washing the walls with a mild detergent solution, then rinse and let them dry completely. |
4. Apply primer | Apply a high-quality primer to ensure good paint adhesion and to help seal any remaining wallpaper adhesive. |
5. Choose paint | Fill in any holes or cracks with joint compound, and then sand the walls smoothly. |
6. Paint the walls | Paint the walls using a roller or brush, applying at least two coats to achieve a smooth and even finish. |
Quickest Techniques for Wallpaper Stripping
Stripping wallpaper can be a time-consuming and labor-intensive task, but with the right techniques and tools, it can be done quickly and efficiently.
• Preparing the Room
Before you begin stripping wallpaper, it’s important to prepare the room. This includes:
- Clearing the room: Remove all furniture and fixtures, or push them to the center of the room and cover with drop cloths.
- Covering the floors: Lay down drop cloths or plastic sheeting to protect your floors and make cleanup easier.
- Disconnecting power: Turn off the electricity to any outlets or switches in the room, and cover them with electrical tape or plastic to prevent water damage.
- Gathering supplies: You’ll need a variety of tools to strip wallpaper effectively. Having them all within reach will help speed up the process.
• Gather Your Tools
To strip wallpaper quickly and efficiently, gather the following tools and materials:
- Wallpaper stripper solution: You can purchase a commercial product or make your own by mixing one part fabric softener to two parts of water.
- Pump sprayer or sponge to apply the solution.
- Wallpaper scoring tool or utility knife to score the wallpaper.
- Wide-blade scraper to remove the wallpaper.
- Steamer (optional): A wallpaper steamer can be useful for particularly stubborn adhesive or vinyl wallpaper.
- Ladder or step stool for reaching higher areas.
- Trash bags or buckets for collecting removed wallpaper.
• Score the Wallpaper
Scoring the wallpaper allows the stripping solution to penetrate the adhesive, making it easier to remove. For this step, use a wallpaper scoring tool or a utility knife to make shallow, diagonal cuts in the wallpaper, spacing them about an inch apart. Be careful not to damage the underlying wall.
• Apply the Stripping Solution
Next, apply the wallpaper stripper solution generously to a section of the wall using a pump sprayer or sponge. Work in manageable sections, about 3 to 4 feet wide, starting from the top and working your way down.
Allow the solution to soak into the wallpaper for several minutes; this will help soften the adhesive and make it easier to remove.
If you’re using a steamer, follow the manufacturer’s instructions for use, typically placing the steamer pad on the wallpaper until the adhesive softens.
• Remove Stripping Solution and Wallpaper
Once the solution has had a chance to soak into the wallpaper, use a wide-blade scraper to remove the wallpaper and adhesive; position your scraper at a 25- to a 30-degree angle, gently scraping off the wallpaper in an upward motion. Remember to work from the top down.
If the wallpaper or adhesive is stubborn, reapply the stripping solution and allow it to soak for a few more minutes before attempting to remove it again.
As you’re removing the wallpaper, periodically clean the scraper blade and empty the accumulated wallpaper scraps into a trash bag or bucket. This helps to keep your work area clean and makes cleanup easier.
• Clean the Walls
Once the wallpaper is removed, you may still have adhesive residue left on the walls. To remove this, use a sponge or rag dampened with warm water and mild detergent to scrub the walls. You can also use a soft-bristle brush for any particularly stubborn spots.
After cleaning, rinse the walls with clean water to remove any detergent residue, then allow the walls to dry completely before moving on to any further wall treatments or painting. This typically takes about 24 hours.
• Conclusion
By following the above steps and using the proper tools, you can strip wallpaper efficiently and quickly, making your next home improvement project easier to complete. For more information, take a look at this comprehensive guide from This Old House, which provides additional tips and techniques.
Simplest Approach to Old Wallpaper Removal
Removing old wallpaper can be a tedious and time-consuming task, but as a seasoned professional, I can assure you that there are easier ways to tackle this DIY project.
• Preparing the Room
Before you begin, it is essential to properly prepare the room to ensure a hassle-free process.
– Clear Out the Space
Remove any furniture or decorations from the room to avoid any damage and create ample space for your work.
– Protect the Floors
Cover your floors with a drop cloth or plastic sheeting to make cleanup easier and shield the surface from potential damage.
– Turn Off the Electricity
It’s a good idea to shut off the electricity to the room to avoid electrical hazards while working around outlets and switches.
• Essential Tools and Supplies
To make the wallpaper removal process efficient, collect the following tools and supplies:
- Wallpaper scraper or putty knife
- Bucket
- Sponge or spray bottle
- Water
- Wallpaper removing solution
- Steamer (optional)
- Trash bags or plastic sheeting
- Ladder or step stool (if necessary)
• The Soaking Method
One of the simplest methods to remove old wallpaper involves soaking the walls, which helps to soften the adhesive and make the paper easier to peel away.
– Mix the Solution
In your bucket, mix a wallpaper-removing solution, following the manufacturer’s instructions. Alternatively, you can create your own solution by mixing equal parts of liquid fabric softener and warm water.
– Apply the Solution
Using a sponge or spray bottle, apply the solution to the walls, ensuring complete coverage.
– Wait for the Wallpaper to Soak
Allow the solution to soak into the wallpaper for 10-20 minutes, loosening the adhesive. Some wallpapers may need a second soaking if they do not readily peel away.
– Scrape Off the Loosened Wallpaper
Once the wallpaper has absorbed the solution, use your wallpaper scraper to gently remove it from the walls, working in small sections.
– Repeat the Process
Continue to apply the solution, wait for soaking, and remove the wallpaper until the entire room is completed.
• The Steaming Method
Using a wallpaper steamer is another effective technique for removing old wallpaper. In my experience, I’ve seen this method work particularly well on stubborn, older wallpapers.
– Rent or Purchase a Steamer
Most home improvement stores offer wallpaper steamers for rental, but if you plan to remove wallpaper often, investing in your own steamer may be worthwhile.
– Fill the Steamer with Water
Consult the manufacturer’s manual for proper filling and heating instructions.
– Steam the Walls
Hold the steamer’s plate against the wallpaper for about 20-30 seconds per section, or until the wallpaper begins to soften and loosen.
– Scrape Off the Loosened Wallpaper
Using your wallpaper scraper, gently remove the steamed sections of the wallpaper from the walls.
– Repeat the Process
Continue to steam and scrape the wallpaper until the entire room is completed.
• Clean Up and Prepare Your Walls for Painting or New Wallpaper
Once you have successfully removed all the old wallpaper, follow these steps to prepare your walls for their next makeover.
- Clean your walls with a damp sponge to remove any leftover adhesive and debris.
- Inspect your walls for any necessary repairs, such as filling holes or sanding uneven areas.
- Prime your walls to create a smooth, even surface for paint or new wallpaper.
• Conclusion
Removing old wallpaper need not be a daunting task if you have the proper tools and techniques. In my experience, the soaking method and the steaming method are both efficient ways to tackle this DIY project.
Remember to prepare the room and follow the detailed steps outlined above. With patience and persistence, you can give your walls the fresh start they deserve.
Importance of Wallpaper Stripping Before Painting
When it comes to home improvement projects, updating the walls with a fresh coat of paint is often at the top of the list. However, if your walls have been previously covered with wallpaper, the question arises: should you strip the wallpaper before painting?
• Assessing the Condition of Your Wallpaper
Before anything else, the first step should be to examine the condition of the wallpaper currently on your walls. The state of the wallpaper will play a significant role in determining whether it’s best to strip it or simply paint over.
– Intact and Secure Wallpaper
If your wallpaper is in good condition with no visible defects or peeling edges, it may not be necessary to strip it before painting. Instead, you could consider applying a quick coat of paint to freshen up the space.
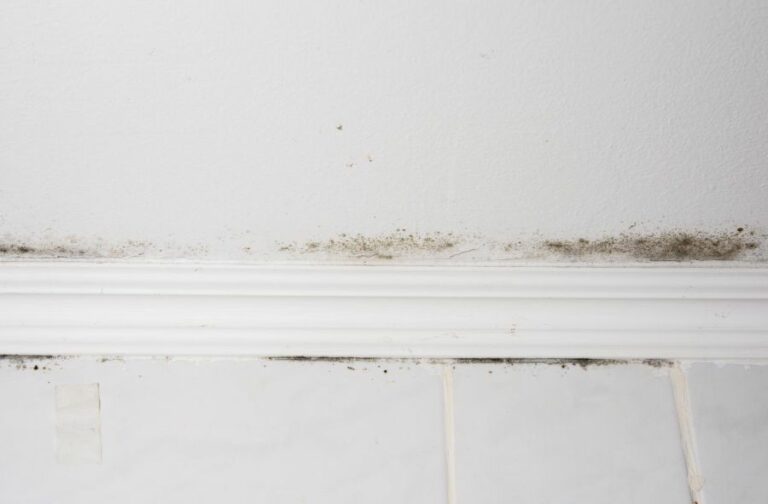
– Damaged or Peeling Wallpaper
On the other hand, if your wallpaper is damaged, bubbling, or peeling away from the walls, it’s best to strip it before painting. Failing to do so can lead to an uneven and unattractive paint job that will only highlight the imperfections in the wallpaper.
• The Pros and Cons of Stripping Wallpaper Before Painting
When deciding whether to strip wallpaper before painting or not, it’s essential to weigh the pros and cons of each option.
– Advantages of Stripping Wallpaper
Some benefits of stripping the wallpaper include:
- Professional Results: A smooth and even paint job is possible only when painting over a flat surface. Removing the wallpaper provides a clean slate for a high-quality finish.
- Reduced Risk of Issues: Stripping the wallpaper eliminates the possibility of the new paint causing the old wallpaper to peel or bubble.
- Easy Future Updates: Should you decide to update your space again, stripping the wallpaper now will make any future painting or wallpaper projects easier to tackle.
– Disadvantages of Stripping Wallpaper
Conversely, there are some disadvantages to consider when stripping wallpaper:
- Time-consuming Process: Removing wallpaper can be a tedious and sometimes challenging task. It may take significantly longer to complete the paint job compared to painting directly over the existing wallpaper.
- Potential Wall Damage: If not done carefully, there’s a risk of damaging the drywall underneath while stripping the wallpaper.
• How to Strip Wallpaper Before Painting
If you’ve decided that stripping the wallpaper is the best option, follow these essential steps for a successful process:
- Gather Tools and Supplies: To remove the wallpaper, you will need a wallpaper stripper or steamer, a wallpaper scoring tool, a scraper, and possibly a mixture of water and fabric softener.
- Score the Wallpaper: Use the scoring tool to create small perforations in the wallpaper that will allow steam or liquid to penetrate.
- Apply Steam or Liquid: Use a wallpaper steamer or the water and fabric softener mixture to saturate the perforations you created. This will help loosen the wallpaper’s adhesive.
- Scrape the Wallpaper Off: Slowly and carefully, begin to scrape the wallpaper away from the walls. Be cautious not to damage the drywall.
- Prepare the Walls: Once the wallpaper is removed, thoroughly clean the walls to remove any adhesive residue. Fill in any dents or damage with a suitable patching compound, then sand and prime the walls before painting.
• How to Paint Over Wallpaper
In cases where stripping the wallpaper is not necessary, follow these steps for a proper paint application on the wallpaper:
- Secure and Repair: Ensure that the wallpaper is securely adhered to the wall with no loose edges, and repair any damage or imperfections with a patching compound.
- Clean the Walls: Remove any dust, dirt, or grease from the wallpaper’s surface to ensure good paint adhesion.
- Prime the Surface: Apply a high-quality primer ideally one designed to cover wallpaper to create a smooth and even surface for painting.
- Apply the Paint: Finally, apply your desired paint color on the primed surface, following the paint manufacturer’s instructions for best results.
• Follow the Department of the Interior’s Guidelines
Additionally, if you are working in a historical building, it is essential to follow the U.S. Department of the Interior guidelines on preserving and conserving historic wallpapers. Their recommendations ensure that the heritage, aesthetic value, and structural integrity of these buildings remain intact.
• Final Thoughts
In conclusion, whether to strip wallpaper before painting mostly depends on the condition of your wallpaper and your preference for a smooth, professional finish. Stripping the wallpaper may be time-consuming, but it can lead to better results overall.
On the other hand, if your wallpaper is in good condition and securely adhered to the wall, painting over it could be a quicker and more cost-effective solution.
Whichever route you choose, the key lies in careful preparation and the correct use of tools and materials for a successful painting project.
Why Sanding After Stripping Wallpaper is Important
• What Happens After Stripping Wallpaper
So, you’ve decided to remove the old, outdated wallpaper from your walls, and you’re now facing the inevitable question: Do you have to sand after stripping the wallpaper?
The straightforward answer is yes, and I’ll explain why. When you strip wallpaper, you are left with various residues and rough surfaces on your walls. These problems need to be addressed before you can proceed with painting or applying new wallpaper.
These residues include glue remnants, leftover adhesive, and uneven wall texture, which can negatively impact the appearance of your walls if not dealt with appropriately.
– Dealing with Residues
Uneven surfaces and residual glue are the main reasons why you should sand the walls after stripping wallpaper. Here are a few steps to follow to ensure a smooth and clean surface.
1. Removing Leftover Adhesive
After removing the wallpaper, there’s often leftover adhesive on the walls. You’ll need to dissolve this residue you can do this by using a mixture of water and white vinegar.
Apply this mixture on the walls using a sponge and let it sit for 15-20 minutes. Afterward, use a scraper tool to gently remove the adhesive.
2. Repairing Damage
During the process of removing wallpaper, you might accidentally damage the drywall, creating gouges and dents. These dents need to be filled with a premixed joint compound applied using a putty knife. Apply a thin layer and let it dry for at least 24 hours before proceeding.
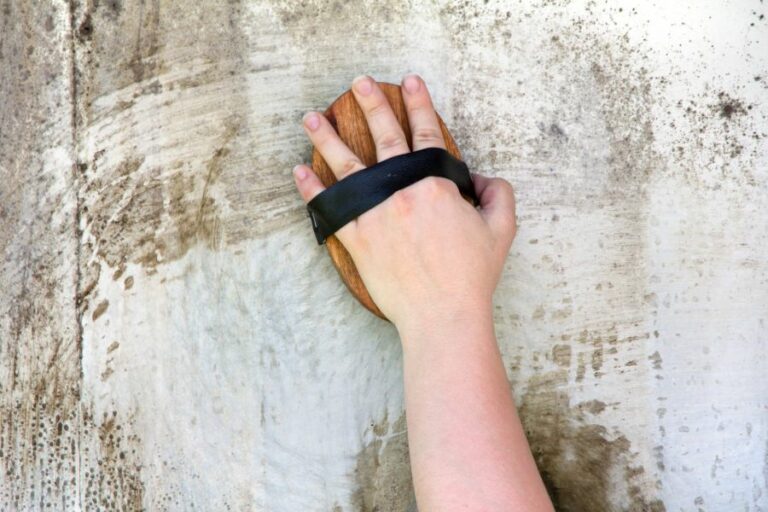
3. Sanding the Walls
This is the main focus of our discussion. After removing adhesive residues and repairing the walls, it’s time to sand them. Sanding is necessary to even out wall surfaces and provide a proper base for painting or applying new wallpaper.
Sanding the walls can be done using a manual sanding block or an electric sander if you have access to one. Using medium-grit sandpaper (around 80-100 grit), sand the walls in a circular motion. Be gentle to avoid creating additional damage to the walls.
4. Final Cleaning
After sanding, it’s essential to clean the walls thoroughly to remove any dust and debris. You can use a vacuum cleaner to collect dust, followed by wiping the walls with a microfiber cloth or a damp sponge.
• The Benefits of Sanding After Stripping Wallpaper
There are clear benefits to sanding your walls after wallpaper removal that contribute to the overall quality and appearance of your end result.
– Smoother Surface
By sanding the walls, you create an even, smooth surface for paint or new wallpaper to adhere to. This is crucial in achieving a professional and polished look.
– Paint Adhesion
Sanding walls provides better paint adhesion by creating a slightly rough surface for the paint to grip onto. The same principle applies when applying new wallpaper – the adhesive will stick more effectively to a sanded surface.
– Longevity
A crucial aspect of any home improvement project is ensuring that the results last for an extended period. Sanding your walls after stripping wallpaper ensures a smooth, clean foundation that increases the longevity of your paint or wallpaper application.
• Safety Precautions
Sanding can produce a lot of dust, which can be harmful if inhaled. When sanding, make sure to wear protective gear such as safety goggles, a dust mask, and gloves. Additionally, it’s a good idea to ventilate the work area by opening windows or using fans.
• Conclusion
While it might seem like an additional step, sanding your walls after stripping wallpaper is essential to achieving a clean, smooth surface for your next project.
Taking the time to prepare your walls by sanding and cleaning will greatly contribute to the longevity and appearance of your freshly painted or newly-papered walls. So, go ahead and invest that bit of extra time and effort – you won’t regret it when you see the finished result!
Steps | Description |
|---|---|
1. Strip the wallpaper | Remove the wallpaper using a wallpaper stripper or by manually peeling it off. |
2. Assess the wall condition | Check for any remaining wallpaper residue, adhesive, or damaged areas on the wall. |
3. Clean the wall | Remove any remaining adhesive or wallpaper residue using a sponge and warm soapy water or a suitable cleaning solution. |
4. Sand the wall | Sanding is necessary if there are any rough or uneven surfaces, damaged areas, or residual adhesive. Use medium-grit sandpaper and sand the entire wall evenly. This will ensure a smooth surface for the next layer of paint or wallpaper. |
5. Wipe away dust | Use a damp cloth or sponge to wipe away any dust and debris left from sanding. |
6. Repair any damages (optional) | Fill in any cracks or holes with a suitable wall filler, then sand the repaired area once it’s dry for a smooth finish. |
7. Apply new paint or wallpaper | Apply primer if necessary, and then proceed with painting or applying new wallpaper. |