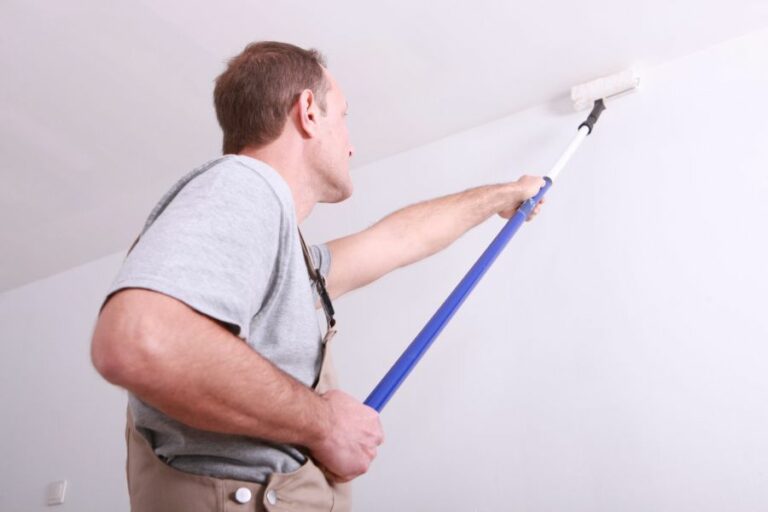
Repaint Basics Essential Surface Preparation. What Pros Say
Repainting a room or furniture can be incredibly satisfying and cost-effective to freshen up your living space. But for a truly professional finish that lasts, it’s essential to properly prepare the surface before applying the paint. Don’t worry – we’re here to guide you through the basics of surface preparation, ensuring a stunning result that will stand the test of time.
Repaint basics: essential surface preparation:
Repaint basics involve essential surface preparation steps, including assessing the surface condition, cleaning, sanding and scraping, repairing damages, caulking and sealing, and priming. Properly preparing the surface ensures a smooth, professional, and long-lasting paint job, with optimal paint adhesion and appearance.

Discover invaluable tips and techniques for the essential surface preparation process before you repaint. Unveil the secrets of a flawless finish that ensures durability and visual appeal. Dive in to learn more!
Contents
- 1 Fundamentals of Repainting: Crucial Surface Preparation
- 2 Key Steps for Preparing an Old Painted Surface for Repainting
- 3 Essential Components of Painting with Surface Preparation
- 4 Is Sanding Required for Painted Surfaces Before Repainting?
Fundamentals of Repainting: Crucial Surface Preparation
• Assess the Surface Condition
Before beginning any painting project, it’s important to assess the condition of the surface that needs repainting. Look for any cracks, peeling paint, or other damage that could impact the quality of your paint job.
If you identify any issues, it’s essential to repair them first to ensure a smooth, long-lasting finish. A professional painter’s experience can be invaluable when assessing a surface, so consider consulting one if you’re unsure about the condition of your painting surface.
• Cleaning the Surface
A clean surface is crucial for the paint to adhere properly. Dirt, dust, and grime can all prevent paint from bonding to the surface effectively. To clean most surfaces, you can use mild detergent and water, applied with a sponge or cloth.
For more stubborn dirt, a scrub brush may be required. When the surface is clean, rinse it thoroughly with clean water.
For exterior surfaces, using a pressure washer can be a more efficient way to clean the surface. Be careful not to use too much pressure, as this can damage the surface and cause paint to peel. Follow the manufacturer’s recommendations for the appropriate pressure level for your surface.
• Sanding and Scraping
After the surface is clean and dry, it’s essential to remove any loose or peeling paint. A scraper or putty knife can be used for this purpose. Make sure to work carefully to avoid gouging the surface, especially if it’s made of wood.
Sanding the surface helps create a smooth finish and improves paint adhesion. A sandpaper with a 120-grit or 150-grit rating should be sufficient for most surfaces.
When sanding, follow the grain of the surface to minimize scratches. Use an electric sander if you’re working on a large surface or if you want to save time and effort.
Once sanding is complete, remove any sanding dust by wiping the surface with a tack cloth or damp rag. You can also use a vacuum cleaner with a brush attachment to clean the surface before proceeding to the next step.
• Repairing Damages
Any surface imperfections, such as holes or cracks, should be repaired before painting. For interior surfaces, use a spackling compound to fill the holes or cracks, smoothing the surface with a putty knife or sandpaper.
For exterior surfaces, you may need a more durable filler, such as a two-part epoxy, to ensure long-lasting repairs.
If there is any damage to wooden surfaces, consider using a wood filler to repair the damaged areas. Make sure to follow the manufacturer’s instructions for proper application and drying times.
• Caulking and Sealing
Caulking is an essential step in surface preparation, as it seals gaps and prevents moisture from entering your walls or other surfaces. Using a high-quality acrylic or silicone caulk, fill any gaps around window frames, door frames, baseboards, or other areas where moisture may enter.
Apply the caulk using a caulking gun, following the manufacturer’s instructions. Smooth the caulk with a wet finger or a damp sponge to ensure a seamless finish.
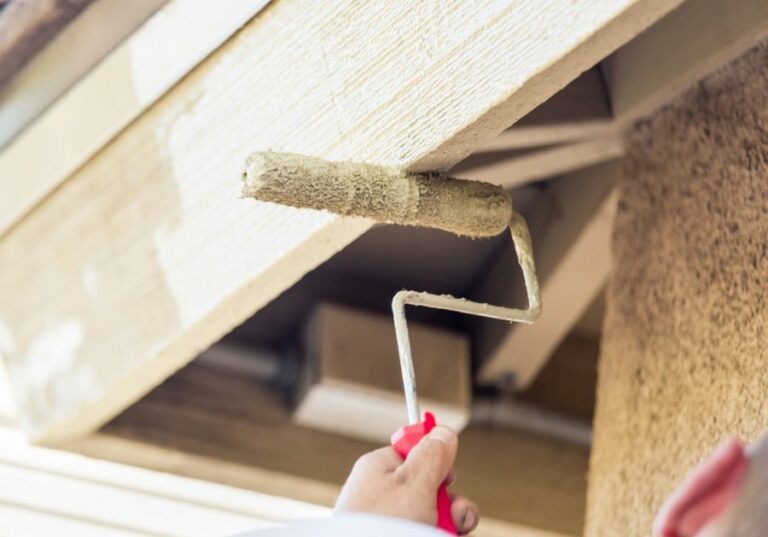
• Priming the Surface
Primer is a crucial component of any repaint project, as it creates a uniform surface for the paint to adhere to and ensures optimal coverage. Choose a primer based on the type of surface you’re painting and the paint you’re using.
For previously painted surfaces, a simple latex primer may be adequate. However, if you’re working on a surface with stains, bare wood, or metal, a specialized primer is necessary to ensure proper adhesion and coverage.
Apply the primer using a brush, roller, or sprayer, depending on the size of the surface and your preferred method. Allow the primer to dry thoroughly, following the manufacturer’s recommendations for drying time. Once the primer is dry, you can begin applying your chosen paint.
• Final Thoughts
Taking the time to prepare the surface before repainting is a crucial step in ensuring a professional, long-lasting paint job. Thoroughly cleaning, repairing, and priming the surface will provide a smooth and uniform foundation for your paint, allowing it to adhere properly and look its best.
Remember that the key to a successful repaint project is patience and attention to detail. Don’t rush through the surface preparation process, as this can lead to an unsatisfactory result that requires additional effort to correct.
By following these essential surface preparation steps, you’ll be well on your way to a beautiful and durable finished paint job.
Key Steps for Preparing an Old Painted Surface for Repainting
Repainting a previously painted surface might seem like a straightforward task, but it requires careful planning and execution to achieve the desired results.
• Inspection and Cleaning of the Surface
Before starting the actual repainting process, it’s essential to inspect and clean the surface thoroughly. I recommend checking for any damage, such as cracks or holes, which may need attention. Additionally, it’s crucial to remove any dirt, grime, or mildew from the surface.
You can use a soft brush, mild detergent, and water to clean the surface. Make sure to rinse the surface with clean water and let it dry completely before moving to the next step.
• Assessing and Removing Old Paint
It’s important to determine the condition of the old paint. If it’s peeling, cracked, or showing signs of wear, it’s crucial to remove the old paint before applying a fresh coat.
Tools such as paint scrapers, wire brushes, or even a heat gun can assist in this process. For areas that are difficult to reach, a sanding block or electric sander can prove helpful.
Remember to wear the appropriate safety gear, including gloves, goggles, and a dust mask, to protect yourself from dust and debris during this process.
• Repairing Surface Damage
After removing the old paint, it’s necessary to inspect the surface for any damage. For small cracks or holes, I recommend using a pre-made filler or putty to fill in the gaps. Larger repairs may require the application of a patching compound or even the replacement of the damaged material.
Once the repairs are complete, sand the surface to ensure a smooth finish. This step is particularly important when repainting wood surfaces, as it helps to create an even foundation for the new paint.
• Priming the Surface
Priming is an essential step in the repainting process, as it provides a good base for the new paint to adhere to. Choose a primer that’s appropriate for the surface material and follow the manufacturer’s instructions for application. Be sure to cover any stains or repairs with the primer for a uniform finish.
• Taping and Masking
To ensure crisp, clean lines and protect surfaces that should not be painted, it’s essential to tape and mask the area appropriately. Use painter’s tape to cover areas, such as windows, doors, and trim, which should not receive paint.
Masking tape can also be used to create design features, such as stripes or patterns, on the painted surface.
Remember to press the tape securely to the surface to prevent paint from seeping under the edges.
• Choosing the Right Paint
With the surface prepared, it’s now time to choose the appropriate paint for your project. Factors to consider when selecting paint include the type of surface being painted, the desired finish, and any specific requirements, such as low VOCs or mold resistance.
For guidance on selecting the right paint, consult resources such as Consumer Reports for expert advice and paint ratings.
• Paint Application
Once the preparatory works are complete, it’s time to apply the new coat of paint. When painting, use consistent brush strokes or a roller in a uniform direction and resist the temptation to overwork the paint.
Apply multiple thin coats rather than a single thick coat to achieve a smoother finish. Allow sufficient drying time between coats, as recommended by the paint manufacturer.
Following these preparatory steps should ensure that your repainting project results in a professional-looking, long-lasting finish that revitalizes your old painted surface. Remember that careful planning and attention to detail are key to achieving a successful outcome.
Step | Description |
|---|---|
1. Inspect the surface | Check for any damages, cracks, or peeling paint. Determine whether it can be repaired or if it needs replacement. |
2. Clean the surface | Remove dirt, dust, and other contaminants from the surface using a mild detergent and a soft brush. Rinse with water and let it dry. |
3. Scrape off loose paint | Use a paint scraper or putty knife to remove any loose or peeling paint from the surface. Sand down any rough edges afterward. |
4. Repair damages | Fill any cracks, holes, or gaps in the surface with a proper filler. Sand the repaired areas smooth once the filler dries. |
5. Sand the surface | Lightly sand the entire surface to create a smooth and even base for new paint. Use fine-grit sandpaper and sand in the direction of the grain. Remove any dust afterward. |
6. Prime the surface | Apply a high-quality primer to the surface to ensure good adhesion of the new paint and to provide a uniform base. Allow the primer to dry according to the manufacturer’s instructions. |
7. Caulk and seal | Apply caulk to any gaps or seams to prevent moisture and air infiltration. Also, seal windows and doors with weatherstripping if necessary. |
8. Protect surrounding areas | Cover adjacent surfaces, furniture, and flooring with drop cloths or plastic sheets to protect them from paint splatters and spills. |
Essential Components of Painting with Surface Preparation
Preparing the surface is often considered one of the most important steps in the painting process. A well-prepared surface ensures a long-lasting, durable, and professional-looking paint job.
• Importance of Surface Preparation
Proper surface preparation allows the paint to adhere to the surface properly, resulting in a smooth, even finish. Poor surface preparation leads to problems like peeling, chipping, and uneven paint application.
According to the U.S. Department of Agriculture, up to 80% of all paint failures can be traced back to insufficient surface preparation.
• Cleaning the Surface
Before applying the paint, it is essential to clean the surface thoroughly by removing dirt, grease, oil, and any other contaminants that can interfere with the paint’s adhesion.
– Dust and Dirt Removal
Removing dust and dirt is often the first step in surface preparation. You can use a dry cloth, a brush, or a vacuum cleaner to remove dust and dirt from the surface. It is also beneficial to wipe down the surface with a damp cloth to remove any residual dust.
– Degreasing the Surface
Grease and oil can interfere with the adhesion of the paint, causing it to peel off or fail prematurely. To degrease the surface, use a commercial degreaser or a solution of warm water and mild detergent. After cleaning the surface, rinse it thoroughly with clean water and allow it to dry completely.
• Sanding the Surface
Sanding the surface ensures a smooth, even finish and provides better adhesion for the paint. Different surfaces require different sanding techniques and tools.
– Wood Surfaces
fine-grit sandpaper. Small wooden furniture or trim can be sanded using a sanding block, while larger surfaces may require an orbital sander.
– Metal Surfaces
Remove any rust or oxidation from metal surfaces using a wire brush, sandpaper, or a rust-removing solution. Sand or grind any remaining rough, uneven areas to create a smooth surface.
– Drywall Surfaces
Sanding drywall requires using a fine-grit sandpaper or a drywall sanding block. It is essential to apply light pressure and make consistent, even strokes to avoid damaging the paper surface of the drywall.
• Repairing Surface Imperfections
Before painting, it is vital to repair any cracks, holes, or imperfections on the surface. This is particularly important for wood, concrete, and drywall surfaces.
– Wood Surfaces
Fill any cracks, holes, or gouges in wood using wood filler or putty. Allow it to dry completely before sanding the area smooth and flush with the wood surface.
– Concrete Surfaces
For concrete surfaces, use a concrete patching compound to fill any holes or cracks. Ensure that the patched area is level with the rest of the surface before the patch dries.
– Drywall Surfaces
Drywall imperfections, such as nail holes or dents, should be filled with a pre-mixed joint compound. Apply the compound using a putty knife and smooth out any excess before it dries. Once it is dry, lightly sand the area to create a smooth, even surface.
• Priming the Surface
Primer is a crucial component in the painting process. A primer prepares the surface for paint, improves adhesion, and allows for better color consistency. It is necessary to apply a primer on surfaces such as bare wood, metal, or drywall.
– Choosing the Right Primer
Different types of surfaces require different types of primers. For example, on wood surfaces, an oil-based or latex-based primer can be used, while for metal surfaces, a metal-specific primer should be used.
Ultimately, it is essential to choose a primer that is compatible with both the surface material and the type of paint you will be using.
– Applying the Primer
Apply the primer using a brush or roller, ensuring that it covers the entire surface evenly. Allow the primer to dry according to the manufacturer’s recommendations before moving on to the painting step.
• Final Surface Inspection
Before applying the paint, it is vital to perform a final inspection of the surface. This involves checking for any missed imperfections, uneven spots, or areas that need additional sanding.
By thoroughly examining the surface, you can ensure that it is in the best possible condition for painting. This will lead to a more professional-looking and long-lasting paint job.
In conclusion, proper surface preparation is crucial for a successful painting project. By following the steps outlined in this article, cleaning, sanding, repairing imperfections, and priming the surface, you can significantly increase the longevity and appearance of your paint job.
Necessities of Painting | Surface Preparation |
|---|---|
Choosing the right paint | Ensure the surface is clean and free from dirt, debris, and any old paint or finish. |
Quality brushes and tools | Repair any visible cracks, holes, or imperfections on the surface. |
Suitable primer | Apply a primer to provide a uniform base for the paint to adhere to and to improve paint durability. |
Proper ventilation | Remove any peeling, flaking, or blistering paint using different methods such as scraping, sanding, or using a heat gun. |
Good lighting | Ensure the surface is completely dry and clean before applying paint. |
Protection for surrounding areas | Use masking tape, drop cloths, or plastic sheeting to protect areas not being painted. |
Proper drying time | Allow adequate time for the primer and paint to dry between coats, following the manufacturer’s instructions. |
Is Sanding Required for Painted Surfaces Before Repainting?
When it comes to repainting a surface, many people often wonder: do you need to sand a painted surface before repainting?
• Importance of Sanding
Sanding a painted surface is an important step in the repainting process. It helps create a smooth and even surface by removing imperfections, as well as improving the adhesion of the new paint layer.
In addition, sanding can help you identify any underlying issues, such as gaps or cracks, that might not be visible under the existing paint layer.
– Sanding for Better Adhesion
Sanding the painted surface provides a better surface for the new paint to stick to, as the process creates small grooves and roughens the surface. This helps the new paint layer adhere better and ensures a smoother and more durable finish.
By sanding the surface, you also get rid of any loose or flaking paint, which could otherwise come off after you have applied the new paint and cause an unsightly finish.
– Sanding for a Smooth Finish
Sanding a painted surface helps create a smoother surface by removing any bumps, ridges, or other imperfections in the existing paint layer.
This is particularly important for glossy or semi-glossy finishes, as these tend to show surface imperfections more than matte finishes.
A smoother surface is not only essential for aesthetics but also allows the new paint layer to be thinner, as the surface is not absorbing as much paint. This can save you both time and money in terms of the amount of paint required.
• When to Sand a Painted Surface
While sanding is generally recommended when repainting a surface, there are certain situations where it is unnecessary or even harmful.
– When Sanding is Unnecessary
If the existing paint layer is in good condition, with no flaking or peeling, it can be possible to skip the sanding step. In these cases, a good cleaning with a degreaser, such as TSP (trisodium phosphate), followed by a thorough rinsing and drying, will suffice.
This will help remove any surface contaminants, such as dirt, grease, or oil, which could hinder the adhesion of the new paint layer.
– When Sanding Can Be Harmful
In certain situations, sanding a painted surface can do more harm than good. For example, sanding lead-based paint can release harmful lead particles into the air, posing serious health hazards.
If you suspect that the existing paint might contain lead, it is crucial to take the necessary precautions and consult a professional before proceeding.
Another situation where sanding may not be advised is if the paint is heavily textured or has multiple layers of paint applied, as sanding can lead to an uneven finish.
• How to Sand a Painted Surface
Once you have determined that sanding is appropriate for your project, follow these steps for a successful result:
- Choose the right sandpaper: Start with coarse-grit sandpaper (e.g., 80 or 100 grit) to remove the majority of the existing paint layer, then move on to finer grit (e.g., 150 or 220 grit) for a smooth finish.
- Clean the surface: Before sanding, make sure the painted surface is clean and free of dirt or contaminants.
- Sand the surface: Sand the painted surface using even and consistent pressure. Avoid pressing too hard, as this can create divots or uneven areas in the surface.
- Clean again: After sanding, use a tack cloth or damp rag to remove any sanding dust from the surface.
- Inspect the surface: Check for any remaining imperfections, such as loose paint or uneven areas, and address them before applying the new paint.
• Risks of Not Sanding a Painted Surface
If you choose not to sand a painted surface before repainting, you run the risk of facing several issues that could affect the overall result, such as:
- Poor adhesion: Without sanding, the new paint layer may not adhere properly to the surface, leading to peeling, flaking, or bubbling.
- Uneven finish: Skipping sanding can result in a less smooth and even finish, as the surface imperfections will likely be more visible.
- Reduced paint durability: Since the new paint layer may not adhere well to the surface without sanding, the overall durability of the finish may be compromised, leading to the need for more frequent repainting.
To minimize these risks, it is advisable to follow the recommended preparation steps and sand the painted surface before applying new paint.
In conclusion, while it is not always necessary to sand a painted surface before repainting, it is generally recommended to ensure a smooth, durable, and professional-looking finish.
By following the proper sanding techniques and considering the specific circumstances of your project, you can make an informed decision about when and how to sand a painted surface.
For more information on best practices in painting, consult resources such as the EPA’s guidelines on lead-safe painting practices.
Condition of Painted Surface | Need to Sand? |
|---|---|
Smooth and in good condition | No, but light sanding is recommended for better adhesion |
Peeling or chipping paint | Yes, to remove loose paint and create a smooth surface |
Glossy or semi-glossy paint | Yes, to promote adhesion of new paint |
Cracks or uneven surface | Yes, to create a uniform surface before repainting |