Outdoor Step Paint, 25 Things You Should Know
Are you tired of looking at your dull, worn-out outdoor steps? Well, you’re in luck! I will spill the secrets of transforming your old, faded steps into a vibrant masterpiece. Discover the functionality and aesthetic appeal of adding a fresh layer of paint to your outdoor steps and expert tips on choosing the right paint and techniques for long-lasting results.
Outdoor step paint:
This article guides readers through selecting suitable paint for outdoor steps, including considering the material of the steps, choosing weather-resistant and non-slip features, and picking the right color and finish. It also covers preparing the steps for painting, including cleaning, repairing damages, and priming; the painting process, including applying multiple coats and an optional sealant for added durability. By following these steps, readers can achieve professional-looking results and enhance the longevity and safety of their outdoor steps.

Uncover the secrets to transforming your outdoor steps with paint! Delve into expert tips on choosing durable, weather-resistant products, step-by-step application methods, and creative design ideas to elevate your entryway with style and functionality. Let’s embark on this vibrant journey together!
Contents
- 1 Exterior Staircase Paint
- 2 Choosing the Appropriate Paint Type for Outdoor Staircases
- 3 Identifying the Optimal Paint Choice for a Step Surface
- 4 How to Professionally Paint Old Exterior Staircases
- 5 Identifying the Most Suitable Paint for Front Porch Steps
- 6 Which Type of Paint Can Be Applied to Steps to Prevent Slipperiness?
- 7 What is the Most Suitable Paint for Wooden Staircases?
- 8 What is the process for painting wooden steps located outdoors?
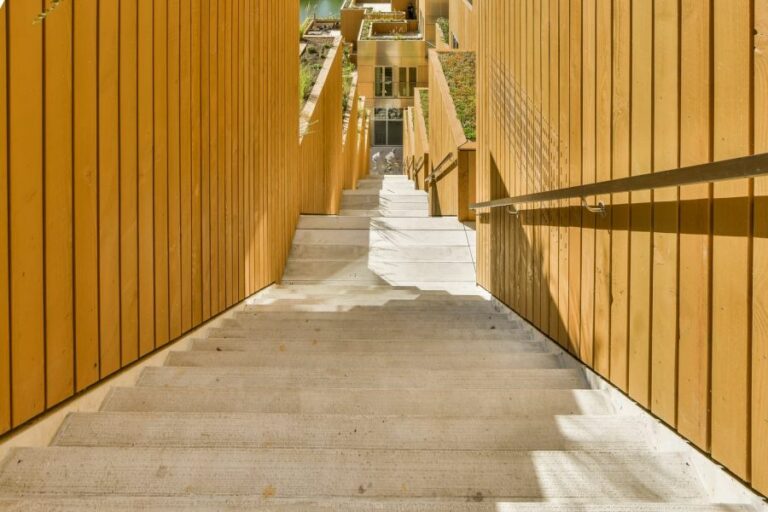
Exterior Staircase Paint
When it comes to outdoor step paint, making the right choice and applying it correctly can greatly increase the longevity of your steps, providing protection against wear and weather.
• Selecting the Ideal Paint for Your Outdoor Steps
1. Consider the Material of Your Steps
Outdoor steps can be made from a variety of materials, including wood, concrete, and stone. The type of paint you choose should be compatible with the material of your steps. For instance, for wooden steps, opt for paints specifically designed for exterior wooden surfaces.
Similarly, for concrete and stone steps, choose paints specifically formulated for masonry and concrete application.
2. Opt for Weather-Resistant, Non-Slip Features
Since outdoor steps are exposed to weather conditions such as rain, snow, and ice, choosing a weather-resistant paint that can withstand these harsh elements is essential. Furthermore, look for non-slip features in your paint to ensure safety when walking on the steps during wet or icy conditions.
3. Choose the Right Color and Finish
The paint color is crucial for both aesthetic and safety purposes. Select a color that complements the exterior of your home while also making the steps stand out to prevent accidents.
As for the finish, consider whether you prefer a matte or glossy look, keeping in mind that glossy finishes are more durable and easier to clean, while matte finishes can hide imperfections better.
• Preparing the Outdoor Steps for Painting
1. Clean the Steps
Before starting the painting process, thoroughly clean the steps to remove any dirt, debris, and grease. Use a stiff bristle brush to scrub the surfaces with a mixture of warm water and mild detergent. Consider using a pressure washer for more effective cleaning for stubborn stains and algae.
Make sure to rinse the steps thoroughly and allow them to dry completely before proceeding to the next step.
2. Repair Any Damages
Inspect the steps for any damages, such as cracks, chipping, or splinters. In the case of wooden steps, sand the surfaces to remove any loose or peeling paint and smooth out rough spots.
Fill any cracks or holes with a suitable patching material for concrete and stone steps, following the manufacturer’s instructions. Wait for the repairs to cure and dry completely before applying paint.
3. Prime the Surface
Applying a primer is essential to ensure better adhesion of the paint and increased durability. Choose a primer suitable for the material of your steps and follow the manufacturer’s guidelines for application. Allow the primer to dry completely before painting.
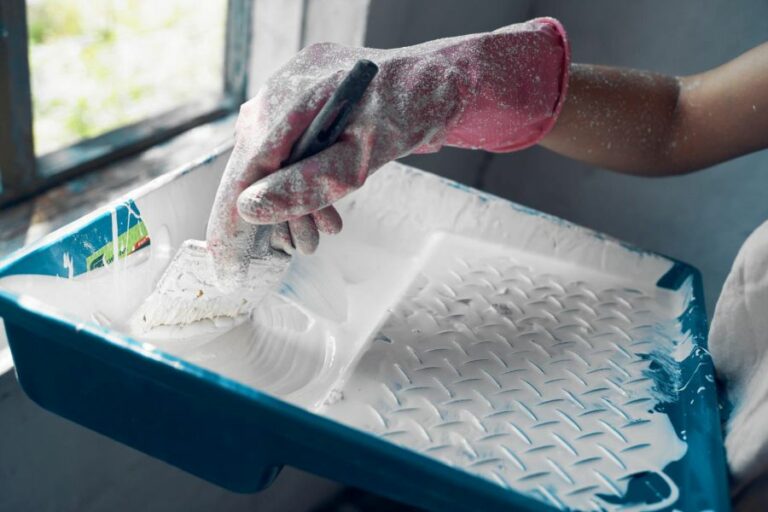
• Painting the Outdoor Steps
1. Apply the First Coat of Paint
Using a suitable brush or roller, start applying the first coat of outdoor step paint. Begin from the top to avoid dripping on the steps below, and follow the grain of the material for uniform coverage.
Make sure to work in a systematic way by painting each step from one side to the other, completely covering the surface before moving on to the next step.
2. Allow the First Coat to Dry
After covering all the steps with the first coat of paint, allow it to dry completely. The drying time may vary depending on the type of paint and weather conditions, so follow the instructions on the paint can for accurate drying times.
3. Apply the Second Coat of Paint
Once the first coat has dried, assess the coverage and decide whether a second coat is needed. If so, follow the same process as the first coat, ensuring thorough and even coverage. Allow the second coat to dry completely before allowing foot traffic on the steps.
4. Apply a Sealant (Optional)
Consider applying a clear sealant compatible with your paint and step material for added protection and durability. The sealant can provide extra protection against weather elements and foot traffic, prolonging the lifespan of your paint job.
• Final Tips and Recommendations
- Always read and follow the manufacturer’s guidelines for paint application and drying times.
- Be prepared to carry out touch-ups when needed to maintain the appearance and safety of your steps.
- Monitor the condition of your outdoor steps regularly and address any issues promptly to prolong the paint job’s life and ensure safety.
By selecting the appropriate outdoor step paint, preparing the surfaces correctly, and applying the paint with precision, you’ll achieve professional-looking results that add visual appeal and lasting protection to your outdoor steps.
Choosing the Appropriate Paint Type for Outdoor Staircases
Selecting the appropriate paint for outdoor steps is crucial in order to provide safety, durability, and an attractive appearance.
• Types of Paints for Outdoor Steps
– Acrylic Latex Paint
Acrylic latex paint is a popular choice for outdoor steps due to its durability and ease of application. It provides a long-lasting finish that resists fading, cracking, and peeling.
Pros:
- Water-based, which makes for easy cleanup with soap and water
- Dries quickly
- Resistant to mildew and mold
- Provides a consistent and even finish
Cons:
- May not be suitable for heavy foot traffic areas
- Not as resistant to harsh weather conditions as other options
– Epoxy Paint
Epoxy paint is a two-part coating system that provides a hard, durable surface once it cures. This makes it an excellent choice for outdoor steps, particularly in high-traffic areas.
Pros:
- Highly resistant to wear and heavy foot traffic
- Withstands harsh weather conditions
- Long-lasting
- Resistant to chemicals, oil, and grease
Cons:
- More difficult to apply, requiring careful mixing and proper timing
- Longer drying time
- Clean up requires solvents
– Oil-Based Paint
Oil-based paint is another option to consider for outdoor steps. It provides a durable, glossy finish that withstand heavy foot traffic and weather conditions.
Pros:
- Superior durability and resistance to wear
- Glossy finish provides an attractive appearance
- Can be more resistant to fading than acrylic latex paint
Cons:
- Requires the use of mineral spirits or paint thinner for cleanup
- Longer drying time
- Strong odor during application and drying
• Factors to Consider When Choosing Paint for Outdoor Steps
– Surface Material
The type of material your outdoor steps are made of will greatly influence your choice of paint. For example, epoxy paint is well-suited for concrete surfaces, while acrylic latex paint is recommended for wood surfaces.
Be sure to choose a paint specifically designed for your steps’ material to ensure proper adhesion and durability.
– Weather Resistance
Outdoor steps are exposed to various weather conditions, such as sunlight, rain, snow, and temperature fluctuations. It is important to choose a paint that can withstand these elements in order to maintain a durable and attractive finish.
Epoxy paint is particularly well-suited for resisting harsh weather conditions, making it an ideal choice for those living in extreme climates.
– Safety
The safety of your outdoor steps should be a top priority when choosing paint. A non-slip additive can be mixed into most types of paint in order to provide additional traction and reduce the risk of slipping.
This feature is particularly important for steps that may become wet or icy during certain weather conditions.
– Color and Finish
When selecting paint for your outdoor steps, consider a color that complements your home’s exterior and surrounding landscape. Additionally, consider choosing paint with a semi-gloss or gloss finish, as these are easier to clean and maintain than a flat or matte finish.
• Recommendations for Painting Outdoor Steps
Based on personal experience, the following tips can help ensure a successful painting project for your outdoor steps.
- Properly prepare the surface by cleaning and removing any loose or peeling paint and applying a primer if necessary.
- Be sure to follow the manufacturer’s recommendations regarding application techniques, drying times, and the number of coats needed for optimal coverage and durability.
- When using epoxy paint, mix only the amount of paint needed for each coat in order to avoid waste and ensure a proper cure.
- If using a non-slip additive, mix the additive according to the manufacturer’s instructions and frequently stir during application to maintain an even distribution.
In conclusion, selecting the appropriate paint for your outdoor steps will provide a durable, safe, and attractive surface and enable you to enjoy your outdoor living space for years to come.
With the variety of paint options available and the considerations explored in this article, you can confidently make an informed decision that best meets your needs and personal preferences.
Identifying the Optimal Paint Choice for a Step Surface
When it comes to choosing the best paint for steps, there are a number of factors to consider.
• Types of Paint for Steps
There are several types of paint that are suitable for steps. The most common options include:
– Epoxy Paint
Epoxy paint is highly durable and resistant to chemicals, making it an excellent choice for both indoor and outdoor steps. It provides a strong, long-lasting finish that can withstand heavy foot traffic and harsh environmental conditions.
Epoxy paint is also resistant to water and stains, making it easy to clean and maintain.
– Acrylic Latex Paint
Acrylic latex paint is a water-based paint that is relatively easy to apply and dries quickly. It is durable, UV-resistant, and available in a wide range of colors. This type of paint is ideal for outdoor steps, as it can withstand exposure to the elements and offers excellent color retention over time.
– Oil-Based Paint
Oil-based paints are known for their strong adhesion and durability, making them a good option for steps exposed to heavy foot traffic or in high-moisture areas, such as near a swimming pool or hot tub.
However, they can take longer to dry, emit strong odors during application, and may require additional ventilation.
• Preparing Steps for Painting
Proper preparation is crucial before you begin painting your steps to ensure the paint adheres well and provides a long-lasting finish. Follow these steps:
- Clean the steps: Thoroughly clean the steps to remove any dirt, dust, or debris. Use a stiff-bristled brush and a cleaning solution appropriate for the material of your steps (concrete, wood, or metal).
- Repair any damage: If there are any holes, cracks, or other imperfections in the steps, address these issues before painting. Use a filler or patching compound designed for the material to repair these areas.
- Sand the steps: When the repairs have dried, lightly sand the steps to remove any loose or peeling paint and create a smooth surface. Be sure to wear a dust mask and eye protection while sanding.
- Prime the steps: Apply a high-quality primer suitable for the material of your steps. This will help ensure proper adhesion of the paint and can extend the life of the finish.
• Choosing the Right Finish and Color
Once your steps are prepped, it’s time to select the right finish and color for your project.
– Finish
For steps, it is generally recommended to use a paint with a satin or semi-gloss finish. These finishes provide a balance between durability, ease of cleaning, and slip resistance. A completely high-gloss finish can be too slippery when wet, while a flat or matte finish may also not withstand regular foot traffic.
– Color
Choosing a color for your steps will depend on your personal preference and the overall design of your space. Some helpful tips for selecting a color include:
- Consider the surroundings: Choose a color that complements the nearby flooring or walls, or opt for a contrasting hue to create visual interest.
- Keep visibility in mind: Lighter colors can help make steps more visible, particularly in low-light areas or for people with vision impairments. Darker colors, on the other hand, can help to hide dirt and scuff marks.
• Maintaining Your Painted Steps
To keep your painted steps looking great and to ensure their longevity, follow these tips:
- Clean regularly: Use a broom or vacuum to remove dirt, dust, and debris on a regular basis. Use a mild detergent and water for deeper cleaning, and rinse thoroughly to avoid leaving residue. Avoid using harsh chemicals or abrasive scrubbers that could damage the paint.
- Avoid dragging heavy items: When moving furniture or other heavy items, take care not to drag them across the painted steps, as this can cause scratches or gouges on the painted surface.
- Address wear and tear promptly: If you notice areas of paint beginning to wear away, address these problem spots as soon as possible. Sand the affected area lightly and apply a new coat of paint to prevent further damage.
In conclusion, the best paint for steps will depend on factors such as the material of your steps, your desired finish, and color, as well as your maintenance preferences.
Epoxy paint, acrylic latex paint, and oil-based paint all have their benefits and drawbacks, so carefully consider your specific needs when selecting a paint type.
Properly preparing your steps, choosing the right finish and color, and maintaining them regularly will ensure your painted steps look great and last for years to come.
How to Professionally Paint Old Exterior Staircases
Painting old outdoor steps can be a great way to refresh their appearance and extend their lifespan.
• Preparations: Choose the Right Materials
The success of a painting project largely depends on the quality of the materials used. To ensure a professional result, consider these factors when selecting paint, primer, and tools for your old outdoor steps:
– Go for Durable, High-Quality Paint
Choose an exterior paint specifically formulated for use on outdoor surfaces. Look for a product that offers the following features:
- Long-lasting durability to withstand changing weather conditions
- Resistance to fading, chipping, and peeling
- Water and mildew resistance
- UV protection to prevent color fading
- Compatibility with the material of your steps (wood, concrete, or metal)
– Pair With a Compatible Primer
Choose a primer that is not only compatible with the paint but also suited for the specific material of your steps. A quality primer is vital for the paint to adhere properly and provide a smooth, long-lasting finish.
– Invest in Quality Tools
The right tools can make all the difference in the quality of your painting project. Invest in a high-quality paintbrush, roller, or paint sprayer for an even and smooth finish.
A paintbrush is most suitable for detailed and intricate areas, while a roller or sprayer will cover larger surface areas faster and more efficiently.
• Steps to Prepare Your Old Outdoor Steps
Proper preparation is crucial before painting your old outdoor steps. Skipping this step can result in a poor-quality finish with an increased likelihood of peeling and chipping. Follow these steps to ensure a successful paint job:
– Step 1: Clean Your Steps Thoroughly
Before painting, remove all dirt, debris, and loose materials from the steps. This process usually includes sweeping, scrubbing with a stiff-bristle brush or broom, and using a pressure washer to remove stubborn dirt and grime.
If you’re working with wood steps, consider using a wood cleaner or mildew remover, followed by a thorough rinse with water.
– Step 2: Repair Any Damage
Inspect your steps for any cracks, gaps, or areas of rotten wood. For small cracks in wooden steps, use wood filler to patch them up. You may need to replace the damaged board or step completely for larger repairs or areas of damaged wood.
Fill any cracks or holes with concrete patching compound if working with concrete steps.
– Step 3: Sand the Surface
Sanding is essential for wooden and metal steps, as it smooths out rough areas and provides a better surface for the paint to adhere to. If the previous paint is peeling or flaking, you must sand the surface to remove loose particles.
Start with coarse sandpaper and work your way down to a finer grit.
– Step 4: Apply a Primer
Apply a compatible primer to the clean and repaired steps. This helps to create a smooth finish and ensures proper paint adhesion. It is especially essential when working with porous materials like wood or concrete.
Allow the primer to dry per the manufacturer’s instructions before painting.
• Painting Techniques for Old Outdoor Steps
Now that your steps are prepared, it’s time to paint. Below are some useful techniques and tips to ensure a professional outcome:
– Use the Right Tools
As mentioned earlier, ensure you are using quality tools such as paintbrushes, rollers, or sprayers for an even application. Choose the most suitable option for your specific steps and type of paint.
– Apply Multiple, Thin Coats
To achieve a smooth, durable finish, apply thin coats of paint rather than a single, thick layer. Applying multiple coats also helps to improve coverage, ensuring no visible imperfections from the primer or substrate beneath.
– Time Your Painting Project
It’s essential to paint your steps during optimal weather conditions. Choose a day with low humidity, minimal wind, and a temperature range between 50 and 90 degrees Fahrenheit. Avoid painting in direct sunlight or on rainy days, as this can affect the paint’s adhesion and overall finish.
– Allow for Proper Drying Time
Each coat of paint requires sufficient time to dry before applying the following layer, as per the manufacturer’s instructions. Neglecting this step can lead to a tacky, uneven finish.
• Final Thoughts
Painting old outdoor steps is an achievable DIY project with proper preparation and the right tools and materials. By following the guidelines outlined in this article, you can give your steps a fresh, professional finish that adds aesthetic value and extends their life.
It’s worth taking the time to research and invest in quality paint, primer, and tools, as this can significantly impact the overall outcome of your project. By doing so, you can enjoy beautifully painted steps that will withstand the test of time and the elements.
Step | Instructions |
|---|---|
1 | Inspect the steps for damage and repair any issues found such as fixing loose boards or filling cracks. |
2 | Clean the surface of the steps thoroughly by sweeping and removing debris or dirt. Use a power washer if necessary. |
3 | Scrape off any loose or peeling paint using a paint scraper or wire brush. |
4 | Prime the steps to ensure a durable and long-lasting paint job. Use an exterior primer suitable for the type of material your steps are made from (e.g., wood, concrete). |
5 | Wait for the primer to dry according to the manufacturer’s recommendations before applying paint. |
6 | Paint the steps using a high-quality exterior paint suitable for the type of material your steps are made from (e.g., wood, concrete). Apply at least two coats, allowing each coat to dry according to the paint manufacturer’s recommendations. |
7 | Allow the paint to dry completely before using the steps. |
Identifying the Most Suitable Paint for Front Porch Steps
Choosing the right paint for your front porch steps is essential for both aesthetics and durability. With the right paint, you can transform your porch steps into a welcoming entrance that not only looks great, but also stands up well to foot traffic and weather conditions.
• Types of Paint for Front Porch Steps
Various paint types are available that are suitable for front porch steps, each with their own unique set of benefits and drawbacks. Here are the most common types of paint you’ll encounter when searching for the best option:
– Acrylic Latex Paint
Acrylic latex paint is a water-based paint that has become increasingly popular due to its quick drying time, low odor, and ease of cleanup. This type of paint is also known for its excellent adhesion to various surfaces, making it a versatile option for front porch steps.
Pros:
- Quick drying time
- Low odor
- Easy cleanup with soap and water
- Excellent adhesion to various surfaces
Cons:
- May not be as durable as other paint types
- May require multiple coats for full coverage
– Oil-Based Paint
Oil-based paint has been a traditional choice for many homeowners thanks to its durability and rich, glossy finish. Although this type of paint takes longer to dry and requires additional preparation and cleanup, it provides lasting protection for front porch steps.
Pros:
- Durable and long-lasting
- Rich, glossy finish
- Protective against moisture and mildew
Cons:
- Longer drying time
- Requires paint thinner for cleanup
- Strong odor
– Porch and Floor Paint
Porch and floor paint is specifically formulated for painting surfaces that will experience foot traffic and exposure to the elements, making it an ideal choice for front porch steps. This type of paint is available in both acrylic and oil-based versions and often includes additional additives for enhanced durability.
Pros:
- Formulated for foot traffic and weather exposure
- Available in acrylic and oil-based versions
- Enhanced durability compared to standard paint
Cons:
- Can be more expensive than other paint types
- Limited color selection
• Key Factors to Consider: Durability, Finish, and Color
To determine the best paint for your front porch steps, keep in mind the following three key factors:
– Durability
Front porch steps are subject to constant foot traffic and weather exposure, so choosing a paint that can withstand these conditions is essential. Porch and floor paint is specifically formulated for this purpose and often includes additives for added durability.
Additionally, oil-based paints are known for their long-lasting protection.
– Finish
The finish of your paint can impact both the aesthetic appeal and performance of your front porch steps. There are three main types of finishes to choose from:
- Matte: A matte finish has no sheen and can provide a modern, understated look. This finish may show dirt more easily and can require more frequent cleaning.
- Semi-gloss: A semi-gloss finish has a moderate sheen and is a popular choice for its balance of aesthetics and durability. It is also easier to clean than matte finishes.
- Gloss: A gloss finish has a high sheen, offering the best protection against moisture and mildew. However, it can also be more slippery when wet and may highlight imperfections in the surface.
– Color
Selecting the perfect color for your front porch steps can enhance your home’s curb appeal and create a welcoming entrance. When choosing a color, consider coordinating with other elements of your home’s exterior, such as siding, trim, and landscaping.
Additionally, be aware that darker colors may show wear more easily and may require more frequent touch-ups.
• Our Recommendations
Based on our experience, here are the top recommendations for the best paint for front porch steps:
- For an acrylic latex option, consider Behr Premium Porch & Patio Floor Paint. This paint offers excellent adhesion, durability, and a mildew-resistant finish, making it a great choice for front porch steps.
- For an oil-based option, I recommend Valspar Porch, Floor & Patio Oil Paint. This paint provides superior durability and protection and a high gloss finish that resists scuffing and weathering.
- If you are looking for porch and floor paint, try Benjamin Moore INSL-X Tough Shield Floor and Patio Paint. This paint offers enhanced durability and exceptional resistance to weather, foot traffic, and abrasion, ensuring a lasting finish on your front porch steps.
• Conclusion
Selecting the best paint for your front porch steps involves carefully considering the type of paint, durability, finish, and color that will best suit your needs and preferences.
By considering these factors and exploring our recommended options, you can give your front porch steps a fresh, durable, and inviting appearance that enhances your home’s curb appeal.
Paint Brand | Type of Paint | Benefits |
|---|---|---|
BEHR Premium | Porch & Patio Floor Paint | Durable, weather-resistant, resist scuffing, can be used on wood and concrete surfaces |
KILZ Interior/Exterior | Enamel Porch & Patio Latex Floor Paint | Long-lasting finish, mildew resistant, perfect adhesion to concrete and wood surfaces |
Rust-Oleum | Anti-Skid Porch & Floor Coating | Slip-resistant finish, weather-resistant, ideal for wood, concrete, and metal surfaces |
Valspar | Porch, Floor & Patio Oil Paint | High-gloss finish, water-resistant, perfect for wood and concrete surfaces, wear-resistant |
Which Type of Paint Can Be Applied to Steps to Prevent Slipperiness?
Slippery steps can be dangerous and may lead to accidents or injuries. Fortunately, there is a solution to this problem, and it comes in the form of specially designed paint. There are multiple types of paint that make steps less slippery, and each has its own set of benefits and drawbacks.
• Types of Non-Slip Paint for Steps
– Textured Paint
Textured paint is often used on steps to provide a non-slip surface. It is essentially a regular paint that includes tiny particles, usually sand or rubber, which create a rough, uneven surface when the paint dries. This texture effectively increases traction, making it difficult for people to slip on the steps.
Pros:
- Easy to apply, just like regular paint
- Comes in a wide variety of colors
- Can be used on various surfaces, including wood, concrete, and metal
Cons:
- The texture may wear down over time, reducing its non-slip effectiveness
- A rough texture may be uncomfortable for barefoot users
– Epoxy Resin Paint
Epoxy resin paint is composed of two parts: a resin and a hardener, which must be mixed together before application. This type of paint dries very hard and is durable, making it an excellent choice for steps that experience heavy foot traffic.
Some epoxy resin paints can also be combined with non-slip additives, like sand or aggregate materials, to provide additional slip resistance.
Pros:
- Extremely durable and long-lasting
- Provides a glossy sheen that is also easy to clean
- Can be combined with non-slip additives for additional traction
Cons:
- Can be more challenging to apply than traditional paint
- May be more expensive than other options
– Pre-Mixed Non-Slip Paint
Pre-mixed non-slip paints are available on the market, designed specifically for use on steps and other potentially slippery surfaces. These paints commonly use fine grit or rubber particles mixed into the paint to provide a non-slip feature.
They offer a smoother finish than textured paint but still provide excellent slip resistance.
Pros:
- Specifically designed for slip resistance
- Smoother finish than textured paint
- Available in a variety of colors and finishes
Cons:
- Some options may be less durable than epoxy resin paint
- Can be more expensive than other options
• Factors to Consider When Choosing Non-Slip Paint for Steps
– Surface Material
The material of your steps plays an essential role in determining the type of non-slip paint that will work best for your situation. For example, textured paint often works well on wood and concrete surfaces, while epoxy resin paint may be a better option for metal steps.
– Foot Traffic
Consider the amount of foot traffic that the steps receive. A more durable option like epoxy resin paint may be ideal for high-traffic areas. Alternatively, if the steps do not experience frequent use, a less expensive option like textured paint may suffice.
– Weather Conditions
If the steps are outdoors and exposed to the elements, choose a non-slip paint formulated for exterior use, as these paints can withstand harsh weather conditions without sacrificing performance.
– Aesthetics
Lastly, consider your personal preferences regarding the appearance of the finished steps. Textured paint typically provides a more rustic appearance, while epoxy resin paint offers a shiny, high-gloss finish. Pre-mixed non-slip paints are also available in various colors and finishes to suit different design aesthetics.
• Tips for Applying Non-Slip Paint to Steps
- Clean the surface: Ensure the steps are clean and free of dirt, grease, and other contaminants to promote proper paint adhesion.
- Repair damage: If there are any cracks or other damage to the steps, repair them before applying the paint.
- Choose the right type of paint: Select the appropriate non-slip paint for your steps based on the factors mentioned above.
- Follow application instructions: Each type of non-slip paint will have specific application recommendations from the manufacturer, so be sure to read and follow the provided instructions.
- Allow ample drying time: Give the paint sufficient time to dry before allowing foot traffic on the steps. This duration may vary depending on the specific paint used and weather conditions.
In conclusion, non-slip paint is an effective solution for making steps less slippery and reducing the risk of accidents.
By considering factors such as surface material, foot traffic, weather conditions, and aesthetics, you can select the best paint for your steps. And by following proper application guidelines, you can ensure the longevity and performance of your non-slip paint.
What is the Most Suitable Paint for Wooden Staircases?
Wooden steps are popular for interior and exterior spaces due to their durability and versatility. However, the right type of paint is essential to keep them in top shape and maintain their appearance.
• Types of Paint for Wood Steps
When it comes to selecting paint for your wood steps, you will find various options in the market. It’s essential to choose the right type based on your requirements, the location of your steps, and the level of protection they need.
– Exterior Paint
If your wooden steps are located outdoors, you need a paint designed specifically for exterior surfaces. These paints are formulated to withstand harsh weather conditions and protect against moisture, sunlight, and temperature fluctuations.
Acrylic Latex Paint
Acrylic latex paint, including steps, is a popular choice for exterior wood surfaces. This water-based paint provides excellent durability and resistance to weathering. It is also easy to clean and maintain.
When applied correctly, acrylic latex paint can offer protection for your wooden steps against moisture, cracking, and fading.
Oil-Based Paint
Another suitable option for painting outdoor wooden steps is oil-based paint. This type of paint offers superior adhesion and penetration, ensuring a strong bond with the wood surface.
Oil-based paint is also known for its resistance to chipping, peeling, and fading, making it a good option for exterior steps. However, keep in mind that oil-based paints can take longer to dry and may release strong fumes during application.
– Interior Paint
For wooden steps inside your home, you need a paint that offers durability and resistance to foot traffic while enhancing the appearance of your home’s interior.
Water-Based Enamel Paint
Water-based enamel paint is an excellent choice for interior wooden steps. This paint dries quickly, emits low odor, and is resistant to scuffs and stains. It is also easy to clean and maintain, ensuring your wooden steps remain in pristine condition for an extended period.
Oil-Based Enamel Paint
Oil-based enamel paint is another option for your indoor wooden steps. This type of paint provides a durable, hard finish that resists wear and tear, making it suitable for heavy foot traffic areas. However, oil-based paint tends to emit strong odors during application and may take longer to dry.
• Preparing and Painting Wood Steps
Before you start painting your wooden steps, you need to prepare the surface properly to ensure the paint adheres well and provides lasting protection.
– Surface Preparation
- Begin by cleaning the steps using a stiff brush to remove dirt, dust, and debris.
- Inspect the steps for any signs of damage, such as cracks or splinters, and repair them accordingly.
- Sand the steps using medium-grit sandpaper to create a smooth surface free of any old paint or finish.
- Wipe down the steps with a tack cloth or damp rag to remove sanding dust.
- Apply a high-quality primer designed for wood surfaces to ensure proper paint adhesion.
– Painting Process
- Choose a high-quality paintbrush or roller suitable for the type of paint you have selected.
- Apply the first coat of paint, starting from the top step and working your way downwards to avoid stepping on wet paint.
- Allow the paint to dry for the recommended time mentioned on the paint container before applying additional coats. For optimal durability and protection, consider applying at least two coats.
- Let the paint dry completely before using the steps to prevent any damage.
• Tips for Maintaining Painted Wood Steps
To keep your wooden steps looking their best and ensure the paint lasts as long as possible, follow these maintenance tips:
- Regularly clean your steps using a soft brush or cloth to remove dirt and dust.
- Address spills and stains promptly to prevent them from setting and causing damage.
- Inspect your steps for signs of wear or damage, and touch up the paint as necessary.
- Consider adding non-slip mats or stair treads to reduce wear and tear on the paint and improve safety.
In conclusion, selecting the best paint for your wood steps depends on the location of the steps and the desired level of protection. Acrylic latex paint and oil-based paint are suitable for exterior steps, while water-based enamel paint and oil-based enamel paint are ideal for interior wooden steps.
By properly preparing the surface, applying the right paint, and following a regular maintenance routine, you can keep your wooden steps in excellent condition and ensure their lasting beauty.
Paint Brand | Type | Features |
|---|---|---|
Benjamin Moore | Exterior Paint | Durable, long-lasting, and weather resistant |
Behr | Porch and Patio Floor Paint | Anti-slip, weather resistant, and suitable for high-traffic areas |
Rust-Oleum | Chalked Paint | Ultra matte finish, easy to distress for a vintage look |
Valspar | Deck and Siding Paint | Alkyd enamel formula for durability and weather resistance |
Sherwin-Williams | SuperDeck Exterior Deck Stain | Protects wood from weather and sun while maintaining the natural look of wood |
What is the process for painting wooden steps located outdoors?
Painting outdoor wooden steps is an excellent way to enhance their appearance, protect them from the elements, and prolong their life.
• Choosing the Right Paint for Your Wooden Steps
The first step in painting outdoor wooden steps is to select the right type and color of paint. It is essential to choose a paint that is specifically designed for exterior use and formulated to protect wooden surfaces from moisture, UV rays, and wear and tear.
– Recommended Exterior Wood Paints
- Acrylic Latex Paint: Acrylic latex paint is water-based, easy to clean, and extremely durable. It provides a long-lasting, protective finish that resists cracking, peeling, and fading. It is available in a wide range of colors and finishes, from flat to gloss.
- Oil-Based Stain: Oil-based stain penetrates the wood’s surface, enhancing the natural grain and color while providing a protective barrier against moisture and UV rays. It typically has a more transparent appearance than paint, allowing the beauty of the wood to show through. However, it may require more frequent reapplication due to wear and tear.
- Stair Treads and Deck Paint: Specially formulated paint for stairs and decks often includes a non-slip additive for increased safety. These paints provide a heavy-duty, long-lasting finish, though they may be limited in color options.
• Tools and Materials
To paint your outdoor wooden steps, gather the following tools and materials before starting the project:
- Broom or leaf blower
- Sandpaper (medium and fine grit)
- Wood filler
- Putty knife
- Exterior grade primer (if using acrylic latex paint)
- Exterior grade paint or stain
- Paintbrush, paint roller, or paint sprayer
- Paint tray
- Painter’s tape
- Drop cloth or plastic sheeting
- Safety gear (gloves, goggles, and a mask)
• Preparing Your Wooden Steps for Painting
Thorough preparation of your outdoor wooden steps ensures a smooth, even paint finish that will last for years. Follow these steps to prepare your wooden steps for painting:
– Cleaning and Inspecting Your Steps
- Remove dirt and debris: Use a broom or leaf blower to clean the surface of your wooden steps, removing leaves, dirt, and any loose paint chips.
- Inspect the steps: Check for any signs of damage, such as loose nails, rotting wood, or large cracks. Make any necessary repairs before proceeding with your paint job.
– Sanding and Filling
- Sand the steps: Using medium-grit sandpaper, sand the entire surface of your wooden steps to remove any rough or uneven areas. This will help the paint adhere better and result in a smoother finish. After sanding, switch to fine-grit sandpaper to give the surface an even smoother touch.
- Fill any gaps or cracks: Use a putty knife to apply wood filler to any cracks, splits, or gouges in the wood. Smooth the filler with the knife, and allow it to dry according to the manufacturer’s instructions.
- Final sanding: Once the wood filler is completely dry, lightly sand over the filled areas to achieve a smooth, even surface ready for painting.
– Priming the Steps (Only for Acrylic Latex Paint)
If you are using acrylic latex paint, it is important to prime your wooden steps before painting to ensure proper paint adhesion, even coverage, and a long-lasting finish.
- Apply painter’s tape: Apply painter’s tape along the edges of your wooden steps to protect any surrounding surfaces from paint.
- Apply primer: With a paintbrush, roller, or sprayer, apply a layer of exterior-grade primer to the steps’ surface. Allow the primer to dry according to the manufacturer’s instructions.
• Painting Your Wooden Steps
Now that your steps are prepared, it is time to apply the paint or stain.
- Stir the paint: Stir the paint or stain thoroughly using a paint stirring stick to ensure an even color and consistency.
- Apply the paint: Use a paintbrush, roller, or sprayer to apply a thin, even coat of paint or stain to your wooden steps. Always paint in the direction of the wood grain to achieve the best appearance. Allow the paint to dry according to the manufacturer’s instructions.
- Apply additional coats: For increased durability and richer color, apply additional coats of paint or stain. Let each coat dry thoroughly before applying the next. Two to three coats are usually recommended for outdoor wooden steps.
• Sealing and Protecting Your Painted Steps
After your final coat of paint or stain has dried, consider applying a sealer to protect and maintain the finish on your outdoor wooden steps.
- Choose a sealer: Select a high-quality wood sealer compatible with your paint or stain. Follow the manufacturer’s recommendations for the best compatibility and performance.
- Apply the sealer: Apply the sealer in a thin, even coat using a paintbrush, roller, or sprayer. Allow the sealer to dry according to the manufacturer’s instructions.
- Additional protection: For wooden steps exposed to heavy foot traffic or extreme weather conditions, consider applying a second coat of sealer for additional protection.
By following these steps and investing in quality materials, your newly painted outdoor wooden steps will provide years of durability and enhanced curb appeal. Happy painting!
Step | Description |
|---|---|
1. Clean the steps | Remove any dirt, debris, or loose paint from the wooden steps using a broom, brush, or scraper. |
2. Sand the steps | Smooth the surfaces of the steps using sandpaper or a sanding block, then wipe away the dust with a damp cloth. |
3. Apply primer | Use a brush or roller to apply a coat of exterior primer designed for wood surfaces to the steps. Allow the primer to dry as per the manufacturer’s instructions. |
4. Paint the steps | Once the primer is dry, apply a coat of exterior paint suitable for wood surfaces. Paint in the same direction as the wood grain to achieve a smooth finish. Allow the paint to dry and apply additional coats as needed, allowing proper drying time between coats. |
5. Protective finish | For added protection against the elements, you can apply a clear protective finish, such as a polyurethane sealer, after the paint is completely dry. Follow the manufacturer’s instructions for proper application and drying time. |