Textured Outdoor Paint, 25 Things You Should Know
Transform your home’s exterior with our ultimate guide to textured outdoor paint! This comprehensive blog post will walk you through the latest trends in textured paint for an exquisite outdoor finish that not only protects your home from harsh elements but also elevates its aesthetic appeal.
Textured outdoor paint:
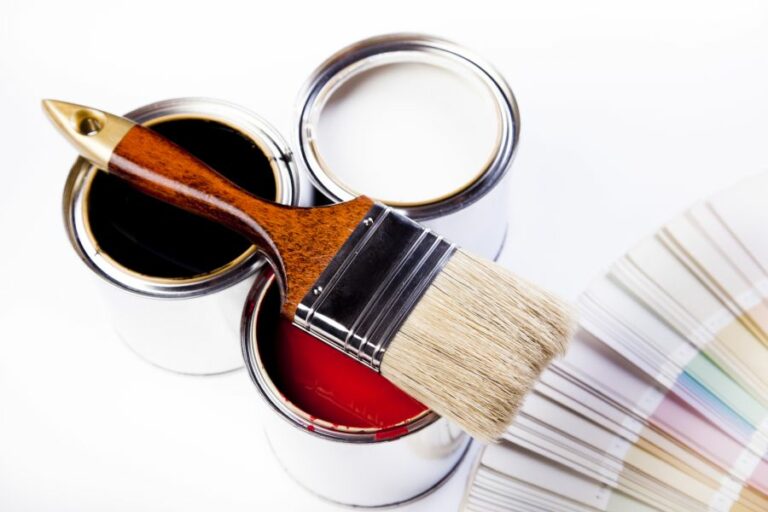
Textured outdoor paint offers a durable and versatile solution for exterior surfaces such as concrete, brick, stucco, and wood. It provides enhanced durability, increased aesthetic appeal, improved surface grip, and can mask surface imperfections. Common types include acrylic, latex, elastomeric, and sand-textured paints. A successful application involves surface preparation, priming, equipment selection, mixing, and finishing touches. Regular maintenance, including cleaning, prompt repairs, touch-ups, and resealing, can help extend the paint’s lifespan and improve the property’s overall appeal.

Discover the endless possibilities with textured outdoor paint, transforming ordinary surfaces into captivating spaces. We’ll cover expert tips, popular finishes, and trending colors that will revitalize your exteriors, creating a lasting impression for years. Time to start painting!
Contents
- 1 Textured Exterior Surface Paint
- 2 Is it Possible to Utilize Textured Paint on Exterior Surfaces?
- 3 How can you apply texture to exterior paint?
- 4 Which Type of Paint Provides a Textured Appearance?
- 5 What is the process for painting a textured exterior wall?
- 6 Examining the Durability of Exterior Texture Paint: Is It Long-lasting?
- 7 What are the drawbacks and limitations of using textured paint?
Textured Exterior Surface Paint
Textured outdoor paint is a versatile and durable painting solution for exterior surfaces. This type of paint is designed to provide additional protection and aesthetic appeal to various outdoor surfaces, including concrete, brick, stucco, and wood.
• Benefits of Textured Outdoor Paint
There are several advantages to using textured outdoor paint for your exterior surfaces. Some benefits include:
– Enhanced Durability
Textured outdoor paint is specifically designed to withstand harsh weather conditions, including rain, wind, and sunlight. This type of paint is typically thicker than regular paint, which helps protect the surface from damage and wear.
– Increased Aesthetic Appeal
Textured paint can add depth and character to your outdoor surfaces. The various textures available can give your walls a unique look, allowing you to achieve a specific design or style.
– Improved Surface Grip
Textured outdoor paint can provide a non-slip surface when applied to areas such as walkways, steps, and pool decks. This additional grip can improve safety, reducing the risk of slips and falls.
– Masking Imperfections
The texture of this paint can help hide minor flaws and imperfections on the surface, such as cracks or uneven patches. This can provide a more visually appealing finish without the need for extensive surface repairs.
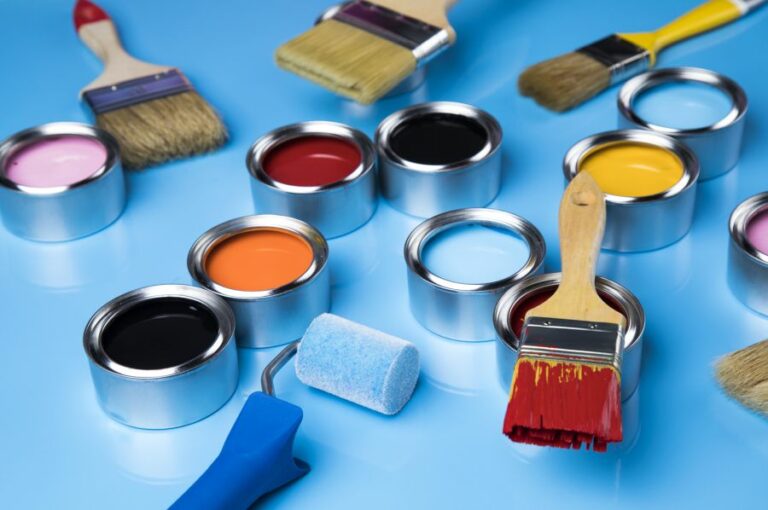
• Types of Textured Outdoor Paint
There are several types of textured outdoor paint available, each with its unique characteristics and recommended uses. Some common types include:
– Acrylic Textured Paint
Acrylic textured paint is water-based, making it an environmentally-friendly choice. It is also resistant to fading, chipping, and peeling, making it a durable option for outdoor surfaces. This type of paint is ideal for use on concrete, brick, and stucco surfaces.
– Latex Textured Paint
Latex textured paint is another water-based option with excellent durability and weather resistance. It is suitable for use on various surfaces, including wood, concrete, and brick. Latex paint is easy to clean and low in volatile organic compounds (VOCs), making it a safer choice for the environment.
– Elastomeric Textured Paint
Elastomeric textured paint is a high-performance coating that provides exceptional weather resistance and flexibility. This type of paint can bridge minor cracks in the surface, helping to prevent water infiltration and further damage. Elastomeric paint is ideal for use on stucco, brick, and concrete surfaces.
– Sand Textured Paint
Sand textured paint contains small particles that create a rough, sand-like finish. This type of paint can be used to create a non-slip surface or add visual interest to walls, walkways, and steps.
• Application Techniques and Tips
Applying textured outdoor paint requires specific techniques and equipment to achieve the desired finish. Follow these steps and tips for a successful application:
- Surface Preparation: Ensure the surface is clean and free of loose paint, dirt, and debris. Patch any cracks or holes with an appropriate filler or patching compound. Allow the repairs to dry fully before proceeding.
- Priming: If the surface is unpainted or if you are applying textured paint over a previously painted surface with a different type of paint, you may need to apply a primer first. Consult the paint manufacturer’s recommendations for the appropriate primer.
- Equipment Selection: Choose the right tools for the job. Textured paint can be applied using brushes, rollers, or specialized spray equipment. A long-nap roller or a specific textured paint roller can help achieve the desired texture.
- Mixing: Thoroughly mix the textured paint before application, ensuring the texture particles are evenly distributed.
- Application: Apply the paint in even strokes, working in small sections at a time. Follow the manufacturer’s instructions for the recommended number of coats and drying times.
- Finishing Touches: Once the paint is fully dry, you may want to apply a protective sealer or clear coat for added durability, particularly on high-traffic surfaces.
• Maintenance and Care Tips
To keep your textured outdoor paint looking its best, follow these maintenance tips:
- Regular Cleaning: Use a mild detergent and water to gently clean the surface when needed. Avoid using harsh chemicals or abrasive tools, as these can damage the paint.
- Prompt Repairs: Address any cracks or damage promptly to prevent further deterioration.
- Touch-ups: If the paint begins to fade or chip, touch-ups may be necessary. Use the same type of textured paint and application technique to ensure a consistent finish.
- Resealing: If you apply a protective sealer, it may need to be re-applied periodically to maintain its protective properties.
In conclusion, textured outdoor paint is an excellent choice for enhancing the appearance and durability of your exterior surfaces.
With proper surface preparation, application technique, and maintenance, you can achieve a long-lasting and visually appealing finish that will enhance the overall appeal of your property.
Is it Possible to Utilize Textured Paint on Exterior Surfaces?
The answer is yes! Textured paint is an excellent choice for giving the exterior of your home a unique and personalized look.
• The Benefits of Using Textured Paint Outside
There are several reasons why you might choose to use textured paint on the exterior of your home.
– Durability
Textured paint is often more durable than traditional paint, making it ideal for protecting your home against the elements. This type of paint can withstand harsh weather conditions, such as heavy rain and strong winds, preventing damage to your home’s exterior surface.
– Aesthetic Appeal
Textured paint can offer a distinctive look for your home’s exterior, setting it apart from other houses in the neighborhood. It can be applied in various ways to achieve a wide range of effects, from a subtle texture that adds depth to your paint color to a bold, three-dimensional look that creates visual interest.
– Hiding Imperfections
If your home’s exterior has minor imperfections, such as small cracks, dents, or other damage, textured paint can help camouflage these issues. The texture can create an uneven surface that masks these imperfections, making your home’s exterior look smoother and more uniform.
– Customizable
Textured paint can be mixed with different colors and can be applied in various ways to achieve a wide variety of looks. This versatility means that you can customize the appearance of your home’s exterior to fit your unique style and preferences.
• Tips for Applying Textured Paint Outside
Textured paint can be applied using a variety of techniques. The method you choose will depend on the type of texture you want to achieve and your skill level as a painter. Here are some tips to help ensure a successful application:
– Choose the Right Paint
Not all textured paint is suitable for outdoor use. Be sure to read the label of the paint you’re considering to ensure that it’s recommended for exterior use. You’ll also want to choose a paint that’s suitable for the type of surface you’ll be painting, such as wood, brick, or stucco.
– Properly Prepare the Surface
Before applying textured paint, it’s essential to prepare the surface you’ll be painting. This may involve cleaning, sanding, or scraping off any old, loose paint, repairing any damaged areas, and priming the surface if necessary.
– Test Your Technique
Before using textured paint, practicing your application technique on a piece of cardboard or scrap wood is a good idea. This will help you develop the necessary skills to achieve the look you want and allow you to test the paint and see how it dries.
– Apply the Paint in Thin Layers
Textured paint will typically be thicker than traditional paint, so it’s important to apply it in thin, even layers. This will help prevent the paint from clumping and ensure a uniform texture across the entire surface.
– Be Patient
Textured paint can take longer to dry than traditional paint, so be prepared to allow for plenty of drying time between coats. This can be particularly important if you’re working with a paint that contains a built-in texture, such as sand or other aggregates.
• Choosing the Right Textured Paint for Your Project
There are several different types of textured paint available, each designed to create a specific effect. Some common types of textured paint include:
– Sand Textured Paint
This paint contains small particles of sand, which create a rough, gritty texture on the surface when applied. Sand textured paint is ideal for creating a rustic or beachy look and can also help hide imperfections on the surface.
– Stone-Textured Paint
Stone-textured paint is designed to mimic the look of natural stone, such as granite or marble. This type of paint can create a sophisticated and elegant appearance for your home’s exterior and is particularly suited for use on stucco or other rough surfaces.
– Stucco-Textured Paint
Stucco-textured paint is designed to mimic the look of traditional stucco, providing a rough, uneven texture on the surface. This type of paint can be an excellent choice for homes with existing stucco exteriors or for those looking to add a Mediterranean or southwestern feel to their exterior.
– Wood-Textured Paint
Wood-textured paint is designed to create a textured finish that resembles the appearance of wood grain. This type of paint can be ideal for homeowners looking to update the look of older wood siding without the expense and effort of replacing the siding altogether.
In conclusion, textured paint can be an excellent choice for your home’s exterior, offering several benefits, such as durability, aesthetic appeal, and the ability to hide imperfections.
Be sure to choose the right type of textured paint for your project, and follow the tips outlined above to ensure a successful application. With a bit of creativity and skill, you can transform your home’s exterior and create a unique and eye-catching look that will stand the test of time.
| Can you use textured paint outside? | |
|---|---|
| Yes | Textured paint can be used outside, as it provides additional durability, protects surfaces from wear and tear, and can help hide surface imperfections. It is also suitable for various weather conditions. |
| No | Unsuitable for high-traffic or high-moisture areas since it can absorb moisture over time, which may cause paint to crack, peel or fade. |
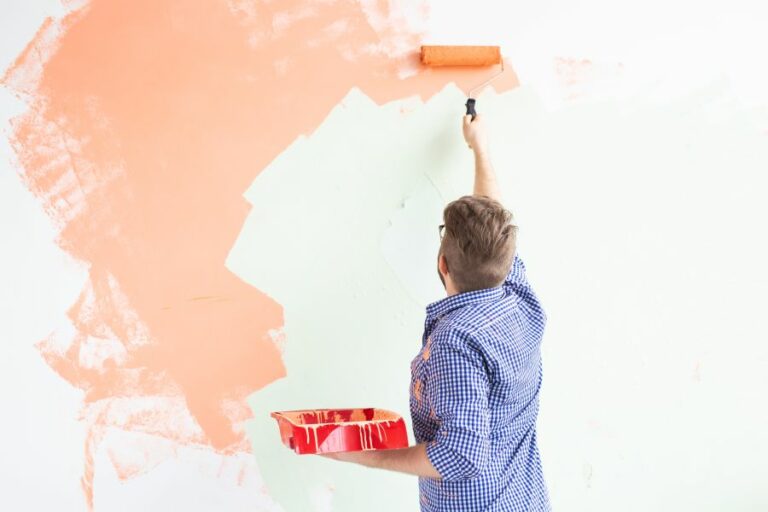
How can you apply texture to exterior paint?
Texturing outdoor paint can give the exterior of your home a unique and attractive appearance. Whether you’re aiming to give your home a fresh new look or covering up an old, worn-out paint job, a textured finish can make all the difference.
• Choosing the Right Paint and Tools
To start texturing your outdoor paint, you’ll first need to choose the right paint and tools. When selecting paint, be sure to choose one that is specifically designed for exterior use. These paints are made to be more durable and resistant to weather conditions, which is crucial for outdoor applications.
I recommend using high-quality acrylic paint, as this type of paint is water-based, making it easy to clean your tools after use, and it also generally offers better adhesion and a longer-lasting finish.
For tools, you’ll need the following:
- Rollers designed for texturing paint: These will help create specific textures on your painted surface.
- Brushes: Ensure you have a variety of sizes for different areas of your home’s exterior, including small brushes for detail work and larger brushes for broader areas.
- Paint trays: These are essential for holding your paint and helping you maintain proper paint distribution on your roller or brush.
- Dropcloths: Protect the surfaces around your home from paint splatters and drips.
• Preparing the Surface Before Texturing
Before you begin texturing your outdoor paint, it’s essential to properly prepare the surface you’ll be painting. This is a crucial step because a clean, smooth surface will provide a better foundation for the textured paint to adhere.
The first step for preparing the surface is to clean it thoroughly, either using a power washer or by hand washing with a mild detergent and water mixture. This process will remove any dirt or debris that could interfere with your paint’s ability to adhere correctly.
Tip: To properly wash your home’s exterior, start at the highest point and work your way down to the bottom.
After cleaning, allow the surface to dry completely before moving on to any additional prep work, such as repairing damaged areas, scraping away old paint, or sanding rough spots. Be sure to fill any holes or cracks with caulk or exterior filler, and then sand the area until smooth.
Once the entire surface is clean and prepped, it’s time to apply your primer. A quality exterior primer will provide additional protection and help your textured paint adhere better to the surface.
• Applying the Textured Paint
Now that your surface is prepped and your primer has been applied, it’s time to start texturing. There are several techniques you can use to achieve various textures on your painted surface, and we will outline a few of the most common ones here.
1. Roll-on Textures
One common technique for applying textured paint is using a roller with a textured surface. These rollers are specifically designed to create patterns and textures on your painted surface.
To use a textured roller, dip the roller into the paint tray and ensure it is coated evenly with paint. Then, apply the paint to the surface using consistent pressure, rolling in various directions to create the desired texture.
It may take some practice to achieve a consistent look, so don’t be discouraged if your first attempts have some inconsistencies.
2. Brush Texturing
You can also create textures using brushes by either dabbing or dragging the brush across the surface. This technique can create more organic and random textures compared to using a textured roller.
When using a brush for texturing, be sure to practice on a scrap piece of material before applying the technique to your home’s exterior to ensure you achieve the desired effect.
3. Stipple Textures
The stippling technique involves using a special stippling brush to create a dotted or stippled texture on the surface.
To achieve this look, dip the tip of the brush into the paint and then dab it onto the surface. This will create a pattern of small, overlapping dots that leave an attractive texture on your painted surface.
4. Comb Texturing
Comb texturing creates a unique striped pattern on the surface by running a notched trowel or combing through the wet paint. Simply apply your paint to the surface with a roller, and while the paint is still wet, drag the trowel or comb through it to create the desired pattern.
• Final Tips and Considerations
- Don’t neglect to properly prep your surface before texturing your paint, as this is vital in ensuring a long-lasting, beautiful result.
- Experiment with various textures on scrap material before applying them to your home’s exterior to find the look you prefer.
- Take your time and don’t rush the process; achieving a professional-looking texture takes patience and practice.
In conclusion, texturing outdoor paint is a fantastic way to add character and interest to your home’s exterior. With the proper tools, paint selection, and technique, you can achieve a unique and attractive finish that will make your home stand out in your neighborhood.
Step | Description |
|---|---|
1. Choose the right paint | Select an exterior paint suitable for your surface, considering factors such as climate and surface material. |
2. Prepare the surface | Clean the surface thoroughly, removing dirt, dust, and debris. Repair any damages, and allow the surface to dry completely. |
3. Apply a primer | Use an appropriate primer for your surface, allowing it to dry completely before applying the textured paint. |
4. Mix the textured paint | Stir the textured paint thoroughly or mix it with the appropriate texture additives, such as sand, to achieve the desired level of texture. |
5. Apply the paint | Using a brush or roller designed for textured paints, apply the paint to the surface in even strokes or rolls. Work in small sections to maintain an even texture. |
6. Create the pattern | While the paint is still wet, use a brush, trowel, or other tool to create the desired texture pattern. |
7. Allow the paint to dry | Let the textured paint dry according to the manufacturer’s instructions, and apply a second coat if necessary. |
8. Seal the surface | Apply a clear sealer to protect the textured paint from weathering and wear. |
Which Type of Paint Provides a Textured Appearance?
If you’re looking to create visual interest and depth in your home, using textured paint can be an excellent option. This guide will break down the different types of paint available, their benefits and drawbacks, and how to choose the perfect one for your project.
• Types of Textured Paint
– Sand-based Texture Paint
A popular choice for adding a coarse, gritty finish, sand-based texture paint has sand particles mixed into the paint formula. It is a great option for hiding flaws on walls or ceilings, as the final result mimics the appearance of stucco.
Recommendation: I recommend using sand-based texture paint in high-traffic areas and rooms that require more durability, such as bathrooms, kitchens, or hallways.
– Smooth Texture Paint
Unlike sand-based texture paint, smooth texture paint contains no added particles. However, its thick consistency allows you to create an assortment of patterns and textures on your walls. Options for texture application include using a brush, sponge, or specialized tools like a trowel or a comb.
Recommendation: Smooth texture paint works well in bedrooms, living rooms, or any space where you want to create a unique texture without a gritty finish.
– Premixed Texture Paint
Available in a variety of textures, premixed texture paint comes ready to be applied to your wall. This makes it a convenient full-proof option for beginners or those with limited experience in adding texture to walls.
Recommendation: Premixed texture paint is an excellent choice for smaller projects, such as accent walls or touch-ups.
– Self-mixing Texture Paint
With self-mixing texture paint, you control the level of texture by adding your desired medium, such as paint powder, sand, or textured granules, to standard paint. This option allows for greater customization and creativity in the finished product.
Recommendation: For experienced DIY enthusiasts or professionals seeking a unique, custom finish, self-mixing texture paint is a fantastic option.
• Choosing the Right Textured Paint for Your Project
– Surface Preparation
Before applying textured paint, it’s essential to prepare your surfaces properly. Any existing cracks, holes, or imperfections should be repaired and sanded smoothly. Once the surface is prepared, apply a high-quality primer. This step will ensure that your textured paint adheres correctly and lasts longer.
– Color and Finish
Textured paint is available in various colors, but it’s essential to choose a color that complements the rest of the room. Keep in mind that lighter colors can make a small room feel more spacious, while darker colors can make a large room feel more intimate.
Select a finish that complements the overall design and function of the space. For instance, matte and eggshell finishes are more subtle, perfect for creating a relaxed atmosphere in a bedroom or living room.
On the other hand, satin and glossy finishes are more durable and easier to clean, making them ideal for high-traffic areas.
– Application Technique and Tools
Your choice of textured paint type will determine which tools and techniques you will need for the application. For example:
- Sand-based texture paint requires a brush, roller, or spray gun for application, with a trowel or a float typically used to create the desired texture.
- Smooth texture paint, as mentioned earlier, can be applied using a variety of tools, such as brushes, sponges, or specialized tools like trowels or combs.
It’s essential to practice your chosen application technique on a small, inconspicuous area before starting the entire project. This way, you can gain experience and skill in achieving the desired texture.
– Consider the Environment
When selecting the best-textured paint for your project, don’t forget to consider the room’s environment. Areas with high humidity or moisture content, such as bathrooms or kitchens, may require specialized paints formulated to be mold and mildew resistant.
• Conclusion
Choosing the perfect textured paint for your project can be challenging with a wide array of options available.
However, by considering factors such as the type of texture desired, the application technique, the color and finish, and the project’s environment, you can create a beautiful, functional space that showcases your unique taste and style.
By following the recommendations and tips highlighted in this guide, you’ll be well on your way to enjoying a stunning textured finish that adds depth, dimension, and character to any room in your home. Happy painting!
What is the process for painting a textured exterior wall?
Painting a textured outdoor wall can be a challenging task. However, with the right techniques and tools, you can achieve a professional-looking finish.
• Essential Tools and Materials
Before you start painting your textured outdoor wall, make sure you have the following tools and materials on hand:
- Exterior paint suitable for textured walls
- Primer
- Paint roller with a long nap (3/4 inch or more)
- Paintbrushes of various sizes
- Paint tray
- Ladder or scaffold
- Drop cloth or painter’s plastic
- Painter’s tape
- Sandpaper (if necessary)
- Wire brush and TSP (trisodium phosphate) cleaner (optional)
• Preparing the Textured Wall
– Cleaning the Surface
To achieve the best possible finish, it is essential to clean the outdoor wall thoroughly before painting. Follow these steps for cleaning:
- Remove loose dirt and debris using a brush or broom.
- If necessary, wash the wall with a mixture of TSP cleaner and water to remove any mold, mildew or stains. Rinse thoroughly with clean water and allow the wall to dry completely.
– Repairing Damaged Areas
Inspect the wall closely for any damage or imperfections, such as cracks or peeling paint. If needed, fill in any cracks with exterior-grade filler and use sandpaper to smooth the surface. Remove any loose or peeling paint with a scraper or wire brush, then sand the edges to blend with the surrounding surface.
– Applying Painter’s Tape and Drop Cloth
Protect any areas you don’t want to be painted, such as windows and doors, by applying painter’s tape. Use a drop cloth or painter’s plastic to cover the ground and nearby surfaces to protect them from paint splatters.
• Priming the Textured Wall
Proper priming ensures better paint adhesion and helps prevent problems like peeling or flaking. Choose a high-quality exterior primer suitable for textured surfaces. Here’s how to apply the primer:
- Stir the primer well.
- Pour the primer into a paint tray.
- Dip the paint roller in the primer, making sure it’s evenly covered.
- Start rolling the primer onto the wall using a vertical “W” or “M” motion. This helps cover the textured surface more evenly.
- Use a paintbrush to cut in around any edges or tight areas where the roller cannot reach.
- Allow the primer to dry according to the manufacturer’s instructions.
• Painting the Textured Wall
– Choosing the Right Paint
When selecting paint for your textured outdoor wall, consider factors such as the type of texture and the wall’s exposure to the elements. Choose a high-quality paint specifically designed for exterior textured surfaces, as these often have added components to withstand weather conditions and resist fading.
– Applying the First Coat of Paint
Follow these steps when applying the first coat of paint:
- Stir the paint well.
- Pour the paint into a paint tray.
- Use a long-nap paint roller to evenly cover the roller in paint.
- Apply the paint to the wall in a vertical “W” or “M” motion, just as you did with the primer.
- Use a paintbrush to cut in around any edges, trim, or tight areas.
- Allow the first coat to dry according to the manufacturer’s instructions.
– Applying Additional Coats
Depending on the color and type of paint, you may need to apply additional coats to achieve a smooth, even finish. Before applying the next coat, ensure the previous one is completely dry. Follow the same process as for the first coat and, if needed, apply a third coat for more coverage.
• Finishing Touches
Once the final coat of paint is dry, carefully remove the painter’s tape by pulling it back over itself at a 45-degree angle. If any paint seeped under the tape, use a small brush to touch up those areas.
Allow the paint to cure fully, as per the manufacturer’s recommendations, before reattaching any fixtures, such as lights or house numbers.
• Tips and Tricks for Painting Textured Outdoor Walls
- Invest in quality paint and tools: High-quality paint provides better coverage and durability, while good tools allow for more precise and efficient work.
- Work in the right weather conditions: Avoid painting during rain or on days with high humidity, as this can slow down the drying process and affect the finish.
- Apply the paint in thin, even coats: This helps avoid visible brush strokes, roller marks, or streaks.
- Pay attention to the time: Make sure to follow the manufacturer’s instructions on the drying time between coats.
- Keep a wet edge: As you paint, ensure that the roller is always evenly saturated and the edges of your strokes stay wet to avoid lap marks.
By following these steps and tips, you can successfully paint a textured outdoor wall, achieving a professional-looking finish that not only improves the appearance of your home but also provides long-lasting protection against the elements.
Step | Description |
|---|---|
1 | Clean the wall surface to remove dirt, dust, and other debris. |
2 | Repair any cracks, holes, or damage on the wall using a suitable filler or patching material. |
3 | Allow the repairs to fully dry and cure before proceeding. |
4 | Apply a layer of primer to the wall to ensure proper adhesion of the paint and coverage of any areas repaired. |
5 | Select an appropriate paint for outdoor use, considering factors such as climate, exposure to elements, and the type of surface being painted. |
6 | Use a roller or brush specifically designed for textured surfaces, such as a roller with a high nap length or a brush with stiff bristles. |
7 | Apply the paint in generous, even strokes, taking care to work the paint into the texture of the wall to achieve full coverage. |
8 | Allow the paint to dry fully, and apply additional coats if needed for desired coverage and finish. |
9 | Clean up tools and equipment, and dispose of paint waste in accordance with local regulations. |
Examining the Durability of Exterior Texture Paint: Is It Long-lasting?
Exterior texture paint is a popular choice for both residential and commercial buildings. Its unique ability to add dimension and texture to surfaces is unparalleled. However, many people often wonder about its durability.
• Impact of Weather on Exterior Texture Paint
One of the primary concerns when it comes to the durability of exterior texture paint is weather exposure. Factors such as direct sunlight, rain, snow, and fluctuating temperatures can all affect the paint’s longevity.
– UV Exposure
Constant exposure to UV rays can cause the paint’s pigments to fade over time, impacting its appearance. Moreover, UV rays can break down the paint’s chemical composition, leading to chipping or flaking.
– Moisture
Rain, snow, and humidity can cause water penetration into the painted surfaces. Moisture can weaken the paint’s bond with the surface, resulting in its deterioration or eventual peeling.
– Temperature Fluctuation
Extreme temperature changes can also impact exterior texture paint. As temperatures rise and drop, the surface expands and contracts, causing the paint to crack.
• Factors Influencing the Durability of Exterior Texture Paint
1. Surface Preparation
Proper surface preparation is crucial for the long-lasting durability of any paint job, including exterior texture paint. One must ensure the surface is clean, free of any dirt, dust, and debris, and adequately primed before applying the paint.
A well-prepared surface allows the paint to bond to it effectively, thus improving its durability.
2. Type of Material
Different surfaces, such as brick, concrete, and wood, require different types of texture paint. Using the wrong type of paint for a particular material can affect its longevity. For instance, paint designed for concrete surfaces may not bond as well to a wooden surface, causing it to peel quickly.
3. Curing Time
Allowing the paint to cure properly is another essential factor for its durability. Rushing through the curing process can lead to poor adhesion and a weaker bond between the paint and the surface, negatively impacting the paint’s lifespan.
4. Quality of Texture Paint
High-quality exterior texture paint, formulated with durable and weather-resistant ingredients, can significantly improve the durability of the painted surface.
Investing in a top-quality product will not only deliver a more pleasant aesthetic but also save time and money in the long run, as it will require less frequent touch-ups and maintenance.
• Recommendations for Improving the Durability of Exterior Texture Paint
To ensure that your exterior texture paint lasts as long as possible, consider the following recommendations:
1. Choose the Right Paint for Your Surface
Select a paint specifically designed for the type of surface material you are working with. Consult with a paint professional to understand which product will work best for your needs.
2. Invest in High-Quality Paint
High-quality paint may be more expensive upfront, but its durability and long-lasting results make it a worthwhile investment in the long run.
3. Properly Prepare the Surface
Take the time to clean, repair, and prime the surface before applying the paint. This will help create a better bond between the paint and the surface, contributing to a more durable finish.
4. Apply the Paint under the Right Conditions
Avoid painting in extreme temperatures or weather conditions, as this can affect the paint’s adhesion and curing process. Follow the manufacturer’s recommendations regarding temperature, humidity, and other environmental factors.
5. Allow Ample Curing Time
After you’ve applied your exterior texture paint, ensure you give it enough time to cure. Rushing the curing process can lead to a weaker bond and compromise the paint’s durability.
In conclusion, exterior texture paint can indeed be durable if you choose the right product for your surface, invest in high-quality paint, and follow the proper application and curing process.
By considering factors such as weather exposure, surface preparation, and paint quality, you can help ensure the longevity of your textured painted surface.
What are the drawbacks and limitations of using textured paint?
Textured paint has gained popularity over the years for its various advantages. However, as with any design or decorating choice, it is essential to consider the disadvantages before deciding if textured paint is the right option for your space.
• Difficult Application Process
One of the main disadvantages of textured paint is the difficulty of applying it. Compared to standard paint, using textured paint can be a more complicated and time-consuming process. This is mainly due to the thicker consistency of the paint, along with the need to create specific patterns and textures.
For those inexperienced with painting or with limited time on their hands, this may pose a significant challenge. Additionally, it is highly recommended to practice on sample boards beforehand to achieve the desired texture correctly.
In most cases, hiring a professional painter with experience in textured paint application will often produce the best results, yet this will increase the overall cost.
• Higher Costs Involved
Speaking of costs, textured paint is typically more expensive than standard paint varieties. This is due to the inclusion of additional materials, such as sand or other aggregates, used to create the unique texture.
Moreover, considering that the application process is more complex and requires special tools, hiring a professional painter skilled in textured paint application will add to your project’s overall expense. If you are working with a limited budget, textured paint may not be the most cost-effective option.
• Difficulty in Repairs and Maintenance
Another disadvantage of textured paint is the challenge of carrying out repairs and maintenance. If damage occurs to a textured wall, spot repairs can be quite difficult, as even slight variations in texture may make the repaired area visually stand out.
Similarly, cleaning textured surfaces can be more demanding than their smooth counterparts, as dirt and dust can become trapped within the crevices of the texture. This may require a more thorough and frequent cleaning to maintain the wall’s appearance.
• Limitations in Style and Design
While textured paint can add visual interest to a space, it can also present limitations in terms of style and design. Some textures may be challenging to coordinate with certain design styles and can clash with specific furniture or decorative pieces.
Moreover, as trends change over time, the textured paint may lose its appeal or appear dated. Keep this in mind when choosing a specific texture for your space, as it could limit future design choices and may require updating sooner than smooth paint finishes.
• Difficult Removal
In the event that you decide to change the texture or revert to a smooth wall finish, removing the textured paint can be a labor-intensive and time-consuming process.
Depending on the type of texture applied, removing textured paint may involve sanding, scraping, or even the use of chemical paint removers to break down the product.
It’s essential to consider the potential need for future removal when choosing textured paint, as this can substantially increase the project’s overall cost and duration.
• Potential Allergen Concerns
For individuals with allergies or sensitivities, textured paint can potentially exacerbate respiratory issues. The uneven surface of the paint can more easily trap dust and allergens in comparison to a smooth paint finish.
When choosing textured paint, consider the space’s intended use and the occupants who will be spending time there. It may be best to opt for a smooth finish in bedrooms or spaces frequented by allergy sufferers.
• Conclusion: Weighing the Pros and Cons
In summary, textured paint has its share of disadvantages that must be considered before making a decision for your space.
These drawbacks primarily involve the complexity of the application process, higher costs, difficulty in maintaining and repairing, limitations in design choices, challenges in removal, and potential allergen concerns.
No. | Disadvantage |
|---|---|
1 | Difficult to apply |
2 | Time-consuming process |
3 | Can be challenging to clean |
4 | Potentially hides wall defects |
5 | Removing or painting over can be difficult |