Outdoor Bench Paint, 25 Things You Should Know
Looking to give your outdoor bench a fresh new look? Discover the transformative power of paint with my informative guide on outdoor bench paints! Let’s explore the best types of paint suitable for withstanding the elements and providing long-lasting protection and beauty. I’ll also share expert tips and techniques for picking the perfect color and achieving a smooth, professional finish.
Outdoor bench paint:
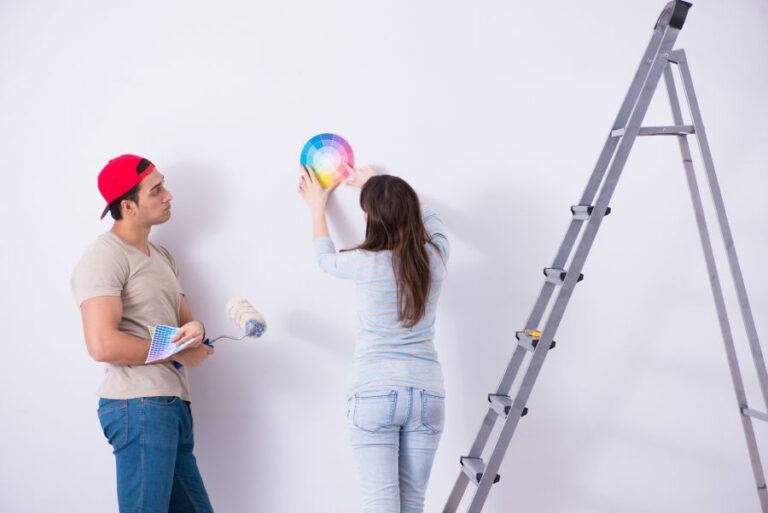
Choose the right paint (acrylic, oil-based, or latex) for your outdoor bench to ensure durability and weather resistance. Properly prepare the surface by cleaning, sanding, and applying primer. Use high-quality tools to apply thin, even coats of paint, allowing each coat to dry fully. Regularly clean the bench and apply a waterproof sealer every few years for longevity and resistance to fading.

Discover the perfect paint for your outdoor bench in this comprehensive guide. Explore various types, finishes, and techniques to achieve long-lasting, stylish results. Your bench will become a stunning centerpiece in your backyard oasis. Keep reading to get started on your bench makeover.
Contents
- 1 Exterior Bench Painting Solution
- 2 Which Type of Paint is Best Suited for an Outdoor Bench?
- 3 What is the Most Suitable Paint for Exterior Wooden Benches?
- 4 What Type of Stain Should You Apply on an Outdoor Wooden Bench?
- 5 How to Effectively Weatherproof an Outdoor Wooden Bench for Longevity
- 6 What is the process for painting an outdoor park bench?
- 7 What is the Most Suitable Type of Paint for Outdoor Furniture?
Exterior Bench Painting Solution
• Choosing the Right Paint for Your Outdoor Bench
When it comes to painting your outdoor bench, you want to ensure that you select the best type of paint to withstand the elements and provide long-lasting color and protection. There are several options to consider when it comes to outdoor paint, including:
– Acrylic Paint
Acrylic paint is a popular choice for outdoor furniture due to its durability and resistance to fading. It dries quickly and is less prone to cracking or peeling. Acrylic paint usually has a low odor, making it ideal for use in well-ventilated outdoor areas. In addition, acrylic paint is easy to clean up with soap and water.
– Oil-Based Paint
Oil-based paint is another option for outdoor benches. It is known for its durability and ability to withstand harsh weather conditions. Oil-based paint takes longer to dry than acrylic paint, but it typically provides a smoother finish.
However, oil-based paint may produce more fumes and requires mineral spirits or paint thinner for cleanup.
– Latex Paint
Latex paint also provides a durable and weather-resistant option for outdoor benches. It can be applied in thinner coats than oil-based paint yet still offer excellent coverage. Latex paint is easy to clean up, dries quickly, and is less likely to crack or peel over time.
However, it may not be as resistant to fading as acrylic paint.
• Prepping Your Outdoor Bench for Painting
Before you start painting your outdoor bench, it’s important to properly prepare the surface to ensure the best possible adhesion and finish. Follow these steps for successful results:
– Clean the Bench
Begin by cleaning your bench thoroughly, removing any dirt, debris, or mildew that may be present. Use a mild soap and water mixture, along with a scrub brush, to remove any stubborn stains. Allow your bench to dry completely before moving on to the next step.
– Sand the Surface
Next, sand the entire surface of the bench using fine-grit sandpaper. This will remove any loose or peeling paint, smooth out rough spots, and create a better surface for the new paint to adhere to. After sanding, use a tack cloth or damp rag to remove any dust or residue.
– Apply Primer
To help improve paint adhesion and prevent any knots or tannins in the wood from bleeding through the paint, apply a coat of exterior primer designed for outdoor use. Allow the primer to dry according to the manufacturer’s instructions before proceeding with painting.
• Painting Your Outdoor Bench
Now that your bench is prepped and primed, it’s time to apply the paint. Here are some tips to ensure smooth, even coverage:
– Use the Right Tools
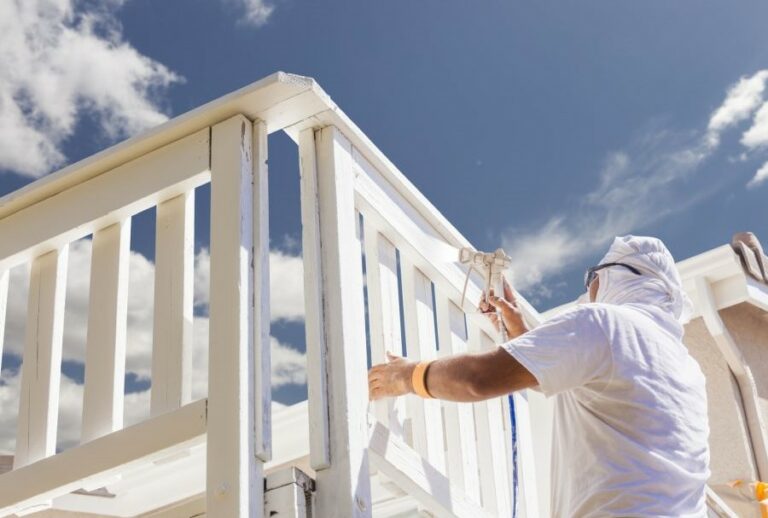
To apply the paint, use a high-quality paintbrush, roller, or paint sprayer designed for outdoor use. A brush or roller will often provide more precise control, while a paint sprayer can make the process quicker and easier.
– Apply Thin, Even Coats
When applying paint, start with thin, even coats. This will help to minimize any brush or roller marks and provide a smoother finish. Allow each coat to dry according to the paint manufacturer’s instructions before applying the next coat.
Depending on the specific paint and color you choose, you may need to apply 2-3 coats to achieve full coverage.
– Allow Paint to Dry Fully
After you’ve applied the final coat of paint, allow it to dry fully before using or exposing the bench to the elements. Keep in mind that while the paint may feel dry to the touch, it can take several days or even weeks for it to cure and harden fully.
• Maintenance and Care for Your Painted Outdoor Bench
To keep your newly painted outdoor bench looking fresh and vibrant, follow these maintenance tips:
- Regularly clean your bench with a mild soap and water mixture to remove dirt, debris, and potential mildew.
- If the paint begins to peel or crack, lightly sand the affected area and apply a fresh coat of paint for touch-ups.
- Consider applying a waterproof sealer or protective clear coat every few years to help maintain the paint’s longevity and resistance to fading.
In conclusion, selecting the right paint and properly preparing your outdoor bench for painting are essential steps in achieving a long-lasting, protective finish.
By following these guidelines and maintaining your bench, you can enjoy a beautiful, colorful piece of outdoor furniture for many years to come.
Which Type of Paint is Best Suited for an Outdoor Bench?
When it comes to painting an outdoor bench, using the right type of paint is essential. It must be able to withstand the elements, maintain its color, and offer protection to the bench’s material.
• Understanding the Types of Paints
Before getting into specifics, it’s essential to understand the main categories of paints available in the market. There are three primary types of paints to consider for your outdoor bench: water-based, oil-based, and exterior-specific paints.
– Water-Based Paints
Water-based paints, also known as latex or acrylic paints, are popular for their easy application and low environmental impact. These paints tend to have low levels of volatile organic compounds (VOCs), making them less harmful to the environment and more comfortable to work with.
Pros:
- Easy to clean up with just water and soap
- Faster drying time compared to oil-based paints
- Low levels of VOCs
- Resistant to cracking and fading
Cons:
- May not adhere well to certain surfaces without proper preparation
- Thinner consistency can require multiple coats
– Oil-Based Paints
Oil-based paints, also known as solvent-based or alkyd paints, are known for their durability and rich finish. These paints are an excellent option if you are looking for a more extended-lasting and vibrant finish for your outdoor bench.
Pros:
- Durable and long-lasting finish
- Rich, vibrant colors
- Adheres well to a variety of surfaces
Cons:
- Requires paint thinner for clean-up
- Longer drying time compared to water-based paints
- Higher levels of VOCs
– Exterior-Specific Paints
Exterior-specific paints are designed to be used on outdoor surfaces and structures, providing added durability and UV resistance. These paints can be found in both water-based and oil-based formulations.
Pros:
- Specifically designed for outdoor use
- UV resistance to prevent fading
- Higher durability compared to interior paints
Cons:
- More expensive than interior paints
• Choosing the Right Paint for Your Outdoor Bench Material
Now that we understand the primary types of paints let’s delve into the specific paint recommendations for different types of outdoor bench materials.
– Wooden Benches
When painting a wooden outdoor bench, it is essential to choose durable paint that will provide protection from moisture and UV rays. For this reason, many people opt for exterior-specific paint or water-based paint with weatherproof additives.
I recommend:
- Using an exterior-specific paint, either water-based or oil-based, designed for outdoor use
- Applying a primer before painting to ensure better adhesion and protection
- Making sure the paint has weatherproofing additives for added durability
– Metal Benches
For outdoor metal benches, you must select paint that provides corrosion and rust protection. A high-quality, rust-inhibiting paint will ensure that your metal bench remains durable and attractive for many years.
I recommend:
- Choosing an oil-based paint specifically designed for metal surfaces
- Applying a rust-inhibiting primer beforehand to provide additional protection
- Ensuring the paint is UV-resistant
– Plastic Benches
Painting a plastic outdoor bench can be a bit more challenging, as many paints do not adhere well to plastic surfaces. Choosing a paint specifically formulated for plastic materials is crucial to ensure proper adhesion and longevity.
I recommend:
- Selecting a paint that is specifically designed for plastic surfaces
- Applying a primer specifically formulated for plastics as a base coat
- Using a topcoat sealer for added protection from the elements
• Tips for a Successful Outdoor Bench Painting Project
Now that you have chosen the right paint for your outdoor bench material, here are some tips to ensure a successful and long-lasting paint job.
- Clean and Prep the Surface: Before painting, clean the bench thoroughly and remove any loose paint, rust, or debris. Properly preparing the surface is crucial in ensuring that the paint adheres well and lasts longer.
- Sand Smooth Surfaces: Lightly sanding the surface of your bench will help the paint adhere better and provide a more even finish, regardless of the bench’s material.
- Apply Primer and Paint in Thin, Even Coats: Applying thin, even coats of primer and paint will prevent drips and brush marks, giving your bench a professional and uniform appearance. Allow each coat to dry thoroughly before applying the next one.
- Protect Your Work Area: Make sure to lay down a drop cloth or plastic sheeting to protect the surrounding area from drips and spills.
- Follow Manufacturer’s Instructions: Always read and follow the paint manufacturer’s instructions for proper application, drying times, and any necessary safety precautions.
• Conclusion
Painting an outdoor bench can be a rewarding project that enhances the appearance and longevity of your outdoor seating. You can ensure a successful and long-lasting paint job by choosing the right type of paint for your bench material and following the best painting practices.
Remember to clean and prep your bench surface, use a primer and select an exterior-specific paint, and take your time applying each coat. Happy painting!
Type of Paint | Description |
|---|---|
Exterior latex paint | Water-based paint that provides long-lasting and durable protection against outdoor elements. Comes in a variety of colors and finishes |
Oil-based paint | Provides a durable and protective finish that is resistant to moisture and UV rays. Has a longer drying time but can offer a smoother finish |
Acrylic paint | Water-based paint dries quickly and is resistant to weather, moisture, and UV rays. Can be used on various materials and is easy to clean up |
Spray paint | Offers a quick and easy application and produces a smooth, even finish. Comes in various colors and finishes suitable for outdoor use |
What is the Most Suitable Paint for Exterior Wooden Benches?
When it comes to protecting and beautifying outdoor wood benches, choosing the right paint can make all the difference.
• Types of Paint for Outdoor Wood Furniture
Before diving into the recommendations, let’s have a look at the various types of paint suitable for outdoor wood furniture:
– Water-Based Paint
Water-based paints have grown in popularity due to their low VOC (volatile organic compounds) content, which makes them more environmentally friendly and less odorous. They dry quickly and are easy to clean up but may not be as durable as oil-based paints.
– Oil-Based Paint
Oil-based paints are known for their outstanding durability and longevity, making them a great choice for outdoor furniture. They take longer to dry than water-based paints, but once cured, they provide a strong protective layer that resists cracking and chipping.
– Latex Paint
Latex paint is a type of water-based paint that contains acrylic or vinyl resins. They possess many of the same properties as water-based paint, such as low odor and easy cleanup, but they offer superior durability and adhesion to surfaces.
– Epoxy Paint
Epoxy paint is a two-part paint system that, when mixed, creates a chemical reaction that results in a hard, durable, and chemical-resistant finish.
This type of paint is ideal for surfaces that require heavy-duty protection, such as garage floors or industrial equipment, but may not be the best choice for outdoor wood furniture due to its complex application process and high cost.
• Best Paint Choice for Outdoor Wood Benches
When selecting the best paint for outdoor wood benches, there are several factors to consider, such as durability, weather resistance, ease of application, and appearance. Based on these factors, the top choices for outdoor wood furniture paint are:
– Latex Paint
Latex paint is an excellent choice for painting outdoor wood furniture due to its combination of durability, ease of application, and low odor.
The acrylic or vinyl resins in latex paint provide excellent adhesion to wood surfaces, meaning the paint will remain in place and protect the surface even in harsh weather conditions.
Also, latex paint is much more resistant to UV rays than water-based paint, ensuring the color remains vibrant over time.
When using latex paint, choosing high-quality paint specifically formulated for outdoor use is important. These paints will provide enhanced protection against the elements and will typically last longer than their indoor counterparts.
I recommend using paints such as Rust-Oleum’s Painter’s Touch Ultra Cover or Behr Premium Plus Exterior due to their reputation for excellent durability and resistance to weathering.
– Oil-Based Paint
For those who prioritize durability and longevity above all else, oil-based paint is the way to go. As previously mentioned, oil-based paints are known for their ability to withstand harsh weather conditions, chipping, and cracking, making them a great choice for outdoor wood furniture.
Additionally, they often provide a richer, glossier finish than water-based paints, which some individuals may find desirable.
It’s important to note that oil-based paints can be more challenging to apply and require longer drying times, which may not be ideal for some DIYers. However, the payoff is a more durable and long-lasting finish that will require less maintenance over time.
Many professional painters swear by the durability of Benjamin Moore’s Impervex Latex High-Gloss paint, which is an excellent option for those seeking high-quality oil-based paint for their outdoor wood furniture.
• Application Tips for Best Results
Regardless of which paint you choose for your outdoor wood benches, proper preparation and application are critical to achieving a durable, long-lasting finish. Here are some tips for achieving the best results:
- Prepare the surface: Ensure the bench is clean, dry, and free of loose paint or debris. Sand the surface smoothly using medium-grit sandpaper, then follow up with a finer grit to create a smooth, even surface.
- Prime: A high-quality outdoor primer will help provide a solid base for your paint, ensuring strong adhesion and a longer-lasting finish. Be sure to follow the manufacturer’s recommendations for application and drying times.
- Apply multiple coats: Applying multiple coats of paint will not only create a more even and attractive finish but will also help enhance the surface’s durability and weather resistance. Be sure to follow the manufacturer’s instructions for drying times between coats.
- Seal: To further protect your paint job, consider applying a clear sealer or varnish specifically formulated for outdoor use. This will add an extra layer of protection, helping your bench to withstand the elements and maintain its appearance over time.
By following these recommendations and choosing the right type of paint for your outdoor wood benches, you can achieve a beautiful, durable finish that will last for years to come.
Whether you opt for the versatility and ease of latex paint or the proven durability of oil-based paint, taking the time to prepare and apply the paint properly will ultimately determine the success of your project.
Paint Brand | Type | Features | Price Range |
|---|---|---|---|
Example Brand | Exterior Latex | Water-resistant, UV protection, easy to clean | $30 – $50 |
What Type of Stain Should You Apply on an Outdoor Wooden Bench?
When selecting the ideal stain for your outdoor wood bench, it is important to consider several factors, such as the type of wood, the weather conditions in your area, and the desired appearance.
• Types of Wood Stains
There are several types of wood stains available on the market, each with its own unique characteristics and applications. Here are the most common types of stains and their benefits:
– Oil-Based Stains
Oil-based stains are a popular choice for outdoor wood furniture due to their durability and resistance to fading from UV rays. They provide excellent penetration and protection for the wood and a natural-looking finish.
Some of the top oil-based stain choices include linseed oil, tung oil, and Danish oil.
– Water-Based Stains
Water-based stains are an eco-friendly option that is easy to clean up, dries quickly, and has low levels of harmful VOCs (volatile organic compounds). They offer good durability and protection for the wood but tend to fade more quickly from sunlight than oil-based stains.
– Gel Stains
Gel stains have a thick consistency, allowing easy application and less dripping. They provide a rich and even color that can be applied to both horizontal and vertical surfaces. Gel stains are a great option for beginners or for staining intricate woodwork like carved benches.
– Semi-Transparent Stains
Semi-transparent stains provide color while still allowing the wood grain to show through. This type of stain is perfect for those who want to enhance the natural beauty of the wood without completely covering it.
– Solid Color Stains
Solid color stains offer a more opaque finish, effectively covering the wood grain completely. They provide excellent protection against UV rays and are an ideal choice for those looking to change the color of their bench or create a more dramatic effect.
• Assessing Your Needs
When choosing the right stain for your outdoor wood bench, consider the following factors to ensure you select the most appropriate one for your needs.
– Type of Wood
Different types of wood require different types of stains. Hardwoods like oak, cherry, and mahogany tend to absorb stains more evenly, while softwoods like pine, cedar, and redwood can have a more blotchy appearance.
It is better to use a stain specifically designed for softwoods or apply a pre-stain wood conditioner to ensure a more uniform finish.
– Weather Conditions
Your area’s climate and weather conditions play a major role in choosing the right stain for your outdoor furniture. In regions with high humidity or frequent rain, opt for a stain that provides excellent water resistance, such as a water-based or specially formulated outdoor stain.
Choose a stain with UV protection in areas with intense sunlight to prevent fading.
– Desired Appearance
Before selecting a stain, consider the end result you want to achieve. A semi-transparent stain would be the best choice if you prefer a more natural look and want to showcase the wood grain. Consider a solid color stain for a dramatic change in color or a more opaque finish.
• Application Tips for a Perfect Finish
To ensure your outdoor wood bench looks its best and lasts for years, follow these essential application tips and recommendations:
- Properly prepare the wood surface by sanding it smooth and removing any old finishes, dirt, and debris.
- Choose a high-quality stain and apply it with a brush or roller, following the manufacturer’s directions and recommended number of coats.
- Allow the stain to dry completely between coats, generally for at least 24 hours.
- Once the final coat has dried, consider applying a clear protective coat, such as a spar urethane, to protect your outdoor wood bench from moisture and sunlight.
• Conclusion
Selecting the right stain for your outdoor wood bench is crucial in order to ensure a beautiful finish, as well as long-lasting protection and durability.
Take the time to consider factors such as the type of wood, climate, and desired appearance, and choose a stain that best meets your needs. Following proper application techniques and safeguarding tips, you can enjoy a stunning and durable outdoor wood bench for many years.
Stain Type | Description | Benefits |
|---|---|---|
Water-Based Stain | A stain that uses water as its primary solvent | Easy clean-up, dries quickly, low odor, eco-friendly |
Oil-Based Stain | A stain that uses oil as its primary solvent | Deep penetration, long-lasting protection, rich colors |
Semi-Transparent Stain | A stain that allows some of the wood’s natural grain to show through | Preserves wood’s natural beauty, good UV protection |
Solid Color Stain | A stain that provides a completely opaque finish | Excellent UV protection, hides wood imperfections, wide range of colors |
Clear Wood Preservative | A protective clear coat that preserves the wood’s appearance | Maintains natural wood appearance, protects against mildew and moisture |
How to Effectively Weatherproof an Outdoor Wooden Bench for Longevity
Wooden outdoor benches make a wonderful addition to any garden, patio or porch, providing comfortable seating and a touch of elegance to your space. However, exposure to various weather conditions can take its toll on the wood, causing it to fade, crack or rot.
This is why weatherproofing your outdoor wooden bench is essential if you want it to last for years to come.
• Select the Right Type of Wood
Before discussing the actual weatherproofing process, starting with the right wood for your outdoor bench is important. Some types of wood naturally resist decay and insect damage, making it a better choice for outdoor use. The most resistant woods for outdoor purposes are:
- Teak
- Cedar
- Redwood
- Eucalyptus
- White oak
These woods contain natural oils that help keep moisture and insects at bay, reducing the need for additional treatment. If you’re building your own bench, select one of these species for a more weather-resistant end product.
• Sealing the Wood: Stains and Sealants
One of the best ways to protect outdoor wooden furniture is by sealing it with a stain or sealant. These products create a protective barrier that resists moisture and protects against harmful UV rays that can cause fading and other damage.
– Stains
Stains are available in different colors, which allows you to enhance the natural beauty of the wood while adding protection. They offer varying levels of protection, with semi-transparent stains providing the most durable finish.
I recommend using a high-quality exterior stain specifically designed for outdoor furniture, following the product’s instructions for application. Apply at least two coats for optimal protection, allowing each coat to dry thoroughly before applying the next.
– Sealants
Sealants are clear coatings that protect the wood without changing its color or appearance. These products can be applied on their own or over a stain to enhance their protective properties further.
Choose a sealant designed for outdoor wooden furniture, such as a marine varnish or spar urethane. Apply multiple coats, following the instructions on the product’s packaging, to ensure a strong and lasting barrier against the elements.
• Paint: A Stylish Option for Extra Protection
Painting your outdoor wooden bench is another weatherproofing option that allows you to add a splash of color to your outdoor space.
Choose an exterior-grade paint in a color of your choice, and don’t forget to pick up a compatible primer. Start by thoroughly cleaning the bench and allowing it to dry completely.
Sand to remove old finishes, and apply the primer, followed by at least two coats of paint, allowing each to dry between applications.
While painted surfaces might require more maintenance, especially when there’s chipping or peeling, they can provide a high level of protection against moisture, UV damage, and insect infestation, keeping your bench looking beautiful for years to come.
• Regular Maintenance and Care
Once your wooden bench is sealed or painted, it’s important to keep up with regular maintenance to prolong its lifespan.
- Keep the bench clean by brushing off dirt and debris and occasionally wiping it down with a damp cloth. Avoid using harsh chemicals, as they can damage the wood and finish.
- Inspect the bench periodically for signs of damage, such as cracks, peeling paint, or rot. If you spot any issues, address them immediately to prevent further deterioration.
- Repaint or reapply sealant as necessary. The frequency of this will depend on the harshness of your local weather conditions, but as a general rule, aim to reapply every couple of years or when you notice the wood starting to look worn.
• Protecting Your Bench from the Elements
In addition to sealing or painting the wood, there are other measures you can take to maximize the lifespan of your outdoor wooden bench:
- Consider placing the bench under a covered area, such as a porch or shaded gazebo, to protect it from direct sunlight and rainfall.
- Invest in a weatherproof cover designed specifically for outdoor benches. This can shield your furniture from heavy rain, snow, and direct sunlight when not in use.
- Bring cushioned seating indoors during heavy rain or snowstorms to prevent water damage and mildew growth.
By following these steps, you can preserve the beauty and functionality of your outdoor wooden bench, ensuring that it remains a valuable addition to your outdoor space for many years to come. Incorporate weatherproofing into your regular maintenance routine, and enjoy the benefits of a well-cared-for outdoor wooden bench.
Step | Description |
|---|---|
1 | Clean the bench thoroughly using a brush and a mixture of warm water and mild soap. Rinse it well and let it dry completely. |
2 | Sand the surface of the bench with medium-grit sandpaper to remove any old paint, splinters or rough spots. Wipe off any dust with a clean cloth. |
3 | Apply a coat of exterior wood primer to the entire bench, following the manufacturer’s instructions for drying time. |
4 | Paint the bench with an exterior wood paint, using a brush or paint sprayer. Apply at least two coats, allowing the paint to dry in between coats. |
5 | Seal the bench with an exterior wood sealant, following the manufacturer’s instructions on dry time and application methods. |
6 | Protect your bench from the elements, such as direct sunlight and rain, by placing it under a roof or awning when possible. Use furniture covers when not in use for added protection. |
What is the process for painting an outdoor park bench?
Painting an outdoor park bench gives it a fresh and appealing look and protects it from various weather elements. Moreover, well-painted benches offer an inviting sitting place for visitors while enhancing the overall aesthetics of your park.
• Step 1: Choose the Right Paint and Tools
The type of paint you choose plays a crucial role in the overall finish and durability of the bench. I recommend using exterior-grade paints for outdoor park benches that protect against harsh weather conditions and ultraviolet rays.
Acrylic latex paints, oil-based paints, or epoxy coatings are ideal choices for painting wooden, metallic, or concrete park benches.
Aside from the paint, you’d need the following tools and materials for the painting project:
- Paintbrushes or paint roller
- Paint tray
- Painters tape
- Sandpaper (80 grit and 120 grit)
- Wire brush
- Wood filler (for wooden benches)
- Rust converter (for metallic benches)
- Clean cloth or rag
- Drop cloth or tarp
• Step 2: Prepare the Bench for Painting
Before you start painting, preparing the bench’s surface is essential. Proper surface preparation not only ensures better paint adhesion but also helps in achieving a smoother and more durable finish.
– Wooden Benches
For wooden park benches, follow these steps to prepare the surface:
- Inspect the Bench: Check for any damages, loose screws, or nails, and fix them before painting.
- Clean the Surface: Remove dirt and debris from the bench using a dry cloth.
- Sand the Surface: Sand the entire bench using 80-grit sandpaper, followed by 120-grit sandpaper to remove old paint or varnish and create a smooth, even surface.
- Fill the Gaps: Use wood filler to fill any cracks, holes, or gaps and let it dry as per the manufacturer’s instructions. After the filler dries, sand the filled areas to ensure they’re even with the surrounding surface.
- Clean the Surface Again: Wipe the bench with a slightly damp cloth to remove any sanding dust.
– Metallic Benches
For metallic park benches, follow these steps to prepare the surface:
- Inspect the Bench: Address rust, loose bolts, or other damages before painting.
- Remove Rust: Use a wire brush to remove any rust from the surface of the bench.
- Apply Rust Converter: Apply a rust converter to any remaining rust spots and allow it to dry as per the manufacturer’s instructions.
- Sand the Surface: Sand the entire bench with 80-grit sandpaper, followed by 120-grit sandpaper to smoothen the surface and ensure better paint adhesion.
- Clean the Surface: Wipe the bench with a clean cloth to remove dirt, dust, and debris.
• Step 3: Apply Primer
Priming the bench is vital for achieving an even and durable paint finish, especially for wooden benches. Choose a primer that’s suitable for the type of paint you’re using and the material of your park bench.
- Tape off Areas: Use painter’s tape to mask off any areas you don’t want to paint, such as bolts or surrounding structures.
- Apply Primer: Use a paintbrush or paint roller to apply a thin, even layer of primer over the entire surface of the bench. Allow the primer to dry as per the manufacturer’s suggested drying time.
- Sand the Primed Surface (optional): For an ultra-smooth finish, lightly sand the primed surface with 120-grit sandpaper and wipe away any sanding dust with a clean cloth.
• Step 4: Paint the Bench
Now that your bench is primed and ready for painting, follow these steps for a professional paint job:
- Pour Paint Into Tray: Pour the chosen paint into a paint tray, making sure to mix it well before use.
- Apply First Coat: Using a paintbrush or paint roller, apply the first coat of paint in thin, even strokes. Keep a wet edge while painting to avoid lap marks.
- Allow Paint to Dry: Allow the paint to dry according to the manufacturer’s recommended drying time.
- Apply Additional Coats: For a more durable and even finish, apply additional coats of paint, allowing each coat to dry before moving on to the next. Two to three coats are usually sufficient for a long-lasting finish.
• Step 5: Clean Up and Enjoy the Result
Once the final coat of paint is dry, follow these steps to wrap up your painting project:
- Remove Painter’s Tape: Carefully peel off the painter’s tape from the bench and surrounding areas.
- Dispose of Waste Materials: Clean your paint equipment, dispose of paint cans, and fold up your drop cloth or tarp.
- Inspect the Bench: Make sure the paint coverage is even and there are no issues with the finish.
Congratulations! Your newly painted park bench is now ready to enhance the beauty of your outdoor space while providing a comfortable seating area for visitors. Regular maintenance and timely touch-ups will keep the bench looking fresh and extend its lifespan.
Step | Description |
|---|---|
1 | Choose the right paint: Select a paint that is suitable for outdoor use, is durable, and can withstand weather conditions. |
2 | Prepare the bench: Clean the bench and remove any dirt, dust, or debris. Sand the surface to remove any old paint or finish and create a smooth surface for the new paint to adhere to. |
3 | Apply a primer: Use a primer that is compatible with the chosen paint and apply it evenly to the entire surface of the bench. This will help the paint adhere better and last longer. |
4 | Paint the bench: Apply at least two coats of the chosen paint, allowing it to dry completely in between coats. Make sure to cover all surfaces and crevices evenly with paint. |
5 | Apply a sealer: Apply a clear sealer or varnish to the bench to protect the paint from the elements and ensure it lasts for years to come. |
6 | Allow the bench to dry: Allow the bench to dry for 24 hours, or as recommended by the paint manufacturer, before using it or placing it back outdoors. |
What is the Most Suitable Type of Paint for Outdoor Furniture?
Outdoor furniture is an essential component of our patio, deck, or garden area, providing comfort and functionality.
However, as these pieces are constantly exposed to external elements like sunlight, rain, and temperature fluctuations, they often need to be protected and refurbished using appropriate paint.
• Latex Paint: A Popular Choice for Wooden Furniture
Latex paint, or water-based paint, is a popular choice for wooden outdoor furniture painting. Due to its water-resistant properties, latex paint prevents moisture from seeping into the wood, protecting it from rot and decay.
– Benefits of Latex Paint
- Easy to apply and clean up: Water-based paints are user-friendly, making them suitable for all skill levels. Brushes and rollers can be easily cleaned using water.
- Quick drying: Latex paint dries faster than oil-based paint, which allows you to apply multiple coats in a shorter period.
- Low odor: These paints have minimal volatile organic compounds (VOCs), reducing unpleasant fumes during and after application.
- Long-lasting finish: Latex paint adheres well to wood, and its flexibility prevents cracking and peeling over time.
– Application Tips
- Begin by thoroughly cleaning your wooden furniture and allowing it to dry completely.
- If your furniture is unfinished or has flaking paint, sand the surface to create a smooth, even base.
- Apply a coat of exterior primer and allow it to cure as per the manufacturer’s instructions.
- Apply at least two coats of latex paint, allowing each layer to dry completely before applying the next.
- For added protection, apply a clear topcoat or sealer after the paint has fully cured.
• Oil-Based Paint: A Durable Option for Metal Furniture
When it comes to painting metal outdoor furniture, oil-based paints are a popular option. These paints provide a durable, protective finish that can withstand harsh weather conditions and prevent rusting.
– Benefits of Oil-Based Paint
- Seamless coverage: Oil-based paints smoothly adhere to metal surfaces, creating a strong and uniform finish.
- Rust prevention: These paints create a barrier that prevents moisture from reaching the metal, reducing the risk of rust and corrosion.
- High gloss finish: Oil-based paints offer a glossy finish, making outdoor furniture look polished and sophisticated.
– Application Tips
- Clean the metal furniture thoroughly using soap and water or a metal cleaner to remove dirt and grease.
- Remove any loose paint, rust, or corrosion using a wire brush or sandpaper.
- Apply a coat of metal primer specifically designed for outdoor furniture, and let it dry as per the manufacturer’s instructions.
- Apply multiple coats of oil-based paint, allowing each coat to dry thoroughly before applying the next.
- Apply a clear topcoat or sealer once the paint has fully cured to enhance durability.
• Spray Paint: A Quick and Easy Solution for Multiple Materials
Spray paint is a versatile option suitable for various outdoor furniture materials, including wood, metal, plastic, and wicker. With its quick application process and wide range of colors and finishes, spray paint is perfect for DIY enthusiasts looking to revamp their outdoor furniture.
– Benefits of Spray Paint
- Time-saving: Spray painting is a quick and efficient method of application, allowing even coverage in a fraction of the time.
- No brushstrokes: As spray paint is applied directly from the can, it eliminates the risk of visible brushstrokes.
- Versatility: Spray paint can be used on various surfaces and materials, making it a practical solution for outdoor furniture projects.
– Application Tips
- Clean the furniture thoroughly and allow it to dry completely.
- Remove any loose or flaking paint using sandpaper or a wire brush.
- Apply painter’s tape to cover any areas you wish to protect from overspray.
- Apply a coat of primer suitable for your furniture material, allowing it to dry as per the manufacturer’s instructions.
- Apply several thin coats of spray paint, holding the can at a consistent distance for a uniform appearance. Allow each coat to dry before adding the next.
- Once the paint has cured, apply a clear topcoat or sealer for added protection.
• In Conclusion
Choosing the best paint for outdoor furniture depends on various factors, including the furniture’s material, desired finish, and skill level.
By following this comprehensive guide, you can select the appropriate paint type and achieve a beautiful and durable finish that will prolong your outdoor furniture’s life.
Whether you opt for latex, oil-based, or spray paint, careful preparation and correct application techniques are crucial to ensure a successful project.
Paint Type | Pros | Cons |
|---|---|---|
Latex Paint | Easy to apply, quick-drying, easy cleanup | Less durable than other options, may fade or chip over time |
Oil-Based Paint | Durable, long-lasting, resistant to fading and chipping | Longer drying time, requires solvents for cleanup |
Acrylic Paint | Excellent adherence, UV-resistant, less likely to crack or fade | May require a primer, more expensive than latex paint |
Spray Paint | Quick, even coverage, available in various finishes | Can be messy, may require multiple coats, may not last as long as other options |