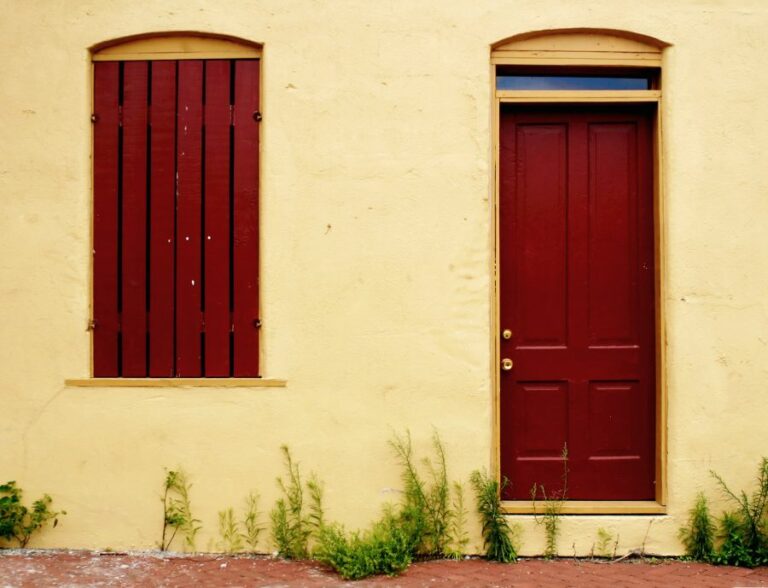
Painting Your Outdoor Concrete: Tips for an Attractive Finish
Welcome to our latest blog post dedicated to outdoor concrete paint, your solution to converting dull, lifeless surfaces into vibrant, attractive ones. Discover all you need to know about this versatile product, capable of withstanding harsh weather conditions and daily wear and tear while enhancing the aesthetics of your space. Dive into our detailed guide as we discuss various paint types, application techniques, and project ideas that will breathe new life into your patios, driveways, and walkways. Transform your concrete outdoors into eye-catching areas with our expert tips and tricks. Read on and get inspired!
Outdoor concrete paint:
Outdoor concrete paint provides a cost-effective way to improve the appearance of concrete surfaces such as driveways and patios. There are two main types: epoxy-based, which is highly durable, and latex-based, which is easier to apply and more affordable. Preparing the surface is essential, including cleaning, removing old paint, repairing cracks, etching, and rinsing. Following the manufacturer’s instructions for the application process, apply the paint and optional sealer. Maintain the painted surface through regular cleaning, spot cleaning, recoating when needed, and using a sealer to prolong the paint job’s life.

Discover the transformative power of outdoor concrete paint to revitalize your space! We’ll guide you through selecting the best products, crucial prep work, and vital application tips. Achieve stunning, long-lasting results with our expert advice. Unleash your creativity and get started today!
Contents
- 1 Exterior Concrete Surface Coating
- 2 Which Variety of Paint is Most Suitable for Exterior Concrete Surfaces?
- 3 Is it Possible to Apply Paint on Outdoor Concrete Surfaces?
- 4 Is the Longevity of Painting Outdoor Concrete Surfaces Reliable?
- 5 Is It Necessary to Prime Concrete Before Painting?
- 6 What is the process for painting aged outdoor concrete surfaces?
Exterior Concrete Surface Coating
Outdoor concrete paint offers a practical and cost-effective solution to elevate the appearance of concrete surfaces like driveways, pathways, patios, and more. This article will provide a comprehensive guide to choosing the right paint type, surface preparation, application process, and maintenance tips for outdoor concrete flooring.
• Types of Outdoor Concrete Paint
There are mainly two types of concrete paint available for outdoor use: epoxy-based and latex-based.
– Epoxy-Based Paint
Epoxy-based paint is more resistant to water, chemicals, and abrasion than latex-based paint. It provides a durable, sleek finish that can withstand constant foot and vehicular traffic, making it suitable for driveways and garage floors.
Advantages:
- Highly durable
- Resistant to water, chemicals, and abrasion
- Suitable for heavy traffic areas
Disadvantages:
- Longer drying time
- The potentially challenging application process
- Expensive
– Latex-Based Paint
Latex-based paint is a water-based product, which makes it easier to apply and clean up. It is generally more affordable than epoxy-based paint and has a quicker drying time, making it a popular choice for DIY projects.
Advantages:
- Easier application and clean-up
- Quick drying time
- Affordable
Disadvantages:
- Less durable compared to epoxy-based paint
- It may require more frequent maintenance.
- Sometimes less resistant to water and chemicals
• Surface Preparation
Before painting, it is essential to thoroughly prepare the outdoor concrete surface to ensure a long-lasting and visually pleasing finish.
- Clean the Surface: Remove any dirt, debris, or mold using a broom, pressure washer, or mild detergent.
- Remove Old Paint or Coatings: Use a paint scraper, wire brush, or a chemical paint remover, as needed, to remove any existing paint or coatings.
- Repair Cracks and Holes: Fill any cracks or holes with concrete filler or patching compound and smooth it out with a trowel. Allow the mixture to dry as per the manufacturer’s instructions.
- Etch the Surface: Apply a concrete etcher or muriatic acid solution as per the product guidelines. This step ensures the paint bonds securely to the concrete and provides a smoother finish.
- Neutralize and Rinse: After etching, neutralize the surface using a neutralizing solution or a solution of baking soda and water, then rinse thoroughly with clean water.
- Dry: Allow the concrete to dry completely for at least 24 hours before painting.
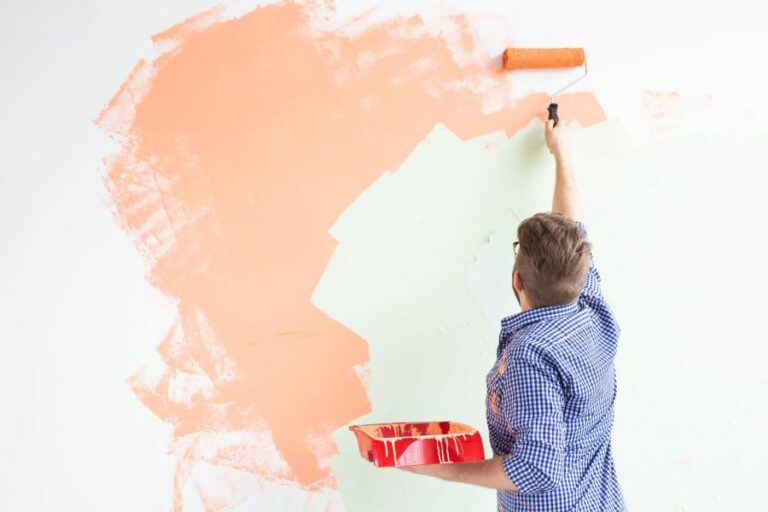
• Application Process
Following the manufacturer’s instructions, ensure you have the correct paint type, tools, and weather conditions for the application process.
- Mix the Paint: Stir thoroughly to ensure even color and consistency.
- Apply the Primer: Use a paint roller or brush to apply a concrete primer if the paint manufacturer recommends it. Allow the primer to dry as per instructions.
- Apply the Paint: Using a paint roller, brush, or sprayer, apply the first coat of paint in a thin, even layer. Allow the first coat to dry as per the manufacturer’s guidelines.
- Apply Additional Coats: If needed, apply additional coats of paint, allowing for proper drying time between coats.
- Sealing (Optional): Apply a concrete sealer after the final paint coat has dried for added protection and durability.
• Maintaining Painted Outdoor Concrete Surfaces
To prolong the life of your painted outdoor concrete surfaces, follow these maintenance tips:
- Regular Cleaning: Keep the surface clean by sweeping or washing away dirt, leaves, and debris.
- Spot Cleaning: If needed, spot clean any stains or spills with a mild detergent and water.
- Recoating: You may need to recoat your outdoor concrete surfaces every few years due to general wear and tear. Thoroughly clean and prepare the surface before applying a new coat of paint.
- Sealing: Apply a concrete sealer every few years to protect and extend the life of your paint job, reducing the frequency of recoating or touch-ups.
• In Conclusion
Outdoor concrete paint is an effective solution for enhancing the appearance and durability of your outdoor concrete surfaces. You can achieve a professional, long-lasting result by understanding the types of paint, surface preparation, and application process. Also, proper maintenance will help prolong the life of your painted surfaces, ensuring your outdoor spaces remain visually appealing for years.
Which Variety of Paint is Most Suitable for Exterior Concrete Surfaces?
Exterior concrete surfaces require special care and attention when choosing the right paint. Factors such as weather, temperature fluctuations, UV rays, and moisture play a vital role in determining the durability and appearance of the painted surface. This article will discuss the different types of paint suitable for exterior concrete and recommend the best options based on the personal experience of a professional painter.
• Understanding Exterior Concrete Properties
Before diving into which paints are best for exterior concrete, it is essential to understand the characteristics of concrete and how it interacts with various paint types. Exterior concrete surfaces are porous, making them susceptible to water and moisture penetration, causing potential damage and faster deterioration. Concrete also tends to expand and contract under temperature fluctuations, which can result in paint cracking and peeling over time. Therefore, the ideal paint for exterior concrete should be durable, water-resistant, and flexible enough to accommodate the concrete’s natural movements.
• Acrylic Latex Paint for Exterior Concrete
Acrylic latex paints are among the top choices for painting exterior concrete surfaces, and for a good reason. These paints are water-based, easy to clean up, and quick-drying. Acrylic latex paint is an excellent option for exterior concrete due to the following reasons:
– Durability
Acrylic latex paint boasts excellent durability, allowing it to withstand harsh weather conditions and direct sunlight exposure. The paint adheres well to the concrete surface and resists peeling or flaking, ensuring a long-lasting finish.
– Flexibility
Acrylic latex paints are highly flexible and ideal for exterior concrete surfaces. They can accommodate concrete’s natural expansion and contraction, preventing cracks and other issues that may arise due to temperature fluctuations.
– Breathability and Moisture Resistance
These paints are breathable, allowing moisture trapped inside the concrete to escape. This quality is crucial for exterior concrete surfaces, as it prevents water from accumulating within the concrete and causing damage. Acrylic latex paint also offers decent water and moisture resistance, ensuring the painted surface’s longevity.
– Environmental Friendliness
Acrylic latex paints are eco-friendly compared to other types of paint. They emit fewer volatile organic compounds (VOCs), which harm humans and the environment. Opting for low-VOC or zero-VOC acrylic latex paints can reduce environmental impact.
However, based on personal experience, I recommend applying a suitable primer to enhance adhesion to the concrete surface and improve the overall durability of the paint.
• Elastomeric Paint for Exterior Concrete
Another excellent option for painting exterior concrete surfaces is elastomeric paint. These paints form a highly flexible, thick, and water-resistant coating that protects against weather elements, UV rays, and moisture. Here’s why elastomeric paint is highly recommended for exterior concrete:
– Superior Flexibility
The most significant advantage of elastomeric paint is its remarkable flexibility. This property is ideal for accommodating exterior concrete surfaces’ natural expansion and contraction, ensuring a long-lasting and secure bond between the paint and the surface.
– Excellent Water Resistance
Elastomeric paint is highly water-resistant, providing a robust barrier against moisture penetration. This characteristic is crucial for exterior concrete surfaces, which are prone to water infiltration that could cause damage in the long run.
– Crack Bridging Capability
Elastomeric paint can fill and bridge small cracks on external concrete surfaces, preventing further cracking and deterioration. This feature is especially beneficial for older or damaged concrete surfaces that require extra protection.
– Energy Efficiency
These paints can reflect solar rays, which helps keep the painted surface cool and results in energy savings, especially in hot climates.
Note that elastomeric paints are generally more expensive than acrylic latex paints. However, their excellent performance and durability often make them worth the investment for exterior concrete surfaces.
• In Conclusion: Acrylic Latex or Elastomeric Paint?
Both acrylic latex and elastomeric paints are excellent for exterior concrete surfaces, offering durability, flexibility, moisture resistance, and UV protection. Based on personal experience, I recommend using acrylic latex paint for general exterior concrete applications due to its easy application, durability, and environmental friendliness. However, if you are looking for a more robust and flexible option, especially for surfaces prone to cracking or situated in regions with extreme temperature fluctuations, elastomeric paint is the ideal choice. Remember always to use a primer designed for exterior concrete to enhance adhesion and improve the overall performance of the paint.
Paint Type | Description |
|---|---|
Masonry Paint | Also known as elastomeric paint, Masonry paint is made specifically for painting concrete and other porous surfaces. |
Acrylic Latex Paint | Acrylic latex paint is a water-based paint that can be used on a variety of surfaces, including concrete. |
Epoxy Paint | Epoxy paint is a heavy-duty, long-lasting paint that offers excellent resistance to chemicals, water, and abrasion. |
Is it Possible to Apply Paint on Outdoor Concrete Surfaces?
Painting outdoor concrete surfaces can dramatically improve your property’s aesthetics while protecting the elements. Whether it’s a patio, walkway, or driveway, a well-executed paint job can breathe new life into these parts of your home. This article will guide you through the process and offer recommendations to help you paint your outdoor concrete surfaces successfully.
• Choosing the Right Paint for Outdoor Concrete
When painting outdoor concrete, not all paints are created equal. It is crucial to select a paint specifically designed for this purpose, which would adhere properly to the concrete surface and provide the necessary durability in the face of changing weather conditions.
– Concrete Paints and Stains
Concrete paints and stains are two popular options for outdoor concrete surfaces. Concrete paints provide a solid coating on the surface, while stains penetrate the concrete and create a semi-transparent, colored finish. Both options are suitable for outdoor use; however, stains may fade more quickly in high-traffic areas.
– Epoxy-Based Paints
Epoxy-based paints are another excellent option for painting outdoor concrete. These paints form a strong, watertight bond with the concrete surface, making them exceptionally resistant to weathering and chipping. Epoxy paints are often used for garage floors and other heavy-duty applications where durability is a primary concern.
– Acrylic Latex Paints
Acrylic latex paints are popular for outdoor concrete painting due to their versatility and ease of use. These water-based paints can be easily cleaned with soap and water, dry quickly, and resist UV rays and weathering. They are also available in various colors and finishes to suit your design preferences.
• Preparing Your Outdoor Concrete for Painting
Proper surface preparation is essential for the success of any paint job, especially when dealing with outdoor concrete. The following steps will help you create a clean, properly prepared surface to ensure strong paint adhesion and a long-lasting, professional-looking finish.
– Clean the Concrete Surface
Before painting, thoroughly clean the concrete surface to remove dirt, dust, and debris that may interfere with paint adhesion; begin by using a broom or leaf blower to remove loose dirt and debris. Then, use a pressure washer or a garden hose with a strong spray nozzle to wash away any remaining dirt and grime.
– Repair Cracks and Damaged Areas
Inspect the concrete surface for cracks, holes, and other damaged areas. These should be repaired before painting to ensure a uniform finish. Small cracks can be filled using a pre-mixed concrete patch product or a mixture of sand, cement, and water to create a thick paste. Larger cracks and holes may require a concrete repair caulk or sealant.
– Apply a Concrete Etching Solution
To improve paint adhesion, it may be necessary to etch the concrete surface. Etching solutions contain acid that reacts with the concrete, creating a rougher surface to which the paint can better adhere. When applying the etching solution, follow the manufacturer’s instructions for proper use and safety precautions. After applying the solution, thoroughly rinse the surface with clean water and allow it to dry completely before proceeding.
– Prime the Concrete Surface
While not always necessary, applying a concrete primer can further improve paint adhesion and enhance the overall durability of the paint job. Look for a primer specifically designed for outdoor concrete surfaces and follow the manufacturer’s application instructions.
• Painting the Outdoor Concrete Surface
Once the concrete surface is properly prepared, you can move on to painting.
– Select the Right Tools
The tools you choose to apply the paint will largely depend on the type of paint you have selected and the size of your project. Brushes, rollers, and paint sprayers can all be effective for outdoor concrete applications. Be sure to choose a brush or roller with synthetic bristles or fibers, less likely to absorb water and cause streaking or uneven paint coverage.
– Apply the Paint
Begin by stirring the paint thoroughly to ensure an even distribution of pigments and additives. Apply the paint in thin, even coats using your chosen application method, allowing each coat to dry according to the manufacturer’s instructions. Two or more coats may be necessary for complete coverage and a uniform finish. If you use a roller or brush, work in one direction for the first coat and then switch to a perpendicular direction for the second coat to minimize visible brush strokes or roller marks.
– Seal and Protect the Painted Surface
To further enhance the durability and longevity of your painted concrete surface, it is advisable to apply a concrete sealer. These sealers act as a protective barrier, prolonging the life of the paint job and preventing wear from water, chemicals, and UV rays. Look for a sealer compatible with your paint type and follow the manufacturer’s application instructions.
Painting outdoor concrete surfaces can significantly enhance the appearance and functionality of your property, providing both aesthetic and protective benefits. By selecting the appropriate type of paint, properly preparing the surface, and following best practices for application, you can achieve a professional-looking, durable paint job that will last for years.
Is the Longevity of Painting Outdoor Concrete Surfaces Reliable?
As a professional painter with years of experience, I have encountered numerous questions about painting various surfaces. One common query is whether painting outdoor concrete lasts. To address this topic thoroughly, we will explore the factors and conditions that can affect the longevity and durability of painted concrete outdoors.
• Importance of Proper Surface Preparation
Before diving into the main question, it is crucial to emphasize that the success of any painting project heavily depends on proper surface preparation. Adequately prepared surfaces bond better with the paint, resulting in a longer-lasting finish. Therefore, irrespective of the painted material, inadequate surface preparation dramatically reduces the paint’s durability.
– Cleaning and Priming Concrete Surfaces
Outdoor concrete surfaces are typically subjected to various elements such as dirt, grime, mildew, and efflorescence. Cleaning the concrete helps remove contaminants that might impede paint adhesion to the surface. Power washing is an efficient method for cleaning outdoor concrete surfaces.
Likewise, priming the surface can significantly enhance the paint’s and concrete’s bond. Primers designed for concrete should be used to ensure compatibility and adequate adhesion with the concrete substrate.
• Factors Affecting the Durability of Painted Outdoor Concrete
Several factors contribute to the longevity of painted outdoor concrete. Some of these factors include the quality of the paint, environmental conditions, and maintenance or upkeep of the painted surface.
– Quality of Paint
The market offers various paint products with varying qualities and price points. Inferior quality paint is less durable, fades rapidly, and is more susceptible to peeling, chipping, and cracking. High-quality paint, on the other hand, generally offers better performance, a more durable finish, and improved resistance to environmental exposures.
As a general rule of thumb, I recommend investing in high-quality exterior-grade paint explicitly designed for concrete surfaces. This may cost more upfront but provides better long-term value because the paint lasts longer and requires fewer touch-ups or repainting.
– Environmental Conditions
The outdoor environment is subject to various weather elements: sunlight, rain, wind, temperature fluctuations, etc. Some of these conditions can accelerate the deterioration of painted concrete surfaces.
For example, painted concrete surfaces exposed to direct sunlight for extended periods tend to experience rapid fading and consequential loss of visual appeal. Furthermore, high-traffic areas are prone to fast wear and tear, leading to a shortened lifespan of the painted surface.
Additionally, painted concrete in regions with freeze-thaw cycles can witness premature damage due to the expansion and contraction caused by freezing and thawing water. In coastal areas, salty air and high humidity can challenge the longevity of painted concrete surfaces.
– Maintenance and Upkeep
Regular maintenance and timely repairs can enhance the performance and longevity of painted concrete surfaces. Regular cleaning using mild cleaning agents and water helps maintain the paint’s appearance and prevents contaminants such as dirt, grime, and mildew buildup.
Cracks or damaged areas should be addressed as soon as they are noticed to prevent moisture infiltration and other issues that could further damage the concrete and paint.
• The Lifespan of Painted Outdoor Concrete
Given proper surface preparation, high-quality paint, and appropriate maintenance, painted outdoor concrete can typically last anywhere from 5 to 10 years before necessitating repainting. However, certain factors, such as environmental conditions and foot traffic, can cause the lifespan of the painted surface to vary.
• Alternative Options: Concrete Stain and Epoxy Coatings
Although painting outdoor concrete is viable, alternatives such as concrete stains and epoxy coatings are worth considering. Concrete stains offer a more natural finish by penetrating the surface and enhancing the existing color and texture. They are less likely to peel or chip, making them a longer-lasting choice for outdoor concrete surfaces.
On the other hand, epoxy coatings provide a robust, chemical-resistant surface and are ideal for high-traffic areas. Epoxy coatings may be more expensive than paint but have a longer lifespan due to their durability, making them a cost-effective option in the long run.
• Conclusion
To conclude, painting outdoor concrete can last several years, given the right choice of paint, proper surface preparation, and regular maintenance. However, environmental conditions and usage must be considered when evaluating the best time to inspect, maintain, and repaint the surface. Finally, alternative options like concrete stains and epoxy coatings might offer unique benefits that can further enhance the durability and longevity of outdoor concrete surfaces.
Is It Necessary to Prime Concrete Before Painting?
Painting concrete surfaces can be an excellent way to transform drab, dull, or damaged concrete into an attractive and functional surface. However, taking the necessary steps to ensure a successful outcome is essential before diving into the project. One critical question you might face is, “Do I need to prime concrete before painting?” This article will explore the purpose of priming, how to choose the right primer, and the proper application technique to ensure a long-lasting, beautiful finish.
• The Importance of Priming Concrete
Priming is a crucial step in painting, especially when dealing with porous surfaces like concrete. Priming serves several purposes:
- It improves the adhesion of the paint, ensuring it sticks to the concrete and lasts longer.
- It creates a uniform layer on the surface, allowing the paint to look consistent and smooth.
- It reduces the number of paint coats required, as the primer prevents the concrete from absorbing paint.
- It seals the concrete, protecting it from moisture and other potential issues.
In conclusion, priming is essential for a successful paint job, as it will ensure good adhesion, durability, and an aesthetically pleasing finish.
• Choosing the Right Primer
With so many primer options available, knowing which one to choose for your specific project can be challenging. Several factors should influence your decision, including the type of paint you will be using, the concrete’s condition, and the environmental requirements.
– Compatibility with Paint
First, ensure that the primer you choose is compatible with the type of paint you plan on using. Generally, it would help if you used a water-based primer with water-based paint and an oil-based primer with oil-based paint. However, many modern primers are formulated to work well with both types of paint, so be sure to read the label carefully.
– Concrete Condition
Consider the condition of the concrete surface you will be painting. A standard concrete primer should be sufficient if the concrete is relatively new or in excellent condition. However, if the concrete is old, damaged, or highly porous, choosing a primer specifically formulated to bond with and seal these surfaces will be more effective.
– Environmental Requirements
It’s essential to consider the environment in which the painted surface will be exposed. If the project is outdoors or exposed to high levels of moisture or chemicals, choose a primer specifically designed to withstand these conditions.
• Prepping the Concrete
Before applying the primer, it’s crucial to prep the concrete surface properly. This includes cleaning, leveling, and repairing any damage to the area.
– Cleaning
Start by thoroughly cleaning the surface. Remove any dirt, dust, oil, or other contaminants that may interfere with the primer’s ability to bond with the concrete. You can use a power washer, concrete cleaner, degreaser, or a combination of both to achieve a clean surface.
– Leveling
If the concrete surface is uneven, you may need to level it before priming. Use a concrete patch or filler to fill in any holes or cracks, following the manufacturer’s instructions. Allow the patch or filler to cure as directed.
– Repairing
Before applying the primer, inspect the surface for any damage, such as cracks or chips, and repair them using a suitable product. Your goal is to create a smooth, even surface for the primer and paint to adhere to.
• Applying the Primer
Once the surface is clean, level, and repair, follow these steps to apply the primer:
- Stir the primer well before use.
- Using a brush, roller, or sprayer, apply an even coat of primer to the entire concrete surface. Be sure to overlap your strokes or passes to ensure complete coverage.
- Allow the primer to dry as per the manufacturer’s instructions. Depending on the product and conditions, this can range from a few hours to a full day.
• Additional Tips and Recommendations
- Always follow the manufacturer’s instructions for the primer, paint, and surface preparation products.
- Consider using a second coat of primer on highly porous surfaces or when a more durable finish is required.
- Always wear appropriate safety gear, including gloves, eye protection, and a respirator, when dealing with chemicals or working in enclosed spaces.
- Be patient and take your time with the prep work, as this will significantly impact the outcome of your painting project.
In conclusion, priming concrete before painting is vital to ensure a long-lasting, professional-looking result. By choosing the suitable primer, properly preparing the surface, and applying the primer correctly, you can achieve a successful paint job that enhances the appearance and durability of your concrete surface.
What is the process for painting aged outdoor concrete surfaces?
Painting old outdoor concrete is an excellent way to refresh and transform the look of any exterior space. It not only improves the appearance of the area but also extends the lifespan of the concrete surface. This article will discuss the step-by-step process of painting old outdoor concrete effectively.
Please note that painting old outdoor concrete should only be done if the concrete is in good condition. If the concrete is damaged, you should repair the damaged areas or replace the concrete surface before painting.
• Choosing the Right Paint and Primer for Outdoor Concrete
One of the most important aspects of painting outdoor concrete is choosing the right paint and primer. For the best results, opt for a paint specifically designed for outdoor concrete surfaces, such as epoxy, acrylic, or latex-based paint. These paints are designed to withstand the elements and provide long-lasting results.
Use a concrete primer before painting to ensure proper paint adhesion to the concrete surface. A concrete primer seals the porous surface of the concrete, allowing the paint to hold better and last longer.
• Preparing the Surface for Painting
Before you start painting your old outdoor concrete, thoroughly cleaning and preparing the surface is essential; this process will help remove any dirt, grease, or stains that might prevent the paint from adhering properly.
– Step 1: Clean the Concrete Surface
Begin by sweeping the concrete surface with a stiff-bristled broom to remove any loose dirt, sand, or debris. If the surface is heavily stained or soiled, you may need a pressure washer to remove stubborn dirt or algae growth.
Use a degreasing cleaner designed for grease or oil stains on concrete surfaces. Follow the manufacturer’s instructions to ensure the best results. Rinse the concrete thoroughly with clean water after cleaning and allow it to dry completely before moving on to the next step.
– Step 2: Repair any Cracks or Chips
Inspect the concrete surface for cracks, chips, or other damage, as these must be repaired before painting. A concrete repair caulk or patching compound can fill small cracks and chips. Use a concrete repair mortar for larger cracks, following the manufacturer’s instructions.
After applying the repair material, allow it to dry and cure according to the product’s recommendations before moving on to the next step.
– Step 3: Etch the Concrete Surface
To ensure proper adhesion of the primer and paint, etch the concrete surface. Etching involves applying an acid-based etching solution that opens up the pores of the concrete, allowing the primer and paint to adhere better.
Following the manufacturer’s instructions, mix the etching solution with water and apply it to the concrete surface using a brush or sprayer. Allow the solution to sit for the specified time, then scrub the surface with a stiff-bristled brush to ensure thorough etching. Rinse the surface thoroughly with water and allow it to dry completely before proceeding.
• Applying Primer and Paint to the Concrete
Once the surface is clean, repaired, and etched, you’re ready to begin painting.
– Step 1: Apply the Primer
Using a paint roller, brush, or sprayer designed for concrete surfaces, apply a generous coat of concrete primer to the surface, following the manufacturer’s instructions for proper coverage and drying time. Be sure to work in small sections, using a brush or roller to ensure adequate coverage and to avoid puddling or uneven application.
– Step 2: Apply the Paint
Once the primer has dried and cured according to the manufacturer’s recommendations, it’s time to apply the concrete paint. Again, use a roller, brush, or sprayer designed for concrete surfaces, and apply the paint in thin, even coats.
Two coats of paint are typically recommended for the best results, with a drying time of at least 24 hours between coats. Check the paint manufacturer’s instructions for specific recommendations on dry time and the number of coats needed for your chosen paint.
– Step 3: Seal the Painted Surface
To protect the painted surface and ensure its longevity, apply a concrete sealer after the final coat of paint has dried. Opt for a sealer designed explicitly for painted concrete surfaces, and follow the manufacturer’s instructions for application and dry time.
After the sealer has dried and cured according to the product’s recommendations, your painted outdoor concrete surface will be ready to enjoy.
• Conclusion
Painting old outdoor concrete can significantly enhance the appearance and longevity of the surface. Following these steps and using the proper materials can achieve professional-looking results that will last years. Remember to choose the right paint and primer, thoroughly prepare the surface, and seal the painted area for long-lasting results.
Step | Description |
|---|---|
1. Clean the surface | Clean the surface with a brush or other cleaning methods. |
2. Repair cracks and holes | Use a paint roller or brush to apply a concrete primer for outdoor use. Allow it to dry according to the package instructions. |
3. Apply a concrete primer | Fill any cracks or holes in the concrete with a patching compound, then smooth the surface with a trowel. Allow it to dry according to the package instructions. |
4. Choose the right paint | Select a paint specifically designed for outdoor concrete, such as masonry or elastomeric paint. These paints are durable, waterproof, and provide good coverage. |
5. Paint the concrete | Apply the paint using a roller or brush in thin, even coats. Applying at least two coats is recommended for the best coverage and durability. Allow each coat to dry according to the package instructions before applying the next one. |
6. Seal the surface (optional) | If desired, apply a concrete sealer to help protect the painted surface from weather, stains, and UV damage. Follow the sealer’s package instructions for application and drying times. |