Can You Paint Outdoor Concrete, 25 Things You Should Know
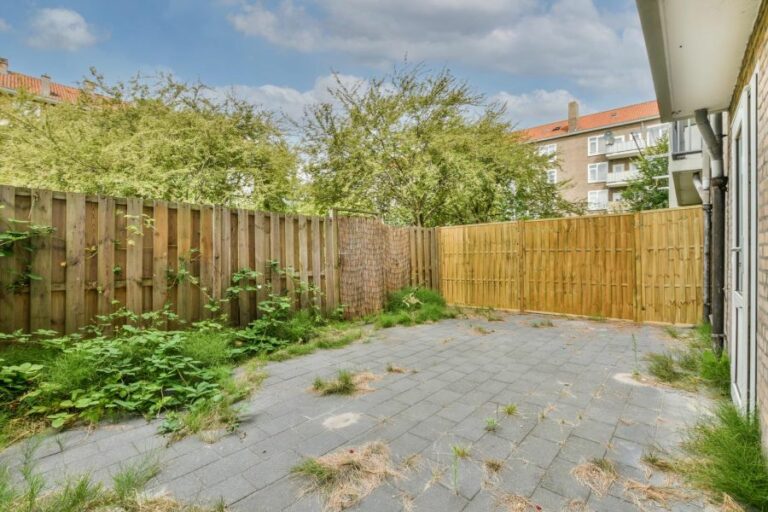
You’ve managed to create a beautiful outdoor space, but something’s missing: a pop of color to bring it all together! Can you paint outdoor concrete? The answer is a resounding yes, but there’s a catch, it needs to be done right. Let’s talk about the do’s and don’ts of painting outdoor concrete surfaces and how to create jaw-dropping designs to turn your space into the talk of the town.
Can you paint outdoor concrete:
Painting outdoor concrete surfaces is possible and can enhance their appearance while protecting them from damage. Before painting, assess the surface for cleanliness, integrity, and porosity, and clean or repair as needed. Choose the right paint, such as acrylic latex or epoxy paint, and follow a step-by-step guide for surface preparation, primer application, and paint application. To maintain the surface, keep it clean and free of debris, address stains promptly, and reapply a clear sealer every few years.

Discover the transformative power of paint on outdoor concrete surfaces. Delve into key factors to consider, essential preparation steps, and expert tips for achieving long-lasting, eye-catching results. Transform your patio, driveway, or pavement today.
Contents
- 1 Is it Possible to Apply Paint on Outdoor Concrete Surfaces?
- 2 Is the longevity of painted outdoor concrete sustainable?
- 3 Is it a Good Idea to Apply Paint on Concrete Surfaces?
- 4 Is it Possible to Apply Paint Directly on Concrete Surfaces?
- 5 What is the Most Effective Method for Painting Outdoor Concrete Surfaces?
- 6 What are the Disadvantages of Applying Paint on Concrete Surfaces?
Is it Possible to Apply Paint on Outdoor Concrete Surfaces?
Outdoor concrete surfaces can often look dull and unattractive, especially after several years of exposure to weather elements. Painting these surfaces is an effective way to enhance their appearance and protect them from damage.
But the question arises – can you actually paint outdoor concrete? Read through this comprehensive guide to find out.
• Assessing the Surface: Is Your Concrete Suitable for Painting?
Before attempting to paint your outdoor concrete, it’s crucial to determine whether your surface is suitable for a fresh coat of paint. Here are some factors you need to consider:
– Surface Cleanliness
- Remove dirt and debris by sweeping the area with a broom or using a pressure washer.
- Check for stains or discoloration, like oil or grease, which may cause your paint to peel or not adhere properly. Use a suitable cleaner for stubborn stains and rinse thoroughly before proceeding.
- Ensure there is no mold or mildew present, as these can lead to an uneven paint job or cause health concerns.
– Surface Integrity
- Inspect the concrete for any cracks, chips, or damage that may interfere with the paint’s ability to adhere to the surface. Repair these issues with a concrete filler or patch product and let it cure according to the manufacturer’s instructions.
- Examine the surface for any concrete sealers or coatings that may diminish the adhesion of your paint. Remove these with a chemical stripper, as sealers can lead to paint peeling or bubbling.
– Surface Porosity
- Test the porosity of your concrete by sprinkling a small amount of water on the surface. If the water is quickly absorbed, your surface is porous enough for the paint to adhere properly.
- In the case of water beading or not absorbing, you may need to etch the surface using a concrete etching product or muriatic acid to increase its porosity.
• Choosing the Right Paint for Outdoor Concrete
After ensuring your concrete surface is suitable for painting, you need to carefully select the right kind of paint for the job. These are the most common types of paints for outdoor concrete:
– Acrylic Latex Paint
- It is known for its durability and is available in a wide range of colors.
- Acrylic latex paint provides a clean and even finish, is easy to clean, and is relatively fast-drying.
- Opt for paint specifically labeled for outdoor or masonry use, as these are formulated to resist weather elements and provide a stronger bond to the surface.
– Epoxy Paint
- Epoxy paint is a two-component paint that is more durable and resistant to chemicals and abrasions than acrylic latex paint.
- Ideal for high-traffic areas like garage floors or driveways, epoxy paint provides a glossy finish that can be more resistant to stains and water.
- Keep in mind that epoxy paint can be significantly more challenging to apply, requiring meticulous surface preparation and mixing of the two components.
• Painting Outdoor Concrete: A Step-by-Step Guide
After selecting the appropriate paint for your project, follow these steps to ensure a successful paint job.
– Step 1: Surface Preparation
- Clean the surface as described above, ensuring all dirt, stains, and debris are removed.
- Repair any cracks or damage with a concrete filler, and etch the surface if necessary to increase porosity.
- Allow the surface to dry completely, as moisture can impede paint adhesion.
– Step 2: Apply Primer
- A concrete primer will help create a uniform surface and improves paint adhesion.
- Follow the manufacturer’s instructions for application, typically using a roller or brush, and allow the primer to dry thoroughly before proceeding.
– Step 3: Paint Application
- Apply your chosen paint as per the manufacturer’s directions, using a high-quality brush, roller, or paint sprayer for larger areas.
- Apply one or two coats for adequate coverage, allowing each coat to dry completely before applying the next.
- In high-traffic areas, consider applying a clear sealer as a topcoat for added protection.
• Maintaining Your Newly Painted Concrete Surface
To ensure the longevity of your paint job, follow these maintenance tips:
- Keep the surface clean and free of debris, using a broom or pressure washer when necessary.
- Address stains promptly to prevent potential damage to your paint.
- Reapply a clear sealer every few years to maintain the protective barrier over your painted surface.
In conclusion, you can certainly paint outdoor concrete surfaces, provided you take the necessary steps to prepare and choose the appropriate paint for the job.
A well-painted surface will not only enhance the overall appearance of your outdoor space but will also provide protection from weather elements and everyday wear and tear.
Steps | Description |
|---|---|
1. Clean the surface | Remove dirt, dust, debris, and any loose or peeling paint from the concrete surface. |
2. Repair cracks and holes | Use a concrete crack filler and patching compound to fix any cracks, chips, or holes in the surface. |
3. Apply a concrete sealer | Apply a concrete sealer to the surface to help protect against moisture and improve paint adhesion. |
4. Choose the right paint | Use a high-quality exterior acrylic latex or masonry paint designed for concrete surfaces. |
5. Prime the surface | Apply a concrete primer to the surface to help ensure even paint coverage and improve durability. |
6. Paint the surface | Use a paint roller or brush to apply at least two coats of the paint, allowing it to dry between coats. |
7. Apply a sealer (optional) | Apply a clear, protective sealer over the paint to improve durability and protect against weathering. |
Is the longevity of painted outdoor concrete sustainable?
When it comes to enhancing the appearance of outdoor concrete surfaces, one of the most commonly asked questions is: Does painting outdoor concrete last?
• The Role of Surface Preparation
– Proper Cleaning
The longevity and durability of painted outdoor concrete largely depend on the quality of surface preparation. Before painting, it is crucial to thoroughly clean the surface of any dirt, debris, stains, or old paint.
A pressure washer is the most effective tool for this task, as it can easily remove dirt and grime. For stubborn stains, consider using a concrete cleaner and etcher to further enhance the cleanliness of the surface.
– Repairing Cracks and Holes
Another crucial step in surface preparation is repairing any cracks or holes in the concrete. Using a concrete patching compound or an epoxy repair kit, fill in any depressions or fissures to create a smooth painting surface.
Make sure to follow the manufacturer’s instructions for both product application and drying time.
• Choosing the Right Concrete Paint
It is vital to select a suitable paint for outdoor concrete applications, as the right type of paint will adhere to the surface and provide long-lasting results. There are two main types of paint suitable for outdoor concrete:
– Acrylic Latex Paint
Acrylic latex paint is an excellent choice for outdoor concrete due to its ability to expand and contract with temperature fluctuations. This elasticity helps prevent the paint from cracking and chipping. In addition, acrylic latex paint is water-resistant and can be easily cleaned with soap and water.
– Epoxy Paint
Epoxy paint is another option for outdoor concrete that is known for its exceptional durability and resistance to chemicals, abrasion, and moisture. Epoxy paint forms a tough coating on the concrete surface, making it an ideal choice for high-traffic areas.
However, it is important to note that epoxy paint can be more challenging to apply and often requires specific environmental conditions for successful curing.
• Primer Application
Applying a primer is an essential step in ensuring the longevity of the paint on outdoor concrete surfaces. A quality primer will serve as a reliable base for the paint, enhancing its adhesion and sealing the porous surface of the concrete. This results in a longer-lasting and more cohesive finish.
– Selecting the Right Primer
For outdoor concrete, it is best to choose a high-quality concrete primer that is specifically designed for such applications. Look for products that have excellent adhesion, stain-blocking properties, and resistance to moisture and alkali.
Furthermore, ensure that the primer is compatible with the paint you have selected.
• Weather Considerations
The weather plays a significant role in the outcome of an outdoor concrete painting project. Certain conditions can negatively impact the curing process and affect the durability of the paint.
– Temperature
Both high and low temperatures can impact the drying and curing process of the paint. It is generally recommended to paint outdoor concrete when the temperature is between 50 to 90 degrees Fahrenheit.
– Humidity
High humidity can also affect the drying time and overall durability of the paint. Aim for a day with low humidity levels to ensure a quicker drying process and optimal paint adherence.
• The Application Process
The application process has a direct impact on the longevity of the paint job. Properly painting outdoor concrete surfaces can be broken down into three main steps.
– Applying the Primer
Using a roller, apply a thin and even layer of primer to the entire surface. Ensure full coverage of the concrete, filling in any pores or small cracks. Allow the primer to dry according to the manufacturer’s instructions.
– Painting the Surface
Once the primer is dry, it is time to paint the surface with your chosen paint. Use a roller to apply thin and even coats, making sure to cover the entire surface without leaving any visible roller marks.
Allow the paint to dry before applying subsequent coats as needed, based on the manufacturer’s recommendations.
– Sealing the Surface
To further prolong the life of your painted outdoor concrete, consider applying a sealant. A high-quality concrete sealer will protect the paint from moisture, UV rays, and staining, leading to longer-lasting results.
Follow the application instructions provided by the manufacturer, and allow the sealer to dry and cure as directed.
• Conclusion
The longevity of painted outdoor concrete depends on several factors, including surface preparation, paint selection, primer application, weather conditions, and proper application techniques.
By following the guidance outlined in this article, you can significantly increase the chances of your outdoor concrete paint job lasting for many years.
Is it a Good Idea to Apply Paint on Concrete Surfaces?
When it comes to home improvement and maintenance, one common question many homeowners have is whether painting concrete is a good idea or not. Well, the answer is both yes and no. There are various factors to consider before deciding to paint concrete surfaces.
• Pros of Painting Concrete
1. Aesthetics
One of the significant reasons people opt to paint concrete surfaces is to improve their appearance. Concrete is a very versatile material that offers various design possibilities. A well-painted concrete surface can transform an otherwise dull, gray slab into a vibrant and engaging part of your home or property, giving it a fresh and modern look.
2. Protection
Another advantage of painting concrete is that it offers an additional layer of protection. Concrete surfaces, especially when exposed to the elements, are prone to damage, such as cracks, stains, and water seepage.
By applying paint or concrete sealer, you can protect the surface from further deterioration and extend its lifespan.
3. Easy Maintenance
Painted concrete surfaces are generally easier to clean and maintain as compared to unpainted ones. Dirt, grime, and stains are less likely to penetrate the surface, making it simpler to maintain its appearance with regular cleaning.
4. Increased Value
A well-maintained and aesthetically pleasing concrete surface can potentially increase the value of your property. Painting is an inexpensive way to help your home look its best and make it more attractive to potential buyers.
5. Slip Resistance
A properly painted and sealed concrete surface can offer increased slip resistance, especially in areas prone to water exposure, such as driveways and pool decks. Some concrete paints with added texture can provide a safer and slip-resistant surface for walking and movement.
• Cons of Painting Concrete
1. Preparation
One of the challenges of painting concrete is the preparation needed before applying paint. The surface must be thoroughly cleaned and free from dirt, oil, and stains, as well as any loose or peeling paint from previous applications.
This process can be time-consuming and laborious, as it often requires pressure washing, scrubbing, and the use of chemicals to ensure a clean surface.
2. Moisture Issues
Moisture is a major concern when painting concrete, as it can cause paint to peel and blister. Concrete is a porous material, and excessive moisture can lead to deterioration and damage.
It’s essential to address any moisture concerns before painting, which may require additional steps, such as sealing or installing a vapor barrier.
3. Repainting and Maintenance
Painted concrete surfaces may require more frequent repainting and maintenance than other types of surfaces. UV exposure, foot traffic, and other factors can cause paint to fade, chip, or wear away over time.
Depending on the quality of the paint and the conditions it’s exposed to, you may need to repaint every few years to maintain its appearance.
4. Limited Color Options
When compared to other surface options, such as tiles or pavers, concrete paint may have fewer color choices. Some homeowners may find the available color options limiting and may prefer other materials that better suit their design preferences.
• Tips for Painting Concrete
1. Choose the Right Paint
Selecting the appropriate paint product is crucial for the success of your project. Make sure to choose a paint that is specifically designed for concrete surfaces, such as acrylic or epoxy-based paints.
These paints offer greater durability, easier application, and enhanced performance when compared to standard latex paints.
2. Test for Moisture
Before painting, be sure to test for moisture content in the concrete. A simple way to do this is the “plastic sheet test.” Tape a plastic sheet to the surface, sealing all edges, and wait for 24 hours.
If any condensation appears on the plastic after 24 hours, you’ll need to address the moisture issue before painting.
3. Properly Prepare the Surface
Surface preparation is key to ensuring a long-lasting and attractive paint job. Clean the concrete surface thoroughly, removing any dirt, stains, and previous paint. Use a concrete cleaner or degreaser to remove oil and grease stains, and use a wire brush to remove loose paint and debris.
4. Apply a Primer
Applying a quality concrete primer before painting can significantly improve the adhesion, durability, and performance of the paint. Primers help to ensure a more even application, fill in any small cracks or imperfections, and create a better bond between the paint and the surface.
5. Follow the Manufacturer’s Instructions
Always follow the manufacturer’s recommendations on the paint can for application methods, drying times, and proper ventilation. This will help ensure the best results for your painted concrete project.
In conclusion, painting concrete can be a good idea if done correctly, with proper preparation and quality materials. It offers numerous benefits, such as improved aesthetics, protection, and easy maintenance.
However, it does have its drawbacks and may not be the best choice for all situations. Consider these pros and cons, as well as the tips provided, before deciding if painting concrete is the right solution for your home improvement project.
Is it Possible to Apply Paint Directly on Concrete Surfaces?
When it comes to transforming a dull, drab concrete surface into a vibrant and attractive space, painting is often the go-to choice. But can you paint directly on concrete? The answer is yes, with proper preparation and the right tools.
– Surface Preparation: The Key to a Successful Paint Job
Before diving into the actual painting process, it’s crucial to ensure that the concrete surface is clean, dry, and free of any imperfections. This will ensure that the paint adheres well and lasts for a long time.
Cleaning the Concrete
First, remove any dirt, grease, or oil stains from the surface. To do this, you can use a mild detergent, a trisodium phosphate solution, or a commercial concrete cleaner. Thoroughly scrub the surface with a stiff-bristle brush and rinse it with clean water. Allow the surface to dry completely before proceeding.
Repairing Cracks and Holes
Inspect the concrete surface for any cracks or holes. For small cracks and holes, use a pre-mixed concrete patching compound to fill them, smoothing the surface with a putty knife. For larger cracks, you might need a vinyl concrete patching compound that can be applied with a trowel.
Allow the patching material to cure according to the manufacturer’s instructions.
Etching the Concrete
Etching is the process of roughening the surface of the concrete to allow the paint to bond more effectively. When applying a paint or coating to a smooth or dense concrete surface, you may need to etch the surface using a muriatic acid solution or a commercial etcher.
Follow the manufacturer’s instructions for the proper mixing ratios and application techniques.
Note: Always wear protective gear, such as gloves and goggles, when working with chemicals.
– Choosing the Right Paint for Concrete
Not all paints are created equal, and choosing the right type of paint for concrete surfaces is of utmost importance to ensure a successful outcome.
Concrete Paint vs. Concrete Stain
When it comes to painting concrete, you have two main options: concrete paint and concrete stain.
The main difference between the two is that concrete paint creates a solid, opaque layer on the surface, while concrete stain penetrates the concrete and creates a more translucent finish that highlights the natural texture of the material.
Types of Concrete Paint
There are several types of paint suitable for concrete surfaces, including:
- Acrylic latex paint: This water-based paint is easy to apply, quick-drying, and offers good adhesion and durability. It’s suitable for both interior and exterior surfaces.
- Epoxy paint: This two-component paint is known for its excellent adhesion, durability, and resistance to chemicals and abrasion. Epoxy paint is ideal for high-traffic or heavy-duty areas like garage floors, but it can be more challenging to apply.
- Urethane paint: This solvent-based paint is extremely durable and resistant to stains and chemicals, making it ideal for industrial and commercial applications.
Remember to choose a paint specifically formulated for concrete surfaces, as general-purpose paints may not adhere well or provide the desired level of durability.
– Applying the Paint on Concrete
Once the surface is prepared and the right paint is chosen, it’s time to apply the paint. Follow these steps to ensure a successful and lasting paint job:
- Priming: Using a roller or brush, apply a coat of concrete primer to the surface, following the manufacturer’s instructions. The primer helps to improve adhesion, seal the surface, and prevent paint from absorbing too much into the concrete.
- Mixing the Paint: If using epoxy or urethane paint, mix the components according to the manufacturer’s instructions.
- Applying the First Coat: Using a roller, brush, or paint sprayer, apply the first coat of paint to the surface. Be sure to apply the paint in a thin, even layer, avoiding puddles or excessive accumulation.
- Allowing the Paint to Dry: Allow the paint to dry for the recommended time, typically between 4-24 hours.
- Applying Additional Coats: Depending on the desired color and coverage, apply additional coats, allowing each coat to dry completely before applying the next one.
Finishing Touches
After the final coat of paint has dried, consider sealing the surface with a clear concrete sealer. This will provide additional protection against moisture, stains, and UV damage, extending the life of your paint job.
• Conclusion
Yes, you can paint directly on concrete with proper surface preparation, a suitable paint type, and the appropriate application techniques. By following the guidelines outlined in this article, you can transform your concrete surface into a beautiful, durable, and long-lasting space.
Question | Answer |
|---|---|
Can you paint directly on concrete? | Yes, you can. However, it is important to ensure the concrete is clean and dry, and it’s often recommended to use a concrete primer or sealer before applying paint for better adhesion and long-lasting results. |
What is the Most Effective Method for Painting Outdoor Concrete Surfaces?
• Choose the Right Paint for the Job
When it comes to painting outdoor concrete, selecting the appropriate paint is crucial. To achieve long-lasting results, it is recommended to use an acrylic or epoxy-based paint specifically formulated for exterior concrete surfaces.
These types of paint offer excellent adhesion and durability, helping to resist weather-related damage, fading, and peeling.
In addition to choosing a paint designed for outdoor concrete, it’s essential to select a paint that is also water-resistant and contains UV stabilizers.
The latter ensures that the paint can withstand direct sunlight without fading or losing its vibrant color. If your concrete surface experiences heavy traffic, choose an epoxy-based paint with added slip resistance.
• Properly Prepare the Surface
– Cleaning the Concrete
Before painting, it is crucial to clean the concrete thoroughly. Start by removing any dirt, dust, and debris from the surface using a stiff-bristled broom or a leaf blower. Follow that up with a pressure washer, if possible.
Pressure washing is an effective way to remove stubborn dirt and stains, ensuring a clean and even surface for painting. If a pressure washer isn’t available, use a garden hose with a high-pressure nozzle attachment.
If there are any grease, oil, or other residue stains on the surface, use a degreaser or trisodium phosphate (TSP) to remove them. This step is crucial, as the paint will not adhere well to areas with any residue.
– Repairing Cracks and Damaged Areas
Inspect the concrete for any cracks or damage. Repairing these areas before painting will ensure a smooth and even finish. For small cracks, a concrete crack filler can be easily applied with a caulking gun. For larger cracks or holes, consider using a concrete patch or repair product.
Follow the manufacturer’s instructions for proper preparation and application.
– Etching the Surface
Etching the surface is essential for proper paint adhesion. Etching roughens up the concrete surface, allowing the paint to bond better. Use a commercial etching solution or a solution of muriatic acid diluted in water.
Following the manufacturer’s instructions, apply the solution to the surface and scrub it with a stiff brush. Rinse thoroughly with a hose and allow the concrete to dry for at least 24 hours.
• Prime the Surface
Using a high-quality concrete primer provides another layer of adhesion and increases the durability of the paint job. Apply the primer with a roller or brush, ensuring proper coverage of the entire surface. Allow the primer to dry per the recommended time on the label before proceeding to the painting.
• Apply the Paint
When it comes to applying the paint, use a roller, brush, or airless paint sprayer. Each method has its benefits and drawbacks, depending on the size of the area and the desired finish. Rollers provide a more even application but might be slower than a sprayer, especially for large areas.
Brushes are great for detail work and corners where rollers or sprayers can’t reach. Airless sprayers offer a quick and smooth application but might require more preparation, such as masking off surrounding areas.
Regardless of the application method, ensure that the paint is spread evenly and consistently across the surface. Apply at least two coats, allowing the paint to dry according to the manufacturer’s instructions between coats.
Some epoxy-based paints may require additional coats or a topcoat sealant for optimal durability.
• Allow Adequate Drying Time
After the final coat has been applied, it is essential to allow the paint to dry thoroughly before using the surface. The drying time can vary depending on the type of paint used, temperature, and humidity.
In general, it’s recommended to wait at least 24 hours before allowing foot traffic and up to a week before heavy vehicle traffic.
• Maintain and Protect the Painted Surface
Regular maintenance, like sweeping away dirt and debris, will help prolong the life of your painted concrete. Reapply a sealant, if needed, every few years to maintain the paint’s integrity and protect it from damage.
In conclusion, painting outdoor concrete can be done successfully and effectively by choosing the right paint, properly preparing the surface, priming, applying the paint in thin, even coats, and allowing adequate drying time.
Regular maintenance will help keep your painted outdoor concrete looking fresh and vibrant for years to come.
Step | Description |
|---|---|
1 | Clean the surface |
2 | Repair any cracks or damage |
3 | Prepare the surface for painting |
4 | Apply a primer |
5 | Choose an appropriate paint |
6 | Apply the paint |
7 | Seal the paint |
8 | Maintain the surface regularly |
What are the Disadvantages of Applying Paint on Concrete Surfaces?
When it comes to deciding whether or not to paint concrete surfaces, it is important to weigh the potential drawbacks in addition to the benefits. While painted concrete can often look pleasing to the eye, there are important cons to be aware of.
• Surface Preparation
One of the major challenges of painting concrete is preparing the surface for paint. It may seem like a simple task, but improper preparation can lead to various complications down the road. Here are a few elements that may become an issue during surface preparation:
– Cleaning and Repairing
Before applying paint, the concrete surface must be thoroughly cleaned and repaired. This usually involves power washing, removal of existing paints or stains, and patching any holes or cracks.
If these steps are not performed properly, the paint will not adhere well, leading to premature chipping and peeling.
– Etching
In many cases, concrete surfaces need to be etched before painting to promote better adhesion. This involves applying an etching solution, which reacts with the concrete to create a rougher texture. If done improperly, this step can damage the surface or fail to provide enough texture for proper paint adhesion.
• Moisture Concerns
Another notable disadvantage of painting concrete is related to moisture. Concrete is a porous material, and if not properly treated, moisture can prove to be a significant issue. Here are a few ways moisture may become problematic when painting concrete:
– Moisture Penetration
Moisture can penetrate the concrete, leading to paint failures such as blistering, peeling, and discoloration. This is particularly an issue in areas where the water table is high or where there is frequent exposure to water, such as basements or patios.
– Efflorescence
Efflorescence is the deposition of soluble salts on the concrete surface, which can occur due to moisture migration. When exposed to humid conditions, these salts can break through painted surfaces, causing unsightly stains and potentially weakening the paint’s bond with the concrete.
– Vapor Barrier
When painting concrete, it is recommended to apply a vapor barrier or sealer to prevent moisture penetration. However, this can block the concrete’s ability to “breathe,” trapping moisture within the material and potentially leading to structural damage.
• Durability and Longevity Issues
The durability of painted concrete surfaces can be a concern, as these surfaces are exposed to various environmental and mechanical factors. Some considerations regarding the durability and longevity of painted concrete include the following:
– Chipping and Peeling
Concrete surfaces are susceptible to chipping and peeling, especially in high-traffic areas or when exposed to heavy equipment. This can result in unsightly surfaces and may require frequent repainting to maintain a uniform appearance.
– UV Exposure
Prolonged exposure to sunlight can cause the paint on concrete surfaces to fade and lose its original color. This is particularly an issue with darker colors, which can lose their vibrancy over time.
– Chemical Exposure
Concrete surfaces, especially in industrial settings or garages, may be exposed to chemicals, oil, and grease. These substances can cause damage to the paint or result in discoloration, requiring additional maintenance or repainting.
• Maintenance and Repainting
In comparison to other flooring options, painted concrete surfaces often require more frequent maintenance and repainting. This is due to the various factors discussed above, which can lead to paint failure over time.
Depending on the location and use of the surface, repainting may be necessary every few years, which can be time-consuming and expensive.
In addition, painted concrete surfaces often require the re-application of sealants or vapor barriers during repainting. This can sometimes strip the old paint or damage the underlying concrete, further complicating the maintenance process.
• Conclusion
While painted concrete can indeed offer an attractive, cost-effective option for various applications, it is essential to consider the potential drawbacks before deciding to paint a concrete surface.
Issues related to surface preparation, moisture, durability, and maintenance should be carefully evaluated, and alternative flooring options may be more suitable depending on the specific application.
Ultimately, the decision to paint concrete will depend on the individual’s priorities and expectations regarding the appearance, longevity, and maintenance of the surface.
By understanding these potential cons, you can make a more informed decision and ensure the best possible outcome for your concrete surfaces.
| Cons |
|---|
| Requires careful surface preparation |
| May peel or flake off over time |
| Paint may not bond well to the concrete surface |
| Not suitable for high-traffic areas |
| May trap moisture, leading to mold and mildew issues |
| Needs regular maintenance and repainting |
| Can be slippery when wet, especially if a non-slip additive is not used |