How To Paint An Outdoor Mural On Concrete. What Pros Say
Welcome to a world where creativity meets concrete! In this blog post, we will dive into the art of transforming dull, lifeless concrete walls into vibrant, eye-catching outdoor murals. You might think painting on concrete is difficult, but with our step-by-step guide, we’ll show you the tips and techniques to make your masterpiece come to life.
How to paint an outdoor mural on concrete:>
To create an exterior mural on a concrete surface, select an appropriate location with good visibility and a smooth surface. Clean and repair the surface before applying a primer. Choose durable, weather-resistant paints and gather necessary supplies, such as brushes, rollers, and drop cloths. Plan and design the mural, considering scale and proportion. Paint base layers, add details and highlights, then seal with a UV-resistant sealant to protect the mural. Be mindful of local regulations, consider collaborating with others, and check the mural’s appearance from a distance for balance and effectiveness.

Discover the ins and outs of creating stunning outdoor murals on concrete surfaces. Learn how to choose the right materials, tools, and techniques for a lasting impression. Unleash your creativity and enhance public spaces with vibrant artwork.
Contents
- 1 Instructions for Creating an Exterior Mural on a Concrete Surface
- 2 Is it Possible to Create a Mural on a Concrete Surface?
- 3 Which Type of Paint is Suitable for a Concrete Mural?
- 4 What is the process for preparing a concrete wall for a mural installation?
- 5 What is the process for painting outdoor murals on stucco surfaces?
Instructions for Creating an Exterior Mural on a Concrete Surface
• Selecting the Right Location
The first step in painting an outdoor mural on concrete is identifying an appropriate location for the artwork. When searching for the perfect spot, keep in mind visibility, accessibility, and natural elements. Ensure the surface is adequately smooth and devoid of cracks or other imperfections.
• Preparing the Concrete Surface
– Cleaning the Surface
A clean surface is essential for the paint to adhere well. Use a pressure washer or a brush and soapy water to scrub away dirt, loose debris, and any existing paint or graffiti.
If mold or mildew is present, use a solution of bleach and water to kill and remove it. Rinse the surface thoroughly and allow it to dry completely before moving on to the next step.
– Repairing Imperfections
Inspect the surface for cracks, holes, or uneven areas. Use a high-quality concrete patching compound to fill in any imperfections.
Allow the compound to dry completely, then use a fine-grit sandpaper to smooth out the area, ensuring it is level with the rest of the surface. Clean away any dust or debris before moving on.
– Applying a Primer
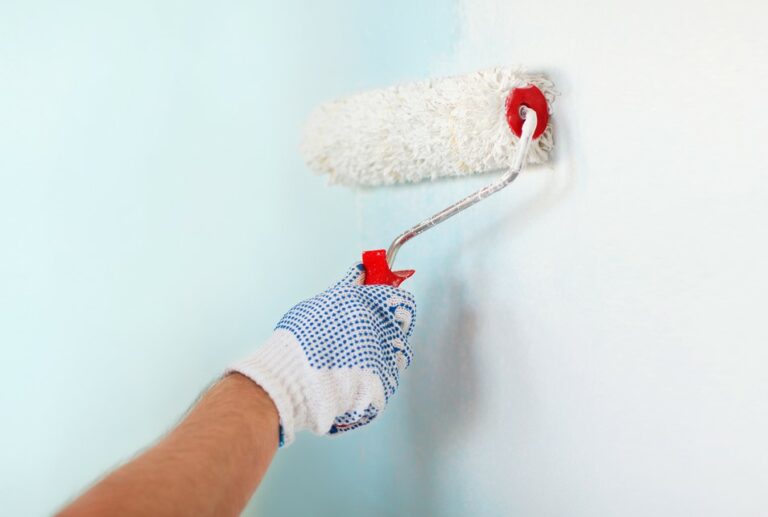
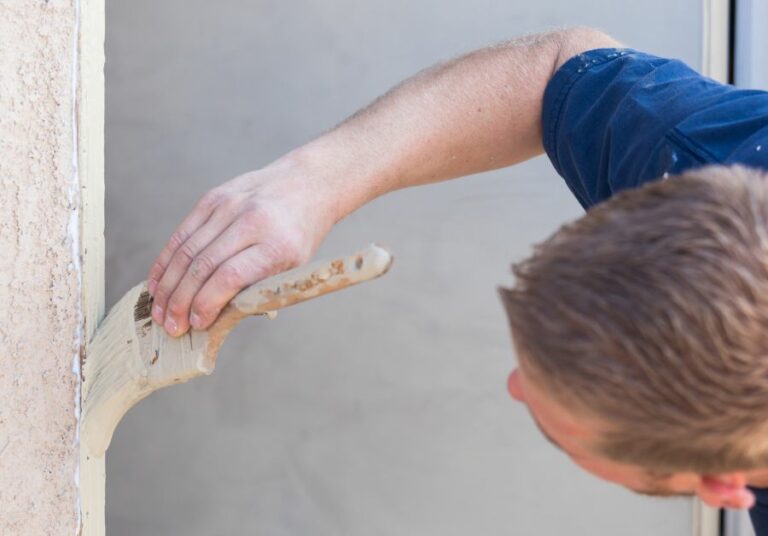
Primer helps the paint adhere better to the concrete and can enhance the longevity of the mural. Choose a high-quality acrylic primer or masonry primer, as these are specifically designed for use on concrete surfaces. Apply the primer with a roller, starting at the top of the wall and working downward. Use a brush for smaller areas and edges. Allow the primer to dry completely, following the manufacturer’s instructions.
• Choosing the Right Supplies
– Selecting Paint
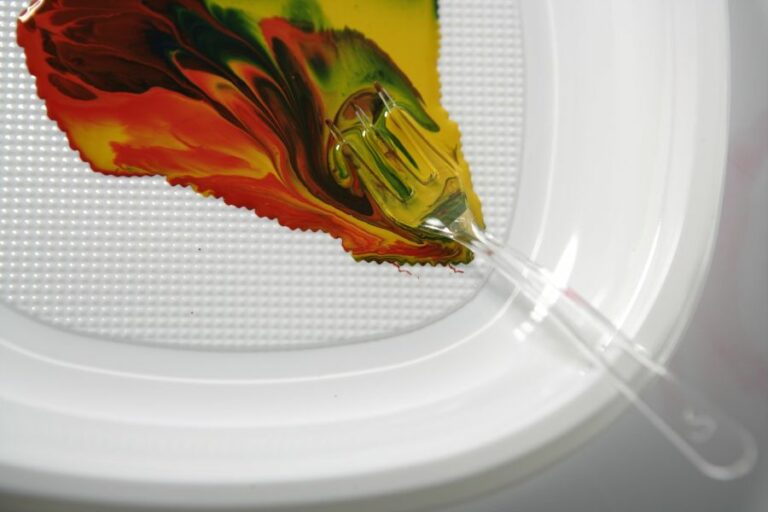
The paint you choose for your outdoor mural should be durable and weather-resistant. Acrylic-based and latex-based paints are ideal choices because they are water-resistant, easy to work with, and designed to withstand the elements.
Opt for high-quality, UV-resistant paint to ensure the colors remain vibrant and true for as long as possible.
– Gathering Additional Supplies
In addition to paint and primer, you’ll also need an assortment of brushes and rollers, drop cloths, painter’s tape, a ladder or scaffolding, and a paint tray. Depending on your design, you may also require stencils, chalk, and pencils for sketching out the composition.
• Planning and Designing the Mural
Before beginning the painting process, it’s crucial to have a well-thought-out design. Sketch out your concept on paper or a digital platform and consider the scale and proportions in relation to the concrete surface.
Once you’re satisfied with the design, use chalk or a water-soluble pencil to lightly draw the outlines on the primed surface. This will ensure everything is correctly positioned and proportioned before you begin painting.
• Painting Your Mural
– Establishing the Base Layers
Start by painting large areas of solid color or applying base tones to different sections of the mural. Doing this first will help establish the overall composition and make it easier to add details and highlights later.
Use a roller for broad strokes and larger areas, and choose brushes in various sizes for smaller sections and finer details. Always allow the paint to dry fully between layers, following the manufacturer’s drying times.
– Adding Detail and Highlights
Once your base layers are complete and dry, begin adding details and highlights to your mural. Use smaller brushes for fine lines and intricate areas, and don’t be afraid to layer multiple colors to create depth and richness.
Be mindful of the natural lighting in the area, incorporating shadows and highlights accordingly.
– Sealing the Mural
To protect your mural from the elements, harsh sunrays, and potential vandalism, consider sealing it with a clear, UV-resistant sealant. Apply the sealant according to the manufacturer’s instructions, ensuring even and complete coverage.
This final step should help prolong the life of your mural and keep it looking vibrant and beautiful for years to come.
• Additional Tips and Recommendations
- Be mindful of local regulations and obtain any necessary permits before painting a mural on public property.
- Consider collaborating with other artists or inviting community members to participate in the mural creation. This can make the process more enjoyable and foster a sense of community engagement and pride in the finished project.
- Regularly step back and view your mural from a distance, ensuring your composition, colors, and details are well-balanced and effective when viewed from afar.
In conclusion, painting an outdoor mural on concrete requires careful planning, the right supplies, and attention to detail. By following these steps and recommendations, you can create a stunning and lasting work of art that brings joy and inspiration to your community.
Step | Description |
|---|---|
1. Clean the concrete surface | Remove dirt, dust, debris, and peeling paint from the concrete surface using a wire brush, pressure washer, or mild detergent. |
2. Repair any cracks or holes | Use a concrete patching compound to fill any cracks or holes in the concrete surface and allow it to dry completely. |
3. Seal the concrete | Apply a concrete sealer to the cleaned and repaired concrete surface to protect it from moisture and improve paint adhesion. Allow it to dry for at least 24 hours. |
4. Prime the surface | Apply a high-quality primer designed for concrete surfaces, and allow it to dry completely according to the manufacturer’s instructions. |
5. Create a design | Plan your mural design on paper or on a digital device, and make any necessary adjustments before transferring it to the wall. |
6. Transfer the design | Use a grid system, projector, or chalk to transfer your design onto the primed concrete surface. |
7. Paint the mural | Begin painting the mural using acrylic or latex paints suitable for outdoor use. Use brushes, rollers, or spray cans to apply the paint, working from the background to the foreground. |
8. Seal the mural | Apply a clear, UV-resistant sealer over the completed mural to protect it from the elements and prolong its life. Allow the sealer to dry according to the manufacturer’s instructions before touching the mural. |
Is it Possible to Create a Mural on a Concrete Surface?
Painting a mural on a concrete surface is a fantastic way to beautify an otherwise dull or neglected area. However, due to the nature and condition of this specific substrate, several factors must be taken into consideration when planning your project.
• Assessing and Preparing the Concrete Surface
Before you begin painting your mural on concrete, it is essential to assess the condition of the surface to determine if it is suitable for your project. Here are some vital points to consider:
– Cleanliness
The concrete surface should be free of dirt, grease, algae, or any other contaminants that might inhibit the paint from adhering properly. Use a power washer, along with a mild detergent and a soft-bristled brush, to clean the surface thoroughly.
– Smoothness
A smooth concrete surface will allow for better paint adhesion and a more consistent final appearance. If you encounter any cracks, holes, or uneven areas, it is crucial to address these imperfections before you start painting.
Use a concrete patch or filler to repair any damaged regions, followed by sanding to ensure a smooth finish.
– Moisture Content
Concrete surfaces can contain varying amounts of moisture, which can adversely affect the paint’s adherence and longevity. To test the moisture content of a concrete surface, it is advisable to perform a “plastic sheet test.”
To do this, secure a piece of transparent plastic sheeting to the surface, sealing all the edges with tape. Leave the sheet in place for 24 hours, and then remove it to check for any condensation.
If condensation is present, you should take appropriate measures to decrease humidity or moisture levels before proceeding with your project.
• Choosing the Right Primer and Paint for Concrete
Once you have prepared the concrete surface, it is essential to choose appropriate paint and primer products designed for use on concrete.
I recommend using a high-quality acrylic or masonry primer, followed by an acrylic or latex paint specifically formulated for exterior concrete surfaces.
– Primer
A good primer is essential to ensure proper paint adhesion, and it will also help to prevent any stains from bleeding through the mural. Apply the primer using a roller or brush, ensuring that you cover the entire surface evenly. Allow the primer to dry for at least 24 hours before proceeding with painting.
– Paint
When selecting paint for your concrete mural, look for a product with high-quality ingredients, excellent adhesion, and resistance to harsh weather conditions, fading, and chipping.
Acrylic or latex paints formulated for exterior concrete surfaces are an ideal choice, as they offer superior durability and flexibility. These paints are available in various finishes, ranging from flat to semi-gloss, allowing you to achieve the desired appearance for your mural.
• Techniques for Painting a Mural on Concrete
Creating a captivating and visually striking mural on concrete requires the use of various techniques and tools. Here are some recommendations to ensure that your mural achieves its full potential:
– Sketching and Drafting
Before you begin painting your mural, it is crucial to layout the design and composition of the piece. Sketch your ideas on paper or create a digital rendering of the proposed mural.
This preliminary planning process will help you to determine the placement of elements within the composition, as well as decide on color schemes, scale, and other important details.
– Grid Method
One effective technique for transferring your design to the concrete surface is to use a grid method. Divide your sketch or rendering into equal sections, and then create a corresponding grid on the concrete surface using chalk or a removable marker.
By doing this, you can ensure that your mural maintains accurate proportions and remains visually balanced.
– Paint Application Techniques
There are various methods and tools for applying paint to the concrete mural, each with its unique effect and result. Some popular paint application techniques include:
- Brushes: Brushes are ideal for precision work and the creation of detailed elements within the mural. They are available in various sizes and shapes, allowing you to create a broad range of textures and effects.
- Rollers: Rollers are great for filling in large areas of color quickly and creating smooth, even coverage.
- Spray Paint: For graffiti-style murals or specific effects, using spray paint can be a creative solution. However, it is crucial to consider local ordinances and environmental factors when choosing to use aerosol-based products.
• Protecting and Maintaining the Mural
To ensure that your concrete mural remains vibrant and intact for many years, it is vital to take steps to protect and maintain it. Apply a UV-resistant, clear concrete sealer or varnish to protect the mural from fading or damage caused by weather conditions.
When selecting a sealer, choose a product that is compatible with the paint used in the mural and ensure that it allows the paint to breathe.
Regular cleaning and maintenance of the mural can also help to prevent dirt buildup and keep the mural looking its best. Use a mild detergent and soft-bristled brush to clean the surface gently, followed by rinsing with water.
In conclusion, painting a mural on concrete is an exciting and rewarding endeavor, requiring proper surface preparation, the use of suitable products and techniques, and regular maintenance.
By following these guidelines and recommendations, you can create a visually stunning and long-lasting work of art that will captivate and inspire you for years to come.
Question | Answer |
|---|---|
Can you paint a mural on concrete? | Yes, you can paint a mural on a concrete surface. However, it’s essential to properly prepare the surface by cleaning and priming it and using the appropriate paint and sealant to ensure the mural’s longevity. |
Which Type of Paint is Suitable for a Concrete Mural?
A well-designed and executed mural can turn a bland concrete wall into a visually captivating work of art. However, choosing the right paint for a concrete mural is crucial, as it ensures the artwork lasts for years to come.
• Understanding the Concrete Canvas
Before discussing the different paint options, it’s important to understand the nature of the concrete surface. Concrete is a porous material, meaning it readily absorbs moisture, which can cause paint to peel or fade over time.
To prevent this, the concrete surface should be properly prepared before painting.
– Surface Preparation
- Clean the surface: Remove any dirt, dust, or debris by using a brush or a pressure washer. This will ensure that the paint adheres appropriately to the surface.
- Repair any damages: If the concrete has any cracks or holes, fill them in using a high-quality concrete patching compound. This will provide a smooth and even canvas for your mural.
- Apply a concrete sealer: This step is crucial to prevent moisture from seeping into the concrete after the mural is completed. Apply a good quality concrete sealer and let it cure for at least 24 hours before moving on to the painting process.
• Types of Paint Suitable for Concrete Murals
There are several types of paint that work well on concrete surfaces. Below are the most common paint types, along with their advantages and drawbacks.
– Acrylic Paint
Acrylic paint is a popular choice for mural artists as it is water-based, easy to use, and available in a vast array of colors. It is also quick-drying and can be applied in thin or thick layers, allowing for greater flexibility in designing your mural.
Pros
- Easy to mix and apply
- Wide variety of colors
- Quick-drying
- Can be easily cleaned up with water
Cons
- May require additional layers for vibrant colors
- Shorter lifespan compared to other paints
– Recommendations:
Based on personal experience, I highly recommend the Golden Heavy Body Acrylics for their excellent pigment load, allowing for vibrant and lasting colors. Another good option is Liquitex Professional Heavy Body Acrylics.
– Masonry Paint
Masonry paint is specifically designed for use on concrete and other porous surfaces. It is highly durable and offers excellent protection against weathering and moisture penetration.
Pros
- Durable and long-lasting
- Weather-resistant
- Good adhesion to concrete
Cons
- Limited color options
- May require a primer
– Recommendations:
Sherwin-Williams Conflex is an excellent masonry paint due to its high-quality, weather-resistant properties. Another great choice is KILZ Interior/Exterior Masonry, Stucco, and Brick Paint.
– Epoxy Paint
Epoxy paint is a two-component paint system consisting of resin and a hardener. When mixed together, these components create durable and long-lasting paint, which is ideal for heavy-duty applications or in areas exposed to high levels of wear and tear, such as floors or outdoor environments.
Pros
- Extremely durable and long-lasting
- Resistant to abrasion, chemicals, and UV rays
- Excellent adhesion to concrete
Cons
- More challenging to mix and apply
- Limited working time before paint hardens
- May require additional ventilation during the application
– Recommendations
I highly recommend Rust-Oleum EpoxyShield Garage Floor Coating for its durability and ease of application. Valspar Premium Clear Epoxy Kit is another option to consider, especially for larger mural projects.
• Sealant and Protective Coatings
To ensure the longevity of your concrete mural, it’s essential to apply a sealant or protective coating. This will act as a barrier against weather, moisture, and other factors that may cause your mural to deteriorate over time.
One highly recommended sealant is Krylon UV-Resistant Clear Coating. It protects your mural from UV rays, preventing fading and discoloration. Another option is the Rust-Oleum Clear Concrete and Masonry Sealer, which provides a durable finish that repels water and extends the life of your mural.
• Conclusion
Choosing the right paint for your concrete mural is a critical step in ensuring its lasting beauty and durability. By understanding the properties of concrete, properly preparing your surface, and selecting a suitable paint type, you can create an artistic masterpiece that will stand the test of time.
Based on personal experience, acrylic, masonry, and epoxy paint are all excellent options with unique advantages and drawbacks. Finally, don’t forget to apply a sealant or protective coating to protect your mural from the elements and preserve it for years to come.
What is the process for preparing a concrete wall for a mural installation?
Murals are an excellent way to spruce up a dull concrete wall, transforming it into a captivating work of art. However, to ensure the longevity and durability of the finished mural, you need to properly prepare the wall.
• Assessing the Wall Condition
Before you start, you must first examine the condition of the wall. This step is crucial as it will determine if any repairs or treatments need to be done to the surface.
– Checking for Moisture and Efflorescence
Moisture can severely damage a mural. Identify any signs of water damage or moisture on the wall, such as damp spots, staining, or mold. If you find moisture, you must identify the source and fix it before proceeding.
Efflorescence refers to the white, powdery residue on a concrete wall caused by water and salt migration. This, too, can be detrimental to your mural. Remove any visible efflorescence with a wire brush and apply a sealer to the wall.
– Inspecting for Cracks and Damage
Examine the wall for cracks, holes, or any other damage. Repair the cracks with a suitable patching compound or use caulk for smaller gaps. Fill the holes using a concrete repair product. Allow the repairs to dry completely before moving on to the next step.
• Cleaning the Wall
A clean surface is crucial for the proper adhesion of the mural paint. Therefore, make sure to remove all dirt, grease, or other contaminants from the wall.
– Power Washing
Power washing is a highly effective method for cleaning concrete walls. Use a power washer with a minimum of 3,000 psi, starting at the top and working your way down. Remember to use a wide-angle spray tip to avoid damaging the concrete.
– Cleaning with a Mild Detergent
If power washing is not an option, use a mild detergent and a stiff bristle brush to scrub the wall thoroughly. Rinse the wall with water, starting at the top and working your way down. Allow the wall to dry completely before proceeding.
• Preparing the Wall Surface
After the wall is clean and dry, it’s time to prepare the surface for optimal paint adhesion.
– Smoothing Uneven Surfaces
If the wall is rough or uneven, you may need to smooth the surface. You can use a concrete sander or grinder for larger imperfections. For small bumps, a rubbing stone or sandpaper can be used.
Be mindful that excessive sanding can result in a surface that’s too smooth, making it difficult for the paint to adhere properly.
– Applying a Concrete Sealer
Applying a high-quality concrete sealer can help to protect your mural from damage caused by moisture, efflorescence, and harsh weather conditions. Sealers also improve paint adhesion, contributing to the longevity of your mural.
Choose a sealer compatible with the type of paint you intend to use and follow the manufacturer’s instructions.
– Using a Primer
Priming the wall is essential to ensure that the mural paint bonds well with the concrete surface. Choose a primer specifically designed for exterior murals, and ensure it is compatible with your chosen paint type.
Apply the primer according to the manufacturer’s instructions, ensuring you cover the entire surface evenly. Allow the primer to dry for the recommended time before applying the paint.
• Selecting Mural Paint
When choosing the paint for your mural, it is crucial to opt for a high-quality, durable paint that is specifically designed for outdoor use. Acrylic and mineral paints are popular choices for murals, as they offer excellent adhesion, UV resistance, and weather resistance.
Remember to check the paint’s compatibility with the sealer and primer used during the preparation process.
• In Conclusion
Preparing a concrete wall for a mural may seem like a daunting task, but following the steps mentioned above ensures that the wall is ready to become a beautiful and long-lasting canvas for your artwork.
By carefully assessing the wall condition, cleaning the surface, applying the appropriate sealers and primers, and selecting the right paint, you can create a stunning mural that will stand the test of time.
Step | Description |
|---|---|
1. Clean the wall | Remove any dirt, grease, or debris from the wall using a pressure washer or a heavy-duty cleaner and scrub brush. Allow the wall to dry completely. |
2. Repair any damage | Fill any cracks, holes, or irregularities in the concrete surface with concrete filler or a patching compound. Allow the filler to dry and sand the surface smooth. |
3. Seal the wall | Apply a concrete sealer to the wall to prevent moisture from seeping through the concrete and damaging the mural. Allow the sealer to dry according to the manufacturer’s instructions. |
4. Apply a primer | Apply a high-quality, acrylic-based primer to the wall to create a smooth, even surface for the mural. Allow the primer to dry completely. |
5. Mark out the design | Using a chalk line or pencil, sketch out the design for the mural onto the primed wall. |
6. Begin painting | Begin painting the mural using acrylic paints that are suitable for outdoor use. Allow each layer of paint to dry completely before applying the next layer. |
7. Seal the mural | Once the mural is complete and the paint is dry, apply a clear, protective sealant to protect the mural from weather and UV damage. Allow the sealant to dry completely. |
What is the process for painting outdoor murals on stucco surfaces?
A well-executed outdoor mural can dramatically enhance the appearance of a stucco wall.
• Preparing the Stucco Surface
– Inspect and Repair
Before starting, it’s essential to carefully inspect the stucco surface for any damages or imperfections. Look for cracks, holes, and detached areas. Repair any damage using a premixed stucco repair patch or a mix of white cement and sand.
Follow the manufacturer’s instructions to prepare and apply the stucco repair patch, allowing it to dry and cure as recommended, usually within 24 to 48 hours.
– Clean the Surface
After repairing, it’s crucial to clean the stucco surface thoroughly. Use a pressure washer or a garden hose with a spray nozzle to remove dirt, debris, and loose particles. Be cautious not to cause new damage to the stucco surface while cleaning.
Allow the surface to dry completely before proceeding to the next step.
• Priming the Stucco Surface
– Choose the Right Primer
To ensure an even and long-lasting result, it’s important to use a high-quality primer designed for exterior stucco surfaces. Choose a primer that’s alkali-resistant, water-based, and has a high level of adhesion.
Remember, a good quality primer will protect your mural from factors such as weather, sunlight, and dirt, ensuring it remains vibrant and vivid for years to come.
– Apply the Primer
Using a roller, apply the primer evenly over the entire stucco surface. Ensure that all areas are covered, paying attention to any small corners and crevices. Allow the primer to dry thoroughly, as recommended by the manufacturer, usually 2 to 4 hours.
• Creating the Mural Design
– Plan Your Design
Before beginning to paint the mural, make sure you have a clear plan for your design. Sketch your ideas on paper, and if necessary, make adjustments until you’re satisfied with the composition. Consider factors such as the size of the mural, the colors you’ll use, and the level of detail you’d like to include.
– Transfer the Design
Once you have your final design, you need to transfer it onto the stucco wall. There are several methods to achieve this, including:
- Projecting the design onto the wall using a digital or overhead projector.
- Using the grid method by dividing the design and the stucco surface into equal squares.
- Drawing the design directly onto the wall using a pencil or chalk.
Choose a method that suits you and transfer the design onto the primed stucco wall.
• Painting the Mural
– Selecting the Paint
Outdoor murals require high-quality paint that can withstand exposure to the elements. Choose acrylic paint, preferably one designed for exterior use, which is UV-resistant and has a high level of adhesion. Select colors according to your design, and make sure you have enough paint to complete the project.
– Painting Techniques
Consider several techniques to paint the mural:
- For a clean and precise result, use brushes of varying sizes to paint the details and larger areas.
- For a textured look and feel, use a sponge or spatula to apply paint onto the stucco surface.
- To create smooth color gradients, you can use airbrushing techniques with the appropriate equipment.
Choose the techniques that suit your design and preferences.
– Layering and Building
Start by painting lighter colors first, and then build up the layers with darker colors. This approach will help prevent colors from mixing unintentionally and creating undesired effects. Allow each paint layer to dry before applying the next to ensure you achieve the desired visual effect.
• Sealing the Mural
After the mural is complete and the paint has had enough time to dry, it’s essential to apply a sealant to protect your mural from environmental factors such as weather, pollution, and sunlight. Use a high-quality, UV-resistant, water-based clear acrylic sealant.
Apply two to three coats of the sealant, allowing each coat to dry as recommended by the manufacturer.
• Final Thoughts
Painting an outdoor mural on stucco can be a rewarding and exciting project. By following these comprehensive guidelines, you can achieve a stunning and long-lasting mural that enhances the aesthetics of any stucco surface.
Don’t hesitate to reach out to a professional muralist or stucco specialist for advice and assistance if needed. Enjoy the creative process, and take pride in the beautiful artwork you’ve created.
Step | Description |
|---|---|
1 | Choose a suitable location for the mural. |
2 | Ensure the stucco surface is clean and dry. |
3 | Repair any damage or cracks on the stucco surface. |
4 | Apply a coat of exterior primer to the stucco surface. |
5 | Sketch the design of the mural on the stucco using a pencil or chalk. |
6 | Paint the mural using high-quality exterior acrylic paint. |
7 | Allow the mural to dry completely. |
8 | Apply a protective clear coat to seal and protect the mural. |