Best Outdoor Shed Paint, 25 Things You Should Know
Choosing the perfect paint for your outdoor shed can be challenging, but worry no more – we are here to help! With numerous factors to consider, such as weather resistance, durability, and color selection, selecting the best paint for your specific needs is crucial. We have analyzed various options and have come up with an ultimate guide to assist you in making an informed decision.
Best outdoor shed paint:
The best outdoor shed paint depends on the surface material. For wooden sheds, Cuprinol Garden Shades provide long-lasting protection and a variety of colors. Hammerite Direct to Rust Metal Paint offers a tough, resilient finish for metal sheds. Dulux Weathershield Smooth Masonry Paint is recommended for brick or concrete sheds due to its exceptional coverage and durability.

Looking to give your outdoor shed a fresh new look? Discover the best outdoor shed paint options that offer exceptional durability and protection against the elements. Read on to learn about our top picks, application tips, and how to choose the perfect shade for your shed makeover!
Contents
- 1 Top-Quality Outdoor Shed Paint for Optimal Results
- 2 Is it necessary to apply primer on my shed prior to painting?
- 3 What is the Most Suitable and Durable Paint for Outdoor Metal Sheds?
- 4 Is it Possible to Apply Exterior Paint on a Shed?
- 5 What are the steps for painting the exterior of a storage shed?
- 6 Is Painting a Shed a Beneficial Approach?
Top-Quality Outdoor Shed Paint for Optimal Results
• Introduction
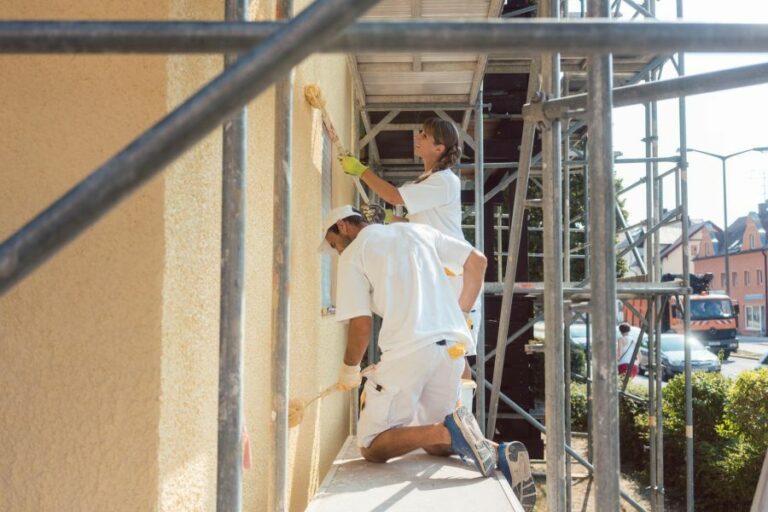
A shed serves multiple purposes in any home or commercial property. It can be used for storage of tools, equipment, and gardening implements, as well as a workspace or even a retreat.
Naturally, you will want your shed to not only be protected from harsh weather but also look pleasant and appealing. This is where choosing the best outdoor shed paint becomes crucial.
In this comprehensive guide, we will discuss the top choices for outdoor shed paint, factors to consider before making a decision, and our expert recommendations to ensure a successful painting project.
• Types of Outdoor Shed Paint
– Wood Paint
Wood paint is specifically designed for outdoor use on wooden surfaces. It provides excellent protection against cracking, peeling, and fading caused by exposure to sunlight, rain, and other harsh environmental factors.
High-quality wood paint also features a waterproof and breathable finish that prevents rotting and maintains the natural look of the wood.
Recommendation: For wooden sheds, I recommend using Cuprinol Garden Shades, which offers long-lasting protection and comes in a wide array of colors.
– Metal Paint
Metal paint is specifically formulated to protect metal surfaces from rust and corrosion. This type of paint works by creating a barrier that prevents moisture and oxygen from reaching the metal surface, ultimately resisting rust formation.
Metal paint is available in different finishes, including glossy, satin, and matte.
Recommendation: For metal sheds, I recommend using Hammerite Direct to Rust Metal Paint, which provides a tough, resilient finish that lasts for years.
– Masonry Paint
Masonry paint is designed for use on brick, concrete, stucco, and other masonry surfaces. It is highly durable and weather-resistant and helps protect the surface from damage caused by moisture, UV rays, and other harsh weather conditions.
Masonry paint is available in a wide range of colors and finishes to suit any style.
Recommendation: For sheds made of brick or concrete, I recommend using Dulux Weathershield Smooth Masonry Paint for its long-lasting protection and exceptional coverage.
• Factors to Consider When Choosing Outdoor Shed Paint
– Durability
The primary purpose of outdoor shed paint is to protect the exterior from harsh weather conditions. Therefore, it is crucial to choose a long-lasting, durable paint that can withstand continuous exposure to sunlight, rain, snow, and other elements.
– Surface Material
As mentioned earlier, different types of outdoor shed paint are designed for specific materials such as wood, metal, and masonry. Make sure to choose a paint that is suitable for your shed’s surface material for optimal results and protection.
– Color and Finish
Outdoor shed paint is available in a wide array of colors and finishes. Consider your personal preferences and the overall look of your property when choosing the color and finish of your shed paint.
Keep in mind that darker colors tend to absorb heat more readily, which may impact the temperature inside your shed.
– Quality of Paint
Investing in high-quality outdoor shed paint will ultimately yield better results compared to cheaper, low-quality options. High-quality paint tends to have better coverage, stronger adhesion, and greater durability, which ultimately means less frequent repainting and maintenance.
– Environmental Considerations
Choose a paint that has low VOC (volatile organic compounds) levels to minimize harmful emissions into the environment. Many reputable paint brands provide eco-friendly options that offer excellent coverage and durability without causing harm to the environment.
• Expert Tips for Painting Your Outdoor Shed
– Proper Surface Preparation
Thorough surface preparation is essential for a successful paint job. Before painting your shed, ensure the surface is clean, dry, and free of any dirt, dust, or debris. If necessary, sand the surface lightly to remove old, peeling paint and create a smooth surface for better paint adhesion.
– Priming
Applying a high-quality primer to the shed’s surface before painting can significantly enhance the paint’s adhesion, durability, and resistance to harsh weather conditions. Ensure the primer is appropriate for the surface material and the paint for optimal results.
– Painting Technique
When painting your shed, use even strokes, working in a consistent direction to achieve a smooth, uniform finish. It is often recommended to apply multiple thin coats of paint rather than a single thick coat to ensure even coverage without dripping or sagging.
– Weather Conditions
Choose a day with favorable weather conditions for your painting project. Mild temperatures and low humidity levels will allow the paint to dry and cure properly.
• Conclusion
In conclusion, selecting the best outdoor shed paint for your project involves considering factors such as durability, surface material, color, and finish, as well as the overall quality of the product.
Additionally, proper surface preparation, priming, painting technique, and weather conditions play significant roles in achieving a professional-looking, long-lasting result.
By following the expert advice and recommendations provided in this comprehensive guide, you can confidently embark on your shed painting project and achieve a stunning, lasting finish that enhances the appeal and utility of your outdoor space.
Brand | Product Name | Color Options | Finish | Durability |
|---|---|---|---|---|
BEHR | BEHR Premium Direct to Metal Paint | Various | Semi-Gloss | High |
Rust-Oleum | Rust-Oleum Stops Rust Protective Enamel | Various | Gloss | High |
KILZ | KILZ Exterior Siding, Fence, and Barn Paint | White, Red | Flat | High |
Valspar | Valspar Duramax Exterior Paint and Primer | Various | Satin, Semi-Gloss | High |
Benjamin Moore | Benjamin Moore Aura Exterior Paint | Various | Flat, Low Lustre, Satin, Semi-Gloss | High |
Is it necessary to apply primer on my shed prior to painting?
It is essential to prime your shed before painting, as it provides an effective barrier between the substrate and the topcoat.
• Benefits of Priming a Shed
Priming your shed before painting provides several benefits that assure long-lasting and appealing results:
– Enhanced Adhesion
A crucial benefit of using a primer is that it enhances the adhesion of the topcoat. This is especially important for surfaces such as wood, which can have inconsistent absorption rates. A well-primed surface ensures that the paint adheres uniformly, preventing problems like peeling, flaking, or blistering.
– Improved Paint Coverage
The primer creates a uniform base that allows the paint to cover the surface evenly. It minimizes the issues caused by porous or textured surfaces, which can lead to uneven paint coverage or color variations. Priming also typically reduces the number of topcoats required, saving time and resources.
– Protection from Moisture
Primer acts as a barrier against moisture, preventing it from causing damage to the shed’s structure. This is especially critical for wooden sheds, which are susceptible to rot and decay from moisture. By sealing the surface, primer reduces the risk of these issues and prolongs the shed’s life.
– Smoother Surface
Priming fills gaps, knots, and blemishes present on the surface of the shed, thereby creating a smoother base for painting. This results in a more professional and aesthetically-pleasing finish with fewer surface imperfections.
• Choosing the Right Primer
To ensure a successful paint job, it’s essential to select an appropriate primer for your shed. Different surfaces and conditions require specific types of primers:
– Oil-Based Primer
Oil-based primers offer superior adhesion and stain-blocking properties, making them ideal for wooden sheds, especially those made from cedar or redwood. These primers effectively seal the surface, protecting it from moisture damage, and providing an even base for paint application.
However, oil-based primers have a longer drying time than latex or water-based primers, and they typically emit strong fumes.
– Latex Primer
Latex, or water-based, primers are more environmentally-friendly and easier to clean up than oil-based products. They dry faster and produce fewer odors, making them suitable for both indoor and outdoor use.
While latex primers are compatible with various surfaces, they may not cover stains and tannins in the wood as effectively as oil-based primers.
– Stain-Blocking Primer
If your shed has stains or noticeable discoloration, you may opt for a stain-blocking primer. These primers are designed to conceal blemishes, ensuring an even color finish during the painting process.
Stain-blocking primers are especially useful for sheds made from wood, which can release tannins that lead to discoloration.
– Metal Primer
For sheds made from metal, it’s essential to choose a primer designed specifically for metal surfaces. These primers offer corrosion resistance, protecting the metal from rust and ensuring a long-lasting finish.
• Steps to Prime and Paint Your Shed
To ensure a successful paint job on your shed, follow these steps:
- Surface Preparation: Begin by thoroughly cleaning the shed’s surface using a recommended cleaner or a mixture of warm water and mild detergent. Remove any dirt, dust, mold, or mildew, and rinse it well. Sand any rough or peeling areas, and after sanding, remove any dust by wiping it down with a damp cloth or sponge.
- Applying Primer: Choose the appropriate primer for your shed based on its material and condition. Apply one coat of the primer with a brush, roller, or sprayer, following the manufacturer’s instructions regarding drying time and recommended application temperature.
- Applying Paint: After the primer has dried, apply your selected paint in multiple thin coats, allowing each coat to dry per the manufacturer’s instructions. Apply the paint evenly and smoothly, using either a brush, roller, or sprayer, and pay attention to any drips or runs that may occur during application.
- Cleanup: After completing the painting process, clean your brushes, rollers, or sprayer using the appropriate cleaning solution.
• Expert Recommendations
I recommend always priming your shed before painting, as it offers several benefits that ensure long-lasting and visually appealing results.
Choose the appropriate primer for your shed based on the material and condition, and follow the application and drying instructions carefully. By doing so, you can enhance the appearance and durability of your freshly-painted shed.
What is the Most Suitable and Durable Paint for Outdoor Metal Sheds?
Keeping outdoor metal sheds looking their best and protecting them from the elements is of utmost importance for homeowners and property managers. One of the most critical factors to consider when maintaining these structures is the choice of paint.
• Key Factors to Consider When Selecting the Best Paint for Metal Sheds
– Corrosion Resistance
Corrosion is the most common problem faced by metal sheds. Paint that provides protection against rust and corrosion will significantly increase the lifespan of your shed.
– Environment-Friendly
Choose paints that are environment-friendly and have low or no volatile organic compounds (VOCs). These paints are safer for both humans and the environment.
– Durability
With outdoor sheds, durability should be a top priority. This means choosing a paint that resists peeling, cracking, and fading from sun exposure, temperature fluctuations, and other outdoor elements.
– Finish
A variety of finishes are available, including glossy, semi-gloss, and matte. The choice depends on your aesthetic preferences and the level of maintenance you are willing to invest in to keep the finish looking fresh.
• The Best Types of Paint for Outdoor Metal Sheds
– Oil-Based Paints
Oil-based paints are highly durable and offer excellent rust and corrosion protection. They are ideal for outdoor metal surfaces, including sheds. However, these paints can emit strong odors and contain more VOCs compared to water-based paints.
- Recommended product: Rust-Oleum Protective Enamel Paint
– Water-Based Acrylic Paints
Water-based acrylic paints are environment-friendly, emit less odor, and have low VOC content. They provide excellent resistance to weathering, staining, and fading, but they may not offer the same level of protection against rust and corrosion as oil-based paints.
- Recommended product: Behr Direct-to-Metal Water-Based Paint
– Solvent-Based Alkyd Paints
These paints are suitable for metal surfaces due to their excellent adhesion, resistance to chalking, and long-lasting durability. Alkyd paints do emit strong odors and contain more VOCs. Ventilation is essential when using these paints to avoid health issues.
- Recommended product: Sherwin-Williams Pro Industrial Urethane Alkyd Enamel
– Zinc-Rich Primers
Zinc-rich primers provide excellent corrosion protection, making them an ideal base layer for metal sheds. They are typically applied before applying topcoat paint, resulting in an extremely durable and weather-resistant finish.
- Recommended product: Tnemec Series 90-97 Tneme-Zinc
• Step-By-Step Painting Guide for Metal Sheds
– Step 1: Surface Preparation
Clean the metal surface thoroughly with a wire brush or sandpaper to remove any loose paint, dirt, and rust. Any remanent rust on the surface should be treated with a quality rust converter.
– Step 2: Prime
Apply a coat of anti-rust primer or zinc-rich primer using a brush or roller. Allow sufficient drying time as specified by the manufacturer before applying the topcoat.
– Step 3: Apply the Topcoat
Apply two thin coats of your chosen paint type, allowing proper drying time between the coats as indicated by the manufacturer. A second coat offers better protection and durability.
– Step 4: Finish
Finish the painting project by applying a clear coat of urethane, polyurethane, or acrylic sealant, offering added UV and weather resistance.
Remember, the durability of the paint often depends on the quality of the application. Ensuring proper surface preparation, priming, and application of the paint will play a massive role in the overall success of the project.
• Maintenance Tips
Regularly inspect your shed for signs of paint damage and rusty spots. Addressing these issues early will help prevent more extensive and costly repairs in the future.
Clean the surface gently with mild soap and water, followed by thorough rinsing, to keep your metal shed looking new, fresh, and vibrant for years to come.
In conclusion, selecting the best paint for your outdoor metal shed can significantly impact its appearance and longevity. By taking into account the specific needs of your project and following the recommended steps, you can ensure a successful and long-lasting outcome.
Brand | Product Name | Type of Paint | Price Range |
|---|---|---|---|
Rust-Oleum | Stops Rust Protective Enamel | Oil-based enamel | $8 – $16 |
Krylon | Rust Protector Enamel | Enamel | $5 – $10 |
Hammerite | Hammered Metal Finish | Alkyd-based | $10 – $25 |
BEHR | Direct to Metal Gloss | Water-based acrylic | $20 – $40 |
Is it Possible to Apply Exterior Paint on a Shed?
When it comes to painting a shed, exterior paint is often the ideal choice. Exterior paint is designed to withstand the elements and provide a long-lasting finish, making it perfect for protecting and beautifying your outdoor structure.
• Why Choose Exterior Paint for Your Shed?
Exterior paint is formulated to be more durable and resistant to the elements than interior paint. The main reasons for choosing exterior paint for a shed are:
– Weather Resistance
Exterior paint is designed to withstand harsh weather conditions such as rain, snow, heat, and UV rays from the sun. These paints contain additives and binders that help them maintain their color and quality even when exposed to moisture, temperature fluctuations, and direct sunlight.
– Durability
Exterior paint is made to last for many years, and it is more resistant to wear and tear compared to interior paint. It can stand up to the constant exposure to outdoor conditions and maintain its integrity better than interior paint, which often cannot handle the same level of wear.
– Mold and Mildew Resistance
Because sheds are often exposed to moisture and dampness, exterior paint is designed to resist mold and mildew growth. This is essential for maintaining a clean and hygienic environment within the shed, as well as ensuring the longevity of the paint.
• Exterior Paint vs. Interior Paint: What’s the Difference?
While exterior and interior paints may share some components, they have key differences that make them more suitable for outdoor applications.
- Pigments: Exterior paints contain pigments that are more resistant to fading and discoloration from UV light exposure. Interior paints usually have less UV-resistant pigments.
- Binders: Exterior paints have more resilient binders to handle temperature fluctuations and weathering. Interior paints have less durable binders, which may not hold up well in outdoor conditions.
- Additives: Exterior paints have additives that increase water resistance, mildew resistance, and overall durability, while interior paints usually contain less of these additives.
- Surface preparation: Exterior paints are made to adhere to wood and other common outdoor surfaces, while interior paints are designed for use on drywall and other indoor surfaces.
• How to Choose the Right Exterior Paint for Your Shed
When selecting exterior paint for your shed, consider the following factors:
– Paint Type
Choose between water-based (latex) and oil-based (alkyd) exterior paints. Latex paints are easier to apply and clean up, dry quickly, and emit fewer odors. Oil-based paints offer better adhesion, particularly on weathered wood surfaces, and provide a more durable finish.
However, they take longer to dry and require mineral spirits for cleanup.
– Sheen
Exterior paint comes in different sheens, such as flat, satin, semi-gloss, and high-gloss. For sheds, satin or semi-gloss sheens are recommended as they provide a balance between durability and esthetic appeal. Flat sheens can absorb dirt, while high-gloss sheens may be too reflective for an outdoor shed.
– Color
Choose a color that complements your home’s exterior or the surrounding landscape. Keep in mind that darker colors may absorb more heat, while lighter colors may help keep your shed cooler during hot summer months.
– Quality
Invest in high-quality exterior paint, as it will provide better coverage, last longer, and offer better protection for your shed. Look for paints that have warranties or guarantees for outdoor use, such as resistance to fading, peeling, and blistering.
• Tips for Properly Applying Exterior Paint to Your Shed
Before applying exterior paint to your shed, follow these steps:
- Prepare the surface: Clean the shed’s exterior, remove any loose paint or rotted wood, and address any repairs or alterations needed.
- Prime: Apply a high-quality exterior primer to ensure proper paint adhesion, especially on raw wood surfaces or areas with stains or discoloration.
- Paint: Apply the exterior paint using a brush, roller, or paint sprayer. Be sure to apply even coats and avoid overloading the surface with paint.
- Dry and cure: Allow the paint to dry completely according to the manufacturer’s instructions. Exterior paint generally takes longer to cure than interior paint, often up to 30 days.
• Shed Maintenance Tips
To keep your shed looking its best and protect your investment, follow these maintenance tips:
- Regularly inspect your shed for any signs of damage or wear, such as chipping paint, leaks, or rot.
- Clean your shed’s exterior at least once a year using mild detergent and water, then rinse with a garden hose.
- Reapply exterior paint or touch up any areas that are showing signs of wear or damage.
By following these guidelines, you can confidently use exterior paint on your shed and enjoy a long-lasting, beautiful, and protective finish.
For further information on exterior paint and its applications, visit the EPA’s guidelines on paint selection and use.
Question | Answer |
|---|---|
Can you use exterior paint on a shed? | Yes |
What are the steps for painting the exterior of a storage shed?
Painting the exterior of a shed not only increases its aesthetic appeal but also helps protect it from weather and insects.
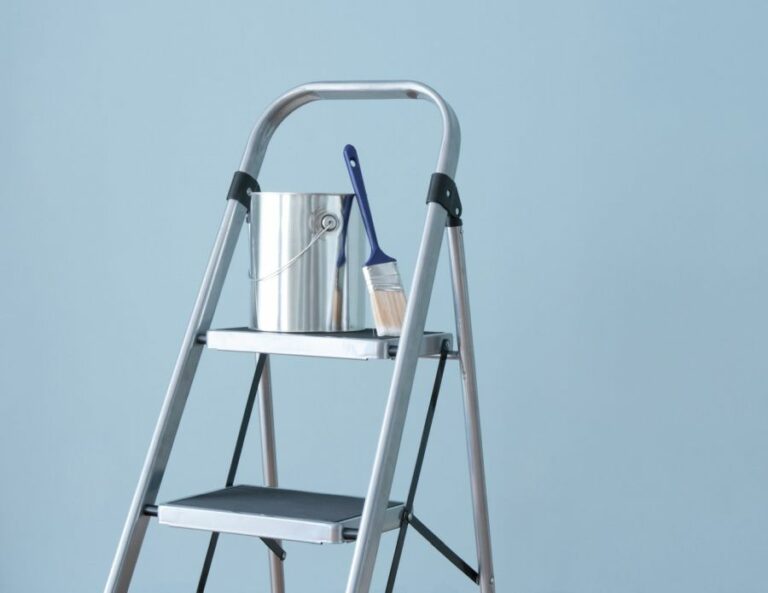
• Step 1: Choose the Right Paint and Supplies
Before you can begin painting your shed, you’ll need to choose the appropriate paint and gather the necessary supplies. Here are a few recommendations:
Paint
Opt for high-quality outdoor paint specifically designed for sheds and other wooden structures. These paints not only last longer but also offer better protection against weather and insects. A good example is Benjamin Moore’s Arborcoat exterior stain.
Supplies
In addition to paint, you will need a:
- paintbrush,
- paint roller,
- paint tray,
- drop cloth,
- ladder,
- sandpaper,
- scraper,
- caulk,
- wire brush,
- painter’s tape, and
- cleaning rags.
Now that you’ve gathered your materials, it’s time to prepare your shed for painting.
• Step 2: Prepare the Shed Surface
Proper surface preparation ensures that the paint adheres well to the shed’s surface and lasts longer. Here are the steps you should follow:
– Inspect the Surface
Examine the shed’s exterior for any signs of damage, such as rot, mold, or cracking paint. If you notice any issues, address them before proceeding with the painting process. For example, you may need to replace rotted boards or remove mold with a mold-killing solution.
– Clean the Surface
To ensure proper paint adhesion, you’ll need to thoroughly clean the shed’s exterior. Use a wire brush to remove dirt, debris, and loose paint particles.
Wash the surface with a solution of mild detergent and water, then rinse it off with a hose. Allow the surface to dry completely before proceeding to the next step.
– Sand the Surface
Sanding the surface not only helps remove any remaining loose paint but also creates a smoother surface for the new paint to adhere to. Use a medium-grit sandpaper and sand the entire shed’s exterior until it’s smooth and free of any rough spots.
– Repair Cracks and Gaps
Examine the shed for any gaps or cracks, especially around windows, doors, and corners. Use an appropriate caulk to fill these gaps and prevent moisture from entering the shed. Once the caulk has dried, sand it smooth for an even finish.
– Mask Off Windows and Doors
Using painter’s tape, mask off any windows, doors, or other areas you don’t want to be painted. This will prevent unwanted paint from getting onto these areas and ensure a clean, finished look.
• Step 3: Apply Primer
Priming the shed’s surface will help the paint adhere better and create a longer-lasting finish. Use a paintbrush to apply a coat of high-quality exterior primer. Be sure to cover the entire surface evenly. Allow the primer to dry for the recommended time before proceeding to the next step.
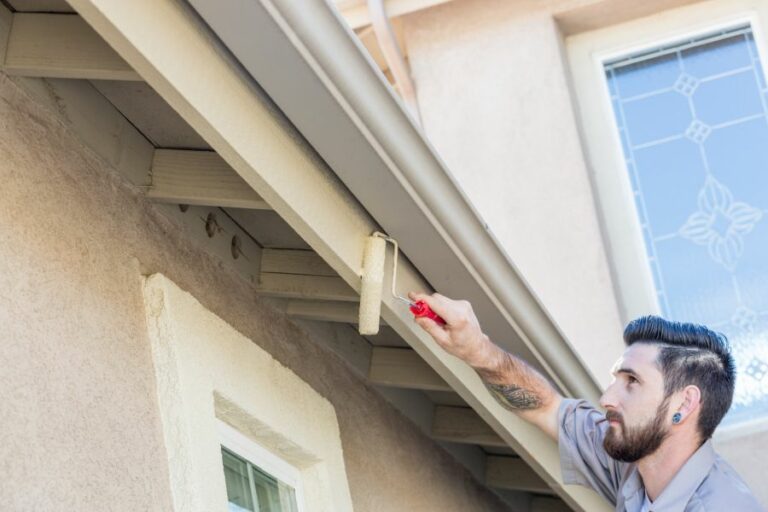
• Step 4: Paint the Shed
Now that your shed is primed and ready, it’s time to apply the paint. Here are the steps to follow:
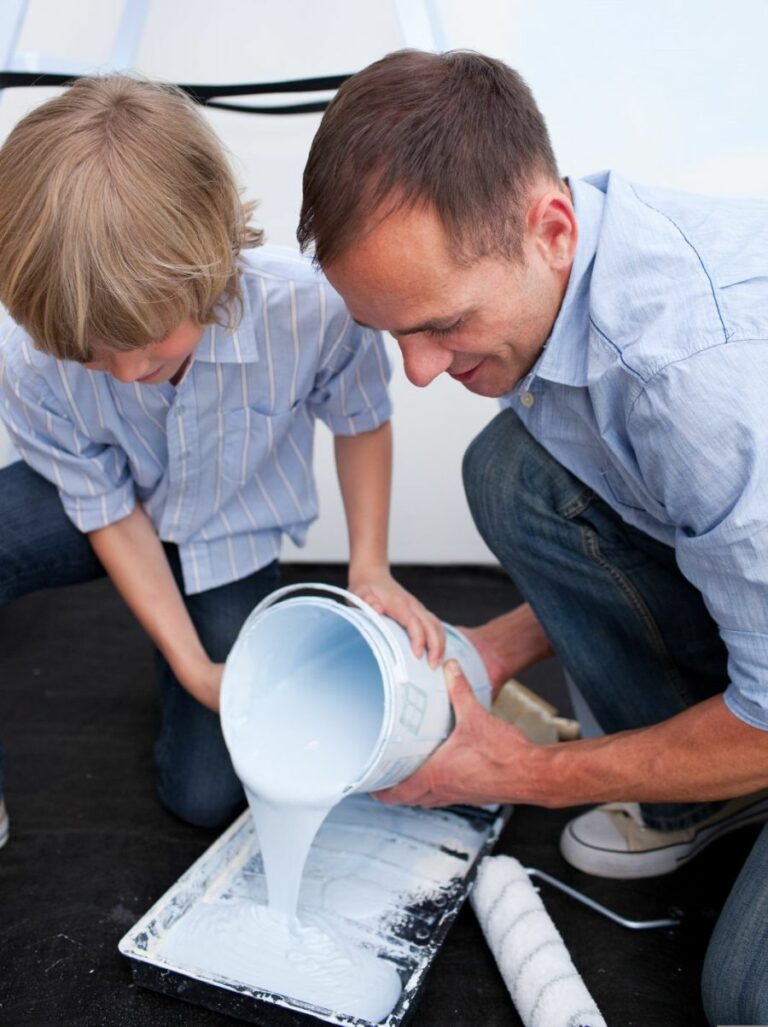
– Stir the Paint
To ensure an even color, thoroughly stir the paint in its container before pouring it into the paint tray.
– Apply the First Coat
Using a paintbrush, cut in around windows, doors, and other detailed areas. Then, use a paint roller to apply an even coat of paint to the entire shed’s exterior. Work from top to bottom and use long, even strokes to avoid drips and streaks.
– Allow the Paint to Dry
Let the first coat of paint dry for the recommended time. Keep in mind that drying times can vary depending on the paint type, humidity, and temperature.
– Apply Additional Coats
Once the first coat is dry, inspect the shed’s surface for any thin or uneven areas. If necessary, apply additional coats of paint, ensuring that each coat dries before applying the next one. Two coats are typically sufficient for a durable, even finish.
• Step 5: Clean Up and Enjoy Your Painted Shed
Once you’ve applied the final coat of paint and allowed it to dry, carefully remove the painter’s tape from windows and doors. Discard any used paintbrushes, rollers, and drop cloths. Store any leftover paint in a cool, dry place for future touch-ups.
With the painting process complete, you can now enjoy the improved appearance and increased protection of your freshly painted shed. By following these steps and using high-quality materials, your shed’s new paint job should last for years to come.
Step |
Description |
|---|---|
1 |
Gather necessary materials and tools, such as paint, brushes or rollers, primer, ladder, and drop cloths. |
2 |
Prepare the shed’s surface by cleaning it thoroughly. Remove dirt, dust, and debris using a brush or pressure washer. |
3 |
Scrape off any loose or peeling paint from the shed with a paint scraper. Sand the surface, if necessary, to create a smooth and even surface for the new paint. |
4 |
Apply a coat of primer to the shed’s exterior. This ensures better paint adhesion and longevity. Allow the primer to dry according to the manufacturer’s instructions. |
5 |
Paint the shed using your chosen paint color. Apply the paint with a brush or roller, starting at the top and working your way down. Use even strokes and work in small sections to ensure full coverage. |
6 |
Allow the paint to dry completely, following the recommended drying time on the paint can. If necessary, apply a second coat for more coverage or deeper color. |
7 |
Clean up your tools and materials, and admire your freshly painted shed. |
Is Painting a Shed a Beneficial Approach?
Painting a shed can be a practical yet aesthetically appealing addition to your outdoor space.
• Benefits of Painting a Shed
– Protection from Weather
One of the primary reasons to paint a shed is to protect it from harsh weather conditions. Unpainted wood can suffer from the damaging effects of moisture, causing it to rot, warp, or develop mold. A coat of paint can act as a barrier and help keep moisture at bay.
– UV Protection
Prolonged exposure to sunlight can cause the wood’s color to fade, leading to a dull and worn-out appearance. Applying paint with UV protection can extend the life of your shed and maintain its vibrant color for a longer period of time.
– Enhanced Aesthetic Appeal
A fresh coat of paint can greatly improve your shed’s appearance, making a once-dull structure an eye-catching complement to your garden or backyard. Besides, you have the opportunity to choose from a vast array of colors and finishes to match your personal style.
– Increased Durability
Painting your shed can increase its overall durability, especially if you use high-quality paint designed for outdoor use. This can help in prolonging its lifespan and save you money on repairs or replacements in the long run.
• Types of Paint for Sheds
Before you start painting, it’s essential to choose the right type of paint. Here are a few options to consider:
– Exterior Wood Paint
Exterior wood paint is ideal for sheds, as it is specifically designed to protect wooden surfaces from harsh outdoor elements. This type of paint comes in various colors and finishes, such as gloss, satin, and eggshell.
– Shed and Fence Paint
Shed and fence paint is formulated to provide long-lasting protection to wooden structures. This type of paint typically has a wax-enriched, water-repellent formula that helps protect against moisture and soften the effects of UV rays. However, it usually comes in a limited range of colors.
– Wood Stain
Wood stain, unlike paint, soaks into the wood’s grain and enhances its natural color. It also offers protection from moisture and UV rays. If you prefer a more natural appearance for your shed, a wood stain is a perfect choice. However, it requires more regular maintenance than paint.
• Preparations and Tips for Painting a Shed
– Preparing the Surface
Before painting, it’s essential to properly prepare the shed’s surface. Start by cleaning your shed to remove dirt, algae, or debris using a stiff brush and a mild detergent. For wooden sheds, check for damaged or rotten wood and replace it if necessary.
– Sanding
Sanding is an important step, especially if your shed has a previous layer of paint or varnish. Use sandpaper to remove any flaking or peeling paint and to create a smooth surface perfect for the new coat of paint to adhere to.
– Priming
Applying a primer will improve the paint’s adhesion and longevity. Choose a primer specifically designed for outdoor wood and be sure to follow the manufacturer’s instructions for application and drying times.
– Choosing the Right Weather
Ideally, paint your shed on a dry day with moderate temperatures and low humidity. Avoid painting in direct sunlight, as it can cause the paint to dry too quickly and potentially crack or peel.
– Techniques and Tools
Choose a suitable paint brush or roller for your shed’s size and the type of paint you’re using. For large surfaces, a roller can save time, while a brush enables greater precision for trim and edges. Be sure to apply paint in thin, even coats and give ample time for each coat to dry before applying the next.
• In Conclusion
Painting a shed can not only enhance its appearance but also protect it from the elements, ensuring it lasts for years to come.
By choosing the right type of paint, preparing the surface correctly, and following the best painting practices, you can give your shed a makeover that adds both practical value and visual appeal to your outdoor space.