Best Paint For Outdoor Pumpkins
Are you looking to make a statement with some beautifully painted outdoor pumpkins this fall? Don’t stress – we’ve got you covered! We understand that finding the perfect paint to withstand the elements and create a stunning masterpiece can be overwhelming. Fear not, because we’re here to share the best paint for outdoor pumpkins, ensuring you’ll be the talk of the neighborhood with your festive decor.
Best paint for outdoor pumpkins:
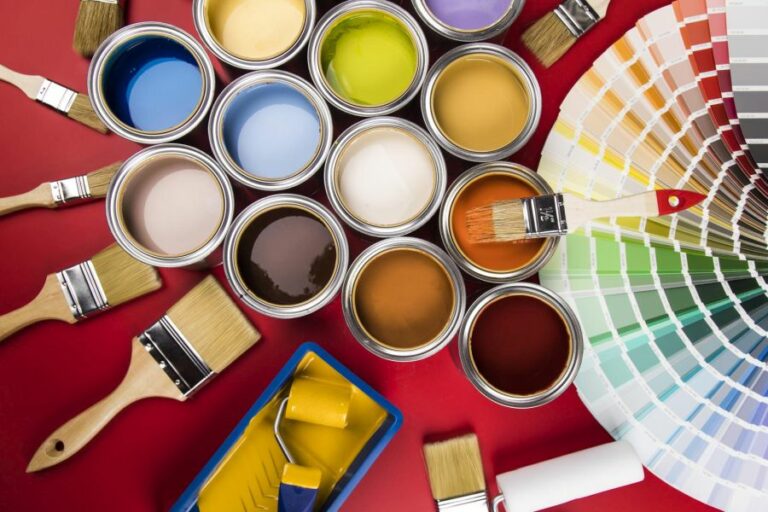
The best paint for outdoor pumpkins includes acrylic paint, outdoor craft paint, spray paint, and enamel paint. High-quality acrylic brands like Liquitex or Golden or specialized outdoor craft paints like DecoArt Patio Paint and FolkArt Outdoor Paint are recommended. Rust-Oleum Painter’s Touch 2X Ultra Cover spray paint and enamel paint like Testors or Humbrol can be used for intricate designs.

Looking for the perfect paint to make your outdoor pumpkins stand out this season? We’ve got you covered! In the next section, discover our top recommendations for the best paints that ensure long-lasting, vibrant colors for your pumpkin decorating adventures. Dive in and get ready to up your pumpkin game!
Contents
- 1 Top-Quality Paint for Outdoor Pumpkin Decoration
- 2 What Type of Paint is Suitable for Outdoor Pumpkin Decoration?
- 3 How can you ensure paint remains on pumpkins when placed outdoors?
- 4 Is it Possible to Place Painted Pumpkins Outdoors?
- 5 What Assists in Adhering Paint to Pumpkins?
- 6 Is It Necessary to Prime Pumpkins Prior to Painting Them?
- 7 What is the process for painting an uncarved pumpkin?
Top-Quality Paint for Outdoor Pumpkin Decoration
• Introduction
Painting outdoor pumpkins for Halloween or autumn decorations can be a fun and creative activity for the whole family. However, choosing the right paint for your outdoor pumpkins is crucial to ensure that your creations last throughout the season.
• Types of Paint Suitable for Outdoor Pumpkins
– Acrylic Paint
Acrylic paint is one of the most popular options for painting outdoor pumpkins. It is easily available in most craft stores and comes in a wide range of vibrant colors. Acrylic paint dries quickly, so it’s perfect for impatient artists, and it is water-resistant when dry, which is essential for outdoor decorations.
From personal experience, I recommend using high-quality acrylic paint brands such as Liquitex or Golden since these are highly pigmented and will provide more coverage and durability than cheaper brands.
– Outdoor Craft Paint
Some brands of paint are specifically designed for use on outdoor surfaces. These outdoor craft paints are usually acrylic-based and include additives that make them more resistant to weather conditions such as sunlight, rain, and temperature changes.
Examples of outdoor craft paint brands suitable for outdoor pumpkins include DecoArt Patio Paint and FolkArt Outdoor Paint.
– Spray Paint
Spray paint is another excellent option for painting outdoor pumpkins. It offers quick and even coverage and comes in various colors and finishes, such as matte, satin, and glossy. Make sure to choose a spray paint that is designed for outdoor use to ensure its durability and resistance to weather conditions.
I personally recommend using Rust-Oleum Painter’s Touch 2X Ultra Cover paint, as it bonds well with the pumpkin surface and is highly weather-resistant.
– Enamel Paint
Enamel paint is a highly durable and weather-resistant paint option that is suitable for outdoor surfaces. Some enamel paint brands, such as Testors or Humbrol, are often used in model painting, making them ideal for intricate pumpkin designs.
• Tips for Painting Outdoor Pumpkins
To achieve the best results when painting outdoor pumpkins, consider these useful tips:
- Clean and dry the pumpkin: Before painting, make sure to clean the pumpkin’s surface with warm water and mild soap to remove dirt and residue. Allow the pumpkin to dry thoroughly before applying the paint.
- Prime the pumpkin: To help the paint adhere better to the pumpkin’s surface and improve its durability, apply a primer before painting. White acrylic gesso works well as a primer for most paint options, but make sure to check the compatibility with your chosen paint type.
- Apply multiple coats: Depending on the paint type you’re using and the design of your pumpkin, applying multiple coats may be necessary to achieve even and vibrant coverage. Allow each coat to dry fully before applying the next one.
- Seal the paint: To protect your painted pumpkin from weather conditions and prolong its life, apply a clear, glossy, or matte sealant after the paint has dried completely. Make sure to choose an appropriate sealant that is compatible with your paint type, such as a clear acrylic varnish for acrylic or enamel paint.
• Recommendations and Resources
As an experienced pumpkin painter, I highly recommend trying various paint types to find the one that best suits your preferences and desired outcome. Ensure that you invest in high-quality paint and pay attention to the pumpkin’s preparation and sealing for long-lasting decoration.
In conclusion, the best paint for outdoor pumpkins depends on your personal preferences, design complexity, and desired durability. By following the tips in this article and using recommended paint types, you are sure to create beautiful and long-lasting outdoor pumpkin decorations.
What Type of Paint is Suitable for Outdoor Pumpkin Decoration?
Decorating outdoor pumpkins is a fun and creative way to celebrate the fall season. From Halloween to Thanksgiving, pumpkins can be painted with various designs and colors to add a festive touch to your front porch or yard.
In order to achieve long-lasting, vibrant results, one must consider the type of paint to use on outdoor pumpkins.
• Acrylic Paint – A Popular Choice
One highly recommended type of paint for outdoor pumpkins is acrylic paint. Acrylic paint is water-based, non-toxic, and quick-drying, making it an excellent choice for both beginners and experienced artists. It offers a wide range of colors, finishes, and consistencies.
Furthermore, acrylic paint is highly resistant to water and weather, ensuring that your pumpkin decorations will last throughout the fall season.
You can find acrylic paint at any local craft or art supply store. For optimal results, choose high-quality, artist-grade acrylic paint. A good quality acrylic paint will result in bright, long-lasting colors that adhere well to the pumpkin surface.
You can also find acrylic paint in a variety of finishes, such as matte, satin, and gloss. Choose a finish that complements your pumpkin design and personal preferences.
– How to Prepare and Paint Your Pumpkin with Acrylics
Before you begin painting your pumpkin, make sure to clean its surface thoroughly. Remove any dirt or debris, and allow the pumpkin to dry completely. Wiping the pumpkin down with a damp cloth or paper towel usually works well.
Next, apply a coat of acrylic gesso to the pumpkin. Gesso is a primer that helps the paint adhere better to the surface and prevents the color from fading. Allow the gesso to dry according to the manufacturer’s instructions.
After the gesso has dried, you can start painting your pumpkin. Using a pencil, lightly sketch your design onto the pumpkin. Then, carefully paint your design with acrylic paint, using an appropriate brush size and shape for your design.
Be sure to apply thin, even coats, allowing each coat to dry before applying the next.
After you have finished painting your design, allow the pumpkin to dry completely. To seal and protect your artwork, apply a coat of outdoor sealants, such as a clear acrylic varnish or spray sealer. This will help to ensure that your pumpkin’s paint withstands the elements throughout the fall season.
• Spray Paint – A Versatile Option
Another excellent choice for painting outdoor pumpkins is spray paint. Spray paint provides a smooth, even coat and is available in a wide range of colors and finishes. Additionally, spray paint adheres well to the pumpkin surface and dries quickly.
For the best results, choose a high-quality spray paint specifically labeled for outdoor use. This will ensure that the paint is weather-resistant and durable. Rust-Oleum and Krylon are popular brands that offer outdoor spray paint in various colors and finishes.
– Tips for Using Spray Paint on Pumpkins
Before you begin spray painting your pumpkin, clean its surface, as previously mentioned. Additionally, be sure to work in a well-ventilated area, preferably outside or in a garage, and wear a protective mask to avoid inhaling paint fumes.
To achieve a clean, even coat on your pumpkin, hold the spray paint can approximately 12 inches away from the surface. Apply a thin coat of paint using a back-and-forth motion, overlapping each pass slightly. Allow the paint to dry before applying a second coat, if necessary.
Once the paint is completely dry, you can add any additional details or designs using acrylic paint and a brush, as previously described. After your design is complete, seal and protect your pumpkin with an outdoor sealant, such as a clear acrylic varnish or spray sealer.
• Decorating Pumpkins with Paint Pens – A Convenient Alternative
For those who prefer a mess-free, detail-oriented approach to painting outdoor pumpkins, paint pens are a great alternative. Paint pens offer the convenience of a pen with vibrant color and coverage of paint.
They are particularly useful for adding intricate details, patterns, or lettering to your pumpkin designs.
Choose paint pens that are specifically designed for outdoor use to ensure durability and weather resistance. Read the manufacturer’s instructions on how to activate and use the paint pen properly.
– Applying Paint Pens to Your Pumpkin
Clean your pumpkin as per the steps outlined earlier to ensure a smooth surface for the paint pens to adhere. Once your pumpkin is clean and dry, you can begin drawing your design directly onto the pumpkin using the paint pens. No primer or gesso is required for this method.
After you have completed your design and the paint pens, have dried, apply a coat of outdoor sealant to protect your pumpkin and prolong the life of your artwork.
• Conclusion
Decorating outdoor pumpkins is a delightful way to celebrate the fall season. By choosing the right type of paint, such as acrylic paint, spray paint, or paint pens, and following the proper application techniques, you can create beautiful and lasting designs that will brighten up your outdoor space.
Remember to clean, prime, and seal your pumpkin to ensure its durability and longevity throughout the fall season. Happy painting!
Type of Paint | Description |
|---|---|
Acrylic Paint | Acrylic paint is a popular choice because it is water-based, easy to clean, and dries quickly. |
Outdoor Latex Paint | Outdoor latex paint is more durable and water-resistant, making it suitable for outdoor use. |
Spray Paint | Spray paint can provide even coverage and is available in a variety of colors and finishes. |
Paint Markers | Paint markers allow for precise application and are suitable for creating detailed designs on pumpkins. |
Temporary Paint | Temporary paint is an option for temporary decoration and can be easily removed after the event. |
How can you ensure paint remains on pumpkins when placed outdoors?
Painting pumpkins is a fun and creative way to decorate your outdoor space during the fall season. However, keeping the paint on your pumpkins can be a challenge, especially when they are exposed to the elements.
• Choose the Right Pumpkin
Selecting the ideal pumpkin is the first step in ensuring your painted pumpkin will last. When choosing a pumpkin, keep the following tips in mind:
- Size: A medium to large-sized pumpkin is ideal, as it provides a larger surface area for painting and is less likely to rot quickly.
- Shape: Round and symmetrical pumpkins are easier to paint and often look more visually appealing when painted.
- Texture: Smooth pump10.27.217.230kins with minimal ridges and grooves are the best choice for holding paint and allowing for easier application.
• Prepare the Pumpkin for Painting
In order to help the paint adhere to your pumpkin, it’s essential to properly prepare its surface. Follow these steps for optimal paint adhesion:
- Clean: Wipe the pumpkin’s surface with a damp cloth to remove any dirt and debris.
- Dry: Allow the pumpkin to completely air dry before applying any paint.
• Select the Right Paint
Using the correct paint for your pumpkin is another crucial factor in ensuring a lasting paint job. Look for paints specifically designed for outdoor use and formulated to bond with non-porous surfaces, such as acrylic or latex paint.
Additionally, it’s helpful to use a primer before painting, as this creates a solid base for the paint to adhere to.
• Apply the Paint Properly
The manner in which you apply the paint to your pumpkin also impacts its longevity. Follow these guidelines for successful pumpkin painting:
- Use a Primer: Apply a coat of primer to create a strong base for the paint, which allows for better adhesion and increased durability.
- Use Multiple Coats: Apply at least two coats of paint, allowing each layer to dry completely before applying the next. This creates a more vibrant and long-lasting color.
- Seal the Paint: After the final coat of paint has dried, apply a clear sealant to protect the paint from the elements and maintain a polished appearance.
• Protect Your Painted Pumpkins from the Elements
Once your pumpkin masterpiece is complete, it’s important to protect it from outdoor factors that can cause the paint to chip, fade, or peel:
- Provide Shelter: Place your painted pumpkins in a sheltered area, such as under an awning, to shield them from direct sunlight and precipitation.
- Elevate: Elevating your pumpkins ensures they are not sitting in standing water or damp foliage, which can lead to accelerated rotting.
- Rotate: Rotate your pumpkins every few days to prevent flat spots from forming and to ensure even exposure to the elements.
• Extend the Life of Your Pumpkin
Even with proper paint application and protection from the elements, it’s essential to acknowledge that pumpkins are perishable and will eventually begin to decay. However, there are steps you can take to prolong their lifespan:
- Inspect: Regularly inspect your pumpkins for signs of rot or soft spots and address the issues promptly.
- Reapply Sealant: Periodically reapply a clear sealant to protect the paint and maintain the pumpkin’s appearance.
- Keep it Cool: Avoid placing your pumpkins in direct sunlight or overly warm areas, as this can accelerate the decay process.
In conclusion, by selecting the right pumpkin, preparing it properly, using the correct paint and application techniques, and taking care of your creation, you can keep the paint on your outdoor pumpkins looking fresh throughout the season.
Follow these guidelines, and enjoy showcasing your artistic talents with beautifully painted pumpkins this fall.
Step | Instructions |
|---|---|
1 | Choose the right paint. Use acrylic or weather-resistant paint for outdoor pumpkins. |
2 | Clean the pumpkin. Remove any dirt or debris from the surface before painting. |
3 | Apply a primer. Use a primer specifically designed for outdoor use to protect the paint from weather conditions. |
4 | Paint the pumpkin. Apply thin, even layers of paint and allow each layer to dry fully before adding another layer. |
5 | Seal the paint. Apply a clear, weather-resistant sealer to protect the paint and help keep it in place. |
6 | Place the pumpkin in a sheltered area. Keep the painted pumpkin away from direct sunlight and rain if possible. |
Is it Possible to Place Painted Pumpkins Outdoors?
Painted pumpkins are a popular and creative way to celebrate the fall season and Halloween. Many people wonder, though, if it is safe and recommended to place these decorative pieces outside.
• Factors to Consider When Displaying Painted Pumpkins Outside
Before you decide to place your painted pumpkins outside for display, there are several factors that you should consider. These factors can greatly impact the longevity and appearance of your painted pumpkins.
– Type of Paint Used
The type of paint you use on your pumpkins can greatly affect their durability when exposed to outdoor elements. Acrylic paint is the most commonly used medium for painting pumpkins, as it dries quickly and provides a smooth, even finish.
However, acrylic paint is not waterproof and can be damaged when exposed to rain, snow, or high humidity. To avoid potential paint damage, use outdoor or waterproof paint, or apply a clear protective sealant over your acrylic paint.
– Surface Preparation
Proper surface preparation is essential for ensuring that your paint adheres well to the pumpkin and can withstand outdoor conditions. This involves cleaning the pumpkin thoroughly to remove any dirt or debris and optionally applying a primer before painting.
Priming your pumpkin creates a smoother surface for paint application and can improve the durability of your painted pumpkin when exposed to outdoor elements.
– Pumpkin Quality
The quality and freshness of the pumpkins you choose to paint will significantly impact how long they last outdoors.
Be sure to select pumpkins with firm, smooth surfaces and free of bruising or damage. Soft, damaged pumpkins are more likely to rot quickly, especially when exposed to varying outdoor temperatures and moisture.
• Protective Measures for Painted Pumpkins
Taking certain precautions can extend the life of your painted pumpkins and maintain their appearance when displayed outside.
– Applying a Protective Sealant
To protect your painted pumpkins from weather damage, apply a clear, protective sealant after the paint has dried. Available in spray or brush-on forms, these sealants provide a weather-resistant layer that will help protect your painted pumpkins against rain, snow, and sun exposure.
– Elevate Your Pumpkins
Keeping your painted pumpkins off the ground will help prevent them from sitting in pooled water or other moisture that can cause your pumpkins to rot or the paint to peel. Try placing your pumpkins on a platform, stand, or a plate with a lip to keep them elevated and ensure better drainage.
• Weather Impact on Painted Pumpkins
Weather conditions can greatly impact the lifespan and appearance of your painted pumpkins. Be aware of your local climate and take precautions to protect your pumpkins from potential damage.
– Extreme Temperatures
Both high and low temperatures can damage your painted pumpkins. Excessive heat can cause the paint to crack or peel, while extreme cold can cause the paint to become brittle and flake off.
It is best to display your painted pumpkins in shady or sheltered areas where they would be less exposed to temperature fluctuations.
– Moisture and Humidity
Rain, snow, and high humidity can cause paint to peel, bubble, or become discolored. Be sure to use waterproof paint or apply a protective sealant to prevent these adverse effects.
During periods of heavy or prolonged precipitation, consider temporarily bringing your painted pumpkins indoors to protect them.
• Conclusion: Displaying Painted Pumpkins Outdoors
Yes, you can put painted pumpkins outside, but it is important to take necessary precautions and be aware of the potential impact of weather conditions on your festive decorations.
By choosing the right paint and properly preparing your pumpkins, you can create beautiful, lasting outdoor displays that celebrate the fall season and Halloween.
| Can you put painted pumpkins outside? | |
|---|---|
| Put painted pumpkins outside? | Yes |
| Considerations | Weather conditions, type of paint used, and potential wildlife interactions |
| Tips | Use outdoor paints, sealant, and place them on a covered surface or elevated platform |
What Assists in Adhering Paint to Pumpkins?
• Introduction to Painting Pumpkins
Painting pumpkins is an incredibly popular activity, particularly during the fall months and the Halloween season. It provides a fun and creative way to decorate and celebrate the season, but it can also be a tricky task.
Unlike a flat canvas, pumpkins have a curved, somewhat slick surface that can make it difficult for paint to adhere properly.
• Choosing the Right Paint for Pumpkins
Picking the right type of paint is crucial for ensuring that it sticks well to the pumpkin’s surface. The best types of paint to use on pumpkins are acrylic or tempera paint, as they are water-based and adhere well to the pumpkin’s surface.
Both acrylic and tempera paints are available in a variety of colors, dry quickly, and can be easily cleaned up with water. Furthermore, they are both non-toxic, making them safe to use by people of all ages.
– Acrylic Paint for Pumpkins
I recommend using acrylic paint for those who are serious about creating a lasting piece of art on their pumpkin. Acrylic paint is known for its durability and resistance to fading, even when exposed to sunlight and the elements.
When using acrylic paint, it is essential to apply it in thin layers, as thicker layers may chip or peel. Adding multiple thin layers of paint will lead to a more vibrant, opaque color.
– Tempera Paint for Pumpkins
Tempera paint is a more budget-friendly option and is particularly ideal for younger kids’ pumpkin painting projects. The paint is washable and easy to handle but may not last as long as acrylic paint when exposed to the elements.
It might be necessary to seal your pumpkin’s surface with a clear sealer after using tempera paint to increase its durability.
• Preparing the Pumpkin for Painting
Before starting the painting process, it is essential to thoroughly clean the pumpkin. Dirt and debris on the pumpkin’s surface can prevent the paint from sticking evenly.
– Cleaning the Pumpkin
To clean the pumpkin, use a damp cloth or sponge to gently wipe the surface. Make sure to remove any dirt or debris, paying particular attention to crevices and indentations.
After cleaning, dry the pumpkin thoroughly using a towel or allowing it to air-dry. Painting on a damp surface may cause the paint to smear or not adhere correctly.
– Adding a Primer (Optional)
Although not strictly necessary, applying a primer to the pumpkin’s surface can help to create a smooth, even base for painting. A white, water-based primer or gesso works well in this context, providing a surface that grips the paint and ensures it sticks properly.
Using a primer also offers the opportunity to incorporate additional effects or texture into the pumpkin painting. For instance, a textured primer can be used to build up rough or raised areas on the pumpkin’s surface.
• Painting Techniques for Pumpkins
Once the pumpkin is prepped, it’s time to begin painting. There are many different techniques and tools available to create a unique work of art on the pumpkin’s surface.
– Brushes and Sponges
When painting a pumpkin, it is important to use the appropriate type of brush or sponge for the desired effect. Flat brushes work well for regular strokes, while round brushes are ideal for detailed work and dabbing paint on the pumpkin.
Sponges can be used to create a variety of effects, such as stippling and gradated colors. This technique involves dabbing the sponge onto the pumpkin’s surface to apply the paint in a unique, textured pattern.
– Stencils and Patterns
For those who prefer a more structured approach or are less confident in their freehand painting abilities, using stencils or patterns can be beneficial. These can be purchased, created from scratch, or even made using a computer and printer.
Stencils can be held or taped onto the pumpkin’s surface and used as a guide for painting. They can be especially helpful when painting intricate and repetitive designs or creating bold, graphic shapes on the pumpkin.
– Layering Paint for Depth and Dimension
Achieving a vibrant, opaque color on a pumpkin may require several layers of paint. However, the layering process can also be used intentionally to create depth and dimension in the painting.
For example, starting with a darker color and layering a lighter color on top can create the illusion of shadows and highlights on the pumpkin’s surface.
• Sealing the Painted Pumpkin
After the paint has had sufficient time to dry, applying a sealant to the pumpkin can help protect the paint and increase its longevity. Look for a clear, water-based sealant suitable for outdoor use.
To apply the sealant, brush on a thin, even layer over the painted surface. Make sure to cover all painted areas, and allow the sealant to dry completely before moving or displaying your masterpiece.
• Conclusion
With the right materials, techniques, and a bit of patience, painting pumpkins can create unique, long-lasting decorations for the fall season.
By choosing the appropriate paint, carefully preparing the pumpkin’s surface, employing various painting tools and techniques, and sealing the final product, you can create a beautiful piece of art that will surely impress you.
Is It Necessary to Prime Pumpkins Prior to Painting Them?
Painting pumpkins is a popular activity during the fall season, particularly during Halloween. Creativity can run wild as pumpkins can be turned into fun and spooky decorations to delight guests or passersby. A common question often arises: should pumpkins be primed before painting?
• Why Priming is Important
Priming essentially means applying a preliminary layer of a base coating to the surface of an object before painting it. In the context of pumpkin painting, priming serves several purposes:
– Enhanced Adhesion
Pumpkins have a naturally smooth, waxy surface, which can be challenging for paint to adhere to directly. Priming a pumpkin with a suitable product will help promote better adhesion, ensuring that the paint sticks well to the pumpkin’s surface and lasts for a longer duration.
– Improved Paint Coverage
The natural color, pattern, and texture of a pumpkin can affect the final look of a painted design. Priming the pumpkin with an opaque base layer helps to even out these variations, providing a smooth and uniform surface for painting. This improves the overall appearance and consistency of the paint job.
– Protection and Preservation
Priming can help seal the pumpkin’s surface, preventing moisture from seeping into the pumpkin and causing rot. This not only helps maintain the integrity of the pumpkin itself but also contributes to the durability of the paint job.
• Selecting the Right Primer
Choosing a suitable primer for painting pumpkins is crucial for achieving the best results. While there are numerous primers available in the market, it is recommended to use one that is formulated explicitly for outdoor or multi-purpose use.
Such primers are designed to adhere well to various surfaces, withstand environmental elements, and allow for better paint application.
A popular choice among pumpkin painters is a spray primer, as it offers quick and even coverage. Acrylic gesso, commonly used for priming canvases, can also serve as an effective option since it dries quickly and can be easily found in most art supply stores.
Another useful primer is the Sargent Art Acrylic Gesso, which provides an excellent base for both acrylic and oil paints.
• Prepping the Pumpkin for Priming
Before applying any primer, it is essential to take a few preparatory steps to ensure the pumpkin is clean and ready to be painted. These steps include:
– Cleaning the Pumpkin
Gently wipe the pumpkin down with a damp cloth or paper towel to remove any dirt or debris. Alternatively, use a mild soap and water solution to clean it, followed by a thorough rinse to remove any soap residue. Allow the pumpkin to dry completely before proceeding to the next step.
– Light Sanding
Using a fine-grit sandpaper, lightly sand the pumpkin’s surface, focusing on areas where the paint will be applied. This will help remove any waxy finish and create a slightly rough surface for better primer adhesion.
Remember to wipe the surface with a damp cloth or paper towel to remove any dust or debris after sanding.
– Placement and Protection
Place the pumpkin on a flat surface protected by a drop cloth or newspaper to prevent any paint or primer from staining the area.
• Priming the Pumpkin
Once the pumpkin is prepped, proceed with the following steps to properly prime it:
- Shake or stir the primer well before using it. Ensure it is appropriately mixed and ready for application.
- If using a spray primer, hold the can approximately 8-12 inches away from the pumpkin and apply a light, even coat in sweeping motions. Allow the primer to dry according to the manufacturer’s recommendations, generally around 15-30 minutes.
- If using acrylic gesso or another brush-on primer, apply a thin, even coat using a soft-bristle paintbrush or sponge. Allow the primer to dry thoroughly, typically taking 30 minutes to an hour.
- After the primer has dried, inspect the pumpkin to ensure complete and even coverage. If necessary, apply an additional coat of primer and let it dry before proceeding to paint the pumpkin.
• Painting Your Primed Pumpkin
With your pumpkin primed and ready, you can now proceed to paint it with acrylic or oil-based paints. Have fun, and get creative with your designs!
In conclusion, priming pumpkins before painting greatly benefits the final result by improving paint adhesion, coverage, and durability, as well as helping preserve the pumpkin itself.
By following the tips and steps provided in this article, you’ll be well on your way to creating impressive painted pumpkins that last throughout the fall season.
What is the process for painting an uncarved pumpkin?
• Choosing the Perfect Pumpkin
It is essential to select the perfect pumpkin for your painting project. Ideally, you should choose one that is smooth and without any deep grooves or ridges. This will make the painting process much easier and result in a better final product.
When selecting a pumpkin, it is also important to consider its size and shape. Choose a pumpkin that will best fit your intended design or theme. Additionally, ensure the surface area is large enough to create your desired artwork.
The pumpkin should also have a sturdy stem that is not damaged, as this will help prolong the life of the pumpkin.
• Gathering the Necessary Materials
To paint an uncarved pumpkin effectively, it is essential to gather the appropriate materials beforehand. These include:
- Acrylic paint: Acrylic paint is the ideal choice for painting pumpkins as it is water-based and easy to work with. Additionally, acrylic paint offers vibrant colors and adheres well to the pumpkin’s surface. Ensure to choose non-toxic paints, especially if you plan to display the painted pumpkin in an area accessible to children or pets. The United States Environmental Protection Agency provides a list of certified safe paints to choose from.
- Paintbrushes: It is crucial to use paintbrushes with soft, synthetic bristles for optimal results. A variety of brush sizes and shapes will allow you to achieve different effects and detail levels.
- Palette: A flat palette is necessary for mixing and holding your paint colors while you work.
- Sealer: To protect your painted pumpkin from moisture and prolong its lifespan, consider applying a sealer. Choose a clear, non-toxic sealer that is specifically designed for use with acrylic paints.
- Drop cloth or newspaper: This will help protect your work area from paint spills and drips.
- Clean cloth and water: For cleaning the pumpkin and brushes during the painting process.
• Preparing the Pumpkin for Painting
Before you begin painting, it is necessary to ensure your pumpkin is clean and dry. Here are some steps to follow:
- Wipe down the pumpkin with a clean, damp cloth to remove any dirt or debris on its surface.
- Pat the pumpkin dry with a clean towel.
- Allow the pumpkin to dry completely in a well-ventilated area, ensuring that there is no residual moisture on the surface.
• Creating Your Design
Before you start painting, it is beneficial to have a clear idea of the design you wish to create. This can include sketching your design on paper beforehand or outlining your design with a pencil directly on the pumpkin.
If you are not confident in your drawing abilities or prefer a more intricate design, consider using stencils or templates. These can be found online or at your local craft store.
• Painting the Pumpkin
Now that your pumpkin is clean and dry, and you have a design in mind, you can begin the painting process.
- If you are using a background color, apply a thin layer of paint to the entire surface of the pumpkin. Allow it to dry thoroughly before moving on to the next step.
- Begin painting your design using acrylic paint and a variety of brush sizes. Remember to start with larger shapes and work your way to smaller, more detailed areas of your design.
- Allow the paint to dry completely between layers or when changing colors to avoid smudging or muddling your design.
- For added depth and texture, consider using additional techniques such as sponging, stippling, or dry brushing.
• Finishing and Sealing Your Painted Pumpkin
Once your painted pumpkin has completely dried, it is essential to apply a sealer to protect the artwork and prolong the pumpkin’s life. Follow these steps:
- Ensure that your work area is well-ventilated before applying the sealer.
- Gently apply a clear, non-toxic sealer using a clean brush or sponge. Be sure to follow the manufacturer’s instructions for the best results.
- Allow the sealer to dry completely, as directed by the manufacturer.
- Display your beautifully painted, uncarved pumpkin for everyone to enjoy!
In conclusion, painting an uncarved pumpkin is a fun and creative activity that allows you to showcase your artistic talents. By following these steps and utilizing the appropriate materials, you can create a unique, beautiful work of art that will be the perfect addition to your fall decorations.
So, gather your supplies, pick the perfect pumpkin, and let your imagination run wild!