How To Paint An Outdoor Mural, 25 Things You Should Know
Transforming a blank wall into a breathtaking masterpiece is always exciting. Are you ready to create your dazzling outdoor mural? Get ready to tap into your inner artist as you learn about selecting the perfect surface, choosing weather-resistant materials, mastering essential skills, and avoiding common pitfalls.
How to paint an outdoor mural:
Creating an outdoor mural requires selecting the right wall and material, preparing the surface, and priming it before sketching the design. Use a grid system to scale the design and choose weather-resistant acrylic paint. Map out the mural, paint the background first, and apply a protective finish. Manage your time, follow safety precautions, and consider collaborating with experienced muralists to ensure a successful outcome.
Discover the essentials of creating a stunning outdoor mural as I guide you through choosing the perfect location, selecting durable materials, navigating legalities, and executing your artistic vision. Transform your community, one vibrant wall at a time!
Contents
- 1 Instructions for Creating an Exterior Mural Painting
- 2 What Type of Paint is Suitable for Creating an Outdoor Mural?
- 3 What are the steps to prepare an outdoor wall for a mural installation?
- 4 What is the process for painting a mural on an exterior wall?
- 5 Is it Necessary to Apply a Sealant on an Outdoor Mural?
Instructions for Creating an Exterior Mural Painting
The art of painting an outdoor mural comes with its own set of challenges that one must overcome to create a successful work of art.
• Preparations Before Painting
1. Choosing the Right Wall and Material
Selecting the right space for your outdoor mural is crucial. Consider factors such as exposure to sunlight, local ordinances, and the wall’s surface material.
Rough textures like brick, stucco, or concrete blocks may require additional effort and material compared to smooth surfaces like masonry or metal. Also, make sure you have legal permission to paint on the chosen wall before you begin.
2. Wall Preparation
A clean surface ensures better paint adherence and a longer-lasting mural. Remove any dirt, mold, or loose paint by power washing or using a wire brush. Patch holes, cracks, or divots with an appropriate filler material. Let the surface dry completely before continuing.
3. Priming the Wall
Use a high-quality exterior primer to provide a blank canvas for your mural. Pick a primer that’s compatible with your chosen paint type, acrylic or oil. Apply one or two coats, and allow it to dry for at least 24 hours.
• Planning and Designing Your Mural
4. Sketching the Design
Brainstorm ideas and create rough sketches for your mural on paper. Consider the size and dimensions of your wall when designing, as well as its location and visibility. Try to incorporate elements that resonate with the surroundings.
5. Scaling the Design
A grid system is a useful technique for transferring your sketch to the wall. To do this, divide your sketch into equal sections, creating a grid over the design. Then, draw a corresponding grid on the wall, scaled to match the size of your mural. Use the grid to guide you as you transfer your design onto the wall.
• Painting Your Mural
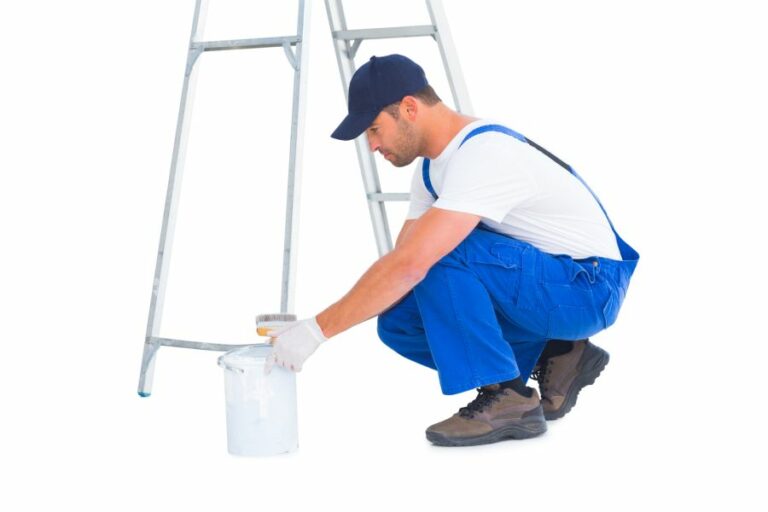
6. Selecting the Correct Paint
Expert muralists commonly recommend acrylic paint for outdoor murals. Acrylics are weather-resistant, long-lasting, and come in a wide range of colors. However, you may choose oil paint if your design requires the slower drying time and blending capabilities offered by oils.
7. Mapping Out the Mural
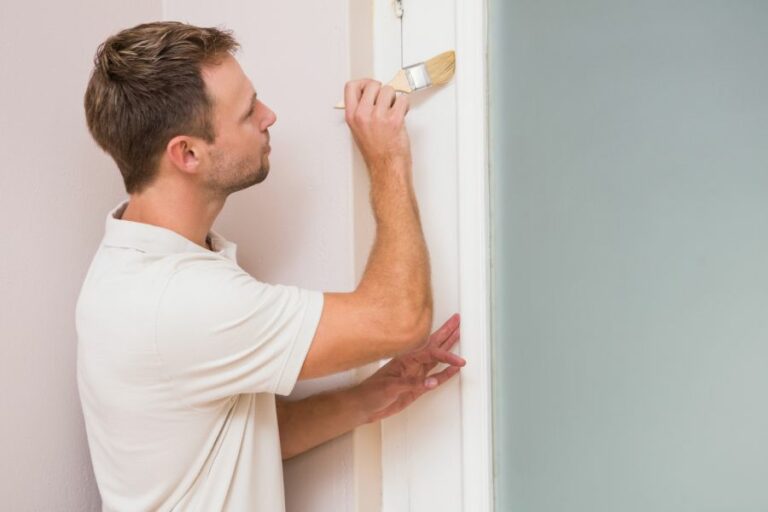
With your design in hand, begin by marking the primary shapes and elements on the wall using chalk or light pencil outlines. This rough layout will serve as a guide to follow as you paint.
8. Painting Technique
Start by painting the background of your mural before adding details and textures. Begin with lighter colors and transition into darker shades as they prevent the background colors from blending with the foreground elements.
Use a range of brush sizes to achieve different levels of detail. Flat brushes work best for large areas, while smaller round brushes are suitable for finer details. Don’t forget to clean your brushes thoroughly after each use to ensure their longevity.
9. Applying Protective Finish
Once your mural is complete and fully dry (allow at least 3-4 days), protect it from the elements by applying a weather-resistant sealant. Choose a sealant compatible with your paint type and follow the manufacturer’s instructions for proper application.
• Additional Tips for a Successful Mural
10. Time Management
Outdoor mural painting requires dedication and patience, especially when tackling large-scale projects. Set realistic deadlines and work at a steady pace to avoid feeling overwhelmed by the task.
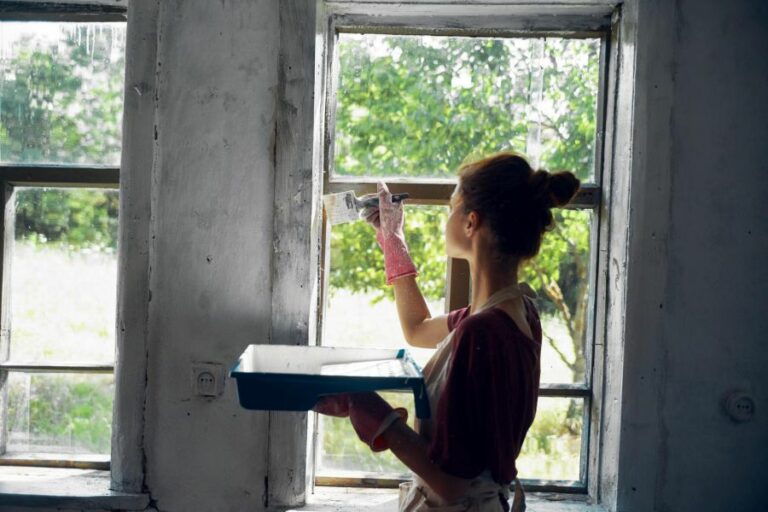
11. Safety Precautions
While painting, ensure that you are taking proper safety precautions. Wear protective gear such as gloves, masks, and safety goggles. Use sturdy ladders or scaffolding to reach higher areas safely.
12. Collaboration
If you’re new to mural painting, consider collaborating with experienced muralists. They can provide valuable advice and assistance, helping you reach your full potential as an outdoor mural artist.
In conclusion, painting an outdoor mural is a challenging but rewarding endeavor. By following this comprehensive guide, you’ll be well on your way to creating beautiful, long-lasting murals that can be admired by all.
Step | Description |
|---|---|
1 | Choose a suitable location for your mural, considering factors such as visibility, wall condition, and local regulations. |
2 | Create a design for your mural, taking into account the size and shape of the wall, intended audience, and overall visual goals. |
3 | Prepare the wall by cleaning it thoroughly and applying a coat of primer or sealer, allowing for proper drying time. |
4 | Transfer your design to the wall using a grid method or projecting it onto the surface, then outline the main shapes and elements with a pencil or chalk. |
5 | Select the appropriate paint types and colors, typically using acrylic or latex paint for outdoor murals due to their durability and weather resistance. |
6 | Begin painting the mural, starting with the largest areas and working from the background to the foreground, allowing layers to dry before applying additional coats or details. |
7 | Add finishing touches and details to the mural, applying highlights, shading, and any additional elements as necessary to complete your design. |
8 | Seal the finished mural with a clear protective coating designed for outdoor use, helping to preserve the artwork and protect it from weather-related damage. |
9 | Take a step back to admire your completed outdoor mural and share it with your community! |
What Type of Paint is Suitable for Creating an Outdoor Mural?
Outdoor murals are a popular form of public art, adding beauty and character to various environments. Choosing the correct paint for an outdoor mural is essential, as this will greatly impact the mural’s longevity and resistance to environmental factors.
• Criteria for Selecting Outdoor Mural Paint
When selecting the paint for your outdoor mural, consider the following factors:
- Durability: The paint must be able to withstand various weather conditions, such as sunlight, rain, and humidity, without fading or peeling.
- UV Resistance: The paint should provide protection against ultraviolet radiation to maintain its vibrant colors and prevent fading over time.
- Adhesion: The paint should adhere well to the surface on which the mural will be painted.
- Flexibility: The paint should be able to expand and contract with the surface, preventing cracks and peeling.
- Environmental impact: Consider choosing paints with low-to-no volatile organic compounds (VOCs) to minimize environmental harm and health risks.
- Ease of application: The paint should be easy to apply with brushes, rollers, or spray equipment.
• Types of Paint Suitable for Outdoor Murals
There are several types of paint that meet the criteria mentioned above. Consider the following options when selecting paint for your outdoor mural project:
– Acrylic Paints
Acrylic paints are the most commonly used paint for outdoor murals due to their versatility, affordability, and durability. Acrylics are water-based and dry quickly, making them easy to work with. They also adhere well to various surfaces such as brick, stucco, and concrete.
Some acrylic paints specifically designed for outdoor murals have better weather resistance and UV protection. I recommend selecting high-quality outdoor-grade acrylic paints like Golden’s Exterior Mural Paints or Nova Color’s Exterior Mural Paints.
– Mural Paints and Liquid Acrylics
Mural paints are a specialized type of paint specifically formulated for outdoor use. These paints typically contain UV-resistant pigments and binders, offering excellent durability and longevity.
Liquid acrylics, specifically made for large-scale murals, have a fluid consistency and excellent coverage. This allows them to be easily applied with brushes, rollers, or spray equipment. Some mural paint brands to consider include Chroma’s Mural Paint, ACRYLITE Exterior Mural Paint, and Blick’s Exterior Mural Paint.
– Silicate Mineral Paints
Silicate mineral paints offer a unique and eco-friendly option for outdoor murals. These paints are made from potassium silicate, which binds with the mineral substrate after application, creating a strong bond and a long-lasting, durable finish.
Silicate mineral paints are breathable, allowing moisture to escape from the surface, preventing issues such as mold growth and paint peeling. Keim’s Soldalit Exterior Paint is a popular option in this category due to its high durability, UV resistance, and environmental benefits.
– Elastomeric Paints
Elastomeric paints are designed for exterior applications, offering excellent durability and weather resistance. These paints form a thick, flexible, and waterproof coat, effectively protecting the mural from environmental factors.
Elastomeric paints are suitable for surfaces that are prone to cracking and peeling, as they can fill small cracks and stretch to accommodate surface movement. When considering elastomeric paints for your mural, SherLastic Elastomeric Coating by Sherwin-Williams is a reliable option.
• Preparing the Surface for an Outdoor Mural
Before applying your chosen paint, it’s important to prepare the surface properly. Follow these steps for optimal results:
- Clean the surface: Remove dirt, grime, and loose material from the surface using a pressure washer or a scrub brush and soapy water.
- Repair cracks and holes: Use a cementitious repair mortar or exterior-grade filler to repair any cracks or holes in the surface.
- Seal the surface: Apply a primer or sealer to the surface to improve adhesion and protect the paint from moisture, efflorescence, and alkali.
- Apply a base coat (optional): A light-colored base coat can help reduce the number of paint layers required and ensure consistent color coverage.
• Tips for Painting an Outdoor Mural
Once you’ve selected your paint and prepared the surface, keep the following painting tips in mind:
- Work in suitable weather conditions: Painting in extreme heat, cold, or humidity can negatively impact the paint’s adhesion and curing process. Aim for moderate, dry conditions when painting your mural.
- Use quality brushes and rollers: Investing in good-quality painting tools will improve the application process and result in a more professional-looking finished product.
- Apply the paint in thin, even layers: Avoid applying the paint too thickly or unevenly, as this can lead to drips, brush marks, and uneven color. Allow each layer to dry before applying the next layer.
- Seal the mural for added protection: To prolong the life of your outdoor mural, consider applying a clear, UV-resistant sealer or varnish to protect it from the elements.
By selecting the most appropriate paint for your outdoor mural project and following the proper preparation and painting techniques, you can create a stunning and long-lasting work of public art.
What are the steps to prepare an outdoor wall for a mural installation?
• Overview
Creating a mural on an outdoor wall is a fantastic way to add a unique, eye-catching design element to your space. However, before you start painting, you must prepare the wall to ensure the final product will be smooth, vibrant, and long-lasting.
• Assessing the Wall
– Choosing the Right Wall
Not every outdoor wall can be transformed into a mural. Here are some factors to consider when picking the right wall for your artistic masterpiece:
- Visibility: Ideally, your mural should be in a well-trafficked area where many people can view and enjoy it. Avoid areas that have obstructions, such as trees or structures, that could block the view.
- Material: Some materials, like brick or concrete, are better suited for murals than others. Walls made of wood or metal may require additional preparation and treatments to create a suitable surface for painting.
- Size: Ensure that the wall is large enough to accommodate your desired mural design. Keep in mind that bigger walls may require more paint and time to complete.
– Inspecting the Wall
Before you start prepping the wall for painting, examine it for any issues that need to be addressed. Look for signs of damage or wear, such as:
- Cracks
- Chipped or flaking paint
- Damp or moldy areas
- Uneven surfaces
Take note of these issues, as you will need to address them during the preparation process.
• Preparing the Surface
– Cleaning the Wall
A clean surface is essential for the paint to adhere properly. To clean the wall, follow these steps:
- Remove loose dirt and debris: Use a stiff brush to remove any loose dirt, dust, and debris from the wall’s surface. Pay particular attention to any cracks or crevices where dirt may be hiding.
- Wash the wall: For most outdoor walls, a combination of water and mild detergent should be enough to clean the surface. Using a garden hose or pressure washer, thoroughly wet the wall before applying the detergent solution. Scrub the wall with a stiff brush, focusing on particularly dirty areas, then rinse it clean with water.
- Allow the wall to dry: Give the wall ample time to dry completely before proceeding to the next step. Depending on the weather and humidity levels, this may take anywhere from a few hours to a couple of days.
– Repairing Damage
Address any issues you identified during the inspection, including cracks, chipped paint, and uneven surfaces. Here are some recommendations for common wall problems:
- Cracks: Fill in small cracks with a high-quality exterior caulk or masonry filler, following the manufacturer’s instructions. For larger cracks, you may need to consult with a professional to ensure structural integrity.
- Chipped or flaking paint: Remove any loose paint using a scraper or wire brush. If the underlying surface is in good condition, you can proceed with priming. However, if you find any damaged areas that need repair, like cracks or holes, address these issues first.
- Damp or moldy areas: Address any underlying issues causing dampness or mold, such as leaks or water damage. Once resolved, you may need to apply a mold- or mildew-resistant primer to the affected areas.
- Uneven surfaces: Sand down any rough spots using medium-grit sandpaper, then fill in any gaps with a suitable filler. Once the filler has dried, sand it down again to create a smooth, even surface.
– Priming the Wall
Priming creates a solid foundation for your mural by helping the paint adhere evenly and providing a barrier against surface imperfections. Choose a high-quality primer specifically designed for outdoor use and the wall’s material, such as masonry or concrete primer.
Apply the primer with a roller or brush, working in small sections and using smooth, even strokes. Allow the primer to dry completely before applying additional coats if necessary. Check the primer’s instructions for recommended drying times and number of coats.
• Final Tips Before Painting
Once your wall is thoroughly prepped, consider the following tips before getting started on your mural:
- Weather: The ideal painting conditions are mild temperatures and low humidity levels. Avoid painting on days with high heat, humidity, or precipitation, as these factors can potentially impact the paint’s quality and adherence.
- Outline your design: Take the time to sketch your mural design onto the wall using chalk or removable pencil marks. This will give you a better sense of scale and help you plan out your colors accordingly.
By following this comprehensive guide to preparing an outdoor wall for a mural, you can ensure that your artwork will remain vibrant and beautiful for years to come. So take the time to do it right and achieve the best possible results for your outdoor masterpiece.
Step | Description |
|---|---|
1 | Choose the right location for your mural, considering factors such as wall material, exposure to sunlight, and visibility. |
2 | Obtain necessary permits and permissions from the building owner, local government, or any other relevant authorities. |
3 | Clean the wall thoroughly with a pressure washer or a heavy-duty cleaning solution to remove dirt, grime, and loose particles. |
4 | Inspect the wall for cracks, holes, or other damages, and make any needed repairs using caulk, mortar, or other appropriate materials. |
5 | Prime the wall with a high-quality exterior primer to create a smooth, uniform surface that will help your mural adhere better. |
6 | Lightly sand the primed wall to ensure that the surface is smooth and free of any imperfections. |
7 | Apply a second coat of primer if necessary, then let the wall dry completely before starting your mural. |
8 | Sketch your design onto the wall using chalk or pencil, taking care to keep the proportions accurate and consistent across the entire wall. |
9 | Begin painting your mural, working from the top down to avoid smudging the paint with your hands or tools. |
What is the process for painting a mural on an exterior wall?
Creating a beautiful, eye-catching mural on an outside wall can add character and vibrancy to any building or public space. But how do you go about painting a mural on an exterior wall, and what materials and techniques work best?
• Determine the Location and Size of the Mural
Before you can start painting, you will need to scout the perfect location for your mural. The ideal spot should be:
- Visible and accessible to the public
- Large enough to accommodate your design
- Made of a material suitable for painting, such as brick, concrete, or wood
Once you have found an ideal location, measure the wall’s size and dimensions. This information will be essential when planning and scaling your design.
• Obtain Permission and Permits
Before you can paint, you must obtain the necessary permissions and permits from the property owner and appropriate authorities. In many cases, this will involve presenting a detailed proposal that outlines the design, materials, and timeline for the mural installation.
Be sure to follow all regulations and guidelines to avoid any legal issues.
• Plan Your Design
Create a sketch or digital rendering of your mural design to help you visualize the final product. Planning your design beforehand will give you a clear sense of the colors and materials needed, as well as help you estimate how long the project will take.
– Tip: Scale Your Design
I recommend using a grid system to scale your design to the wall’s size. Divide your sketch and wall into equal sections and use these to guide your painting. This technique will ensure accuracy in reproducing your artwork on a larger surface.
• Choose the Right Materials
Selecting the proper materials for your mural is essential for its long-term durability and aesthetic appeal. Take into account the weather conditions and the type of wall surface you will be working with when choosing your paint and primer.
– Primers
Prior to painting, apply a primer to the wall to create a suitable surface for your paint. The following are recommended primer options:
- Masonry primer: Ideal for concrete or brick surfaces. It helps to fill in pores and smooth the surface.
- Latex primer: Suitable for wood surfaces. It seals the wood and prevents paint absorption.
– Paint Types
Use high-quality exterior-grade paint to ensure your mural withstands the elements and lasts as long as possible. Consider the following options:
- Acrylic paint: A versatile and excellent choice for most mural projects. They are water-based, easy to work with, and offer vibrant colors.
- Mural paint: Specifically designed for outdoor murals, these specialized paints contain UV protection and are durable against harsh weather conditions.
• Prepare the Wall
Before applying any paint, thoroughly clean the wall surface to remove dirt, grease, and old paint. This step is crucial to ensure proper adhesion of the primer and paint.
I recommend using a pressure washer to clean large exterior walls for best results. Following cleaning, allow the wall to dry completely before applying primer.
• Apply Primer and Begin Painting
Once the wall is clean and dry, apply the appropriate primer to the entire surface. Allow the primer to dry according to the manufacturer’s instructions.
Begin painting your mural, starting with the background colors and working your way toward the foreground elements.
Use your grid system to guide your painting and maintain accuracy in your design. Be patient and work methodically, allowing time for each layer of paint to dry before moving on to the next.
– Expert Tip: Use a Projector for Accuracy
If you’re concerned about reproducing your design accurately on a large wall, consider using a projector to display the design directly onto the surface. This method can help increase precision and save time during the painting process.
• Seal and Protect Your Mural
Apply a protective sealant to the surface once your mural is complete and fully dried. This clear coat will help protect the artwork from UV rays, weather, and potential vandalism. Look for a sealant specifically designed for outdoor murals, and follow the manufacturer’s instructions for proper application.
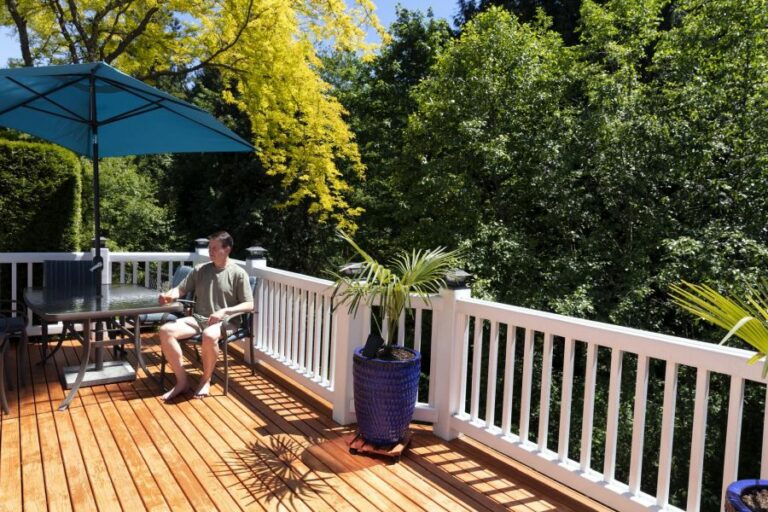
• Maintain and Enjoy Your Artwork
Regularly inspect your mural for signs of wear or damage. Perform any necessary touch-ups or repairs to ensure the artwork remains vibrant and intact for years to come.
In conclusion, painting a mural on an outside wall is a rewarding and impactful way to share your artistic talents with the community.
By following the guidelines outlined above, you can create a stunning work of art that stands the test of time. With careful planning, the right materials, and proper maintenance, your mural will become a cherished landmark for all who encounter it.
Step | Description |
|---|---|
1 | Choose the right wall and get permission from the owner. |
2 | Create a design for your mural and plan the layout. |
3 | Prepare the wall by cleaning it and applying a primer if necessary. |
4 | Transfer your design onto the wall using a grid method, stencil, or freehand. |
5 | Select the appropriate paint for an outdoor mural, such as high-quality acrylics or outdoor mural paint. |
6 | Paint your mural using brushes, rollers, or spray paint, working from light colors to dark colors, and filling in large areas before adding details. |
7 | Allow the paint to dry according to the manufacturer’s instructions. |
8 | Apply a protective clear coat or sealant to protect the mural from weather and UV damage. |
9 | Maintain your mural by cleaning it regularly and touching up the paint as needed. |
Is it Necessary to Apply a Sealant on an Outdoor Mural?
When it comes to outdoor murals, many artists and enthusiasts wonder whether or not they need to seal their artwork to protect it from the elements. The answer to this question ultimately depends on the specific project, materials used, and environmental conditions.
• Importance of Sealing an Outdoor Mural
Sealing an outdoor mural is crucial in ensuring its longevity and protection against various environmental factors. Unsealed murals may fade over time, as UV rays from the sun can break down the pigments in the paint, leading to discoloration.
Additionally, moisture can affect the mural’s integrity, causing the paint to deteriorate, peel, or develop mold and mildew.
Applying a sealant creates a protective barrier over the mural, helping preserve its vibrant colors and overall condition for years to come.
• Factors to Consider Before Sealing a Mural
Before deciding to seal an outdoor mural, consider the following factors to ensure the best possible outcome.
– Type of Paint Used
The type of paint used on a mural can determine whether a sealant is necessary. For instance, acrylic paint is typically water-resistant and offers some protection against fading from sunlight.
However, oil-based paints can be more susceptible to damage from the elements and might require a sealant to increase longevity.
– Surface Material
Consider the composition of the mural’s surface when deciding whether to apply a sealant. For example, murals applied to porous surfaces like brick or concrete may benefit from sealing to prevent moisture absorption and potential paint degradation over time.
– Weather Conditions
Environmental factors can significantly impact the durability of an outdoor mural. In regions with heavy rainfall, high humidity, or harsh sunlight, sealing a mural may be especially crucial to preserve its appearance and structural integrity.
• Recommended Sealants for Outdoor Murals
Numerous sealants are available on the market, but choosing one specifically designed for outdoor mural applications is essential. Below are some recommended sealants that provide excellent protection for a variety of outdoor mural projects.
– Varnishes
Varnishes are widely used for outdoor mural protection, providing excellent UV resistance and a durable finish. Acrylic varnishes and polyurethane varnishes are recommended for their compatibility with most paints, ease of application, and long-lasting protection.
Varnishes are available in different finishes, such as matte, satin, or glossy, allowing you to select one that matches your mural’s desired aesthetic. Be sure to choose a non-yellowing varnish to ensure that the mural’s colors remain true over time.
– Clear-Coat Sealants
Clear-coat sealants, such as polycrylic and polycarbonate coatings, provide a tough, abrasion-resistant finish while still allowing the mural to breathe. These sealants also offer excellent UV and moisture resistance, making them suitable for murals painted on porous surfaces or in humid areas.
– Graffiti-Resistant Sealants
For murals located in areas prone to vandalism, graffiti-resistant sealants can provide an added layer of protection. These sealants, such as epoxy-based or specialized silicone coatings, make it easier to clean off graffiti without damaging the original mural’s paint.
• Application Tips for Sealing Outdoor Murals
Before sealing a mural, ensure that you follow these steps for the best possible results:
- Wait for the paint to dry: It’s essential to let the mural dry completely before applying any sealant. The paint manufacturer’s guidelines should provide an estimated drying time; however, a waiting period of at least 48 hours is generally recommended.
- Clean the surface: Remove any dust, debris, or dirt from the mural’s surface by gently sweeping or wiping it with a clean, dry cloth.
- Choose the right sealant: As mentioned earlier, select a sealant that’s right for your mural’s specific needs. This includes considering factors like paint type, surface material, and environmental conditions.
- Apply the sealant: Follow the manufacturer’s instructions for proper application of the chosen sealant. This may include using a brush, roller, or spray-on application technique and applying multiple coats for optimal protection. Be sure to allow each layer to dry as directed by the manufacturer.
- Inspect the mural: After the sealant has dried, inspect the mural for any missed spots or imperfections. Address any areas needing additional sealant as necessary.
In conclusion, sealing an outdoor mural is essential for preserving its lifespan and appearance. By considering factors such as paint type, surface material, and environmental conditions, artists and enthusiasts can make an informed decision on the best sealant for their projects.
With proper application and maintenance, outdoor murals can remain vibrant and protected for years to come.
Question | Answer |
|---|---|
Do you need to seal an outdoor mural? | Yes, it is recommended to seal an outdoor mural to protect the paint from harsh weather conditions, sun exposure, and potential damage from vandalism. A high-quality sealant like a clear polyurethane or an acrylic varnish can help prolong the life and vibrancy of the mural. |