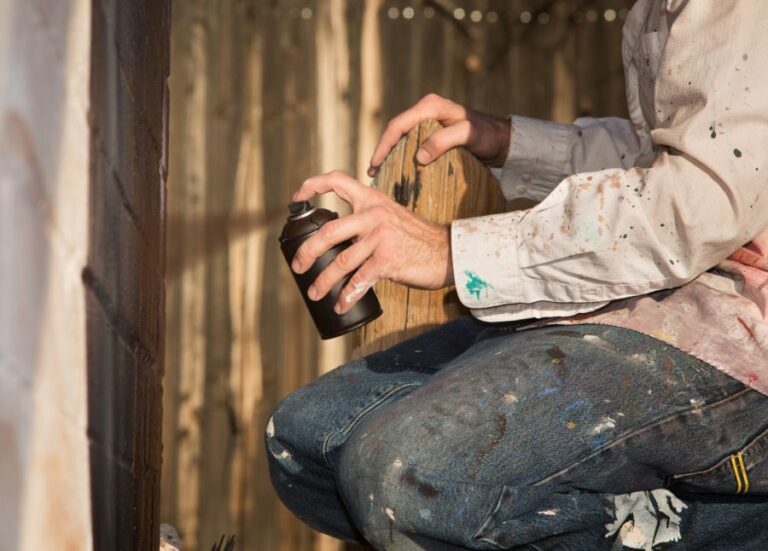
What Kind Of Paint To Use On Outdoor Rocking Chairs. What pros say
Looking to add a fresh coat of paint to your outdoor rocking chairs? Choosing the right paint is essential to ensure longevity and withstand weather conditions. In this post, we’ll guide you through the best paint options for outdoor furniture and provide expert tips to achieve the perfect finish that lasts long and impresses your guests.
What kind of paint to use on outdoor rocking chairs:
When painting outdoor rocking chairs, choosing the right weather-resistant paint is essential to ensure durability. Options include exterior oil-based paint, which is highly durable but less environmentally friendly; latex paint, which is eco-friendly but less suitable for metal; and acrylic paint, which offers fade-resistance and UV protection. Consider the chair’s material, local weather conditions, desired finish, and low VOC for health and environmental benefits. Properly prep and paint the rocking chair and apply a protective sealant for best results.

Discover the best paint options for your outdoor rocking chairs as we delve into different types of paint, their pros and cons, and their application techniques. By the end, you’ll know how to ensure longevity and vibrancy for your beloved furniture.
Contents
- 1 Appropriate Types of Paint to Utilize on Outdoor Rocking Chairs
- 2 Which Type of Paint is Suitable for a Rocking Chair?
- 3 How to Effectively Weatherproof a Wooden Rocking Chair
- 4 What is the Process of Painting Outdoor Rocking Chairs?
- 5 What is the Most Suitable Paint for Applying on Outdoor Wooden Furniture?
Appropriate Types of Paint to Utilize on Outdoor Rocking Chairs
When painting outdoor rocking chairs, it’s essential to pick the right type of paint to ensure durability and weather resistance. This article will guide you through the different types of paint suitable for outdoor rocking chairs and give tips for selecting the best one for your needs.
• Understanding the Importance of Weather-Resistant Paint
A critical factor to consider when painting outdoor furniture is the weather resistance of the paint. The paint you choose should withstand the elements, including sun exposure, rain, humidity, and temperature fluctuations. This will help ensure your rocking chair remains in good condition, regardless of the climate.
• Types of Paint Suitable for Outdoor Rocking Chairs
Several types of paint are available specifically designed for outdoor use. Here, we will introduce you to a few popular options and discuss their pros and cons.
– Exterior Oil-Based Paint
Oil-based paint is known for its durability, making it an ideal choice for outdoor furniture made of wood or metal. It provides a tough and glossy finish, protecting your rocking chair from peeling, cracking, or fading due to sun exposure.
Pros:
- Highly durable and weather-resistant
- It comes in various colors and finishes
- Excellent adhesion to various surfaces
Cons:
- It may take longer to dry compared to other types of paint.
- It can be harder to clean up as it requires the use of paint thinner or mineral spirits
- Not as environmentally friendly due to the use of organic solvents
– Exterior Latex Paint
Latex paint is a popular choice for outdoor furniture because it’s water-based, making it easier to clean up and better for the environment. Latex paint provides excellent UV protection, crucial for an outdoor rocking chair.
Pros:
- Quick-drying and easy to apply
- Resistant to peeling, fading, and cracking
- Low VOCs (volatile organic compounds) and environmentally friendly
Cons:
- It may not be as durable as oil-based paint
- Requires frequent maintenance due to its susceptibility to mildew growth in damp conditions
- Typically not suitable for metal surfaces
– Exterior Acrylic Paint
Acrylic paint is another water-based option that offers a durable and weather-resistant finish for outdoor furniture. It’s known for its fade-resistant properties, making it ideal for outdoor rocking chairs frequently exposed to direct sunlight.
Pros:
- Fade-resistant and UV protective
- Easy to apply and clean up
- Durable and able to withstand harsh weather conditions
Cons:
- Not suitable for use on metal surfaces without a primer
- It may not adhere well to some types of plastic
- More expensive than other paint options
• Tips for Selecting the Best Outdoor Paint for Your Rocking Chair
With several types of paint to choose from, here are some tips to help you find the best one for your outdoor rocking chair:
- Consider the Material of Your Rocking Chair: The type of paint you choose should be compatible with the material of your rocking chair. For example, oil-based paint may not adhere well to some plastics, while latex paint typically isn’t suitable for metal surfaces.
- Evaluate the Weather Conditions in Your Area: If your rocking chair is exposed to harsh weather conditions, opt for paint with high durability and weather resistance, like exterior oil-based or acrylic paint.
- Think About the Desired Finish: Each type of paint offers different finishes, such as glossy, semi-gloss, or matte. Select a finish that complements the style of your rocking chair and outdoor space.
- Prioritize Low VOC Paints for Health and Environmental Benefits: Whenever possible, choose paint with low VOC emissions to reduce the risk of health issues and environmental impact.
- Test the Paint on a Small Hidden Surface First: Before committing to a specific paint, apply a small amount on the hidden surface of your rocking chair to ensure it adheres well and dries to the desired color and finish.
• Prepping and Painting Your Outdoor Rocking Chair
Once you’ve chosen the ideal paint for your outdoor rocking chair, follow these simple steps to prep and paint it for lasting results:
- Clean the rocking chair thoroughly to remove dirt, mildew, or debris.
- Lightly sand the surface to promote better adhesion of the paint.
- Apply a primer if necessary, especially if using latex paint on metal surfaces or if your rocking chair has a dark existing finish.
- Apply the chosen paint using a high-quality brush, roller, or spray gun, depending on your preference and the paint type. Be sure to apply thin, even coats, and allow sufficient drying time between coats.
- For optimal durability, apply a protective sealant, such as a clear water-based polyurethane, over the painted surface once it’s scorched.
In conclusion, selecting the right paint for your outdoor rocking chair is crucial for ensuring durability and weather resistance. With the information and tips in this article, you’ll be well-equipped to choose the perfect paint and achieve a beautiful, lasting finish on your outdoor rocking chair.
Which Type of Paint is Suitable for a Rocking Chair?
Rocking chairs have been popular in homes and outdoor spaces for generations. They bring a sense of nostalgia and comfort to any room or porch and are a perfect place to relax and unwind. However, over time, the paint on your favorite rocking chair may start to fade, chip, or peel.
When it comes to repainting your rocking chair, it is essential to choose the right paint to ensure durability and a stunning finish. In this article, we will discuss the best types of paint for rocking chairs and provide expert advice on achieving the perfect paint job.
• Types of Paint for Rocking Chairs
When choosing paint for your rocking chair, it is essential to consider the chair’s material, the location where it will be used, and your desired finish. Here are some of the most common types of paint for rocking chairs:
– Latex-Based Paint
Latex-based paint is a versatile, easy-to-use paint suitable for wooden and metal rocking chairs. It is popular due to its easy cleanup with soap and water and its fast-drying properties. In addition, latex paint is water-based, which means it is less likely to emit harmful VOCs (volatile organic compounds) and is environmentally friendly.
When choosing a latex-based paint, look for a high-quality binder to help it adhere to the surface and increase its durability.
– Oil-Based Paint
Oil-based paint is another suitable option for rocking chairs, particularly wooden ones. Oil-based paint takes longer to dry than latex-based paint, but it forms a hard, durable surface that can withstand the wear and tear a rocking chair may experience.
Remember that oil-based paint typically has a stronger odor and can emit VOCs, so proper ventilation is essential when using this type of paint. In addition, oil-based paint requires mineral spirits or thinner for cleanup, making it less convenient than its latex-based counterpart.
– Chalk Paint
Chalk paint has recently gained popularity as a favorite choice for furniture, including rocking chairs. Its unique features, such as the matte finish and the ability to easily distress the painted surface, give your rocking chair a rustic, vintage look.
Chalk paint can be applied to various surfaces, including wood, metal, and glass, without priming or sanding. It also dries quickly and is available in various colors, making achieving a customized look for your rocking chair easy.
– Outdoor Paint
If your rocking chair is destined for an outdoor space, such as a porch or a patio, choosing a paint designed specifically for outdoor use is crucial. Outdoor or exterior paint is formulated to withstand sun exposure, temperature changes, and moisture.
Look for a high-quality outdoor paint that offers UV protection and is mold and mildew resistant to ensure your rocking chair remains beautiful and well-protected for years.
• Preparing Your Rocking Chair for Painting
Before you start painting your rocking chair, it is crucial to prepare the surface properly. Here are some steps to follow:
- Clean the surface: Use a damp cloth or sponge to remove dirt, grease, or dust from your rocking chair. Allow it to dry completely before moving to the next step.
- Sand the surface: If the chair has any peeling or chipping paint, sand it thoroughly to create an even surface. Use fine-grit sandpaper (150-220 grit) for the best results.
- Prime the surface: Depending on the type of paint you’ve chosen, you may need to apply a coat of primer. Priming helps the paint adhere correctly to the surface and increases its durability.
- Tape off any parts you don’t want to be painted: Use painter’s tape to protect any areas of the chair you don’t want accidentally painted or stained, such as hardware or embellishments.
• Painting Your Rocking Chair: Expert Tips
Once your rocking chair is prepped and ready, it’s time to apply your chosen paint. Here are a few expert tips to ensure a beautiful, long-lasting finish:
- Thin your paint if necessary: Thinning your paint slightly with the appropriate thinner (water for latex paint and mineral spirits for oil-based paint) can make it easier to apply and help prevent brush strokes.
- Use high-quality brushes or rollers: Investing in high-quality brushes or foam rollers can ensure a smoother, more even paint application. Avoid low-quality brushes, as they can leave streaks or lose bristles.
- Apply multiple thin coats: Apply thinner coats of paint and let each coat dry before applying the next one. This will help you achieve a more even, professional-looking finish.
- Allow adequate drying time: Following the manufacturer’s recommended drying time between coats and before use is crucial for achieving a beautiful, durable finish.
- Seal your paint job: If desired, apply a clear coat sealant to protect your paint job and ensure its longevity. This step is particularly crucial for outdoor rocking chairs.
By following these expert tips and choosing the right paint for your rocking chair, you can enjoy a beautiful, durable finish that will breathe new life into your favorite piece of furniture. Happy painting!
Type of Paint | Description |
|---|---|
Acrylic Paint | Water-based, easy to clean, and quick-drying paint that provides a smooth finish. |
Chalk Paint | Matte finish, easy to distress, and requires less prep work, making it popular for shabby chic and rustic styles. |
Enamel Paint | Oil-based, durable, and provides a glossy finish, making it suitable for high-traffic or outdoor rocking chairs. |
Milk Paint | Quick and easy to apply, it provides a smooth and even finish, suitable for metal or plastic rocking chairs. |
Spray Paint | Quick and easy to apply, provides a smooth and even finish, suitable for metal or plastic rocking chairs. |
How to Effectively Weatherproof a Wooden Rocking Chair
Wooden rocking chairs add a timeless touch of elegance to any porch or patio. However, they are also susceptible to the elements, which can cause wear and tear over time. This comprehensive guide will discuss various methods for weatherproofing wooden rocking chairs to extend their life and preserve beauty.
• Selecting the Right Wood for Your Rocking Chair
Before diving into weatherproofing techniques, mentioning that the wood used to construct your rocking chair can significantly impact its durability against the elements is essential.
– Recommended Wood Species for Rocking Chairs
Hardwoods like teak, ipe, and white oak are known for their weather-resistant properties, making them excellent choices for outdoor furniture. These species are also resistant to insect damage and rot, which is crucial when the chair is exposed to rain, snow, and other forms of precipitation.
• Weatherproofing Techniques for Wooden Rocking Chairs
Now that we’ve covered the importance of selecting the right wood let’s delve into various weatherproofing methods to protect your wooden rocking chair.
– Proper Cleaning and Maintenance
Keeping your rocking chair clean is the first defense against premature wear and damage. Dirt, pollen, and other debris can settle in the wood grain, harboring moisture that leads to rot, mildew, and mold. At least once a season, clean your rocking chair by following these simple steps:
- Remove any cushions or padding from the chair.
- Mix a solution of mild soap, such as dish detergent, in a bucket of water.
- Use a soft brush to gently scrub the rocking chair, carefully not to scratch its surface.
- Rinse the chair thoroughly with a hose, ensuring it’s soap residue-free.
- Allow the chair to dry completely before replacing cushions or padding.
– Applying a Weather-Resistant Finish
To further protect your wooden rocking chair, consider applying a weather-resistant finish. This step should be performed after the chair has been cleaned and completely dried. The following finishes are recommended for weatherproofing rocking chairs:
Oil-Based Finishes
Oil-based finishes can enhance the wood’s natural beauty while providing some protection against moisture, UV rays, and general wear. Tung oil, Danish oil, and teak oil are excellent choices due to their durability, though regular reapplication (every 6-12 months) is necessary to maintain their protective properties. For best results:
- Lightly sand the rocking chair’s surface with fine-grit sandpaper to prepare it for the finish.
- Apply the oil-based finish liberally, using a brush or cloth. Be sure to follow the manufacturer’s instructions.
- Wipe away any excess finish with a clean cloth.
- Allow the finish to dry thoroughly before use, typically 24-48 hours.
Varnishes and Sealers
Varnishes and sealers offer a more robust and long-lasting protective barrier against the elements than oil-based finishes. They tend to be more resistant to water, UV rays, and scratches. To apply a varnish or sealer:
- Prepare the rocking chair’s surface by lightly sanding it with fine-grit sandpaper.
- Use a brush to apply a thin coat of the varnish or sealer, following the manufacturer’s instructions.
- Allow the finish to dry completely before adding coats or using the chair.
– Protective Covers
A well-fitting, weather-resistant cover can significantly protect your wooden rocking chair from rain, snow, sun, and other damaging elements when it’s not in use. Look for a cover that:
- It is designed for rocking chairs or can be adjusted for a snug fit.
- Features waterproof materials and UV resistance.
- It has air vents to prevent condensation and mildew growth.
Use the cover consistently, especially during inclement weather or humid environments, to provide optimal protection.
• Final Thoughts on Weatherproofing Wooden Rocking Chairs
In conclusion, protecting your wooden rocking chair from the elements can significantly increase its durability and life.
By selecting the right type of wood, maintaining proper cleaning habits, applying a protective finish, and investing in a weather-resistant cover, you can ensure your rocking chair remains a beautiful and functional outdoor centerpiece for years.
What is the Process of Painting Outdoor Rocking Chairs?
Outdoor rockers can add a touch of elegance and comfort to any patio or porch. However, over time, the paint on outdoor rockers can fade or peel due to exposure to the elements. Refreshing the paint on your outdoor rockers not only enhances their appearance but also extends their durability.
This comprehensive guide will cover the essential steps to achieving a professional-looking paint job for outdoor rockers.
• Supplies and Equipment Needed
Before you begin, gathering all the necessary supplies and equipment is essential. Here’s what you’ll need:
- Rubber gloves and a dust mask
- Paint scraper
- Sandpaper (medium-grit and fine-grit)
- Tack cloth or damp cloth
- Primer (preferably a bonding primer)
- Exterior paint suitable for outdoor furniture and rockers
- Paintbrush or paint sprayer suitable for outdoor use
- Drop cloth (to protect surrounding surfaces)
- Screwdriver, drill, or wrench (to disassemble rocker, if necessary)
• Step 1: Prepare the Rocker
Before you start painting your outdoor rocker, you’ll need to prepare the surface for the new coat:
– Remove Existing Paint and Rust
Wearing gloves and a dust mask for protection, use a paint scraper to remove any peeling, chipping, or bubbled paint. Be gentle to avoid gouging the rocker’s surface. A wire brush can be useful in removing any rust spots.
– Clean the Rocker
Next, thoroughly clean the rocker. Use a damp cloth and mild soap to wipe down the surface, removing dirt, dust, and debris. Allow the rocker to dry completely.
– Disassemble the Rocker (If Necessary)
Some outdoor rocker designs may require disassembly to access hard-to-reach areas. You may need a screwdriver, drill, or wrench to remove screws, bolts, or fasteners. Be sure to label and save all hardware to ensure smooth reassembly later.
– Sand the Surface
Once the rocker is dry, use medium-grit sandpaper to sand the entire surface toward the wood grain. This process will help remove any remaining paint, rust, or rough spots and create a smooth surface to the paint to adhere to.
After the initial sanding, switch to fine-grit sandpaper and repeat the process. Be sure to apply even pressure and avoid sanding in one place for too long.
– Remove Dust and Debris
After sanding, use a tack or damp cloth to remove any remaining dust or debris from the rocker. This step is crucial, ensuring a clean surface for the primer and paint to adhere to.
• Step 2: Apply Primer
Once your rocker is properly prepared, it’s time to prime the surface:
– Protect Surrounding Surfaces
Before applying the primer, place a drop cloth under and around the rocker to protect surrounding surfaces from paint drips and spills.
– Apply Bonding Primer
Using a paintbrush or paint sprayer, evenly apply a coat of bonding primer to the rocker’s surface. Bonding primer is specifically designed to adhere to various surfaces, ensuring a durable foundation for the paint.
– Allow Primer to Dry
Refer to your primer’s label for recommended drying time; typically, it takes about two to four hours. Ensure the primer is fully dry before proceeding to the painting step.
• Step 3: Paint the Rocker
After your primer has dried, it’s time to paint your outdoor rocker:
– Choose the Right Paint
Select an exterior-grade paint suitable for outdoor furniture and rockers. Oil-based paints and acrylic enamels offer excellent resistance to moisture and the elements, ensuring a long-lasting finish.
– Apply the First Coat
Using a properly-sized paintbrush or paint sprayer, evenly apply the first coat of paint to the rocker’s surface. Be sure to cover all areas, including hard-to-reach spaces. Use smooth, even strokes and avoid applying too much paint in one area to minimize drips and imperfections.
– Allow the First Coat to Dry
Exterior paint should dry for at least four to six hours before applying another coat. Drying time can vary based on temperature and humidity, so refer to your paint’s label for specific drying times.
– Apply a Second Coat (If Necessary)
If the first coat of paint doesn’t provide full coverage or a smooth finish, apply a second coat after the initial coat is dry. Waiting for the proper drying time is essential to avoid compromising the paint’s durability and appearance.
• Step 4: Reassemble and Enjoy
Once your rocker is fully painted and dry, reassemble it if you disassembled it earlier. Attach all hardware securely and place the rocker back in its original location.
Congratulations, you now have a beautifully painted outdoor rocker! With regular maintenance, including wiping it down regularly and refreshing the paint every few years, your outdoor rocker can continue providing style and comfort for years.
Step | Description |
|---|---|
1 | Wipe the rocker with a slightly wet to remove dirt. |
2 | Allow the rocker to dry completely. |
3 | Sand the entire surface of the rocker using medium-grit sandpaper to remove any old finish or rough spots. |
4 | Wipe down the rocker with a tack cloth to remove any dust or particles from sanding. |
5 | Apply a coat of primer designed for outdoor use, following the manufacturer’s instructions for drying time and coverage. |
6 | Once the primer is dry, apply the first coat of outdoor paint, using a brush or spray, following the manufacturer’s instructions for drying time and coverage. |
7 | After the first coat of paint is dry, assess whether a second coat is needed for full coverage. If so, apply a second coat and allow it to dry completely. |
8 | Optional: Apply a clear sealant or protective finish designed for outdoor use, following the manufacturer’s instructions for drying time and coverage. |
What is the Most Suitable Paint for Applying on Outdoor Wooden Furniture?
Outdoor wood furniture can be both functional and beautiful, adding a touch of style to any outdoor space. However, it is essential to use the right paint to ensure that your furniture remains durable and maintains its appearance.
This article will discuss the various types of paint that work best on outdoor wood furniture and provide tips on applying them properly.
• Characteristics of Quality Outdoor Paint
When selecting paint for your outdoor wood furniture, consider the following factors:
- Durability – The paint should withstand harsh weather conditions, including rain, snow, and direct sunlight.
- UV Resistance – A protective coating should resist ultraviolet (UV) rays, which can cause fading, chipping, and peeling.
- Mildew and Mold Resistance – The paint should prevent mildew growth and mold on your wooden furniture.
- Easy Maintenance – Quality paint should be easy to clean and maintain without requiring frequent touch-ups.
• Types of Paint Suitable for Outdoor Wood Furniture
Several types of paint are ideal for outdoor wood furniture, each with unique properties and benefits.
– Acrylic Latex Paint
Acrylic latex paint is a popular choice for painting outdoor wood furniture due to its durability and versatility. This water-based paint dries quickly, is easy to clean, and offers excellent adhesion to wood surfaces.
Advantages:
- Long-lasting and durable
- Resistant to fading, cracking, and peeling
- It comes in a wide range of colors and finishes.
- It can be easily cleaned with soap and water.
Disadvantages:
- It may have a strong odor during application.
- It can sometimes require a primer for optimal adhesion.
– Oil-Based Paint
Oil-based paint is another suitable option for outdoor wood furniture, known for its durable finish and ability to protect against the elements.
Advantages:
- It provides a resilient, hard finish
- Excellent UV resistance
- Long-lasting protection from moisture and rot
Disadvantages:
- It takes longer to dry than acrylic latex paint
- Requires mineral spirits or paint thinner for cleanup
- It may be more challenging to apply, particularly for inexperienced painters
– Exterior Wood Stain
While not technically a paint, wood stain is an excellent alternative for those seeking a more natural look for outdoor wood furniture. Wood stain penetrates the wood fibers, highlighting its natural grain while protecting it from the elements.
Advantages:
- Enhances the wood’s natural beauty
- It comes in a variety of shades and finishes
- It provides protection against water, UV rays, and mildew
Disadvantages:
- It may require more frequent maintenance than paint
- It can be more challenging to apply evenly
• Application Tips for Painting Outdoor Wood Furniture
To achieve the best results when painting your outdoor wood furniture, keep the following tips in mind:
- Surface Preparation – Begin by thoroughly cleaning the furniture and removing dust, dirt, and grime. Sand the wood surface with medium-grit sandpaper to ensure proper paint adhesion. Apply a wood filler to repair gouges or cracks, then smooth the sand.
- Priming – Apply a high-quality primer to the wood surface for oil-based or acrylic latex paints with poor adhesion. This will provide a uniform base for the paint to adhere to and prevent uneven color absorption.
- Paint Application – Apply your chosen paint or stain according to the manufacturer’s instructions using a high-quality brush, roller, or paint sprayer. To achieve the best results, apply thin, even coats, allowing each coat to dry fully before applying the next.
- Sealant – If a wood stain or additional protection is desired, apply a clear exterior wood sealant after the final coat of paint or stain has dried. This will provide a protective barrier against moisture, UV rays, and general wear and tear.
- Maintenance – Regularly clean your painted or stained furniture with mild soap and water, and touch up any areas that show signs of wear or damage. Reapply sealant as necessary, depending on your specific product’s recommendations.
• Conclusion
In conclusion, the best paint for outdoor wood furniture depends on your preferences and needs. Both acrylic latex paint and oil-based paint offer durability and protection, while wood stain provides a more natural appearance.
By carefully selecting the right paint, properly preparing the wood surface, and applying the paint correctly, you can ensure that your outdoor wood furniture remains functional and attractive for years.
Paint Type | Advantages | Disadvantages |
|---|---|---|
Acrylic Latex | Water-based, easy cleanup, UV-resistant, dries quickly, non-toxic | It preserves the natural wood look, protective, available in various shades |
Oil-Based | Durable, long-lasting, adheres well to surfaces, resistant to wear and tear | Slower drying time, harder cleanup, may emit harmful VOCs, not environmentally friendly |
Solvent-Based | It may not adhere well to some surfaces, less durable than oil-based paint | Strong odor, not environmentally friendly, harder cleanup |
Exterior Wood Stain | It preserves the natural wood look, is protective, available in various shades | Requires sealant for protection, may require more maintenance |