The Ultimate Guide to Finding the Best Outdoor Pot Paint
Do your outdoor ceramic pots need to be more exciting and inviting? A fresh coat of paint can work wonders in breathing new life into them, but with so many options available, how do you choose the best paint for the job? Our comprehensive guide on the best paint for outdoor ceramic pots is here to help!
Best paint for outdoor ceramic pots:
Outdoor ceramic pots require durable paint that withstands elements and sunlight. Acrylic paint is versatile and suitable for many surfaces but may require reapplication; oil-based paint offers increased durability, longevity, and resistance to weathering but may contain harmful volatile organic compounds (VOCs); and enamel paint provides a glossy, durable finish. Proper preparation, application, and sealing with varnish are essential for lasting, vibrant results.

Discover the top paints for transforming outdoor ceramic pots, enhancing durability and visual appeal. Learn about key factors, such as drying time, UV resistance, and ease of application. Unleash your creativity with our expert-recommended products, tips, and techniques.
Contents
- 1 Top-Quality Paint for Outdoor Ceramic Planters
- 2 Determining the Most Suitable Type of Paint for Ceramic Pots
- 3 Is it Possible to Paint Outdoor Ceramic Planters?
- 4 What Type of Paint Should You Utilize for Outdoor Planters?
- 5 What is the Proper Technique for Painting Outdoor Glazed Planters?
- 6 What are the techniques for painting ceramic outdoor pots?
- 7 Determining the Ideal Paint for Outdoor Plant Pots
Top-Quality Paint for Outdoor Ceramic Planters
• Introduction
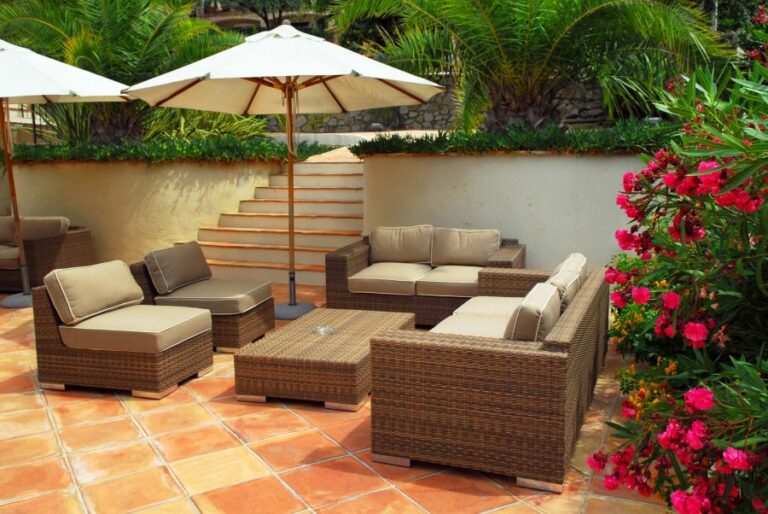
Outdoor ceramic pots are a great way to display plants and flowers around our homes, adding personality and depth to our outdoor space. However, keeping these pots looking their best requires choosing the right paint to withstand the elements and continuous exposure to sunlight.
We will explore the best paint options for outdoor ceramic pots, ensuring your ceramics stay vibrant, attractive, and protected.
• Acrylic Paints: Versatile and Suitable for Many Surfaces
Acrylic paint is an excellent choice for outdoor ceramic pots due to its versatility and suitability for many surfaces. It is water-based, which makes it easy to clean and work with, and the quick drying time minimizes the risk of smudging during the painting process.
Pros of Acrylic Paints:
- Easy to work with and can be applied with brushes, rollers, or spray cans.
- Dries quickly and is water-resistant once dry.
- Can be mixed to create a wide range of colors.
- Can be sealed with a clear varnish for added protection.
Cons of Acrylic Paints:
- Less durable than some other paint types.
- May require reapplication after a few years.
Recommended Acrylic Paints for Outdoor Ceramics:
- Liquitex Professional Heavy Body Acrylic Paint: Offers vibrant colors ideal for outdoor ceramic pots.
- Nova Color Artists’ Acrylic Paint: A high-quality, professional-grade outdoor paint with excellent adhesion, coverage, and durability.
• Oil-Based Paints: Durability and Longevity
Oil-based paints provide increased durability and longevity, making them a great choice for outdoor ceramic pots. The paint adheres well to the surface and provides a strong, long-lasting coat that is less likely to peel, chip, or fade.
Pros of Oil-Based Paints:
- Highly durable and resistant to weathering.
- Provides a long-lasting finish.
- Great for achieving a glossy or satin finish.
Cons of Oil-Based Paints:
- Takes longer to dry than water-based paints.
- Requires solvents for cleaning brushes and tools.
- Some oil-based paints contain VOCs (volatile organic compounds) which can harm the environment and human health.
Recommended Oil-Based Paints for Outdoor Ceramics:
- Rust-Oleum Protective Enamel Paint: Offers superior coverage and protection and is ideal for outdoor ceramics.
- Glidden High Endurance Exterior Paint: A durable, long-lasting paint perfect for outdoor ceramic pots.
• Enamel Paints: Glossy Finish and Protection
Enamel paint is another great option for painting outdoor ceramic pots, as it provides a glossy and durable finish that is resistant to wear and tear. It adheres well to the ceramic surface and is less likely to chip, flake, or peel over time.
Pros of Enamel Paints:
- Provides a glossy finish that looks great on outdoor ceramic pots.
- Highly durable and can withstand outdoor elements.
- Excellent coverage and adhesion.
Cons of Enamel Paints:
- Some enamel paints can contain harmful VOCs (volatile organic compounds).
- Drying time may be slower than water-based paints.
Recommended Enamel Paints for Outdoor Ceramics:
- Rust-Oleum Painter’s Touch Ultra Cover: A highly durable enamel paint perfect for outdoor ceramics.
- Krylon Fusion All-In-One: A versatile enamel paint suitable for various surfaces, including outdoor ceramic pots.
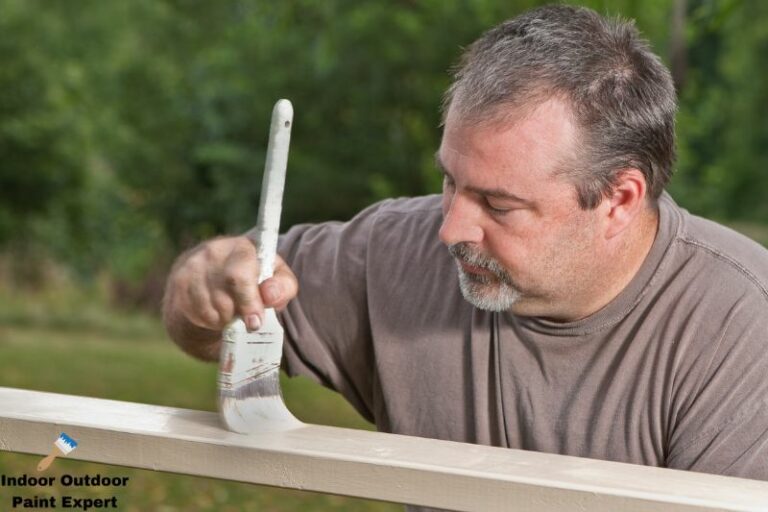
• Preparation and Application Tips
Before applying any paint to your outdoor ceramic pots, it’s essential to follow some preparation and application tips to ensure the best results:
- Clean the pots thoroughly, removing any dirt, debris, and mold.
- If the ceramic pot has a glossy surface, lightly sand it to create a more adherent surface for the paint.
- Use a primer before applying your chosen paint. A good primer will help the paint adhere to the pot and provide a base for an even, smooth finish.
- Apply the paint in thin, even coats, allowing each coat to dry thoroughly before applying the next.
- Seal the paint with a clear varnish or sealant for additional protection and durability.
• Conclusion
In conclusion, the best paint for outdoor ceramic pots depends on your preferences and priorities. Acrylic, oil-based, and enamel paints offer great results following proper preparation and application techniques.
By choosing high-quality paint and following the recommended steps, you can ensure that your outdoor ceramic pots remain vibrant and protected for years.
Brand | Paint Name | Type | Weather Resistant | UV Resistant |
|---|---|---|---|---|
Rust-Oleum | Universal All Surface Paint | Spray Paint | Yes | Yes |
Krylon | Outdoor Dcor Paint | Spray Paint | Yes | Yes |
MONTANA | Montana GOLD | Acrylic-Based Spray Paint | Yes | Yes |
DecoArt | Americana Decor Outdoor Living | Acrylic Paint | Yes | No |
Liquitex | Heavy Body Professional | Acrylic Paint | Yes | Yes |
Determining the Most Suitable Type of Paint for Ceramic Pots
As a painting enthusiast specializing in ceramic pots, I understand that choosing the right paint is crucial to achieving the perfect finish and durability. I will share everything you need to know about the best types of paint for ceramic pots and how to use them effectively.
• Acrylic Paint: A Versatile Choice for Ceramic Pots
Acrylic paint is one of the most widely used and popular types of paint for ceramic pots. It is water-based, so it’s easy to clean up and dries quickly. Acrylic paint works well on various surfaces, including ceramic, and provides a vibrant, long-lasting color.
– Pros of Using Acrylic Paint
- Easy to Use: Acrylic paint is easy to work with and easily blended to create various shades and finishes.
- Quick-Drying: Unlike oil-based paint, acrylic paint dries fast, which allows you to complete your project quickly.
- Vibrant Colors: Acrylic paint comes in a wide range of vibrant colors that can bring your ceramic pots to life.
- Water-Resistant: Once dry, acrylic paint becomes water-resistant, which helps protect your ceramic pots from moisture.
– Cons of Using Acrylic Paint
- Not Food Safe: Acrylic paint is not suitable for ceramic pots that will come into contact with food or drink.
- Less Durable: Acrylic paint may be less durable than other types, like enamel paint, and may require additional protection, like a clear sealer.
– Tips for Using Acrylic Paint on Ceramic Pots
- Properly Clean Your Ceramic Pot: Before applying acrylic paint, ensure your ceramic pot is free of dust or dirt. Clean it with warm, soapy water and let it dry completely before you start painting.
- Apply a Primer: To ensure proper paint adhesion, apply a suitable ceramic primer. This step is crucial for outdoor ceramic pots exposed to the elements.
- Use High-Quality Brushes: Invest in high-quality brushes that won’t leave brush strokes or shed bristles to achieve a smooth, even finish.
- Apply Multiple Coats and Seal: Apply at least two coats of acrylic paint, allowing each coat to dry completely. After your final coat has dried, apply a clear, protective sealer to make your paint job last longer and protect it from UV rays, moisture, and scratches.
• Enamel Paint: A Durable Option for Ceramic Pots
Enamel paint is another popular choice for painting ceramic pots. This oil-based paint is known for its durability and glossy finish. Enamel paint is ideal for outdoor ceramic pots, providing excellent resistance to water, UV rays, and other weather elements.
– Pros of Using Enamel Paint
- Durable Finish: Enamel paint offers a long-lasting and durable finish, making it ideal for ceramic pots exposed to outdoor elements.
- Glossy Finish: Enamel paint gives a smooth, glossy finish that offers an elegant touch to your ceramic pots.
- Resistant to Elements: Enamel paint is resistant to water, UV rays, and other weather elements, making it an excellent choice for outdoor ceramic pots.
– Cons of Using Enamel Paint
- Slow Drying Time: Unlike acrylic paint, enamel paint takes longer to dry, meaning your project may take longer.
- Strong Odor: Due to its oil-based nature, enamel paint has a strong odor, which may be unpleasant and require adequate ventilation.
- Difficult Cleanup: Cleaning up enamel paint requires turpentine or mineral spirits, making the process more challenging than cleaning water-based paint.
– Tips for Using Enamel Paint on Ceramic Pots
- Use a Suitable Primer: Like with acrylic paint, applying a suitable primer designed for ceramics before enamel paint ensures proper adhesion and durability.
- Paint in a Well-Ventilated Space: Enamel paint should be used in a well-ventilated area due to the strong odor.
- Thin the Paint: To ensure a smooth, even application, thin the enamel paint with the appropriate paint thinner.
- Apply Multiple Thin Coats: For the best results, apply multiple thin coats of enamel paint, allowing each coat to dry thoroughly.
In conclusion, acrylic and enamel paint are excellent choices for ceramic pots, depending on your specific needs and preferences. Acrylic paint is easy to use and quick-drying, while enamel paint offers a durable and glossy finish.
Following the tips above, you can ensure a successful paint job that will bring new life to your ceramic pots. Happy painting!
Paint Type | Advantages | Disadvantages |
|---|---|---|
Acrylic Paint | Not as durable as other paints, it might flake or fade over time | Requires careful application and may need multiple coats |
Oil-Based Paint | Highly durable, resistant to water and scratches, vibrant colors | Provides a glossy finish, is durable, resistant to wear and tear |
Enamel Paint | Specifically designed for ceramics, it provides long-lasting color, dishwasher-safe when baked | Takes a long time to dry and requires solvents for clean-up |
Porcelain Paint | It provides a glossy finish, is durable, resistant to wear and tear | More expensive, limited color options |
Is it Possible to Paint Outdoor Ceramic Planters?
Absolutely! You can paint your outdoor ceramic planters to give them a fresh, vibrant look. Painting your ceramic planters allows you to express your creativity and add a personal touch to your living space. We will distinguish the right materials and methods to guide you in painting.
• Choose the Right Paint and Supplies
First, it’s essential to choose the paint and supplies that are suitable for ceramics and withstand outdoor weather conditions.
– Paint Type
I recommend using acrylic or latex paint, as both types adhere well to ceramic and are durable for outdoor exposure. Consider selecting a brand that specifically states it’s suitable for outdoor use and is water-resistant.
– Primer and Sealer
You should apply a primer and sealer to ensure the paint adheres properly and lasts longer. The primer creates a smooth surface for the paint to stick to, while the sealer protects against weather, water, and UV rays.
Choose a primer and sealer designed for use on ceramics or outdoor objects. Some products offer a combination of primer and sealer, which saves time and effort.
– Brushes
Pick brushes with synthetic bristles; they’re better suited for applying acrylic or latex paint to ceramics. Various brush sizes will enable you to paint large areas and smaller, intricate details.
– Other Supplies
- A sponge or cloth for cleaning the planter
- Sandpaper (150 to 180 grit) to smooth the surface
- Painter’s tape for masking off areas
• Prepare the Outdoor Ceramic Planter
Before painting your ceramic planter, cleaning and preparing the surface is vital. Follow these steps to ensure your planter is ready for a fresh coat of paint:
- Clean the planter: Gently scrub the planter with a sponge or cloth and mild soapy water to remove dirt, grime, and other impurities. Allow it to dry completely before proceeding.
- Sand the surface: Lightly sand the planter with sandpaper to create a rougher surface, helping the paint adhere better. Wipe off the dust and debris with a damp cloth after sanding.
- Mask off areas: Use painter’s tape to cover any parts of the planter you don’t want to paint, such as the drainage hole or any decorative elements you want to preserve.
• Apply Primer, Paint, and Sealer
Follow these steps to give your outdoor ceramic planter a new and improved look:
- Apply the primer: Using a brush, apply a thin coat of primer to the entire surface of the planter. Allow it to dry according to the manufacturer’s instructions. You may need to apply a second coat, especially if the planter has a glazed surface.
- Paint the planter: Once the primer is dry, paint your ceramic planter with your chosen paint colors. Apply even and thin coats, allowing each coat to dry before applying another, as per the paint’s instructions. It’s better to build up the color in layers rather than achieve full coverage in one go.
- Add details and accents: If desired, use smaller brushes to paint intricate details or accents on the planter for a more personalized and artistic touch.
- Apply the sealer: After thoroughly drying the paint, apply a sealer to protect your work from the outdoor elements. Ensure that the sealer you choose is compatible with your chosen paint, and follow the manufacturer’s instructions on drying time.
• Caring for Your Painted Outdoor Ceramic Planter
To ensure longevity and maintain the appearance of your painted ceramic planter, take the following precautions:
- Avoid placing the planter where it will be subject to excessive moisture, such as under a downspout or in a low spot where water may collect.
- During the winter months, consider bringing the planter indoors or covering it with a weather-resistant cover to protect it from freezing temperatures and precipitation.
- Inspect the planter periodically for any signs of wear or damage, and touch up the paint and sealer as needed.
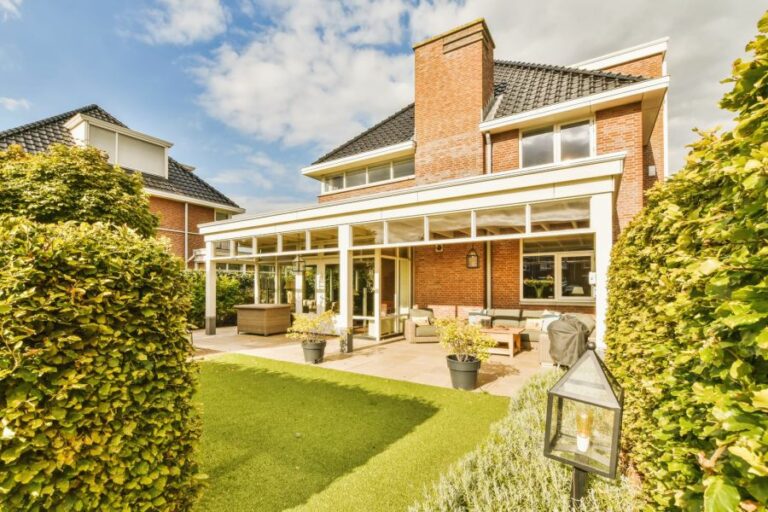
Painting your outdoor ceramic planters can be a fun and creative way to enhance the appearance of your garden or outdoor living space. By choosing the right paint, primer, and sealer and adequately preparing the planter before painting, you can create a beautiful, long-lasting piece of art that you’ll enjoy for years.
What Type of Paint Should You Utilize for Outdoor Planters?
When selecting the right paint for your outdoor planters, there are various factors to consider. The type of material your planter is made from, the longevity of the finish, and the overall aesthetic you aim for are all essential elements to consider.
We will explore different types of paint, recommended application methods, and tips for maintaining the beauty of your painted planters.
• Types of Paint for Outdoor Planters
– Acrylic Paint
A popular choice for outdoor planters, acrylic paint is known for its durability, versatility, and ease of use. It adheres well to various materials, including wood, ceramic, terra cotta, and plastic. Acrylic paint dries quickly and is water-resistant, making it an excellent option for outdoor use.
Additionally, acrylic paints are available in various finishes: matte, satin, gloss, and high-gloss, allowing you to achieve the desired look for your planters.
– Exterior Latex Paint
Exterior latex paint is another excellent option for outdoor planters. This type of paint is specifically designed to withstand harsh outdoor conditions, providing a long-lasting and durable finish.
Exterior latex paint is available in various finishes, including flat, satin, semi-gloss, and high-gloss, and can be applied to wood, metal, and plastic surfaces.
– Enamel Paint
Enamel paint is a tough, durable paint for outdoor planters made from metal or glazed ceramic. This type of paint creates a hard, glossy finish that is resistant to chipping and scratching, making it perfect for surfaces that experience frequent handling.
Enamel paint can be oil-based or water-based, with oil-based enamel offering greater durability and longevity.
– Spray Paint
Spray paint offers a convenient and efficient way to paint outdoor planters, with many options for outdoor use. Choosing a spray paint designed for your planter’s specific material is essential to ensure proper adhesion and durability.
Spray paint is available in various finishes, including matte, satin, and high gloss.
• Preparing Your Planter for Painting
Proper surface preparation is crucial when painting outdoor planters, as it will ensure the best results and extend the life of your paint job. Here are some essential steps to follow:
- Clean the planter thoroughly: Remove any dirt, dust, or debris from the planter’s surface. A gentle soap and water solution works well for cleaning most materials. Be sure to rinse thoroughly and let the planter dry completely before painting.
- Sand the surface (if necessary): For wood, metal, or previously painted planters, lightly sand the surface to create a smooth surface and promote adhesion.
- Apply a primer (if necessary): A primer is essential for optimal paint adhesion and durability, especially for porous materials like wood or terra cotta. Choose a primer suitable for your planter’s material and the type of paint you plan to use.
- Tape off areas you don’t want to paint: Use painter’s tape to protect any planter areas you don’t want to be painted. This is especially important if your planter has intricate designs or multiple colors.
• Tips for Applying Paint to Outdoor Planters
- Choose a suitable painting environment: Ideal painting conditions include a well-ventilated area with low humidity and temperatures between 50F and 90F (10C and 32C). Avoid painting in direct sunlight or windy conditions.
- Apply thin, even coats: Multiple thin coats of paint yield a more durable and professional-looking finish than one thick coat. Be sure to let each coat dry completely before applying the next one.
- Use a high-quality brush or roller: Investing in high-quality painting tools will result in a smoother and more even paint application.
- Seal your paint: A clear sealer (such as a varnish or polyurethane) can provide additional protection and extend the life of your paint job. Be sure to choose a sealer compatible with the type of paint used.
• Maintaining Your Painted Planter
To ensure the longevity and beauty of your painted outdoor planters, it’s important to take a few simple maintenance steps:
- Regularly clean your planters: Wipe away any dirt or debris with a damp cloth and gentle soap solution as needed. Avoid using harsh chemicals or abrasive materials that can damage the paint.
- Watch for chips or scratches: Touch up any areas where the paint has chipped or scratched away to prevent moisture from seeping in and causing further damage.
- Move planters to a sheltered location during extreme weather: To protect your painted planters from harsh weather conditions, consider moving them to a more sheltered location during extreme cold, heat, or storms.
In conclusion, various types of paint are suitable for outdoor planters, including acrylic, exterior latex, enamel, and spray paint. Choosing the right paint based on your planter’s material and the desired finish is essential, as properly preparing the surface and following recommended application techniques.
With proper care and maintenance, your painted outdoor planters will remain beautiful and durable for years.
Paint Type | Description |
|---|---|
Acrylic Paint | Water-based paint is ideal for wood or masonry planters. It is durable and can withstand harsh weather conditions. It is also easy to clean up with soap and water. Look for exterior-grade latex paint for the best results. |
Latex Paint | Applying a primer before painting your planter can help ensure better paint adhesion and a longer-lasting finish. Choose a primer compatible with your chosen paint type and suitable for outdoor use. |
Oil-Based Paint | Paint that provides a durable finish, suitable for metal or wood planters. Oil-based paint takes longer to dry, but it can withstand exposure to the sun, rain, and other outdoor elements. Look for an exterior-grade paint intended for outdoor use. |
Spray Paint | Convenient and easy to apply, spray paint can provide a smooth, even finish on various planter materials. Choose a paint specifically designed for outdoor use and follow the manufacturer’s instructions for application and drying times. |
Paint Primer | Applying a primer before painting your planter can help ensure better paint adhesion and a longer-lasting finish. Choose a primer that is compatible with your chosen paint type and is suitable for outdoor use. |
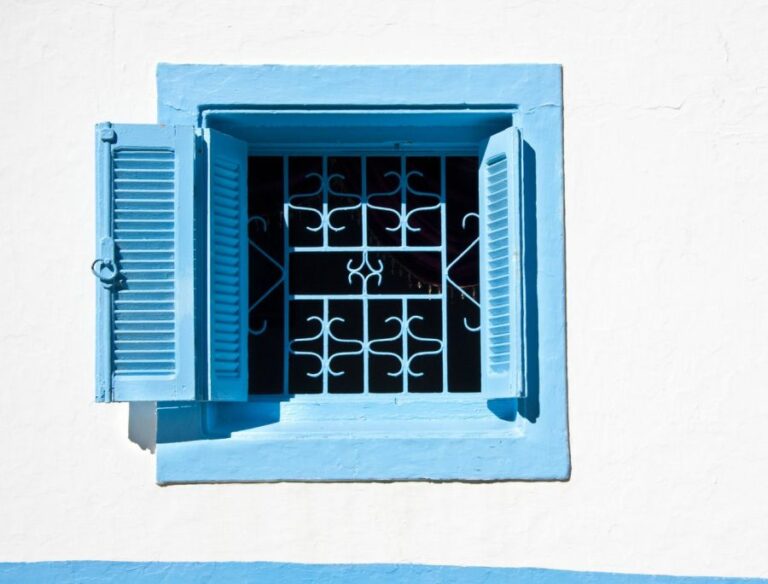
What is the Proper Technique for Painting Outdoor Glazed Planters?
Painting outdoor glazed pots is a creative and cost-effective way to give your garden a personalized touch. Choosing the right paint, preparing the pot for painting, and adding a protective sealant are crucial steps.
This comprehensive guide will cover everything you need to know about painting outdoor glazed pots, offering recommendations and tips for a successful project.
• Choosing the Right Paint for Outdoor Glazed Pots
When selecting paint for your outdoor glazed pot, choosing a product suited for exterior use and resistant to weathering is essential. Here are the most suitable options:
– Acrylic Paint
Acrylic paint is a popular choice for outdoor glazed pots due to its versatility, water resistance, and ease of use. Opt for high-quality, exterior-grade acrylic paint, as it offers better adhesion to glazed surfaces and is less likely to fade from sunlight exposure.
– Spray Paint
Spray paint designed for outdoor use is another excellent option for painting glazed pots. Look for a product specified for use on ceramics, as it will have a better bond with the glazed surface.
• Preparing the Pot for Painting
Before you start painting your outdoor glazed pot, preparing the surface adequately is crucial. Follow these steps to ensure the paint adheres correctly and lasts longer:
– Clean the Pot
Thoroughly clean the pot to remove any dirt, dust, or grime. Use warm soapy water and a scrub brush to eliminate any stubborn stains. After cleaning, rinse the pot with clean water and allow it to dry completely before moving on to the next step.
– Sand the Glazed Surface
Sanding the glazed surface is critical for proper paint adhesion. Use medium to coarse-grit sandpaper (80-120 grit), and lightly sand the entire exterior of the pot. This will create a slightly rough texture, allowing the paint to adhere more effectively.
Wear a dust mask when sanding to avoid inhaling dust particles.
– Wipe Down the Pot
After sanding, use a damp cloth to wipe down the pot, removing any dust or debris left behind. Allow the pot to dry completely before applying any paint.
• Painting the Outdoor Glazed Pot
Now that your pot is prepared, it’s time to get painting! Follow these steps for a successful painting process:
– Apply a Primer (Optional)
Applying a primer to the pot’s exterior is an optional but recommended step, as it will improve the adhesion of the paint and provide a more uniform finish. Use a primer specifically designed for outdoor use and follow the manufacturer’s instructions for application.
– Paint the Pot
Carefully apply the chosen paint to the pot using a paintbrush or spray paint, following the manufacturer’s instructions. For the best results, apply multiple thin coats, allowing each coat to dry before applying the next. This technique will yield a more even and durable finish.
– Add Details and Designs (Optional)
If you want to create a more intricate design on your glazed pot, use painter’s tape to mask off portions of the pot and create patterns. You can use stencils or freehand paint details using smaller brushes or paint pens.
• Sealing and Protecting the Painted Pot
To ensure your painted outdoor glazed pot remains vibrant and protected from the elements, apply a clear sealant:
– Choose a Sealant
Select a clear sealant specifically designed for outdoor use and appropriate for the paint you have used (acrylic or spray paint). The sealant should be water-resistant, UV-resistant, and non-yellowing.
– Apply the Sealant
Follow the manufacturer’s instructions to apply the sealant to the pot. Generally, this will involve applying one or more coats of the sealant using a clean brush or spray. Be sure to allow each coat to dry fully before applying the next.
– Allow the Sealant to Cure
Once the final coat of sealant has been applied, allow it to cure fully before placing the pot outdoors or filling it with soil and plants. Curing times will vary depending on the sealant, so refer to the manufacturer’s instructions.
• Final Thoughts on Painting Outdoor Glazed Pots
Painting outdoor glazed pots is a rewarding and straightforward project that can bring new life to your garden space. You can create a beautiful and durable painted pot that will last years with the proper preparation, paint selection, and sealing process. Happy painting!
Step | Description |
|---|---|
1 | Clean the pot thoroughly with soap and water to remove dirt and grime. Allow it to dry completely. |
2 | Wipe down the pot’s surface with a damp cloth to remove any dust generated from sanding. Allow it to dry. |
3 | Wipe down the surface of the pot with a damp cloth to remove any dust generated from sanding. Allow it to dry. |
4 | Apply a coat of primer specifically designed for glazed surfaces to the pot, following the manufacturer’s instructions. Let it dry completely. |
5 | Depending on your preference, paint the pot with acrylic or outdoor paint using a brush or spray can. Apply 2-3 coats, allowing each coat to dry before adding the next one. |
6 | Apply a clear sealer or topcoat, such as a water-based polyurethane, to protect the paint and provide durability. Allow it to dry completely before using the pot. |
What are the techniques for painting ceramic outdoor pots?
Painting ceramic outdoor pots is a creative way to add a personal touch to your garden or patio. With the right preparation, paint selection, and finishing, you can transform plain or old pots into beautiful, functional art pieces that withstand weather elements.
We will discuss the step-by-step process of painting ceramic pots effectively and provide helpful tips for achieving professional results.
• Gather the Necessary Supplies
Before you begin, gather the following items to ensure your painting project runs smoothly:
- Ceramic pots (unglazed or previously glazed)
- Fine-grit sandpaper
- Damp cloth or sponge
- Painter’s tape
- Primer specifically designed for ceramic or masonry surfaces
- Acrylic paint or ceramic paint
- Synthetic bristle brush or foam brush
- Clear, water-based urethane sealer
- Artistic tools (optional), such as stencils, sponges, or painter’s tape for creating patterns
Having all necessary materials readily available will streamline the painting process and prevent interruptions.
• Prepare the Ceramic Pot
– Step 1: Sand the Surface
Begin by lightly sanding the entire ceramic pot with a fine-grit sandpaper. This will create a slightly rough texture, allowing the primer and paint to adhere more effectively. If you’re working with a glazed pot, sand the surface until the glossy finish appears dull.
Be thorough but gentle, as applying excessive pressure can cause damage to the pot.
– Step 2: Clean the Pot
Once the pot is sanded, use a damp cloth or sponge to remove dust or debris. It is essential to properly clean the surface, as any remaining dirt or dust can interfere with paint adhesion. Allow the pot to dry completely before moving on to the next step.
• Apply Primer
A primer is necessary to bond the ceramic surface and the paint. Choose a primer specifically designed for ceramic or masonry surfaces, and follow the manufacturer’s instructions for application.
Generally, you must apply one coat of primer with a synthetic bristle or foam brush, ensuring smooth and even coverage. Allow the primer to dry for the time specified on the product label.
• Paint the Ceramic Pot
With the primed pot dry, it’s time to have fun and let your creativity shine! Whether using acrylic or ceramic paint, the application process is similar. Here are the steps to follow:
– Step 1: Plan Your Design
Before opening your paint, take some time to plan your design. You may paint your pot a single color or create a pattern using multiple shades. Consider using stencils, painter’s tape, or sponges to achieve your desired effect for intricate designs.
– Step 2: Apply the Paint
Apply the paint to the ceramic pot using a synthetic bristle or foam brush. To ensure even coverage and prevent brush strokes, apply thin layers of paint and allow each to dry before applying the next.
Most projects will require a minimum of two coats for adequate coverage, but additional layers may be necessary depending on your chosen design.
– Step 3: Create Patterns (Optional)
If you wish to add a pattern or design to your pot, it is best to do so after the base color is dry. Use stencils, painter’s tape, or other artistic tools to achieve your desired look. Be sure to allow each layer of paint to dry before proceeding to avoid smudging or uneven results.
• Seal the Painted Ceramic Pot
After the final paint layer is dry, it is essential to seal the pot to protect the paint and ensure longevity. Using a clear, water-based urethane sealer, apply one to two coats with a synthetic bristle or foam brush, allowing each coat to dry according to the manufacturer’s instructions. This sealer creates a protective barrier that helps to prevent fading, chipping, or peeling.
• Additional Tips for Painting Ceramic Pots
- Select outdoor-rated paints and sealers designed to withstand harsh weather conditions for best results.
- Always allow ample drying time between primer, paint, and sealer coats.
- When choosing colors, consider the surrounding environment and how the pots will look when filled with plants.
- Feel free to experiment with different techniques and tools to create unique patterns and textures.
- Painting ceramic pots can be fun to enjoy with friends or family. Consider hosting a pot painting party!
In conclusion, painting outdoor ceramic pots is an enjoyable, easy way to personalize your outdoor living space. By following the steps outlined above and utilizing the additional tips, you can create beautiful pots that reflect your style and grace your garden, patio, or porch for years to come.
Step | Description |
|---|---|
1 | Clean the pot: Before painting, ensure the ceramic pot is clean. Remove dirt and dust using a cloth or sponge. |
2 | Apply a primer: Use a primer suitable for ceramic surfaces to prepare the pot for painting. Allow it to dry according to the manufacturer’s instructions. |
3 | Select paint: Choose paint suitable for outdoor use and ceramic surfaces. Acrylic paint is a popular choice for this project. |
4 | Paint the base coat: Apply the base color to the pot using a brush or sponge. Allow it to dry, and apply a second coat if necessary. |
5 | Add designs or patterns: Once the basecoat is dry, use a smaller brush or stencil to create any designs or patterns you desire. |
6 | Apply a sealer: After the paint has dried completely, apply a clear sealer to protect the design from weather and wear. Allow the sealer to dry according to the manufacturer’s instructions. |
Determining the Ideal Paint for Outdoor Plant Pots
Choosing the right paint for your outdoor pots can be a challenging task. With various available options, it can be overwhelming to determine which one is best suited for your needs.
We will discuss the different types of paint best suited for outdoor pots, their benefits, and tips for successful application.
• Types of Paint Suitable for Outdoor Pots
– Acrylic Paint
Acrylic paint is a popular option for outdoor pots due to its versatility, affordability, and water resistance. This type of paint is suitable for various surfaces, including terracotta, wood, metal, and plastic pots. Acrylic paint dries quickly and forms a durable, flexible finish that resists chipping, fading, and cracking.
I recommend using acrylic paint for simple, easy-to-paint designs like stripes, polka dots, or other patterns. For more intricate designs, you might want to consider other types of paint discussed below.
– Outdoor Latex Paint
Outdoor latex paint is designed to withstand the elements, making it an ideal choice for painting outdoor pots. It forms a durable, weather-resistant layer that protects the pot from UV rays, moisture, and temperature fluctuations.
This type of paint adheres well to various surfaces, such as terracotta, wood, and metal pots.
I recommend using outdoor latex paint for large-scale projects or when repainting multiple pots, as it provides optimum coverage and durability.
– Spray Paint
Spray paint is an excellent choice for outdoor pots, especially for those who prefer a quick and efficient painting process. This type of paint is available in various finishes, including gloss, satin, and matte. It adheres well to surfaces such as plastic, metal, and terracotta pots.
I recommend spray paint for an even smooth finish or hard-to-reach areas. Additionally, it’s great for creating various artistic effects, such as ombre, color blocking, or stencil patterns.
– Enamel Paint
Enamel paint is renowned for its durability, making it a suitable option for outdoor pots exposed to harsh weather conditions. It is suitable for surfaces like metal, glass, and porcelain. This type of paint dries hard and has a glossy finish, adding elegance and sophistication to your pots.
I recommend using enamel paint for intricate designs or customized hand-painted artwork on your pots, as it offers fine detailing and long-lasting durability.
• Tips for Successful Application
– Preparing the Surface
Before you begin painting, ensure the pot’s surface is clean and free from debris or dirt. You can use a mild detergent mixed with water to clean the surface, then wipe it dry with a clean cloth. If required, lightly sand the surface to remove rough spots or existing paint.
– Priming the Pot
Priming your outdoor pot is an essential step that helps the paint adhere better to the surface and provides an even base for painting. Make sure to choose a primer specifically designed for the type of surface you are painting, such as terracotta or metal.
Following the manufacturer’s instructions, apply a thin layer of primer, and let it dry completely before proceeding with the painting process.
– Proper Technique
Regardless of the type of paint you choose, always follow the manufacturer’s instructions and guidelines for application. Depending on the paint and desired finish, use the appropriate applicator, such as a brush, roller, or spray nozzle.
Apply multiple thin layers, allowing each coat to dry completely before applying the next one. This technique helps achieve a neat and evenly painted surface, reducing the risk of drips and runs.
– Sealing the Paint
After the paint has dried completely, seal your outdoor pot with a clear coat or sealer. This step protects your designs from fading, chipping, and weather damage. Choose a sealer designed for outdoor use and compatible with the type of paint used.
Apply the sealer following the manufacturer’s guidelines, and let it dry completely before placing your pot outdoors.
• Final Thoughts
In conclusion, the right paint for your outdoor pots largely depends on factors such as the pot’s material, the desired finish, and the complexity of the design. Acrylic, outdoor latex, spray, and enamel paints are suitable for various applications.
Whichever type of paint you choose, follow the essential steps of surface preparation, priming, proper application, and sealing to ensure long-lasting, beautiful results.
Following the recommendations and tips, you can transform your outdoor pots into functional, stylish, and creative pieces to enhance your garden or patio space.
Paint Brand | Type | Durability | Weather Resistance | Price |
|---|---|---|---|---|
Rust-Oleum Universal | Spray Paint | High | Excellent | $$ |
Krylon Fusion All-In-One | Spray Paint | High | Excellent | $ |
Behr Premium Plus | Acrylic Latex | Medium | Good | $$ |
Sherwin-Williams Emerald | Acrylic Latex | High | Excellent | $$$ |