How To Paint Outdoor Light Fixture Without Taking It Down
Is your outdoor light fixture looking outdated or showing signs of wear and tear? You don’t need to remove the entire fixture for a fresh look! We’ll walk you through the steps to paint and revitalize your outdoor light fixture without taking it down. Say goodbye to rusty eyesores as we teach you effective techniques for an efficient and cost-saving transformation.
How to paint outdoor light fixture without taking it down:
This article provides a comprehensive guide to professionally paint an outdoor light fixture without removing it. It covers steps like preparing the light fixture, turning off the power, cleaning, protecting glass with painter’s tape, sanding the surface, selecting the right paint and tools, painting with thin and even coats, and optionally applying a primer and clear coat. The guide emphasizes safety and achieving a long-lasting, refreshed look.
Learn foolproof techniques to paint your outdoor light fixture in place, avoiding the hassle of removal. Our step-by-step guide covers proper surface preparation, paint selection, and application, ensuring a professional and enduring finish. Transform your fixture with ease and confidence!
Contents
- 1 How to Professionally Paint an Outdoor Light Fixture Without Removing It First
- 2 Is it Possible to Paint a Light Fixture Without Removing it from its Position?
- 3 How can you effectively paint an exterior light fixture without removing it from its position?
- 4 What Type of Paint is Suitable for Outdoor Light Fixtures?
- 5 What is the process for painting old exterior light fixtures?
- 6 Is it Possible to Apply Spray Paint on Brass Outdoor Lighting Fixtures?
- 7 Is it Possible to Apply Paint on Metal Light Fixtures?
How to Professionally Paint an Outdoor Light Fixture Without Removing It First
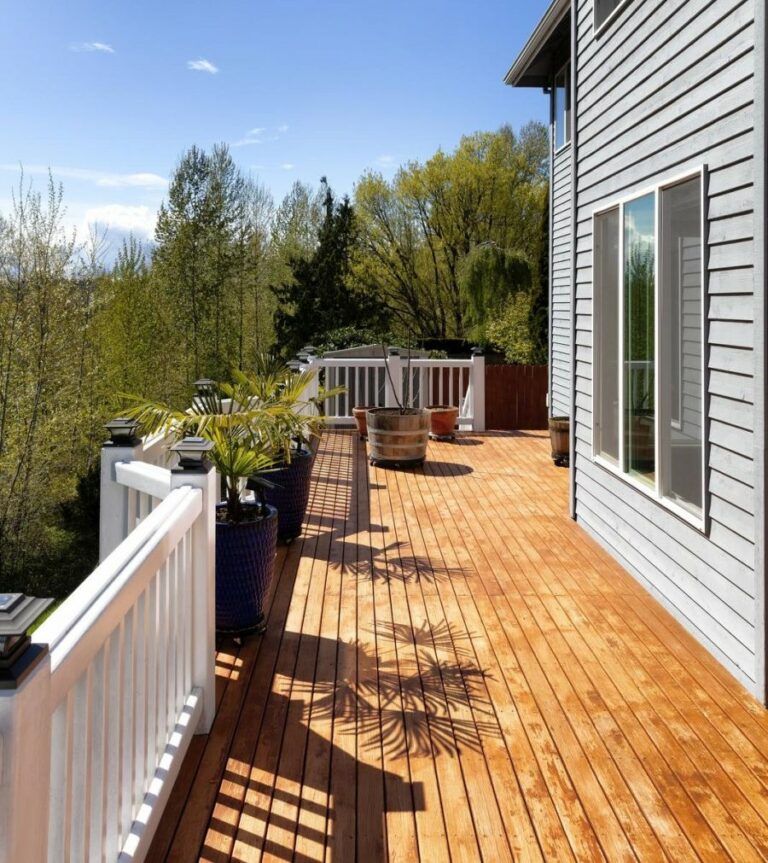
A well-lit yard can increase the beauty and security of any property. But, over time, outdoor light fixtures may become discolored, rusted, or chipping from exposure to the elements.
• Preparing the Light Fixture for Painting
Before you begin your project, make sure to turn off the power to the light fixture at the circuit breaker for added safety.
– Clean the Light Fixture
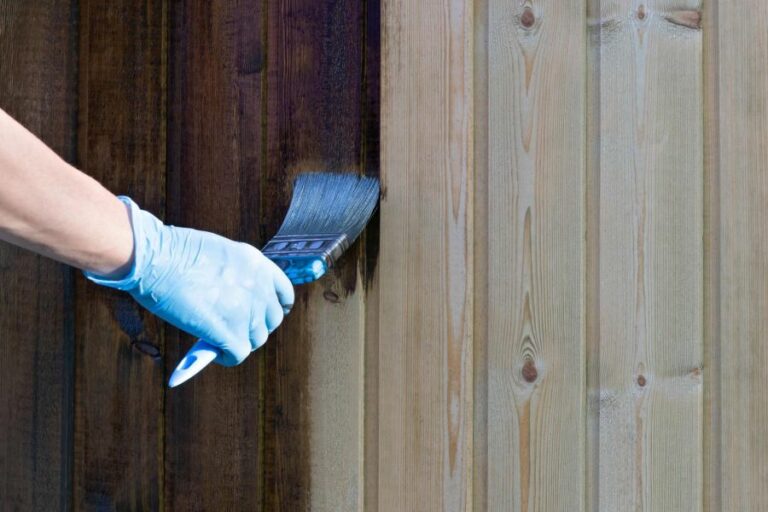
It’s important to remove any dirt or debris before you begin the painting process to ensure a smooth and professional-looking finish. Use a soft-bristle brush to dust off the fixture, and then wash it with a solution of mild dish soap and warm water.
Rinse with clean water and use a cloth to dry the fixture thoroughly.
– Protect the Glass, Bulbs, and Other Parts
When painting the light fixture, you’ll want to avoid getting paint on the glass or other parts that should not be painted. To protect these areas, use painter’s tape to cover the glass and bulbs, ensuring there are no gaps where paint could seep in.
Additionally, you can wrap plastic wrap around any other parts of the fixture you do not want to be accidentally painted.
– Sand the Surface
To ensure a smooth and long-lasting finish, you’ll need to lightly sand the surface of the light fixture to remove any loose paint or rust. Use fine-grit sandpaper (180-220 grit) for this task, being gentle to avoid damaging the fixture. After sanding, use a tack cloth to wipe away any dust or debris.
• Choose the Right Paint and Tools for the Job
– Select the Proper Paint
When painting an outdoor light fixture, it’s crucial to choose a paint specifically designed for the outdoors and metal surfaces. I recommend using a paint that is labeled as moisture-resistant and rust-preventative to ensure long-lasting results.
Spray paint is the most popular option for this type of project, as it provides a uniform and smooth finish. However, if you prefer, you can also use a brush-on paint designed for metal surfaces. Just make sure to choose high-quality paint for optimal results.
– Use the Right Tools
For a professional-looking finish, be sure to gather the necessary tools and materials for your project. If you’re using spray paint, choose a spray paint nozzle designed for outdoor projects that will provide a smooth, even coat.
If you opt for brush-on paint, use a high-quality paintbrush to avoid any brush marks on the fixture.
• Painting the Light Fixture
Now that your light fixture is prepared and you have the proper materials, you can begin the painting process.
– Apply a Primer (Optional)
Although many metal paints feature built-in primers, applying a standalone primer can further increase the longevity and durability of your paint job. It provides added adhesion to the surface and prevents rust formation. If you decide to use a primer, make sure it is specifically formulated for metal surfaces.
– Apply the Paint
Whether you’re using spray paint or brush-on paint, remember to apply thin and even coats to prevent drips, runs, or uneven coverage. For spray paint, hold the can at a consistent distance from the fixture, using sweeping side-to-side motions and overlapping each pass slightly.
Allow each coat to dry as recommended on the paint can before applying the next. For brush-on paint, use a high-quality paintbrush and ensure it is properly loaded with paint for each application. Use long, even brush strokes to create a smooth and uniform finish.
– Apply a Protective Clear Coat (Optional)
To further protect your newly painted light fixture and increase its longevity, consider applying a clear protective coat after your paint has fully dried. Make sure to choose a clear coat that is compatible with your chosen paint and is specifically designed for metal surfaces.
• Final Steps
Once your paint is fully dry, carefully remove the painter’s tape and plastic wrap from the light fixture. Turn the power back on at the circuit breaker, and enjoy the renewed appearance of your outdoor light fixture.
By following this comprehensive guide on how to paint an outdoor light fixture without taking it down, you can refresh the look of your property while increasing the longevity of your fixture.
Remember to always prioritize safety by turning off the power to the fixture at the circuit breaker before beginning the painting process.
Step | Description |
|---|---|
1 | Clean the light fixture thoroughly using mild soap and warm water. Make sure to remove any dirt, debris, and cobwebs. |
2 | Allow the light fixture to dry completely before proceeding. |
3 | Place painter’s tape around the edges of the light fixture to protect the surrounding surfaces or walls from paint. |
4 | Cover the light bulbs, sockets, or any other part you do not want to paint with painter’s tape or plastic bags. Secure tightly to ensure that there will be no paint on these areas. |
5 | Lightly sand the surface of the light fixture with fine-grit sandpaper to remove any old paint or rust and create a smooth surface for the new paint to adhere to. |
6 | Apply a coat of high-quality primer specifically designed for metal surfaces using a paintbrush or small foam roller. Let the primer dry according to the manufacturer’s instructions. |
7 | Sign in. |
8 | Apply the desired color of exterior-grade paint suitable for metal surfaces using a paintbrush or foam roller. Apply multiple thin coats, allowing each coat to dry according to the manufacturer’s instructions before applying the next one. |
9 | Allow the final coat of paint to dry completely before removing the painter’s tape and plastic covers from the light bulbs and sockets. |
10 | Once the paint is completely dry, turn the power back on to the light fixture and admire your freshly painted outdoor light fixture! |
Is it Possible to Paint a Light Fixture Without Removing it from its Position?
Painting a light fixture is a popular and cost-effective way to modernize a room’s decor.
Whether you are trying to match the color of your light fixture to your room’s color scheme or update the look of an outdated fixture, painting allows you to customize your space without the need for expensive replacement items.
However, many homeowners wonder if it’s possible to paint a light fixture without first removing it from the ceiling. The answer is yes, but certain precautions and considerations should be taken to ensure a smooth and successful DIY project.
• Preparing Your Workspace
Before beginning the project, it’s crucial to properly prepare your workspace for both safety and efficiency.
1. Ensure Safe Access to the Light Fixture
First and foremost, make sure you have a stable means of accessing the light fixture, such as a secure ladder or step stool. Avoid standing on countertops, tables, or other unstable surfaces when attempting to reach your light fixture.
2. Turn Off the Electricity
Always start your project by turning off the electricity to the light fixture at your electrical panel. This ensures a safe environment while working around electric equipment.
Although you will not be taking down the fixture, it’s always best to err on the side of caution when working around electrical components.
3. Protect Your Surroundings
Before painting, you should take appropriate steps to protect the area around the light fixture, including removing any furniture or decorative items that could be damaged by paint, and covering your floor with a drop cloth. You will also need painter’s tape to protect the ceiling around the base of the fixture.
• Tools and Materials for Painting a Light Fixture
Before starting the project, gather the necessary materials and tools to paint your light fixture. These items include:
- A clean cloth or sponge
- Mild soap
- Painter’s tape
- A drop cloth, plastic sheeting or newspapers
- Spray paint or paint specifically for metal surfaces
- Abrasive sanding pad or steel wool (if needed for removing rust or flaking paint)
- Primer (optional, but recommended for better paint adhesion)
• Step-By-Step Guide to Painting a Light Fixture Without Taking It Down
1. Clean the Light Fixture
Before painting, ensure the light fixture is clean, dry, and free of dust or grease. Use a clean cloth or sponge and mild soap to clean the surface of the fixture. Wipe it dry with a clean cloth before moving on to the next step.
2. Prepare the Light Fixture Surface
If your light fixture has any rust or flaking paint, you will need to remove it before painting using an abrasive pad or steel wool. Once you have thoroughly sanded the fixture, use a clean cloth to remove any dust or debris.
3. Apply Painter’s Tape
Apply painter’s tape to the ceiling around the base of the fixture to protect it from any potential paint overspray or drips. Be sure to press firmly on the edges of the tape to ensure a good seal and crisp paint lines.
4. Prime the Light Fixture (Optional)
While using a primer may not be necessary, I recommend applying one for better paint adhesion and a more seamless final result. Primer can be applied using a brush or sprayed on, depending on the type of primer and your personal preference.
Allow the primer sufficient time to dry according to the manufacturer’s instructions.
5. Apply the Paint
When the primer is dry, you can begin painting the light fixture using either spray paint or paint specifically designed for metal surfaces. When using spray paint, hold the can approximately 8 to 12 inches away from the fixture and use a sweeping motion to apply the paint evenly.
With either approach, it is important to apply several thin coats, allowing each coat to dry before applying the next. This method will provide better coverage and a smoother finish.
6. Remove Painter’s Tape and Allow to Dry
Once the final coat of paint is applied, carefully remove the painter’s tape while the paint is still wet, ensuring the paint does not peel away with the tape.
Allow the paint to dry according to the manufacturer’s instructions before turning the electricity back on and reassembling any removed parts of the light fixture.
• Final Thoughts
Painting a light fixture without taking it down is possible, but it requires careful preparation and attention to detail. By following the steps outlined above, you can refresh the look of your light fixture and enhance your room’s decor.
Just remember to always prioritize safety when working around electrical components and elevate your workspace securely for the best possible outcome.
How can you effectively paint an exterior light fixture without removing it from its position?
Painting an outside light fixture can be a quick and easy way to give your home’s exterior a mini-makeover. However, removing the light fixture from its position can be a hassle, especially if it’s installed high up or in hard-to-reach locations.
• Gather Your Materials
Before you begin, gather the necessary materials and tools to complete the job. Some essentials for painting a light fixture include:
- Paint: Choose a paint specifically designed for outdoor use and that is suitable for the material of the light fixture (usually metal or plastic).
- Painter’s tape: This will help protect the surrounding areas from accidental paint drips or spills.
- Equipment for cleaning the fixture: A soft cloth, warm soapy water, and a soft brush
- Sanding block or sandpaper: To create a smooth surface for the paint to adhere to
- A drop cloth or plastic sheet: To protect the surrounding area from paint
- A small brush or foam applicator: For applying the paint
- A small ladder or step stool: To reach the light fixture safely
• Clean the Light Fixture
Before applying paint to your outdoor light fixture, it is essential to thoroughly clean the surface. Dirt, dust, and grime can interfere with paint adhesion or create an uneven and unattractive paint job.
- Turn off power to the light: Disconnect or turn off the circuit breaker to avoid any risks associated with working around electricity.
- Clean the fixture: Use a soft cloth and warm soapy water to wipe down the entire light fixture gently. Remove any stubborn dirt or debris by gently scrubbing with a soft brush. Be cautious not to scratch or damage the surface.
- Dry the fixture: Allow the light fixture to air dry or use a soft cloth to wipe off any remaining moisture. Ensure that the surface is completely dry before you move on to the next step.
• Prepare the Surface for Painting
Preparing the surface of your outside light fixture will ensure a smooth and long-lasting finish.
- Sand the surface: Using a sanding block or sandpaper, lightly sand the entire light fixture to create a smooth and even surface. Be sure to focus on any areas with chipping or peeling paint. If your light fixture has intricate details or hard-to-reach areas, consider using a small piece of sandpaper, folded, or wrapped around an appropriate tool to access these areas.
- Clean the surface again: Wipe down the light fixture with a damp cloth to remove any dust or debris created during the sanding process. Allow it to dry completely.
• Protect Surrounding Areas with Painter’s Tape
Before you begin painting, it is vital to protect the surrounding areas from any paint drips, splatters, or spills.
- Apply painter’s tape: Use painter’s tape to cover any parts of the light fixture that you do not want to be painted. This can include the lightbulb socket, any glass or plastic parts, as well as any hardware or connections. Be sure to press the tape down firmly to create a good seal.
- Protect surrounding surfaces: Place a drop cloth or plastic sheet under the light fixture to catch any paint drips or spills. In some cases, you may need to tape the cloth or sheet to the wall or ceiling for added security.
• Apply the Paint
Now that your light fixture is clean, the surface is prepared, and the surrounding areas are protected, it is time to apply the paint.
- Stir the paint: Before use, stir the paint thoroughly to ensure proper consistency and color mixing.
- Use a proper applicator: A small brush or foam applicator is recommended for painting light fixtures. This type of applicator will allow for better control and ensure that the paint is applied evenly.
- Apply thin, even coats: When painting, use thin, even coats and avoid applying too much paint at once, which can lead to drips, runs, and uneven surfaces. If the paint is too thick, it may not dry correctly and could result in a poor-quality finish.
- Allow each coat to dry: Follow the manufacturer’s instructions for drying times between coats. In most cases, allowing the paint to dry for a minimum of two hours between coats will ensure a more durable and long-lasting finish.
• Reassemble and Enjoy Your Newly Painted Light Fixture
Once your light fixture is painted and completely dry, you can remove the painter’s tape and reassemble any removed components.
- Carefully remove the painter’s tape: Slowly and carefully pull the painter’s tape away from the light fixture. If you notice any areas where the paint may have leaked or bled under the tape, carefully touch up these spots using a small brush or applicator.
- Reassemble the light fixture: Reinstall any removed components or hardware.
- Turn on power: Restore power to the light fixture by reconnecting the circuit breaker or turning the electricity back on.
Your outside light fixture has now been successfully painted without taking it down! Enjoy the beautiful new look it provides for your home’s exterior.
Step | Description |
|---|---|
1 | Turn off the power to the light fixture at the breaker or fuse box. |
2 | Protect the surrounding area with a drop cloth or plastic sheeting. |
3 | Clean the light fixture thoroughly with a mild soap and water solution. Rinse and let dry completely. |
4 | Use painter’s tape to cover any parts of the fixture that should not be painted, such as the glass or electrical components. |
5 | Use a fine-grit sandpaper to lightly sand the fixture’s surface to improve paint adhesion. Wipe the fixture down with a tack cloth to remove any dust. |
6 | Apply a thin coat of primer designed for metal surfaces, following the manufacturer’s instructions for drying time. |
7 | Apply 1-2 coats of paint formulated for metal surfaces, allowing each coat to dry completely before adding the next one. |
8 | Once the paint is completely dry, remove the painter’s tape and turn the power back on. |
What Type of Paint is Suitable for Outdoor Light Fixtures?
Outdoor light fixtures are exposed to various weather conditions, such as rain, sunlight, and temperature fluctuations. To ensure their durability and maintain their appearance, it is essential to select the appropriate paint that can withstand these external factors.
• Types of Paint for Outdoor Light Fixtures
– Acrylic Latex Paint
Acrylic latex paint is a popular choice for outdoor light fixtures due to its flexibility, durability, and resistance to weather conditions, such as ultraviolet (UV) radiation, moisture, and temperature fluctuations.
Additionally, acrylic latex paint dries quickly and is easy to clean, making it an ideal option for outdoor use.
– Oil-based Paint
Oil-based paint provides a durable and long-lasting finish for outdoor light fixtures. It produces an even, glossy appearance, and it is water-resistant. However, oil-based paint takes longer to dry compared to acrylic latex paint, and it may become brittle over time when exposed to harsh weather conditions.
– Spray Paint
Spray paint can be an excellent option for outdoor light fixtures as it is easy to apply and provides a uniform finish. Both acrylic latex and oil-based spray paints are available and can be used on outdoor light fixtures depending on the required finish and durability needs.
• Essential Factors to Consider When Selecting Paint for Outdoor Light Fixtures
– Surface Material
The material of the light fixture is an essential factor to consider when selecting paint. Some types of paint may not adhere well to specific materials, such as plastic, metal, or wood. Therefore, it is crucial to choose a paint that is specifically formulated for the surface material of your outdoor light fixtures.
– Weather Resistance
As outdoor light fixtures are exposed to varying weather conditions, it is crucial to select a paint that can withstand these conditions. Look for paint options that contain UV inhibitors and moisture-resistant properties to protect the fixture from sunlight, rain, and humidity.
– Color Retention
Choose a paint that can retain its color for an extended period, particularly for outdoor light fixtures that are exposed to sunlight. High-quality acrylic latex and oil-based paints are known for their excellent color retention properties.
– Application Method
Depending on your preference and the size of your project, you may choose to use a brush, roller, or spray paint for your outdoor light fixtures. Each method has its pros and cons, so consider which one will work best for your needs.
• How to Apply Paint on Outdoor Light Fixtures
– Step 1: Cleaning and Preparation
Thoroughly clean the light fixture to remove dust, dirt, and debris. Use mild detergent and water to clean the surfaces and allow them to dry completely before proceeding.
For fixtures with an existing layer of paint, removing any peeling or flaking paint may be necessary using a wire brush, sandpaper, or paint scraper.
– Step 2: Priming
Applying a primer on the light fixture before painting ensures better adhesion of the paint, resulting in a more durable finish. Choose a primer that is specifically formulated for the surface material of your light fixture, such as metal, plastic, or wood.
Allow the primer to dry for the recommended time duration mentioned on the product label.
– Step 3: Painting
Once the primer has dried, you can begin painting the light fixture. Apply thin, even coats of paint using a brush, roller, or spray paint method, based on your chosen paint type and personal preference. Allow each coat to dry for the recommended time duration before applying the next.
Two to three coats may be required to achieve the desired finish and coverage.
– Step 4: Sealing
For added protection and durability, it is recommended to apply a clear sealant or topcoat after the paint has completely dried. This step is particularly crucial for outdoor light fixtures exposed to harsh weather conditions. Choose a sealant that is compatible with the paint used and follow the manufacturer’s instructions for application and drying time.
• Conclusion
Selecting the right paint for outdoor light fixtures ensures their durability, resistance against weather conditions and an aesthetically pleasing appearance.
Acrylic latex paint, oil-based paint, and spray paint are suitable options for outdoor light fixtures, depending on the specific requirements and preferences.
Always consider factors such as surface material, weather resistance, color retention, and application method when choosing the appropriate paint.
Following the recommended application steps, cleaning, priming, painting, and sealing will provide the best results and prolong the lifespan of your outdoor light fixtures.
Type of Paint | Description |
|---|---|
Acrylic Latex Paint | – Water-based paint that is resistant to UV damage, flexible, and durable – Suitable for most outdoor light fixtures |
Oil-based Paint | – Long-lasting paint offering excellent protection against weathering and corrosion – Can be more difficult to work with and may require longer drying time |
Metallic Paint | – Provides a strong and decorative finish for metal light fixtures – Offers good resistance to rust and corrosion. |
Spray Paint | – Available in a variety of finishes, including matte, gloss, and metallic – Easy to apply and provides a smooth, even finish |
Outdoor Primer | – A base coat applied before painting, designed to enhance the adhesion and durability of the paint – Essential for long-lasting protection of outdoor light fixtures |
Outdoor Sealer | – A top coat applied after painting, designed to provide additional protection and durability against weather and UV rays – Highly recommended for prolonging the life of painted outdoor light fixtures |
What is the process for painting old exterior light fixtures?
Upgrading your old outdoor light fixtures can be effortless and budget-friendly, and there’s no better way to do this than by applying a fresh coat of paint.
• Materials and Tools You Will Need
Before starting your project, gather the following materials and tools:
- Screwdriver/Adjustable wrench
- Stiff-bristle brush
- Sandpaper (120- and 220-grit)
- Tack cloth
- Painter’s tape
- Primer (meant for indoor/outdoor use and metal surfaces)
- Paint (meant for indoor/outdoor use and metal surfaces)
- Clear coat (meant for indoor/outdoor use and metal surfaces)
- Paintbrushes or paint sprayer
- Dropcloth or newspaper
- Gloves and face mask (optional, but recommended)
• Step 1: Remove the Fixture and Disassemble
Safety should be your first priority. Turn off power to the light fixture from the main electrical panel to ensure there’s no chance of an electric shock.
Using a screwdriver or adjustable wrench, remove the fixture from the wall or post. Be sure to keep any hardware, screws, or other components in a safe place, as you’ll need them during reassembly.
Carefully disassemble the fixture, removing any glass panels or other fragile parts. Be extra cautious during this step, as broken glass can be hazardous.
• Step 2: Clean and Prep the Fixture
To ensure a smooth and uniform paint finish, thoroughly clean your light fixture. Start by using a stiff-bristle brush to remove dirt, debris, and loose paint.
Next, sand the fixture using 120-grit sandpaper, followed by 220-grit sandpaper. Focus on any areas where the old paint is peeling or chipping.
After sanding, use a tack cloth to remove any remaining dust or debris from the surface. This step is crucial, as it helps the primer and paint stick to the metal surface.
If there are any areas you don’t want to paint, cover them with painter’s tape. This may include sockets, screws, or other small components.
• Step 3: Apply Primer
Applying a primer is essential for a long-lasting paint job. Make sure to choose a primer specifically meant for metal surfaces and indoor/outdoor use.
Lay a drop cloth or newspaper on the work surface to protect it from paint drips. With a paintbrush or paint sprayer, apply a thin layer of primer to the fixture, ensuring even coverage. Hold the paintbrush or paint sprayer at a consistent distance from the fixture to avoid drips or runs.
Allow the primer to dry for the recommended time specified on the product label. This step is crucial, as applying paint to wet primer can lead to an uneven finish.
• Step 4: Apply Paint
Once the primer is fully dry, you’re ready to apply your chosen paint. As with the primer, be sure to select paint designed for metal surfaces and indoor/outdoor use.
Apply the paint in thin, even layers using a paintbrush or paint sprayer. It’s better to apply multiple thin layers rather than one thick layer, as this helps prevent paint drips and uneven coverage.
Allow each coat to dry before applying additional layers until you achieve the desired coverage and color intensity. Make sure to follow the drying time specified on the paint product label.
• Step 5: Apply Clear Coat
To further protect the finish and extend the life of the paint job, apply a clear coat to the fixture. Select a clear coat designed for metal surfaces and indoor/outdoor use.
Apply the clear coat in the same manner as the paint, using a paintbrush or paint sprayer. Allow the clear coat to dry thoroughly according to the product label instructions.
• Step 6: Reassemble and Reinstall the Fixture
Once the clear coat has fully dried, carefully reassemble the outdoor light fixture, reattaching any glass panels or other components.
With the help of the hardware you set aside earlier, reinstall the fixture in its original location. Restore power to the light fixture from the main electrical panel and test to make sure it’s working correctly.
Congratulations, you’ve successfully repainted your old outdoor light fixtures! By following these steps and using the proper materials, you’ve added new life and curb appeal to your outdoor space without breaking the bank. Enjoy your updated fixtures and the satisfaction of a job well done!
Step | Instructions |
|---|---|
1 | Turn off the power: Ensure the power is turned off to the outdoor light fixtures you’ll be painting, either by turning off the switch or the circuit breaker that controls the fixtures. |
2 | Remove the fixture: Carefully remove the light fixture from its mount, following any necessary disassembly steps if required. This may require a screwdriver or other tools. |
3 | Clean the fixture: Clean the surface of the light fixture using a mild soap and water solution or a solution specifically designed to clean metal surfaces. Use a soft-bristle brush or cloth to remove any dirt, grime, or debris. Allow the fixture to dry completely. |
4 | Sand the surface: Lightly sand the entire surface of the light fixture using fine-grit sandpaper (around 220 grit) to remove any old paint or finish, as well as any rough spots or imperfections on the metal. Wipe away any sanding dust with a tack cloth or damp cloth. |
5 | Apply primer: Apply a coat of primer designed for metal surfaces to ensure proper adhesion of the paint. Follow the manufacturer’s instructions for application and dry time. |
6 | Paint the fixture: Once the primer is dry, apply an appropriate paint for outdoor metal surfaces using a brush, roller, or spray can. Apply thin, even coats, allowing each coat to dry according to the manufacturer’s recommendations before applying additional coats. Generally, two to three coats should be enough for full coverage. |
7 | Seal the paint: If desired, apply a clear sealer to the painted surface to provide added protection and durability once the paint is completely dry. |
8 | Reassemble and reinstall: If you disassemble any parts of the light fixture, reassemble them now. Reinstall the painted fixture to its original location, making sure all connections are secure and the fixture is properly mounted. |
9 | Turn the power back on: Turn the power back on to the light fixture, either by flipping the switch or turning the circuit breaker back on. Test the fixture to ensure it is functioning properly. |
Is it Possible to Apply Spray Paint on Brass Outdoor Lighting Fixtures?
Brass outdoor lights can be a beautiful and elegant addition to your exterior space. However, over time, these fixtures may require a makeover due to tarnishing, fading, or simply wanting to update their appearance.
• Why Spray Paint Brass Outdoor Lights?
Spray painting brass outdoor lights is a cost-effective alternative to purchasing new fixtures. It allows you to update and personalize the appearance of your exterior space without breaking the bank. Plus, the process is relatively simple and can be a rewarding DIY project for homeowners.
• Choosing the Right Spray Paint
For a successful brass outdoor light painting project, selecting the right spray paint is crucial. Not all spray paints are suitable for use on brass or outdoor fixtures. Here are some key considerations to keep in mind when choosing a spray paint for your brass outdoor lights:
- Compatibility with brass: Choose a spray paint specifically designed for use on metal surfaces, like brass. Look for paints that are labeled as “bonding” or “direct to metal” (DTM) to ensure they adhere properly to the brass fixture.
- Rust prevention: As brass outdoor lights are exposed to moisture and humidity, it’s important to choose a spray paint that offers rust-preventative properties. This will help prolong the life of your fixtures and minimize the need for maintenance.
- UV resistance: Exposure to sunlight can cause color fading over time. To avoid this issue, choose a spray paint with UV-resistant properties to maintain the vibrancy of the finish.
- Finish options: Spray paints come in various finishes, including satin, gloss, and matte. Choose a finish that matches your desired aesthetic and consider how it will blend with your existing outdoor dcor.
- Color options: Lastly, select a color that complements your exterior design. You are not limited to brass shades; you can switch to various colors that match your style and preferences.
• Preparation: Clean and Remove the Existing Finish
Before you begin spray painting your brass outdoor lights, it’s essential to prepare the surfaces properly. A clean, smooth surface will ensure a uniform and long-lasting paint finish.
– Step 1: Remove the Fixtures
First, turn off the electricity supply to the lights, and then carefully remove the fixtures from their mounting. Removing the lights will make it easier to clean and spray paint them, ensuring an even and consistent finish.
– Step 2: Disassemble and Clean
Disassemble the light fixtures as much as possible to access all surface areas. Use a soapy water mixture and a soft cloth or sponge to clean the brass surfaces thoroughly. For stubborn dirt or tarnish, you can use a brass cleaner and a soft brush.
– Step 3: Sand the Surface
Once the brass surfaces are clean, use fine-grit sandpaper (around 220 grit) to lightly sand and remove any existing finish or tarnish. This will create a smooth, even surface for the paint to adhere to.
– Step 4: Wipe and Dry
After sanding, use a clean, damp cloth to wipe away any dust or residue. Allow the brass fixtures to dry completely before moving on to the painting process.
• Spray Painting Brass Outdoor Lights
With your brass outdoor lights cleaned and prepped, it’s time to start spray painting. Follow these steps for a professional-looking result:
– Step 1: Apply a Primer
Using a quality metal primer is crucial for ensuring the paint adheres properly and provides a durable finish. Apply a thin, even coat of primer to the brass surfaces, following the manufacturer’s instructions regarding drying time and coats.
– Step 2: Spray Paint
Shake the spray paint can well to ensure proper mixing of the paint. Hold the can approximately 12 inches away from the brass surface, and apply the paint in thin, even coats using a back-and-forth motion.
Allow each coat to dry before applying the next coat, as per the manufacturer’s recommendations.
To achieve an even finish, practice your spraying technique on a piece of cardboard or scrap material beforehand. This will help familiarize you with the can’s spray range and consistency.
– Step 3: Apply a Clear Coat (Optional)
For extra protection and durability, consider applying a clear topcoat. This is especially important if the spray paint you’ve chosen doesn’t have built-in UV or rust-resistant properties. Follow the manufacturer’s instructions for drying times and coats.
– Step 4: Reassemble and Install
Once the paint has fully dried, reassemble your brass outdoor lights and reinstall them to their original positions. Remember to turn the electricity supply back on, and enjoy your freshly painted brass outdoor light fixtures.
• Key Takeaways
Spray painting brass outdoor lights is a cost-effective and straightforward way to update your exterior space. With the right paint, thorough preparation, and careful application, you can rejuvenate your brass fixtures and add a personal touch to your home.
So, roll up your sleeves and get spraying. It’s easier than you think!
Process | Instructions |
|---|---|
Clean the brass outdoor lights | Remove any dirt, grime, or dust using a cloth and a cleaner suitable for brass. |
Prepare the surface | Use a fine-grit sandpaper to lightly sand the entire surface of the brass light fixture. This will help the paint adhere better. |
Protect surrounding areas | Cover any surrounding surfaces or nearby objects with newspaper or plastic to protect them from overspray. |
Prime the surface | Apply a coat of primer specifically designed for metal surfaces. Allow it to dry according to the manufacturer’s instructions. |
Apply the spray paint | Choose a spray paint suitable for outdoor use and compatible with metal surfaces. Apply multiple thin coats, allowing each coat to dry before applying the next one. |
Allow to dry and reassemble | Allow the paint to dry for the recommended time before reassembling the light fixture and reinstalling it outside. |
Is it Possible to Apply Paint on Metal Light Fixtures?
Painting over metal light fixtures is an excellent way to update old, outdated fixtures or to customize any room in your home. With proper preparation and the right tools, anyone can transform their metal light fixtures with just a few steps.
• Why Consider Painting Metal Light Fixtures?
There are many reasons someone might want to paint over metal light fixtures. Some of the most common reasons include:
- Updating outdated fixtures: If your home still has metal light fixtures from a previous decade, a new coat of paint can bring them into the current design trends.
- Restoring old fixtures: Sometimes, metal light fixtures can become discolored or rusty over time. Painting over them can give them a fresh look and a new lease on life.
- Customizing your home: Painting your metal light fixtures can help you add a personal touch to any room in your home. You can choose any color you want to match your unique design style.
• Preparing Your Metal Light Fixture for Painting
Before you begin painting your metal light fixture, proper preparation is crucial. Skipping this step can result in an uneven paint job, peeling paint, or damage to your light fixture. Follow these steps to prepare your fixture for painting:
– Step 1: Gather Your Materials
You will need the following materials to prepare your metal light fixture for painting:
- Screwdriver or wrench (to remove the fixture)
- Painter’s tape or masking tape
- Fine grit sandpaper (220 grit or finer)
- Metal primer
- Paintbrush or paint sprayer
- Paint (appropriate for metal surfaces)
- Clear sealer (optional)
– Step 2: Remove the Light Fixture
First, turn off the power supply to the light fixture you will be painting to ensure your safety. Then, use a screwdriver or wrench to remove the fixture from the ceiling or wall. Keep track of the screws and other hardware so that you can reassemble the fixture later.
– Step 3: Clean the Fixture
Clean the surface of the metal light fixture to remove dust, dirt, and grease. A simple solution of warm water and mild dish soap should be thorough enough for this task. Make sure to dry the fixture with a clean, soft cloth after cleaning.
– Step 4: Sand the Surface
Using fine-grit sandpaper, gently sand the entire surface of the metal light fixture. This will help the primer and paint adhere better to the metal. Be careful not to sand too aggressively, as you may damage the surface of the fixture.
– Step 5: Tape Off Areas You Don’t Want to Paint
Use painter’s tape or masking tape to cover any areas of the light fixture that you don’t want to paint. This may include parts that will be hidden when the fixture is reassembled, or it may be portions of the fixture that you want to keep as a contrasting color.
• Painting the Metal Light Fixture
Now that your light fixture is properly prepped, it’s time to apply your primer, paint, and sealer.
– Step 1: Prime the Fixture
Apply a generous coat of metal primer to the entire surface of the fixture. Be sure to use a primer specifically designed for metal surfaces to ensure proper adhesion. Allow the primer to dry according to the manufacturer’s instructions.
– Step 2: Apply Paint
After the primer has dried, it is time to apply the paint. Use a paint that is formulated for use on metal surfaces. You can use a paintbrush or a paint sprayer, depending on your preference and the size of your fixture.
Apply thin, even coats of paint, allowing each coat to dry before applying the next. Typically, you will need at least two coats to achieve full coverage.
– Step 3: Apply Clear Sealer (Optional)
If you want to protect your paint job and add an extra layer of durability to your metal light fixture, you can finish with a clear sealer. Make sure to choose a sealer that is compatible with the type of paint you use.
Apply the sealer according to the manufacturer’s instructions, and allow it to dry.
• Reassemble and Reinstall Your Metal Light Fixture
After the paint and sealer have dried, carefully remove the painter’s tape from the fixture. Reassemble the light fixture, making sure to replace all screws and hardware securely. Finally, reinstall the fixture in its original location, ensuring that the power supply is restored.
With proper preparation and the right tools, painting your metal light fixtures can breathe new life into your home’s decor. By following the steps outlined in this article, you can successfully update and customize your metal light fixtures with confidence.
Questions | Answers |
|---|---|
Can you paint over metal light fixtures? | Yes, you can paint over metal light fixtures. However, it is essential to follow proper preparation steps, such as cleaning the surface, using primer, and choosing the right paint. |
How to prepare the metal surface? | Before painting, clean the metal surface thoroughly with soapy water and a scrub brush, then rinse and let it dry completely. Lightly sand the surface with fine-grit sandpaper to create a smooth surface, then wipe off any dust with a clean cloth. |
What type of primer should be used? | Use a rust-inhibiting metal primer to provide proper adhesion and prevent rust formation. Apply a thin and even coat of primer, then allow it to dry completely, following the instructions on the product label. |
What type of paint should be used? | Choose a paint that is specifically formulated for metal surfaces, such as acrylic latex, enamel, or epoxy paint. These paints provide durability and resistance to elements, making them suitable for metal light fixtures. |
What is the proper painting technique? | Apply the paint in thin, even coats using a brush or spray can, following the manufacturer’s instructions. Allow each coat to dry before applying the next. Two or more coats may be needed for full coverage and a better finish. |