Polished Indoor Painting Options, 25 Things You Should Know
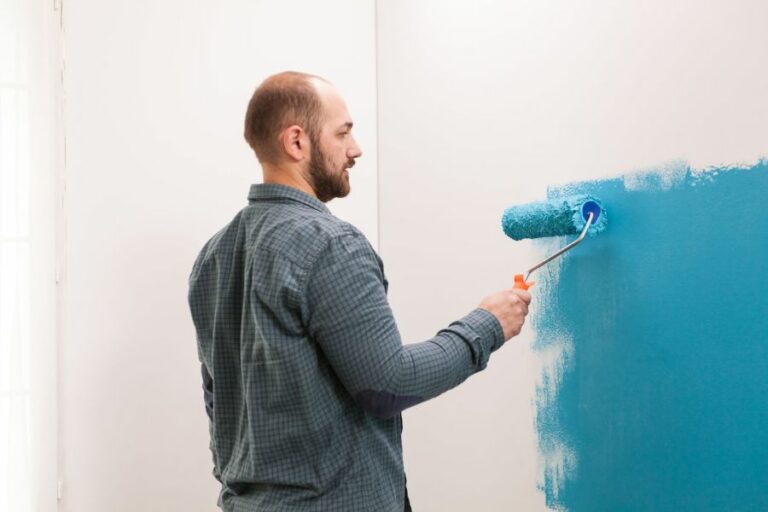
Are you tired of staring at your dull, lifeless walls and craving a fresh, polished look for your indoor spaces? I got you covered! This comprehensive guide on polished indoor painting options is tailored to help you make an informed decision, ensuring that your home or office space reflects your unique style while maintaining sophistication.
Polished indoor painting options:
Polished indoor painting requires careful planning, selecting high-quality materials, and employing meticulous painting techniques. Choose the appropriate paint type, such as water-based or oil-based, based on room conditions. Decide on the right finish, ranging from flat to high-gloss, depending on durability needs. Proper surface preparation and execution of painting techniques ensure a professional, aesthetically pleasing result.

Looking to give your interiors a fresh makeover with stunning paint colors? Discover my curated selection of polished indoor painting options for every room. Unleash your creativity, and read on for endless inspiration, tips, and trends that will transform your living spaces!
Contents
- 1 Refined Interior Painting Choices
- 2 Top Lustrous Paints for Interior Walls
- 3 Paint Options for a Glossy Finish
- 4 Ideal Paint Selections for Uneven Walls
- 5 Eggshell vs. Semi-Gloss: Which is Superior?
Refined Interior Painting Choices
Indoor painting can truly transform the overall look and feel of your home. Achieving a polished and professional finish requires careful planning, selection of high-quality materials, and meticulous execution of the painting process.
• Choosing the Right Paint Type
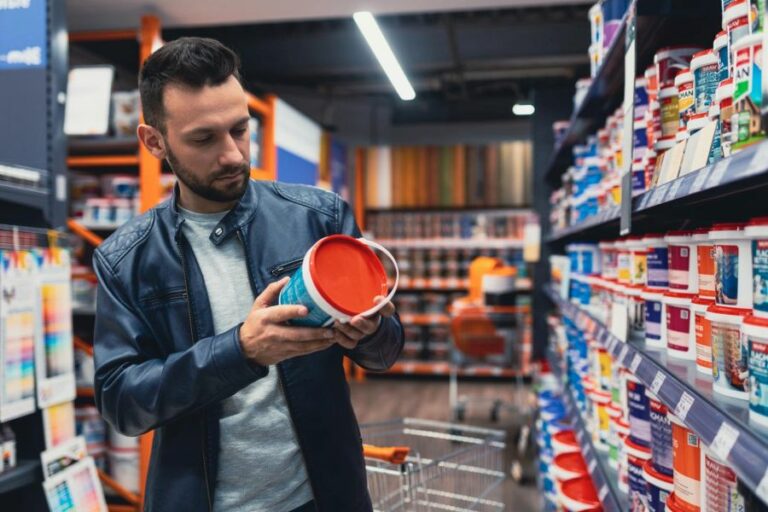
When embarking on an indoor painting project, the first critical decision is selecting the appropriate paint type. Every room in your home has a unique purpose and set of conditions, such as light exposure, humidity, and wear and tear, that should influence your choice.
A few common paint types for interior use include:
– Water-Based (Latex) Paints
Water-based paints have become increasingly popular due to their quick drying time, low VOC (volatile organic compounds) content, and easy clean-up with water. These paints are durable, long-lasting, and resistant to chipping or peeling.
They are also non-yellowing and generally allow for better color retention over time.
– Oil-Based (Alkyd) Paints
Although oil-based paints require longer drying times and the use of solvents for clean-up, they provide a smoother finish than water-based paints. The result is a hard, durable surface best suited for high-traffic areas such as hallways and kitchens.
Remember that oil-based paints are less eco-friendly due to higher VOC content and could become yellow over time.
• Evaluating Different Paint Finishes
Once you’ve determined the correct paint type, the next step is to select an appropriate finish. Each finish offers a different level of shine and affects the durability of the paint. Explore these options to choose the best finish for your needs:
– Flat (Matte) Finish
A flat finish offers a non-reflective, smooth surface that effectively hides surface imperfections. It is an ideal choice for living rooms, dining rooms, and bedrooms, where high durability is not a requirement.
Flat finishes are not typically recommended for high-traffic areas, as they are more challenging to clean and maintain.
– Eggshell Finish
Eggshell finishes provide a low sheen and are more washable than flat finishes, making them suitable for moderate-traffic areas. This finish offers a soft, subtle glow and is an excellent choice for children’s rooms, playrooms, or family rooms.
– Satin Finish
Satin finishes offer a subtle shine without appearing too glossy. They are highly durable, easy to clean, and perfect for areas that see a lot of activity, such as kitchens, bathrooms, and hallways.
– Semi-Gloss Finish
Semi-gloss finishes offer a sleek, radiant appearance that is both easy to clean and highly resistant to moisture. This finish is commonly used for windows, doors, cabinets, and trim work in bathrooms or kitchens.
– High-Gloss Finish
High-gloss finishes provide a dramatic, ultra-shiny look and the highest level of durability. While they can highlight surface imperfections, they are also the most cleanable and moisture-resistant finish. This finish is ideal for high-use areas, such as doors, cabinetry, and trim work.
• Preparing the Surface
Proper surface preparation is critical for achieving a polished final result. Invest time in the following steps before applying any paint:
- Clean all surfaces using mild soapy water to ensure the paint adheres properly.
- Repair any holes, cracks, or imperfections using a surface filler.
- Sand surfaces to promote adhesion and remove any remaining surface imperfections.
- Wipe down surfaces with a damp cloth to remove dust and debris.
- Apply a primer if your paint type recommends or if you are covering a dark color with a lighter one.
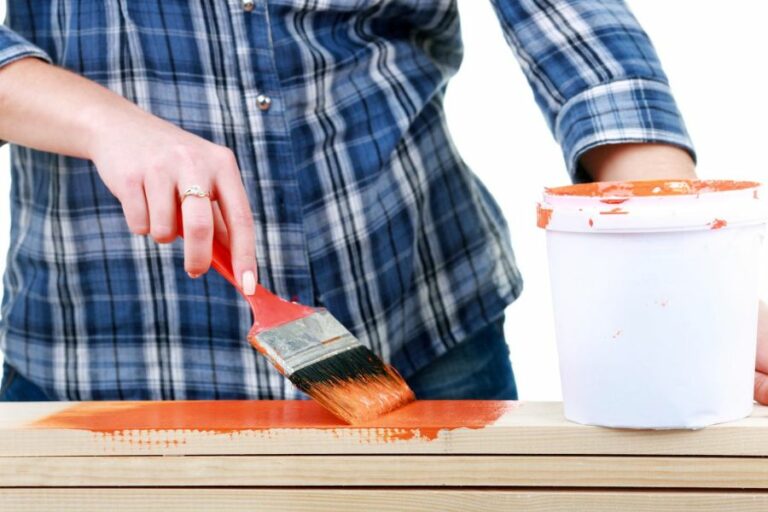
• Painting Techniques for a Professional Finish
When it’s time to start painting, use these techniques to ensure a polished, professional appearance:
- Utilize an angled brush to cut in around edges and corners before using a roller or brush for larger surfaces.
- Apply the paint in a “W” or “M” pattern to promote even distribution, continually overlapping strokes until the entire surface is covered.
- Allow the first coat to dry completely before applying a second coat as needed, following the recommended drying time on the paint can.
- Remove painter’s tape before the paint fully dries to prevent peeling.
• Final Tips and Recommendations
To guarantee a successful and polished indoor painting project, remember the following tips:
- Always use high-quality materials, including paint, brushes, and rollers, to achieve a professional finish.
- Test your chosen paint color on a small wall area to ensure it corresponds with the desired result.
- When selecting a paint color, factor in natural and artificial light sources, as these can drastically affect the appearance.
- Invest in durable drop cloths, painter’s tape, and other protective equipment to shield surfaces from paint drips and spills.
For further reading on indoor paint types and finishes, visit the U.S. Department of Energy’s guide to make an informed decision.
Whether you’re repainting a single room or your entire home, the selection of the appropriate paint type and finish, combined with meticulous surface preparation and painting techniques, is essential for achieving a polished appearance.
By following these steps and recommendations, you’ll be well on your way to creating an elegant and inviting living space.
Top Lustrous Paints for Interior Walls
The right paint choice can transform a room and create the desired atmosphere, enhancing the appearance of your home’s interior.
For those who want to add a touch of glamour and shine to their walls, various paint options are available that provide a luminous finish.
• Gloss and Semi-Gloss Paints
One popular option for adding shine to your walls is gloss or semi-gloss paints. These types of paints provide a high sheen and are durable, making them ideal for areas that need frequent cleaning or are prone to moisture, such as kitchens and bathrooms.
Gloss paints offer the highest level of shine but can sometimes show imperfections on the wall’s surface. Proper surface preparation is necessary before applying gloss paint to your walls to achieve a smooth, even finish.
On the other hand, Semi-gloss paints have a slightly lower shine than gloss paints but are more forgiving when masking surface irregularities.
I recommend using high-quality gloss or semi-gloss paints, such as those from Sherwin-Williams or Benjamin Moore, as they offer excellent coverage, durability, and long-lasting shine.
• Metallic Paints
Metallic paint is another option for adding glamorous shine to your interior walls. These specialized paints contain tiny metallic particles that shimmer when light hits the painted surface.
Metallic paints are perfect for adding a touch of sophistication and luxury to any room and can be used as a feature wall or to add depth and interest to your space.
When choosing a metallic paint, it’s essential to consider the size of the metallic particles, as this will affect the level of shine and the overall appearance of the finished wall. Fine metallic particles will produce a more subtle, elegant sheen, while larger particles will create a more dramatic, sparkly effect.
For the best results, I recommend using high-quality metallic paint, such as Modern Masters Metallic Paint or Farrow & Ball’s Metallic range, which offers a variety of stunning colors and finishes.
• Glazing Techniques
Using a glazing technique could be the perfect solution if you’re looking for a more subtle shine on your interior walls. Glazing involves applying a translucent layer of paint over a base coat, which can be flat or semi-gloss. This technique creates depth and adds a soft, luminous finish to the wall.
To achieve a glazed effect, you can either use a pre-mixed glazing paint or create your own by mixing a clear glazing medium with regular paint. Some popular glazing paint options include Behr Premium Plus With Style Faux Glaze or Benjamin Moore Studio Finishes Glazing Liquid.
When applying the glaze, it’s important to use a specific technique, such as ragging, sponging, or combing, to create the desired effect. This Old House’s website offers a comprehensive guide on various glazing techniques and how to achieve them.
• Conclusion
When it comes to the best shining paint for interior walls, the options are vast, and the choice ultimately depends on your personal preferences and the overall look you wish to achieve.
Gloss and semi-gloss paints offer a durable, high-shine finish, while metallic paints bring a touch of luxury and sophistication. Alternatively, glazing techniques can provide a more subtle, luminous effect.
By considering the different paint options and their potential impact on your space, you can make an informed decision and create the stunning, shiny interior you’ve always dreamed of.
Paint Options for a Glossy Finish
A glossy finish on surfaces can make them look more appealing and add a touch of sophistication to your home or workplace. But how do you achieve this effect? The answer lies in choosing the right type of paint.
• Types of Paints for a Glossy Finish
Mainly three types of paints can give you the desired glossy finish. These are:
1. Gloss Paints
As the name suggests, gloss paints are specifically designed to give surfaces a high-gloss effect. They contain more resins than pigments, which results in a glossy appearance.
Gloss paints are popular for their durability, making them ideal for high-traffic areas like doors, window sills, trims, and cabinets. Examples of gloss paints include oil-based gloss paint and water-based gloss paint.
2. Semi-Gloss Paints
Semi-gloss paints provide a slightly less glossy finish than gloss paints but still offer a shiny appearance. These paints are perfect for areas where you need a balance between a glossy look and practicality.
They are easy to clean and have a moderate sheen level. Semi-gloss paints are commonly used for kitchens and bathrooms, as well as doors and trims.
3. High-Gloss Enamel Paints
High-gloss enamel paints deliver a very glossy, almost mirror-like finish. They are highly durable, as they possess the ability to resist moisture and stains, which makes them an excellent choice of paint for areas exposed to a lot of moisture, such as kitchens and bathrooms.
• How to Choose the Right Glossy Paint
Choosing the right type of glossy paint is crucial for achieving the desired finish. Here are some factors you should consider:
1. Surface
Identify the surface you want to paint and its specific requirements. For instance, kitchen cabinets and doors require more durable paint due to frequent use, and therefore, gloss or high-gloss enamel paints might be more suitable.
2. Durability
If you’re looking for long-lasting, durable paint, opt for oil-based or high-quality water-based glossy paints. These are known for their durability and ability to withstand wear and tear.
3. Sheen Level
Determine the sheen level you desire. Gloss paints offer a high sheen, semi-gloss paints have a moderate sheen, and high-gloss enamel paints provide a very shiny surface.
• Tips for Applying Glossy Paints
To achieve a perfect glossy finish, here are some tips you should follow:
1. Surface Preparation
Preparing the surface is an essential step to ensure a smooth and glossy finish. Start by cleaning the surface thoroughly, removing any dirt, grease, or dust. Then, sand it with fine-grit sandpaper to create a smooth and even base for the paint.
2. Use a Primer
A primer ensures better paint adhesion, increases durability, and provides a smoother surface. Choose a primer explicitly designed for glossy paints and apply it according to the manufacturer’s instructions.
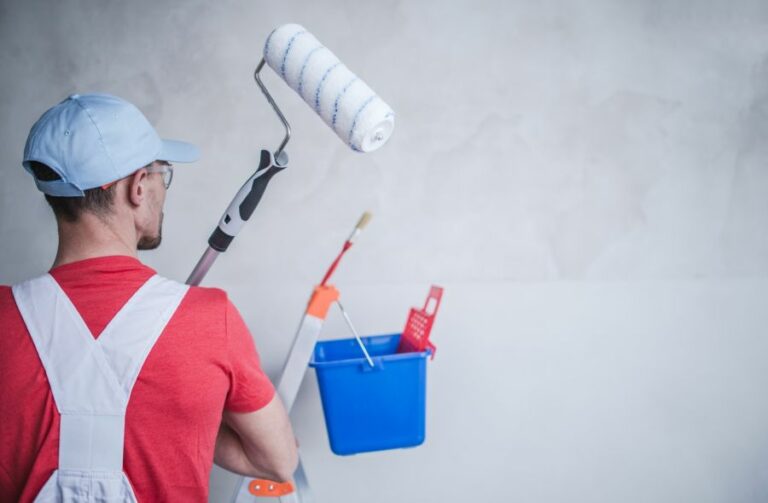
3. Use the Right Tools
The tools you use to apply the paint can significantly impact the outcome. I recommend using a high-quality synthetic brush or a foam roller for glossy paints. Avoid using a nap roller, as it may leave a textured finish.
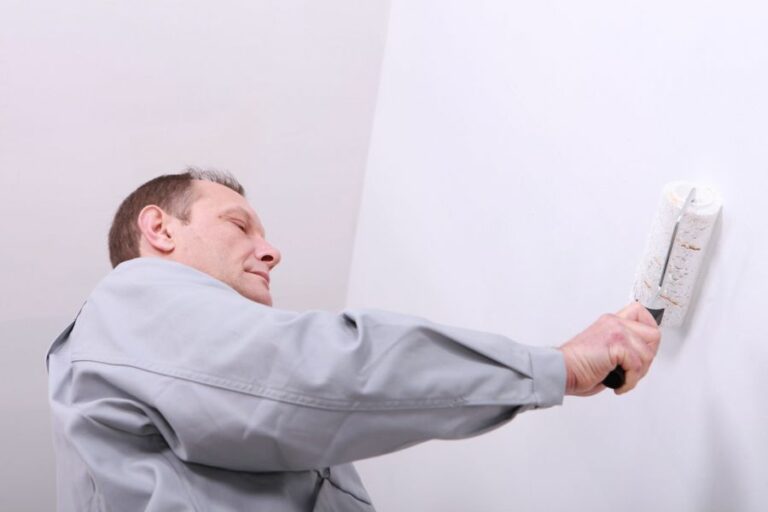
4. Apply Multiple, Thin Coats
Glossy paints work best when applied in thin, even coats. Start by applying a light first coat, then, once it dries, follow with additional layers until the desired gloss level is achieved.
5. Proper Drying Time
Allow ample time between coats for the paint to dry completely, as indicated by its product label. Insufficient drying time can result in a less glossy finish or other issues like streaks or bubbles.
In conclusion, achieving a glossy surface finish requires selecting the right paint and following proper application techniques.
By understanding the differences between gloss, semi-gloss, and high-gloss enamel paints and considering factors such as surface type, durability, and sheen level, you can choose the appropriate paint for your project.
Additionally, by preparing surfaces carefully and using the correct tools and application techniques, you can create a stunning glossy finish that adds elegance to your space.
Ideal Paint Selections for Uneven Walls
As an experienced painter, I have encountered walls with various textures and roughness levels. Painting not-smooth walls can be a challenge, but choosing the right type of paint can make all the difference.
• Acrylic and Latex Paints: Versatile and Water-based
Acrylic and latex paints are popular due to their versatility and ease of use. These water-based options can be applied to various surfaces, from wood and concrete to rough-textured walls, making them a staple for many projects.
– Pros
- Water-based, which makes for easy cleanup.
- Low odor, making it suitable for indoor projects.
- Fast-drying, so you can apply multiple coats in a day.
- Flexible, allowing the paint to expand and contract with the wall, preventing cracks.
– Cons
- May require multiple coats for complete coverage, particularly on rough surfaces.
- Can be prone to peeling if applied to walls with moisture issues.
I recommend using a primer specifically designed for textured walls before applying acrylic or latex paint, as this will ensure better adhesion and coverage.
• Textured Paint: Embrace the Imperfections
Textured paint, specifically designed for not smooth walls, comes in various pre-mixed options or can be created by adding texture additives to standard paint. This paint type is an excellent choice for disguising any wall imperfections, as it creates a unique, visually appealing surface.
– Pros
- Hides blemishes and uneven surfaces.
- Offers an assortment of textures, from sand to popcorn finishes.
- Can be applied with a roller, brush, or spray gun, depending on the desired finish.
– Cons
- May require multiple coats, particularly on rougher surfaces.
- Can be more difficult to clean, as dirt and grime can accumulate in the texture.
When using textured paint, be prepared to invest more time in the application process to create an even, consistent finish.
• Oil-based Paint: Durable and Long-lasting
Oil-based paint is a heavy-duty option that provides excellent coverage and durability, making it ideal for not smooth walls in high-traffic or moisture-prone areas, such as kitchens, bathrooms, and hallways.
– Pros
- Durable and long-lasting, with a tough finish that can withstand wear and tear.
- Provides better coverage and adhesion than water-based paints.
- Highly resistant to water and stains, making it ideal for use in areas prone to moisture.
– Cons
- Strong odor and requires proper ventilation during application.
- Clean up can be more challenging, as it requires the use of mineral spirits or paint thinner.
- Takes longer to dry, with a typical drying time of at least 24 hours.
If opting for oil-based paint, make sure you take the necessary precautions for proper application and clean up, such as using a respirator and ensuring adequate ventilation.
• Elastomeric Paint: A Waterproof Solution
For exterior walls or walls with moisture issues, elastomeric paint offers a waterproofing solution that can help protect not smooth surfaces. This paint type forms a rubbery, elastic coating that can bridge small cracks and prevent water infiltration.
– Pros
- Waterproof and ideal for exterior or moisture-prone walls.
- Highly durable and can withstand harsh weather conditions.
- Can help conceal surface imperfections, like cracks or uneven texture.
– Cons
- Typically more expensive than other paint types.
- Can be challenging to apply due to its high viscosity and may require a specialized roller or spray gun.
- May not adhere well to previous paint layers, making it necessary to strip existing paint.
Considering its waterproof and durable nature, elastomeric paint is an excellent investment for protecting not smooth walls from moisture damage.
• Final Thoughts
Each paint type comes with its pros and cons, and the best option for not smooth walls will depend on various factors like preference, project requirements, and budget. As a general guideline, I recommend using the following:
- Water-based (acrylic or latex) paint for most interior projects.
- Textured paint for concealing imperfections.
- Oil-based paint for high-traffic or moisture-prone areas.
- Elastomeric paint for exterior walls or walls that require waterproofing.
Regardless of the paint type you choose, proper surface preparation, such as cleaning, repairing cracks, and using the appropriate primer, is essential to achieving a professional and long-lasting finish. Taking these steps can significantly improve the appearance and lifespan of your paint job on not smooth walls.
Paint Type | Description | Recommended Use |
|---|---|---|
Textured Paint | A paint containing particles that create a rough, textured finish when applied to the wall. | For not smooth walls, it helps hide imperfections and add visual interest to the surface. |
Matte or Flat Paint | A paint with a flat, non-reflective finish that helps minimize surface imperfections. | For not smooth walls, best for hiding small imperfections and uneven surfaces. |
Primer and Paint Combination | A paint that includes a built-in primer, which helps provide better coverage and adhesion. | For not smooth walls, it helps hide imperfections and provides an even base for the topcoat. |
Eggshell vs. Semi-Gloss: Which is Superior?
When it comes to choosing the right paint finish for different surfaces, the decision often comes down to eggshell or semi-gloss. Both paint finishes have their own unique set of qualities, and your choice will significantly impact the final appearance of your painted surface.
• Eggshell Finish: A Subtle Sheen
Eggshell paint offers a subtle, low-sheen finish, somewhat similar to the surface of an eggshell. This finish provides a mid-range between flat and gloss paints, and it’s known for its ability to hide imperfections in the surface while still providing a soft, elegant look.
– Pros of Eggshell Finish
- Durability: Eggshell paints offer an excellent balance between durability and visual appeal. They are more resistant to scuffs and scrapes than flat finishes, making them a popular choice for high-traffic areas such as living rooms, bedrooms, and hallways.
- Hides Imperfections: Due to their subtle sheen, eggshell finishes can hide surface flaws, such as cracks or bumps, better than high-gloss paints. This is particularly useful when painting older walls with a less-than-perfect surface.
- Easy Application: Eggshell paints are generally easy to work with, as they provide good coverage and reasonably smooth application.
– Cons of Eggshell Finish
- Less Washable: Although they are more durable and scuff-resistant than flat finishes, eggshell paints are not as washable as semi-gloss or gloss finishes. For walls that require frequent cleaning, eggshell may not be the best choice.
- Narrow Range of Colors: Eggshell finishes are typically available in a more limited color range compared to other paint finishes.
• Semi-Gloss Finish: A Reflective Appearance
Semi-gloss paints offer a shiny, reflective finish that is not as prominent as full-gloss paint. Best known for their durability, semi-gloss paints are popular in areas that are subjected to moisture, such as kitchens and bathrooms.
– Pros of Semi-Gloss Finish
- High Durability: Semi-gloss paints are highly durable and resistant to moisture, making them a popular choice for kitchens, bathrooms, and other high-humidity environments. They also resist scuffs and scrapes, allowing your painted surfaces to stay in good condition for longer periods.
- Easy to Clean: The durability of semi-gloss paints makes them easy to clean, as they can withstand scrubbing without compromising the paint surface. This makes them ideal for busy, high-traffic areas or spaces prone to dirt and grime.
- Wide Range of Colors: Semi-gloss finishes are available in a broad spectrum of colors, allowing for extensive customization of your space.
– Cons of Semi-Gloss Finish
- Shows Imperfections: Due to their reflective nature, semi-gloss paints can highlight imperfections in your painted surface, such as cracks, bumps, or uneven texture.
- Application Challenges: Semi-gloss paints can be more difficult to apply evenly, as they have a tendency to show brush strokes or roller marks. Experienced painters or careful application is needed to ensure a smooth, even finish.
• How to Choose the Right Finish: Recommendations
Based on the pros and cons of each finish, here are some recommendations to help you choose between eggshell and semi-gloss for specific projects:
- Living Spaces: For living rooms, bedrooms, and hallways, where a balance between durability and the visual appeal is desired, an eggshell finish is the recommended choice. It is durable enough to withstand daily wear and tear while still providing a soft, warm appearance.
- Kitchens and Bathrooms: In high-moisture areas such as kitchens and bathrooms, a semi-gloss finish is the preferred option due to its resistance to moisture and easy-clean properties.
- Trim and Doors: For trim, doors, and other architectural features, a semi-gloss finish is recommended for its durability and ability to withstand frequent cleaning without showing wear.
In conclusion, the choice between eggshell and semi-gloss finishes largely depends on the specific needs of your project.
The durability, washability, and reflectiveness of a semi-gloss paint may make it the ideal choice for high-traffic or high-moisture environments, whereas the more subtle sheen and ability to hide surface imperfections make eggshell finishes ideal for everyday living spaces.
Consider the particular requirements and expectations of your paint project before making your final decision. For more details and further insights, visit the U.S. Environmental Protection Agency’s guide on paints and coatings.