Outdoor Chalkboard Paint, 25 Things You Should Know
Transform your outdoor space into a creative haven for kids and adults alike with our guide on outdoor chalkboard paint. I’ll unleash the possibilities of turning an ordinary surface into a playground of art and learning with simple steps and creative inspirations. Whether it’s a wall, fence, or table, rediscover the joy of drawing, writing, or playing games together without boundaries.
Outdoor chalkboard paint:
Outdoor chalkboard paint is a versatile and creative solution that can transform various surfaces, including wood, metal, and concrete, into interactive spaces. Proper surface preparation and application are crucial to ensure adhesion and durability. Available in various colors and finishes, this paint adds a unique touch to outdoor spaces, promoting creativity, organization, and an interactive design.

Discover the wonders of outdoor chalkboard paint in this comprehensive guide. Learn how to transform any surface into a creative canvas for children and adults alike, along with essential tips for application, maintenance, and maximizing your chalkboard’s potential. Happy chalking!
Contents
- 1 Exterior Chalkboard Paint
- 2 Is it Possible to Utilize Chalkboard Paint for Outdoor Applications?
- 3 Is it Possible to Maintain a Chalkboard Outdoors?
- 4 What is the most suitable material for constructing an outdoor chalkboard?
- 5 How to Create an Outdoor Chalkboard Wall?
- 6 How to Construct an Outdoor Black Board?
- 7 What are the potential disadvantages of using chalkboard paint?
- 8 Which Type of Wood is Best for an Outdoor Chalkboard?
Exterior Chalkboard Paint
Outdoor chalkboard paint is an ideal surface solution that transforms any ordinary wall or flat surface into an interactive and creative playground. Not only is it functional and practical, but it also adds a unique touch to your outdoor space.
Whether you’re a parent wanting to provide a creative outlet for your children or want to add some flair to your outdoor space, outdoor chalkboard paint is sure to be a favorite.
• Ideal Surfaces for Outdoor Chalkboard Paint
One of the best features of outdoor chalkboard paint is its versatility. It can be applied to several surfaces, including wood, metal, concrete, and more.
– Wood Surfaces
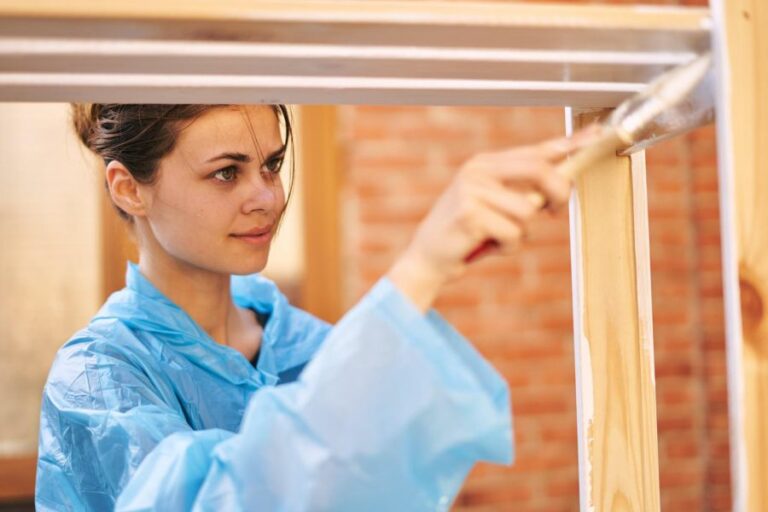
Wooden surfaces such as fence panels, playhouses, and outdoor furniture provide an excellent base for applying outdoor chalkboard paint. Ensure the surface is clean, dry, and free of any dirt or debris before applying the paint.
– Metal Surfaces
Metal surfaces such as mailboxes, planters, and gates can also be transformed with outdoor chalkboard paint. Be sure to use a primer specifically designed for metal surfaces to ensure proper adhesion and protection against rust.
– Concrete Surfaces
Outdoor chalkboard paint can also be applied to concrete surfaces such as retaining walls, patios, or walkways. Ensure the concrete is properly cured, and use a suitable primer to fill any pores or cracks.
• Prepping the Surface for Application
Proper surface preparation is essential to ensure outdoor chalkboard paint adheres effectively and lasts for years. Here are some basic steps to follow:
- Clean the surface: Remove any dirt, grime, or debris from the surface using mild soap and water. Rinse thoroughly and let the surface dry completely.
- Sand the surface: Lightly sand the surface to create a smooth and even texture. This will help the paint adhere better and ensure a smoother finish.
- Apply primer: Choose a primer that is suitable for the surface you’re working on. Apply one to two coats, allowing each coat to dry thoroughly before proceeding to the next step.
• Applying Outdoor Chalkboard Paint
Once the surface is prepped, it’s time to apply the outdoor chalkboard paint. Be sure to follow the manufacturer’s specific instructions, but here are general guidelines:
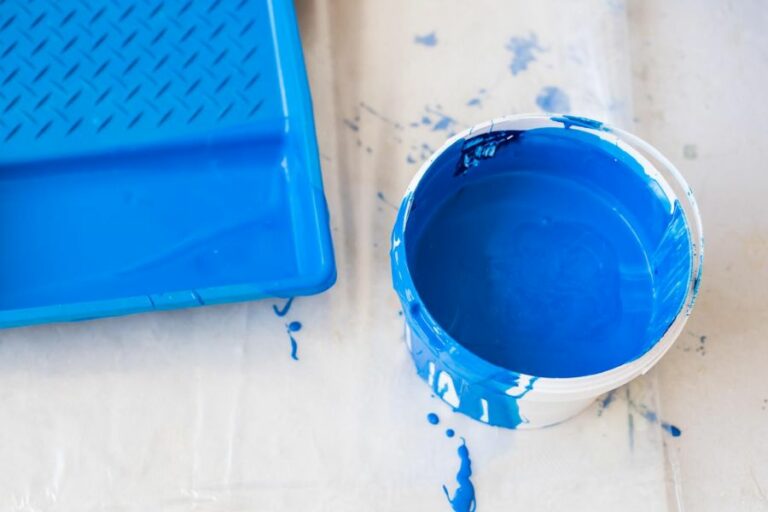
- Stir the paint: Thoroughly mix the paint before application to ensure even color distribution and a smooth finish.
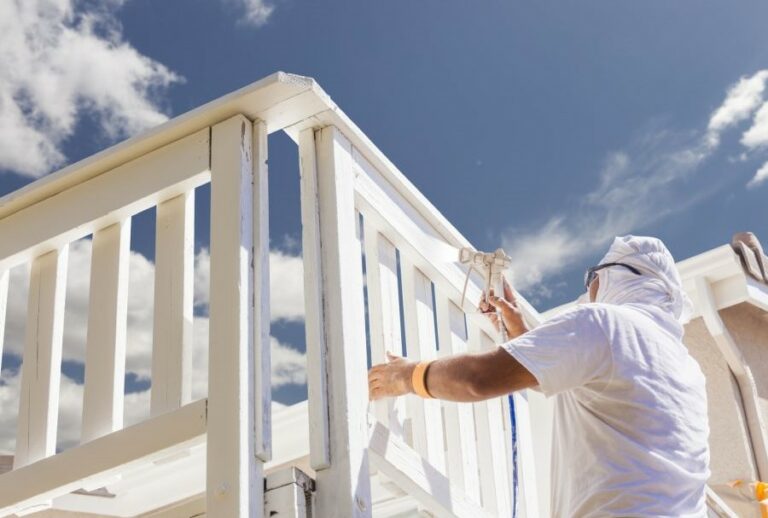
- Apply the paint: Use a high-quality paintbrush, roller, or sprayer for application. Apply multiple thin, even coats rather than one thick coat to achieve the desired finish. Make sure to let each coat dry completely before applying the next one.
- Allow the paint to cure: Most outdoor chalkboard paint requires at least 24 hours to cure fully. Be sure to keep the surface free from dust or debris during this time.
- Condition the surface: After the paint has cured, prepare the surface for chalk by rubbing a piece of white chalk all over the area. Wipe with a damp cloth and then dry with a clean cloth.
• Choosing the Right Outdoor Chalkboard Paint
Outdoor chalkboard paint is available in various brands and colors, so select one that meets your specific needs and preferences. Consider the following factors when making your decision:
- Quality: Look for high-quality brands that have suitable weather resistance and durability.
- Color: Most outdoor chalkboard paints come in either black or green, but custom colors can be achieved with specific brands. Choose one that complements your outdoor space and meets your preference.
- Finish: Outdoor chalkboard paint is typically available in either matte or satin finishes. Matte finishes provide a better chalk writing experience, while satin finishes offer enhanced weather resistance and can be easier to clean.
• Maintaining and Cleaning Your Outdoor Chalkboard
Regular maintenance and cleaning will keep your outdoor chalkboard looking great and functioning properly. Here are a few simple tips for proper maintenance:
- Erase chalk marks with a soft cloth or chalkboard eraser.
- For stubborn stains, dampen a cloth with water and a small amount of mild soap. Wipe the surface gently and rinse with clean water. Avoid using abrasive materials or harsh chemicals.
- Periodically, it is recommended to reapply a fresh coat of outdoor chalkboard paint to keep the surface looking and functioning like new.
• The Benefits of Outdoor Chalkboard Paint
Utilizing outdoor chalkboard paint in your outdoor space provides numerous benefits:
- Creativity: Outdoor chalkboard paint provides an engaging and fun outlet for children and adults to express their creativity.
- Organization: Use the chalkboard surface to keep track of important reminders, events, or shopping lists.
- Interactive Design Element: Outdoor chalkboard paint brings an interactive and unique design element to your outdoor space, setting it apart from others.
• In Conclusion
Outdoor chalkboard paint is a versatile, functional, and entertaining addition to any outdoor space. By following the correct surface preparation, application, and maintenance steps, you can enjoy the benefits and creativity that outdoor chalkboard paint adds to your home for many years to come.
Is it Possible to Utilize Chalkboard Paint for Outdoor Applications?
Chalkboard paint is a versatile and functional tool that can transform a variety of surfaces into functional chalkboards. It is widely used for interior projects, such as walls, doors, and furniture pieces. One question that often arises is whether or not chalkboard paint can be used outside.
• Factors to Consider
Before applying chalkboard paint outdoors, it’s essential to understand the factors that may affect its performance and durability. These include exposure to sunlight, rain, humidity, and temperature fluctuations.
The following sections will discuss these factors and provide recommendations on how to overcome them.
– Sunlight Exposure
When exposed to direct sunlight, chalkboard paint can fade and lose its color over time. To minimize this effect, ensure that the painted surface is not continuously exposed to sunlight or use UV-resistant sealers.
– Rain and Humidity
Chalkboard paint is not inherently waterproof, meaning it can be damaged by excess moisture or frequent rain exposure. However, applying a water-resistant sealer can help protect the surface and extend its lifespan.
– Temperature Fluctuations
Extreme outdoor temperature fluctuations can cause chalkboard paint to crack or peel. Though temperature fluctuations are not always preventable, proper surface preparation and priming can help mitigate the risk of paint failure.
• Surface Preparation
Proper surface preparation is critical for a successful outdoor chalkboard paint application, as it ensures the paint will adhere well and be long-lasting.
– Cleaning the Surface
Before applying chalkboard paint, ensure the surface is clean and dry. Remove any dirt, dust, or debris. Wash the surface with a mild detergent and rinse with clean water. Allow the surface to dry completely before applying any paint.
– Priming
It is essential to prime the surface before applying chalkboard paint outdoors, as it will ensure better adhesion and protection against moisture. Use a high-quality exterior primer and follow the manufacturer’s application and drying time instructions.
Additionally, it is recommended to use a primer suited for the material you are painting, such as wood, metal or concrete.
• Choosing the Right Chalkboard Paint
When using chalkboard paint outdoors, choosing a product specifically formulated for exterior use is essential. Exterior chalkboard paint is designed to withstand exposure to the elements and provide better durability compared to interior chalkboard paint.
• Application Tips
Follow these tips for a successful outdoor chalkboard paint application:
- Use a brush or roller: Apply the chalkboard paint with a high-quality brush or roller, working in small sections to ensure an even coat. Be sure to follow the manufacturer’s instructions for application methods and drying times.
- Apply multiple coats: Generally, at least two coats of chalkboard paint are necessary for proper coverage and performance. As per the manufacturer’s guidelines, allow the paint to dry completely between coats.
- Cure the chalkboard: After the final coat of paint has dried, it’s essential to cure the chalkboard before use. This process involves rubbing the side of a piece of chalk across the entire surface and then erasing it. Curing prepares the surface for regular use and ensures easy erasing.
- Seal the surface: As mentioned above, sealing the chalkboard paint is crucial for protecting it from outdoor elements. Apply a clear, water-resistant sealer after the chalkboard paint has cured, following the manufacturer’s instructions for application and drying times.
• Conclusion
In summary, while chalkboard paint can be used outdoors, it’s crucial to consider factors such as sunlight exposure, rain and humidity, and temperature fluctuations. Proper surface preparation, priming, and sealing are essential for a successful outdoor application.
Choosing the right chalkboard paint formulated for exterior use and following the recommended application techniques will significantly enhance the paint’s performance and longevity.
Is it Possible to Maintain a Chalkboard Outdoors?
Chalkboards are a versatile and functional medium of communication that can be used in various indoor and outdoor environments. Though traditionally associated with classrooms, chalkboards have found their way into homes, offices, cafes, and weddings.
One question that commonly arises is whether these boards can be kept outside without compromise.
• Types of Chalkboards
Before delving into the specifics of keeping a chalkboard outside, it is crucial to recognize that not all chalkboards are created equal. Different types of chalkboards might have varying levels of resistance to outdoor elements. These are the three primary types of chalkboards:
– Traditional Chalkboards
Traditional chalkboards are the oldest and most common type. They are made from a hard, porous material like slate, which can wear over time, particularly when exposed to the elements.
– Painted Chalkboards
In recent years, chalkboard paint has become popular for creating custom chalkboards on surfaces like wood, walls, or glass. These painted surfaces are relatively durable and offer a more personal touch when decorating a space.
– Non-porous Chalkboards
Non-porous chalkboards, made from a material like porcelain or Melamine, provide an even surface for writing and easier erasing than traditional chalkboards. They are also more resistant to staining, ghosting, and chemicals.
Now that we have a basic understanding of the types of chalkboard, let’s look at the factors that can affect their durability and functionality when placed outside.
• Weather Conditions
One of the primary concerns when using a chalkboard outdoors is weather conditions. Exposure to rain, snow, or even just high humidity can cause a chalkboard to swell, warp, or rust, depending on the materials used in its construction.
Moreover, direct sunlight can cause the surface of the board to become hot and challenging to write on. In this regard, I recommend using non-porous chalkboards, as they have better resistance to challenging weather conditions.
• Preventive Measures
You can take certain precautions to prevent damage to your chalkboard when keeping it outside. Here are a few of them:
– Weatherproofing
Weatherproofing your chalkboard is essential to maintain its longevity, especially if it will be exposed to the elements on a regular basis. You can use a clear sealant or varnish to protect both the frame and the writing surface.
For added protection, you can also attach a cover or awning above the chalkboard to shield it from rainfall or direct sunlight.
– Proper Mounting
Securing your chalkboard to a sturdy surface or mounting it on a stand is essential to prevent it from toppling over due to strong winds. Ensure that the fixing brackets, screws, and other materials you use for mounting the chalkboard are rust-resistant to minimize weather-related damage.
– Maintenance
Regular maintenance is necessary for preserving the quality of your outdoor chalkboard. This includes periodically cleaning the surface with a damp cloth, checking the board’s edges and mounting hardware for rust, and reapplying sealant as needed.
• Choosing the Right Chalk
The type of chalk you use on your outdoor chalkboard can significantly affect the clarity and longevity of the message you write. Here are some chalk options and their benefits:
– Standard Chalk
Regular chalk is widely available, affordable, and sufficient for temporary messages that don’t need to withstand the elements.
– Chalk Pens
Chalk pens are often used by cafes and restaurants for their vibrant, high-contrast colors and ease of use. They can also be used on outdoor chalkboards for more permanent or artistic designs, as they are water-resistant and easy to clean.
– Wet-Erase Chalk
This type of chalk is specifically designed for outdoor use. They are made with water-soluble pigment, which resists fading in sunlight and can withstand light rain, making it ideal for prolonged outdoor exposure.
• Alternatives to Chalkboards
If you require a more suitable outdoor writing surface, various other options are available:
– Whiteboards
Whiteboards are made from a non-porous material that is easier to clean and maintain than chalkboards. However, exposure to intense sunlight or varying temperatures might warp or damage the surface over time.
– Weatherproof Notice Boards
Designed explicitly for outdoor environments, weatherproof notice boards are often made from water-resistant materials, and a lockable door secures contents from unauthorized access.
– Digital Signage
Equivalent to an outdoor television screen, digital signage displays can showcase messages, menus, or advertisements through a connected device.
In conclusion, it is possible to keep a chalkboard outside, provided that you take the necessary precautions and select the most suitable chalkboard type for your specific needs.
An outdoor chalkboard can be a functional and aesthetically pleasing addition to any external setting by ensuring its protection from weather conditions and conducting regular maintenance.
What is the most suitable material for constructing an outdoor chalkboard?
Choosing the perfect material for an outdoor chalkboard may seem like a daunting task. But with some key considerations in mind, the decision can become much simpler.
• Durability and Weather Resistance: Crucial Factors in Your Decision
Durability is one of the most important factors in choosing the best material for an outdoor chalkboard. Since the chalkboard will be exposed to varying weather conditions, you should select a material that can withstand the elements without losing its quality and efficiency. Here are some options to consider:
– Plywood and MDO (Medium Density Overlay) Panels
Plywood is a popular choice for outdoor chalkboards because of its availability and affordability. However, when exposed to moisture, regular plywood can warp, split, and break down over time.
MDO panels are a more durable alternative made of plywood with a smooth, weather-resistant resin overlay. These panels provide better moisture resistance and are less prone to warping. However, their downside is their weight, making them a bit more difficult to install and move around.
– Painted Hardboard
Painted hardboard, also known as tempered hardboard, is another option for outdoor chalkboards. It is made of densely compressed wood fibers and is smoother than regular plywood. Using a high-quality exterior paint can provide a weather-resistant surface for the hardboard.
Though painted hardboard offers an affordable and smoother surface for chalkboards, it falls short when it comes to extreme weather conditions. Prolonged exposure to harsh elements can cause the hardboard to deteriorate and succumb to moisture damage.
– Porcelain-Enamel Steel
Porcelain-enamel steel is a high-quality, durable material that combines a steel core with a porcelain-enamel coating. This creates a non-porous, weather-resistant, and virtually indestructible surface that can easily handle harsh conditions.
In addition to its durability, porcelain-enamel steel is known for its easy cleaning, resistance to staining, and exceptional writing surface. These benefits make it a top choice for outdoor chalkboards, but the material comes with a significantly higher price tag compared to plywood or hardboard options.
• The Importance of a Proper Frame and Backing
No matter which material you choose for your outdoor chalkboard, its lifespan and effectiveness can be significantly impacted by its frame and backing quality. A sturdy frame is essential to prevent warping and provide support, while a durable backing prevents any potential problems caused by moisture.
I recommend using treated lumber or aluminum for the frame, as both materials are weather-resistant and relatively lightweight. For the backing, opt for weather-resistant materials such as marine plywood or aluminum sheets to ensure your chalkboard withstands the test of time.
• The Best Material: Porcelain-Enamel Steel
Considering the factors mentioned above, it’s clear that porcelain-enamel steel takes the crown as the best material for outdoor chalkboards. Despite its higher price point, its unmatched durability, weather resistance, and superior writing surface make it a worthy investment for any outdoor space.
However, if budget constraints make porcelain-enamel steel an unrealistic option, I would recommend opting for MDO panels with a proper frame and backing. This combination offers a more affordable alternative with improved weather resistance and durability compared to regular plywood or painted hardboard.
• Installation and Care Tips for Your Outdoor Chalkboard
To get the most out of your outdoor chalkboard and protect its longevity, follow these installation and care tips:
- Proper Installation: Ensure your chalkboard is securely fastened, with a sturdy frame and backing, to prevent warping or damage from wind and other environmental factors.
- Treat Your Chalkboard Surface: Regardless of the material you choose, treating your chalkboard surface with a specialized outdoor chalkboard paint or primer can help protect it from the elements and enhance its performance.
- Routine Maintenance: Regularly clean your chalkboard with a damp cloth or sponge to remove dust, dirt, and chalk residue. This will keep the surface in good condition and extend its lifespan.
- Protect from Excessive Sunlight: If possible, position your chalkboard in a shaded area or use a protective cover to shield it from prolonged exposure to direct sunlight. This will help prevent fading and warping.
In conclusion, selecting the best material for an outdoor chalkboard should prioritize durability and weather resistance. With porcelain-enamel steel as the top choice and MDO panels as a budget-friendly alternative, you can ensure your outdoor chalkboard will serve its purpose for years to come.
Don’t forget proper framing, backing, and ongoing care to maximize your chalkboard’s longevity and performance.
Material | Advantages | Disadvantages |
|---|---|---|
Exterior Grade Plywood | Weather resistant, affordable, widely available | Heavy, may require additional sealing |
HardieBacker Cement Board | Durable, weatherproof, lightweight | More expensive, harder to find |
Galvanized Sheet Metal | Weather resistant, durable, easy to clean | Heavy, expensive, may require special tools for installation |
Porcelain Steel Chalkboard Surface | Extremely weather resistant, durable, easy to clean | Expensive, may be difficult to find |
How to Create an Outdoor Chalkboard Wall?
Creating a chalkboard wall outside is an excellent way to add a unique, functional, and creative touch to any outdoor space.
Whether you want to set up an artistic space for your kids, provide an interactive area for friends and family, or add a personal touch to your garden, a chalkboard wall is an ideal project.
• Choose the Right Space and Surface
Before starting creating your chalkboard wall, choosing the right location and surface is important. Ideally, you should select a well-lit, easily accessible area free from excessive moisture or humidity.
Additionally, ensure that the wall you select has an appropriate surface for painting, such as wood, brick, or a smooth cement wall.
– Tips for choosing the perfect location
- Aim to choose a location that offers a comfortable working space for yourself or your kids.
- If possible, select a space with some form of shade or protection from direct sunlight, as this can help extend the life of your chalkboard paint.
- Bear in mind that while chalkboard walls are relatively easy to maintain, they can create a bit of dust, so it’s wise to choose a location that is easy to clean and keep tidy.
• Gather Your Materials and Tools
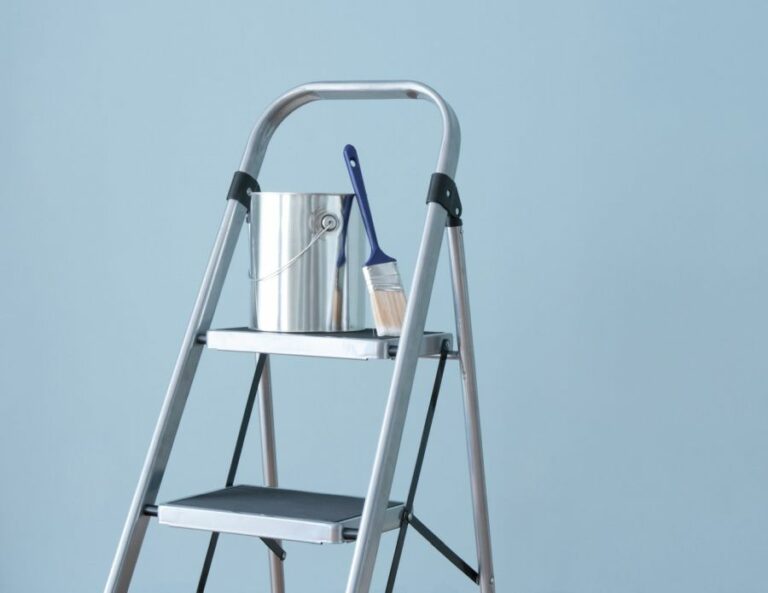
Once you have selected the perfect location for your chalkboard wall, gathering the necessary materials and tools for the project is essential. These include:
- Chalkboard paint
- Primer (for certain surfaces)
- Paintbrushes (various sizes)
- Paint roller and tray
- Painter’s tape
- Chalk and eraser
- Level
- Drop cloth or tarp
– Expert recommendations for materials and tools
- When selecting a chalkboard paint, choose a high-quality, weather-resistant product designed specifically for outdoor use.
- Investing in good-quality paintbrushes and rollers will help ensure a smooth, seamless finish.
- Make sure to purchase a level to ensure that your lines are straight and your finished chalkboard looks professional.
• Prepare the Surface
Proper surface preparation is crucial for a successful chalkboard wall. Begin by thoroughly cleaning the chosen wall, removing any dirt, grime, or loose paint. Depending on the surface, you may need to use a wire brush or power washer. Ensure any cracks or holes are filled and the surface is as smooth as possible.
– Surface preparation tips
- Always allow the surface to dry completely before moving on to the next step.
- If painting a wooden surface, sand it lightly first to create a smoother finish for your chalkboard wall.
• Apply Primer (If Necessary)
In some cases, applying a coat of primer may be necessary before painting your chalkboard wall. If you are working with a porous surface such as brick, a layer of primer can help ensure even coverage and a longer-lasting result.
Be sure to select a primer specifically designed for your surface type and follow the manufacturer’s instructions for application.
– Primer application tips
- Don’t skimp on the primer! Applying a high-quality primer will provide a smooth, stable base for your chalkboard paint.
- Allow the primer to dry completely before applying the chalkboard paint, as advised by the manufacturer.
• Paint Your Chalkboard Wall
Now that your surface is prepared and primed, it’s time to apply the chalkboard paint. Using a paintbrush or roller, apply the paint in smooth, even strokes to cover the entire surface. Depending on the paint and surface, you may need to apply multiple coats to achieve the desired finish.
– Painting tips
- Take your time and be patient when painting your chalkboard wall, as rushing can lead to uneven coverage and a less professional finish.
- When applying multiple coats, allow the paint to dry completely between coats, as specified by the paint manufacturer.
- After completing the final coat, allow the paint to cure for at least 24 hours, or as the paint manufacturer recommends, before using chalk.
• Add Chalk and Accessories
With your chalkboard wall complete, it’s time to add chalk and any other desired accessories, such as a chalk holder or eraser. Be sure to choose weather-resistant chalk and accessories designed for outdoor use.
– Chalk and accessory recommendations
- Opt for bold, bright colors of chalk to create eye-catching and vibrant designs on your outdoor chalkboard wall.
- Invest in a high-quality eraser to keep your chalkboard wall clean and ready for new creations.
• Conclusion
Creating an outdoor chalkboard wall can be a fun, rewarding project, transforming any space into a welcoming and engaging place for artistic expression.
By following the steps outlined in this article, from choosing the perfect location and surface to expertly preparing and painting your chalkboard wall, you’ll be well on your way to enjoying your new outdoor feature in no time at all.
Step | Description |
|---|---|
1 | Choose a suitable wall outside with a smooth surface for your chalkboard. |
2 | Clean the chosen wall surface thoroughly, removing any dirt, dust, or debris. |
3 | Apply a coat of primer to the wall surface to ensure better adhesion of the chalkboard paint. |
4 | Once the primer is dry, apply the chalkboard paint using a paint roller or brush, following the manufacturer’s instructions. You may need 2-3 coats of paint for complete coverage. |
5 | Allow the chalkboard paint to dry completely, typically 24-48 hours. |
6 | After the paint is completely dry, prepare the surface for use by rubbing the side of a piece of white chalk over its entire surface, then wiping it clean with a damp cloth. This “seasoning” process will help prevent initial marks from being permanently visible. |
7 | Enjoy your new outdoor chalkboard wall, an ideal space for drawing, playing games, and various activities. |
How to Construct an Outdoor Black Board?
Outdoor blackboards can be a great addition to any outdoor area, such as your backyard or a playground. They provide an excellent, weather-resistant surface for writing, drawing, or displaying information.
• Choose the Right Location
Before you begin, picking the right spot for your outdoor blackboard is crucial. Consider these aspects when selecting a location:
- Accessibility: The blackboard should be easily accessible to the people who will be using it, such as kids or educators.
- Visibility: It should be positioned in a place where it can be easily seen by those who need to read or use it.
- Protection: The area should provide some shelter from harsh weather conditions, such as direct sunlight, heavy rains, or strong winds. This will help prolong the lifespan of the blackboard.
- Safe surface: Make sure the location has a sufficiently flat and stable surface on which to mount or place the blackboard.
• Choose the Right Materials
Once you have chosen the perfect spot for your outdoor blackboard, it’s time to gather your materials. Here is what you will need:
– Blackboard Surface
- Exterior-grade plywood or MDF – These materials are suitable for outdoor use because of their resistance to moisture and humidity. Ensure it is at least 1/2 inch thick for adequate durability. The size of your blackboard will depend on your desired dimensions, but common sizes include 4×8 feet or 4×4 feet panels.
- Blackboard paint – You will need a specialized primer and paint specifically designed for blackboard surfaces (usually available in black or dark green). These products contain additives that provide a better writing surface and improved erasability compared to regular paint. Some brands may offer an all-in-one paint and primer solution.
– Frame and Mounting Materials
- Lumber – To build a sturdy frame for your blackboard, select pressure-treated lumber or cedar, which are resistant to rot and insect damage. Common sizes for the frame include 2x4s or 2x6s, depending on your desired thickness.
- Screws and/or nails – Use exterior-rated screws or galvanized nails to secure the frame and fasten the blackboard surface to the frame.
- Mounting hardware – There are various mounting options, such as brackets, French cleats, or heavy-duty hooks, depending on how you plan to attach the blackboard to a wall or support structure.
• Prepare and Paint the Blackboard Surface
Before assembling your blackboard, you will need to prepare and paint the blackboard surface. Here’s how:
- Begin by thoroughly sanding the plywood or MDF on one side, ensuring that there are no rough patches or splinters. This will become the writing surface.
- Apply a coat of blackboard primer, following the manufacturer’s instructions. Allow it to dry as recommended.
- Next, apply at least two coats of blackboard paint, again following the manufacturer’s instructions and allowing for proper drying time between coats. This may vary depending on the brand of paint chosen.
• Build and Assemble the Frame
Following the preparation and drying of the blackboard surface, it’s time to build the frame and assemble the blackboard:
- Cut your lumber to the desired dimensions, creating a rectangular frame that will fit around your painted blackboard surface.
- Assemble the frame using appropriate nails or screws in each corner, making sure it’s sturdy and square.
- Lay the painted blackboard surface face down on a flat surface, then place the frame on top. Align the frame with the edges of the blackboard surface.
- Attach the blackboard surface to the frame by drilling screws through the back of the frame and into the edges of the plywood or MDF. Multiple screws should be used on each side to ensure a secure attachment.
• Mount the Blackboard Outdoors
With the frame and blackboard surface assembled, you’re now ready to mount it in the chosen location:
- Determine the preferred height for your blackboard – this will depend on the age and height of the individuals using the blackboard. Ensure that it’s easy to reach for those who will be writing or drawing on it.
- Attach your chosen mounting hardware (brackets, cleats, or hooks) to the back of the blackboard frame, and to your support structure (wall, fence, or posts), following the manufacturer’s instructions.
- Once securely fastened, ensure the mounted blackboard is level, sturdy, and in the desired location.
• Additional Tips
Here are some useful tips to help you maintain the functionality and longevity of your outdoor blackboard:
- Weather protection: Try to provide additional shelters, such as an awning or overhang, to protect your blackboard from extreme weather conditions.
- Cleaning: Regularly clean the blackboard using a brush, water, or specialized blackboard cleaner to remove chalk and dust, maintaining a high-quality writing surface.
- Maintenance: Periodically check your blackboard for any signs of wear or damage, and make necessary repairs to prolong its life.
In conclusion, creating an outdoor blackboard is a fun and practical addition to any outdoor space. By carefully selecting a location, choosing the right materials, and following the steps outlined in this article, you’ll be able to produce a functional and durable blackboard that can be enjoyed for years to come.
Step | Instructions |
|---|---|
1 | Choose a suitable location for the black board – a flat, solid surface is best. |
2 | Measure the desired size of the black board and mark it on the wall with a pencil. |
3 | Choose a suitable material for your outdoor black board like plywood or cement board, and purchase it in the desired size or cut it to fit the marked dimensions. |
4 | Apply two coats of exterior primer to one side of the board, allowing each coat to dry between applications. |
5 | Apply two coats of blackboard paint on top of the primer, allowing each coat to dry between applications. |
6 | Attach the board to the wall using the appropriate screws, anchors, or adhesives, making sure it is level and secure. |
7 | Add a chalk holder or shelf, if desired, near the bottom edge of the black board for easy access to chalk and erasers. |
What are the potential disadvantages of using chalkboard paint?
• Introduction
Chalkboard paint has become increasingly popular in recent years, especially among DIY enthusiasts and home decorators. The ability to transform almost any surface into a functional chalkboard has given many an opportunity to express their creativity and add a personal touch to their living spaces.
However, not everyone is aware of the potential downsides that might come with using chalkboard paint.
• Difficulty in Application
One of the first issues many encounters when using chalkboard paint is the difficulty in achieving a smooth, even application. While several brands and types of chalkboard paint are available in the market, most of them require a skill level to achieve a professional finish.
Users often struggle with unsightly brush strokes, uneven coverage, or patchiness in their painted surfaces.
– Tip for Smoother Application
Based on personal experience, I recommend using a foam roller instead of a brush for the smoothest possible application. If using a brush is unavoidable, try a high-quality, synthetic bristle brush to minimize visible brush marks.
• Inconsistency in Performance
While chalkboard paint is designed to create a surface that mimics a traditional chalkboard, the performance of the paint can vary significantly between brands and even between batches.
Some users may find their painted chalkboard difficult to write on or erase, making the surface less functional than intended.
– Ensuring Better Performance
To avoid such inconsistencies, I recommend testing a small, inconspicuous area prior to completing a larger project. Additionally, opting for a higher-quality, reputable chalkboard paint brand could minimize the risk of encountering performance issues.
• Limited Color Options
Although chalkboard paint is available in a range of colors, the most common and easily accessible options are typically black or green. Such limitations might prove disappointing for those seeking a more vibrant or unique color for their chalkboard surface.
– Customizing Chalkboard Paint Colors
To add some creativity to your chalkboard paint projects, try mixing different colored chalkboard paints, or create your own by adding unsanded grout or powdered tile grout to regular latex paint. However, note that such customization may compromise the performance and durability of the final product.
• Durability and Scratches
Chalkboard paint can be prone to scratching, particularly on surfaces that experience frequent use or are in high-traffic areas. Over time, these scratches may lead to a less-than-ideal appearance and reduced functionality of the painted surface.
– Maintaining Painted Surfaces
To extend the life of a chalkboard paint project, I recommend applying a clear, protective topcoat after the paint has fully cured. This additional layer can offer enhanced protection against scratches and other potential damage.
• Ghosting Issues
Another common downside to chalkboard paint surfaces is the issue of ghosting. Ghosting refers to the faint marks left behind after erasing chalk from the surface. These marks can detract from the appearance of the chalkboard and create a cluttered, unprofessional look.
– Tips for Reducing Ghosting
To minimize ghosting, I recommend priming the surface with a layer of chalk prior to use. Simply cover the entire chalkboard in chalk, then erase it. This process, known as “seasoning” the board, can help reduce the appearance of ghosting.
• Environmental and Health Concerns
Finally, chalkboard paintlike many other paints, can come with environmental and health concerns.
Using chalk on a chalkboard-painted surface can produce dust, which may irritate those with allergies or respiratory issues. Additionally, some chalkboard paints contain volatile organic compounds (VOCs), which can release fumes and potentially negatively affect indoor air quality.
– Healthier Alternatives
For those concerned about chalkboard paint’s environmental and health impacts, consider choosing a low- or zero-VOC paint option. Alternatively, opt for a non-toxic chalkboard surface, such as a chalkboard vinyl decal, that can be applied to walls, doors, or other surfaces without the need for paint.
• Conclusion
While chalkboard paint undoubtedly offers a creative and versatile way to personalize spaces within your home, it is essential to consider the potential downsides before undertaking any projects with this material.
By being aware of the issues and following the recommended tips and alternatives above, you can make a more informed decision when incorporating chalkboard paint into your home decor projects.
Which Type of Wood is Best for an Outdoor Chalkboard?
Creating an outdoor chalkboard can provide an excellent space for children to express their creativity or for businesses to display menus or messages. When designing an outdoor chalkboard, knowing which types of wood are best suited for this purpose is vital.
• Pressure-Treated Lumber
One of the most commonly used woods for outdoor chalkboards is pressure-treated lumber. This wood has been infused with preservatives, which helps provide resistance against rot, decay, and insects.
– Advantages:
- Durable and long-lasting
- Resistant to insects, rot, and decay
- Widely available and affordable
– Disadvantages:
- May contain harmful chemicals, requiring caution when cutting or touching the wood
- Susceptible to warping over time
– Recommendations:
When using pressure-treated lumber for an outdoor chalkboard, applying a solid, water-based paint or stain to seal the surface and prevent exposure to chemicals is essential. Also, ensure proper ventilation when cutting this wood to avoid inhaling any harmful particles.
• Cedar
Cedar is popular for outdoor woodworking projects due to its natural resistance to moisture, decay, and insects.
– Advantages:
- Naturally resistant to moisture, decay, and insects
- Aesthetically pleasing with rich color and grain
- Lightweight and easy to work with
– Disadvantages:
- Can be more expensive than other wood options
- Requires regular maintenance to maintain its appearance and durability
– Recommendations:
Use a high-quality exterior paint or stain to protect the cedar’s surface and maintain its rich color. Additionally, consider using stainless steel screws and fasteners when assembling the chalkboard to prevent any rust or corrosion.
• Redwood
Redwood is another excellent option for an outdoor chalkboard due to its inherent resistance to decay, insects, and warping.
– Advantages:
- Naturally resistant to decay, insects, and warping
- Beautiful color and grain
- Less prone to shrinking, twisting, or checking as it dries
– Disadvantages:
- Can be significantly more expensive than other wood options
- Limited availability in some areas
– Recommendations:
Use a clear or tinted exterior stain with UV protection to maintain redwood’s natural beauty. This will help preserve the wood’s color and prolong its life. As with cedar, it’s best to use stainless steel fasteners to avoid potential corrosion.
• Marine-Grade Plywood
Marine-grade plywood is an engineered wood product designed for use in environments with exposure to moisture, making it a suitable choice for outdoor chalkboards.
– Advantages:
- Designed for high moisture environments
- Strong and durable
- More affordable than some of the other wood options on this list
– Disadvantages:
- Less attractive compared to cedar or redwood
- Needs additional treatments to withstand outdoor conditions
– Recommendations:
When using marine-grade plywood for an outdoor chalkboard, applying a few coats of exterior primer and paint is crucial to ensure durability against the elements. You may also want to add a frame made from more attractive wood, such as cedar or redwood, to enhance the chalkboard’s appearance.
• Tips for Installation and Maintenance
Now that you’re familiar with the top wood options for an outdoor chalkboard, here are some tips to help with installation and maintenance:
- Choose a three-layer chalkboard paint specifically designed for outdoor use to ensure maximum longevity.
- Install the chalkboard on a wall or fence that receives minimal direct sunlight to help prevent fading and warping.
- Use outdoor-rated mounting hardware, such as stainless steel screws or brackets, to secure the chalkboard in place.
- Keep the chalkboard clean by regularly wiping it down, removing any moisture or debris that could lead to damage over time.
- Apply a fresh coat of paint or stain every couple of years to keep the wood in optimal condition.
In conclusion, the best wood types for an outdoor chalkboard include pressure-treated lumber, cedar, redwood, and marine-grade plywood.
By selecting the right wood, applying proper treatments, and following the installation and maintenance tips provided, you can create a beautiful, durable, and long-lasting outdoor chalkboard for everyone to enjoy.