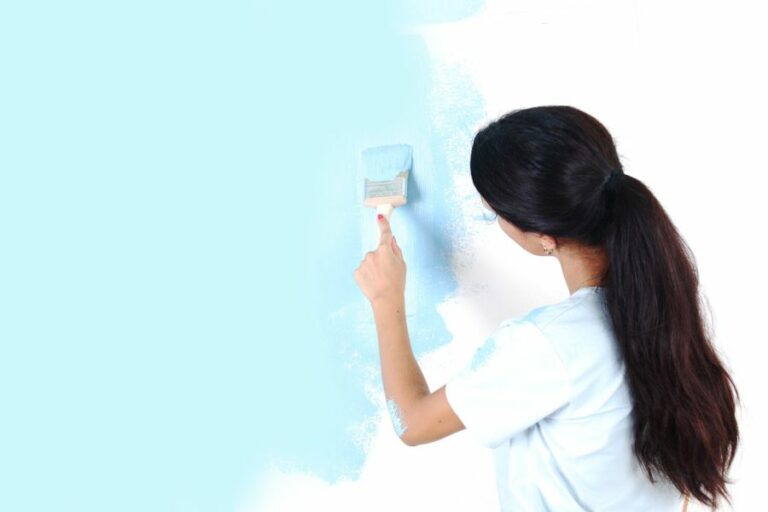
Interior Paint Prep For Beginners, 25 Things You Should Know
Are you ready to give your home a fresh look but unsure where to start? You’re in the right place! I’m here to guide you through the initial steps of interior paint prep for beginners, ensuring a smooth and successful project. With my tried-and-true tips and some elbow grease, you can transform any room like a pro in no time.
Interior paint prep for beginners:
Interior paint preparation for beginners involves choosing high-quality paint and tools, selecting the right color, protecting furniture and floors, and cleaning and repairing walls. Proper prepping ensures smooth application and desired results. Seek expert advice and use dedicated guides for detailed instructions.

Ready to transform your space with a fresh coat of paint? Don’t know where to begin? Worry not. I have you covered! Dive into this beginner’s guide to learn everything you need to know about interior paint preparation, from choosing the right paint to achieving a professional finish.
Read on and bring your vision to life!
Contents
- 1 Beginner’s Guide to Interior Painting Preparation
- 2 Steps to Prepare Your Room for Interior Painting
- 2.1 • 1. Assess the Walls
- 2.2 • 2. Remove Furniture and Wall Decorations
- 2.3 • 3. Clean the Walls
- 2.4 • 4. Protect the Floor and Trim
- 2.5 • 5. Mask Electrical Outlets and HVAC Vents
- 2.6 • 6. Prime the Walls (if needed)
- 2.7 • 7. Gather Tools and Materials
- 2.8 • 8. Mix the Paint
- 2.9 • 9. Establish a Painting Plan
- 2.10 • 10. Cut-In and Roll
- 2.11 • Conclusion
- 3 Is Prepping Interior Walls for Painting Necessary?
- 4 Do Pros Clean Walls Prior to Painting?
- 5 Initial Steps to Take Before Starting a Painting Project
Beginner’s Guide to Interior Painting Preparation
• Choose the Right Paint and Tools
Before starting any painting project, the first step is to gather the necessary supplies. High-quality paint and tools will make the entire process easier and result in a better final product.
I recommend going to a local paint store to ask for advice on the best paint brand and finish for your specific needs. For a list of recommended painting supplies, check out this article by FamilyHandyman.
• Color Selection
Picking the perfect color is crucial for achieving the desired results. Take the time to sample different colors on your walls since paint colors can look different in your space than they do on a paint swatch. This will help you visualize how the colors will look in the room’s natural light.
For more tips, consider visiting BenjaminMoore’s color selection guide.
• Protect Furniture and Floors
Before you start painting, you’ll want to protect your furniture and floors from any accidental paint spills. Move furniture to the center of the room and cover it with drop cloths or plastic sheeting. Be sure to cover the entire floor to avoid any damage to carpets or hardwood.
• Cleaning and Repairing Walls
Properly preparing your walls for painting will ensure a smooth and even finish. First, use a sponge and mild detergent to clean any stains, dirt, or dust from the walls. This will allow the paint to adhere properly.
Next, inspect the walls for any cracks, holes, or damage that needs repairing. Use spackle or joint compound to fill any imperfections, and sand the area smoothly once it’s dried. For more detailed instructions on wall repair, visit this guide by HomeDepot.
Steps to Prepare Your Room for Interior Painting
Painting a room can be a rewarding DIY project that transforms the look and feel of your space. To achieve professional results and ensure a smooth painting process, proper preparation is crucial. Follow these steps to prepare your interior room for painting.
• 1. Assess the Walls
Before starting any painting project, inspect the walls for any imperfections, such as cracks, holes, or peeling paint. Small holes or cracks can be filled with spackling paste, while larger ones may require a patching compound or even drywall repair.
For peeling paint, a scraper or wire brush can be used to remove any loose or flaking paint. For more information on addressing these common issues, visit the U.S. Department of Housing and Urban Development’s website.
• 2. Remove Furniture and Wall Decorations
Eliminate potential obstacles and protect your belongings by removing all furniture, rugs, and wall decorations from the room. If it’s not possible to remove everything, move large items to the center of the room and cover them with drop cloths or plastic sheeting.
• 3. Clean the Walls
Wipe down the walls with a damp cloth or sponge to remove any dust, dirt, or grease. For particularly stubborn stains or grime, use a mild detergent and rinse with clean water. Allow the walls to dry completely before proceeding.
• 4. Protect the Floor and Trim
Cover the entire floor with drop cloths or plastic sheeting, ensuring that they are secured and tucked tight against the baseboards. Use painter’s tape to cover trim, baseboards, and crown molding to prevent paint from accidentally getting on these surfaces.
For added protection, you can also tape down the edges of the drop cloths.
• 5. Mask Electrical Outlets and HVAC Vents
Remove any outlet covers or switch plates and place them in a safe location. Use painter’s tape to cover the electrical outlets and switches. This will protect them from paint splatters and drips. Similarly, cover any HVAC vents to prevent paint from entering the ductwork.
• 6. Prime the Walls (if needed)
Priming is an essential step if you are painting over a dark color, painting a new wall, or if you have made significant repairs to the walls. Priming helps to create a uniform surface that allows for better paint adhesion and coverage.
Be sure to use a primer that is compatible with the type of paint you have chosen (e.g., water-based or oil-based). Apply the primer using a brush or roller, and allow it to dry according to the manufacturer’s instructions.
• 7. Gather Tools and Materials
Before you begin painting, make sure you have all the necessary tools and materials. This includes:
- Paintbrushes (angled for cutting in, flat for general painting)
- Paint rollers (small for tight spaces, large for wide walls)
- Roller tray and liners
- Paint can opener and stir sticks
- Ladder or step stool
- Clean rags or cloths
- Paint, primer, and any additives (e.g., mildew-resistant coating)
• 8. Mix the Paint
Stir the paint thoroughly and pour it into a roller tray. If you are using multiple cans, it is recommended to combine them to ensure consistent color across the entire room. You can also add any additives or coatings at this time, following the manufacturer’s instructions for the proper ratio.
• 9. Establish a Painting Plan
Identify where you will start painting and determine the best method for working around the room. Typically, it is recommended to start at the top of the walls, work your way down, and complete one wall at a time.
• 10. Cut-In and Roll
Having completed the preparation, you are ready to start painting. Begin by cutting in (using a brush to paint the edges) around the trim, baseboards, and outlets. Then, using a roller, paint the walls in a “W” or “M” pattern, working in 3 ft x 3 ft sections.
Refill your roller often to ensure even coverage and avoid drips. For professional results, apply two coats of paint, allowing sufficient drying time between them, as recommended by the paint manufacturer. Be thorough by checking for any touch-ups or missed spots during the process.
• Conclusion
Proper preparation is the key to a successful interior painting project. Meticulous attention to detail and following the steps above will help ensure a smooth, professional finish that will revitalize your living space. Happy painting!
Is Prepping Interior Walls for Painting Necessary?
Painting the interior walls of your home can transform the space and breathe new life into any room. But before you grab a roller or a paintbrush, it’s essential to spend some time prepping the walls to ensure a professional and long-lasting finish.
• Prep Work Makes All the Difference
Properly preparing your walls for painting is crucial to achieving a high-quality, professional-looking finish that will last for years to come. Skipping this step may result in uneven paint application, visible imperfections, peeling paint, or even damage to your walls.
Here are the key reasons why you should invest time in prepping your interior walls:
– 1. Cleanliness Is Crucial
Cleaning walls before painting ensures that you are working with a clean and dust-free surface, which will help the paint adhere better and provide a smooth, long-lasting finish.
Use a mild detergent mixed with water and a soft cloth or sponge to clean any dirt or grime from the surfaces gently. Don’t forget to pay attention to trim, baseboards, and windowsills (Cleaning Walls Before Painting | Today’s Homeowner).
After cleaning, go over the walls with a damp cloth to remove any soap residue, and allow the walls to dry completely before proceeding with the next steps.
2. Repair Imperfections
Even the best paint job can’t hide faulty walls. Make a thorough inspection of your walls, looking for cracks, holes, and other imperfections that can mar your finished product. Some common issues to watch out for:
- Nail holes or minor dents: Fill these with a lightweight spackling compound (available at any home improvement store) and allow it to dry before sanding the area smoothly.
- Larger holes or cracks may require a more substantial repair involving patching with drywall compound and mesh tape. Consult a professional for guidance if you are unsure how to tackle this type of repair yourself.
- Uneven surfaces: Sand the wall lightly with fine-grit sandpaper to smooth out any rough or uneven areas.
Once any repairs are completed, use a vacuum cleaner with a brush attachment or a slightly damp cloth to remove any dust before moving on to the next step.
3. Protect Your Surfaces
Cover floors, furniture, and any other items in the room with drop cloths or plastic sheeting to protect them from paint splatters and spills. Ensure that edges are securely taped down to prevent accidents and make cleanup easier when the painting is complete.
4. Priming Is Key
Priming your walls is an essential step in the preparation process, as it can significantly improve the finished look of your paint job. A primer:
- Seals porous surfaces, preventing paint from soaking into the wall and creating an uneven finish.
- Improves adhesion, helping the paint stick to the wall better and reducing the risk of peeling or chipping.
- Makes the paint color truer, ensuring a more vibrant and accurate shade that can be achieved with fewer coats of paint (Why Primer? | Sherwin-Williams).
When choosing a primer, look for a high-quality product that is designed for your specific wall material and paint type. Apply the primer evenly with a roller, and allow it to dry according to the manufacturer’s instructions before proceeding with your paint job.
• Expert Recommendations and Tips
Now that we’ve covered the importance of wall prep, let’s discuss some expert recommendations to help you achieve the best possible results when painting your interior walls:
- Choose the right paint: High-quality paint will adhere better to the walls and provide a more professional-looking finish. Modern paints also incorporate a primer in their formula, saving you time and effort.
- Use the correct tools: Invest in high-quality rollers, brushes, and a sturdy, adjustable ladder or scaffold for painting hard-to-reach areas.
- Allow plenty of time for each phase of the process; rushing through any step can lead to unsatisfactory results and the need for costly do-overs.
- Keep a consistent method for applying the paint, working from the top down, and maintaining a wet edge to avoid streaking or lap marks. This painting guide from Better Homes and Gardens is an excellent resource to help you perfect your technique.
- Safety first! Remember to use proper precautions, such as wearing protective eyewear, gloves, and clothing and ensuring the room is well-ventilated.
Painting your interior walls is a project that can yield beautiful and satisfying results when done correctly. By taking the time to prepare the walls properly and following expert recommendations, you will be well on your way to a professional-looking and long-lasting paint job.
Preparation Step | Description |
|---|---|
Clean walls | Remove dirt, dust, and grease spots with a solution of water and mild detergent. |
Repair any damages | Fix holes, cracks, and other imperfections on the wall surface with spackling or other appropriate products. |
Sanding | Sand the walls to remove any rough spots and create a smooth surface for the paint to adhere properly. |
Priming | Apply primer to the walls for better paint adhesion, coverage, and long-lasting results. |
Tape off areas | Use painter’s tape to protect trim, window, and door frames, as well as areas where you don’t want paint to apply. |
Remove or cover furniture | Remove or cover any furniture and items in the room to protect them from paint splatters and drips. |
Do Pros Clean Walls Prior to Painting?
When it comes to painting walls, many may wonder whether or not professional painters wash the walls before applying paint. The answer is yes. Washing the walls is a crucial step in ensuring a high-quality, long-lasting paint job.
• The Importance of Washing Walls Before Painting
Washing walls before painting is essential for several reasons. First and foremost, it helps to remove dirt, grime, and dust that can accumulate on walls over time. Paint will not adhere well to a dirty surface, which can lead to an uneven finish or even cause the paint to peel and crack.
Moreover, cleaning walls before painting helps to eliminate any lingering odors that may be trapped within the dirt and grime.
Another important reason to wash walls before painting is to prevent mold and mildew growth. Dampness or humidity can cause mold and mildew to thrive on walls, leading to potential health hazards and damage to the structure of your home.
Cleaning the walls with a solution designed to kill mold and mildew can help prevent these issues and create a healthier living space.
By washing walls prior to painting, professional painters create a clean slate for the new paint to adhere to, ultimately offering a better quality and longer-lasting finish.
• Proper Techniques for Washing Walls
Professional painters follow specific techniques to ensure a thorough wall cleaning prior to painting. These expert methods simultaneously ensure that the wall is not damaged and that the paint adheres smoothly.
1. Initial Inspection and Dust Removal
First, professionals will inspect the walls for any significant stains or damage that may require additional treatment before cleaning. Common issues include water damage, heavy soot, or mold growth. In these instances, a specialized cleaning solution or primer may be necessary.
Next, professionals will remove loose dust and dirt by using a microfiber cloth or a vacuum cleaner with a brush attachment. This step helps to prepare the wall for washing and prevents existing dirt from being smeared across the wall during the washing process.
2. Wall Washing Solution
Once the loose dust and dirt are removed, professionals will create a wall-washing solution. This typically consists of warm water and a mild detergent, which is both effective at removing grime and gentle on the walls.
The U.S. Environmental Protection Agency recommends a mild detergent solution for general mold cleanup, which can also be effective for cleaning walls before painting.
Professionals will apply the cleaning solution to the wall using a soft sponge, working their way from top to bottom in a gentle scrubbing motion. This method prevents any dirty water from dripping down onto clean areas and causing streaks.
3. Rinsing and Drying
After washing, professional painters will rinse the walls with clean water to remove any detergent residue. It is essential to use a damp cloth or sponge for this step, as using too much water can damage the walls.
Once thoroughly rinsed, the walls are left to air dry or are wiped down gently with a clean, dry cloth. It is essential to let the walls dry entirely before applying any paint, as moisture can lead to paint adhesion problems and other issues.
• Determining If Your Walls Need Washing Before Painting
Not all walls will require washing before a new paint job. However, it’s always a good idea to inspect the walls for any visible dirt, dust, or mold growth. Washing the walls can help prevent any issues related to paint adherence and provide a cleaner, more polished finished product.
In addition, if the walls are in a high-traffic area or exposed to smoke, moisture, or cooking grease, washing them before painting is highly recommended.
As a professional painter, I recommend always cleaning your walls before painting to ensure the best possible results. The extra time and effort put into washing the walls can make a significant difference in the final look and longevity of the paint job.
By following the proper techniques and patiently allowing the walls to be dry, you can create a beautiful, long-lasting finish that transforms your space.
Initial Steps to Take Before Starting a Painting Project
As someone with experience in painting, I cannot stress enough the importance of adequate surface preparation before applying paint. This crucial step can make or break the final results of your paint job, and it should never be overlooked or rushed.
• Cleaning and Degreasing
First and foremost, before doing anything else, make sure you clean the surface thoroughly. The presence of dirt, dust, and grease will prevent the paint from adhering properly, leading to a poor-quality finish.
I recommend using a mild detergent mixed with water to clean the surface. For stubborn stains, you may need to use a degreaser specially designed for the type of surface you’re working with. Always follow the manufacturer’s instructions when using these cleaning products.
Pro tip: After cleaning the surface, rinse it well with clean water, then allow it to dry completely before moving on to the next step.
• Removing Old Paint and Sanding
If you’re painting over an already painted surface, you will need to remove any old, loose, or peeling paint. This can be done using a scraper, wire brush, or a combination of both. Be cautious not to damage the underlying surface while removing the paint.
Once the old paint is removed, now it’s time to sand the surface. Sanding helps create a smooth finish and promotes better adhesion of the new paint. Moreover, it helps in hiding the remaining imperfections.
Start with a coarse-grit sandpaper (around 80-grit) and progress to a finer-grit (around 220-grit) for a smoother finish. Remember to sand evenly and follow the grain direction when working with wood surfaces.
When sanding, always wear a dust mask and safety goggles for your protection.
Pro tip: A power sander can save you time and effort, especially when working on large surfaces. Just make sure not to over-sand, as this can damage the surface.
• Repairing Surface Imperfections
Now that the surface is clean and sanded, the next step is to fix any cracks, holes, or other imperfections.
For small cracks and holes in walls, a pre-made joint compound or patching material can be used. For larger repairs, a two-part filler may be needed. Always follow the manufacturer’s instructions and allow the filler to dry completely before sanding it smoothly.
For wood surfaces, use a wood filler that matches the color and texture of the wood. Make sure it’s paintable if you plan to paint over it.
After patching and filling, sand the repaired areas to create a smooth and even surface.
• Caulking and Sealing
Caulking is an essential step when painting surfaces in areas like kitchens and bathrooms, where moisture resistance is crucial. Use a paintable, silicone-based caulk to seal all gaps and joints. Allow the caulk to dry completely before painting over it.
• Priming the Surface
Priming is a crucial step in preparing a surface for painting. It helps ensure proper adhesion of the paint, improves the paint’s durability, and prevents stains from bleeding through.
Choose a primer that’s appropriate for the type of surface and paint you’re using. For instance, an oil-based primer works well for wood surfaces, while a latex-based primer is suitable for drywall.
Apply the primer evenly, ensuring full coverage. Allow the primer to dry for the recommended time before applying the topcoat.
Pro tip: Tint your primer with a small amount of the topcoat color to help achieve better color coverage.
• Properly Preparing Your Tools and Workspace
Before starting the painting process, set up a well-ventilated, clean, and organized workspace. Gather all the necessary tools, such as brushes, rollers, paint trays, and drop cloths.
Protect floors and furniture with drop cloths or plastic sheeting to prevent paint splatters and spills. Use painter’s tape to mask off any areas that should remain paint-free, such as window and door trim.
Lastly, read the manufacturer’s instructions on the paint cans for proper application techniques, drying times, and recommended number of coats.
• In Conclusion
Taking the time to prepare your surface correctly before painting ensures professional-quality results that last. By following the steps outlined above, cleaning, sanding, repairing, caulking, priming, and setting up a proper workspace, you’ll set yourself up for painting success.
For further information on surface preparation and painting best practices, I recommend visiting the Paint Quality Institute‘s website, where you can find expert advice and resources on a variety of painting topics.