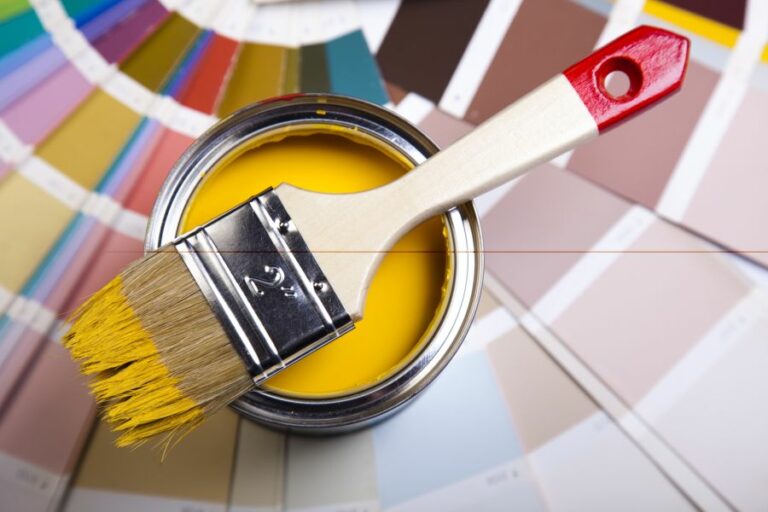
Paint Wood For Outdoor Use, 25 Things You Should Know
If you’re looking to transform a simple piece of wood into a beautiful and durable outdoor decoration or furniture, you’ve come to the right place. Painting wood for outdoor use can seem like a daunting task, but fear not – we have the secrets to help you achieve the perfect finish that will withstand the elements. By the end of this discussion, you will surely have the confidence and knowledge to start working on your masterpiece.
Paint wood for outdoor use:
To paint wood for outdoor use, prepare the surface by cleaning, sanding, repairing, and priming. Choose the right paint, such as latex or oil-based, considering factors like UV protection, water resistance, and mildew resistance. Apply paint using a high-quality brush in thin coats, following the wood grain, and adhering to drying times for a durable, weather-resistant finish.

Want to transform your outdoor wooden furniture or structures but unsure how? We’ve got you covered with tips, tricks, and expert advice on painting wood for outdoor use.
Keep reading to explore the best paints, techniques, and maintenance strategies to make your wooden creations weatherproof and stunning!
Contents
- 1 Apply Paint on Wooden Surfaces for Outdoor Use
- 2 What is the Most Effective Method for Painting Outdoor Wooden Surfaces?
- 3 Is it Possible to Paint Wooden Furniture for Outdoor Usage?
- 4 Which Type of Paint is Suitable for Outdoor Wood Applications?
- 5 What is the process for sealing painted wood intended for outdoor use?
- 6 What is the Optimal Paint Choice for Exterior Wooden Surfaces?
- 7 What is the Process for Ensuring Painted Wood Endures Outdoor Conditions?
- 8 What is the process for sealing and painting wood intended for outdoor use?
- 9 What Type of Paint is Best Suited for Outdoor Wooden Decorations?
Apply Paint on Wooden Surfaces for Outdoor Use
Wood is a popular choice for outdoor applications due to its natural beauty, versatility, and durability. However, exposure to the elements, such as sunlight, water, and temperature fluctuations, can deteriorate wood over time.
Properly painting wood for outdoor use can protect it from these adverse conditions, prolong its lifespan, and provide an aesthetically pleasing appearance.
• 1. Preparing the Wood Surface
Before applying paint, it’s crucial to thoroughly prepare the wood surface to ensure proper adhesion and protection.
– Cleaning the Surface
Begin by removing any dirt, debris, or mildew from the wood using a soft-bristle brush, mild soap, and water. For stubborn stains, a mixture of equal parts bleach and water can be effective. After cleaning, rinse thoroughly with water and allow the wood to dry.
– Sanding
Sanding is essential to remove any loose or peeling paint and to smoothen the wood surface. Start with coarse-grit sandpaper (such as 60 or 80 grit) and gradually work your way up to finer-grit sandpaper (such as 120 or 180 grit).
Be sure to sand along the wood grain to avoid scratches and remove imperfections. Wipe the surface with a damp cloth to remove sanding dust after each grit application.
– Repairing and Filling
For damaged or cracked wood, use a wood filler to level the surface and ensure a smooth final appearance. Follow the manufacturer’s instructions regarding the application, curing times, and sanding requirements.
– Priming
Applying a quality primer is a critical step for long-lasting paint protection. Primers penetrate the wood’s surface, provide a uniform base for paint adhesion, and help prevent stains from bleeding through the paint.
Select an appropriate primer based on the type of paint you plan to use (latex or oil-based) and follow the manufacturer’s instructions for proper application and drying time.
• 2. Choosing the Right Paint
Selecting the right paint for your outdoor wood project is crucial to achieving a long-lasting, weather-resistant finish.
– Paint Types
There are two primary types of paint for outdoor wood: latex (water-based) and oil-based. Both have their pros and cons:
- Latex paint dries quickly, has a low odor, and cleans up easily with water. It also remains flexible, allowing it to tolerate wood’s natural expansion and contraction in various weather conditions. Latex paint typically provides a more durable and longer-lasting finish, making it the preferred choice for most wood projects.
- Oil-based paint provides a hard, glossy finish that resists chipping and abrasion. However, it tends to be less flexible, dries slower, and has a strong odor, making it less preferred for outdoor wood projects. That said, oil-based paint can be suitable for specific applications where a hard, glossy finish is desired.
– Paint Considerations
When selecting paint, consider the following factors to ensure optimal protection and appearance:
- UV Protection: Choose paint with added UV protectants to shield wood from the sun’s damaging rays.
- Water Resistance: Water-resistant paint helps prevent moisture penetration, which can lead to wood rot and decay.
- Mildew Resistance: Mildew-resistant paint contains additives that deter mold and mildew growth, protecting wood in damp environments.
- Opacity (Solid vs. Semi-transparent): Choose between solid color paint, which provides complete coverage and hides the wood grain, or semi-transparent paint, which enhances the wood’s natural appearance while still providing some protection.
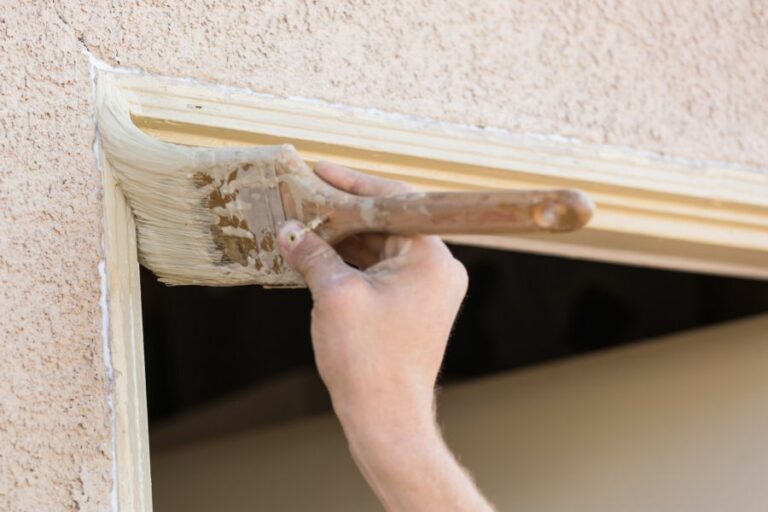
• 3. Painting Techniques and Tips
The application technique is critical to achieving a smooth, professional finish for your outdoor wood projects.
– Brush or Roller?
While brushes and rollers each have their advantages, we recommend using a high-quality brush for painting outdoor wood. Brushes provide better control in tight spaces, around edges, and on intricate woodwork.
Additionally, brushes can better work the paint into the wood’s grain, ensuring proper adhesion and protection.
– Proper Application
Follow these tips for a successful paint application:
- Stir the Paint: Stir the paint well before and during use to evenly distribute pigments and additives.
- Thin Coats: Apply two or more thin coats of paint rather than a single thick layer. This practice ensures even coverage, proper adhesion, and durability.
- Smooth Strokes: Use long, smooth strokes with the brush, following the wood grain. Overlap each stroke to prevent visible brush marks and maintain a wet edge.
- Drying Time: Follow the manufacturer’s instructions for drying time between coats, and use a light hand when applying additional layers to avoid disturbing the previous coat.
- Proper Ventilation: Ensure adequate ventilation when painting and during the drying process, particularly for oil-based paints.
• Conclusion
Painting wood for outdoor use requires proper preparation, choosing the right paint, and employing appropriate application techniques. By following this comprehensive guide, you can protect your wood projects from the elements, prolong their lifespan, and enhance their appearance.
What is the Most Effective Method for Painting Outdoor Wooden Surfaces?
Painting wood that will be exposed to the outdoors can be a time-consuming yet rewarding task.
• Choose High-Quality Outdoor Wood Paint
Not all paints are created equal. To ensure your painted wood stands up to harsh outdoor elements, select a high-quality, water-resistant paint specifically designed for exterior wood surfaces.
2-component paints are widely acknowledged as the best choice for durability and long-lasting protection. Composed of a base paint and a hardening agent, these paints create a strong, weather-resistant barrier.
While more expensive than traditional latex or oil-based paints, the investment in long-lasting protection is well worth the additional cost.
• Prepare Your Wood Surface
– Clean and Remove Dust, Dirt, and Debris
Information on wood finishes and performance can be excellent companions for those looking to paint wood for outdoor settings. Poorly prepared surfaces will lead to unsatisfactory paint jobs, regardless of how high-quality your chosen paint may be.
Begin by thoroughly cleaning your wood surface, removing all dust, dirt, and debris using a stiff brush or damp cloth. You can also use a wood cleaning product for particularly stubborn grime.
– Repair Damaged Wood and Sand Smooth
Inspect the wood surface for any damage or uneven areas. Fill any cracks or holes with wood filler, and allow it to dry according to the manufacturer’s instructions. Once repairs are complete, sand the entire wood surface with medium-grit sandpaper to smooth any rough spots or previous paint layers.
Finish with fine-grit sandpaper for a perfectly smooth surface that’s ready to be painted.
– Apply a Wood Primer
A wood primer is essential for protecting the wood and ensuring proper paint adhesion. Choose a high-quality exterior wood primer, and apply it according to the manufacturer’s instructions. Primers come in both oil-based and water-based varieties; select one that is compatible with your chosen paint type.
• Choose the Right Tools for the Job
The right tools can make a world of difference in the quality and speed of your wood painting project. I recommend investing in good-quality brushes and rollers for a smoother, even coat.
Brushes with synthetic bristles are ideal for applying water-based paints, while natural bristle brushes work well with oil-based paints.
For painting large outdoor wood surfaces such as fences or siding, using a paint sprayer can save time and improve the consistency of the paint application.
• Apply the Wood Paint
– Stir the Paint
Before applying your exterior wood paint, give it a thorough stir to ensure even color distribution and proper consistency. A paint mixing attachment for your drill or a wooden paint stirrer will do the trick.
– Apply Paint with Proper Technique
Using a brush or roller, apply the first coat of paint using long, smooth strokes in the same direction as the wood grain. To avoid drips and streaks, do not overload your brush or roller, and work in controlled sections.
Always follow the manufacturer’s recommended drying time before proceeding to the next coat.
– Two Coats Minimum for Maximum Protection
For maximum protection and durability, I recommend applying at least two coats of paint to your outdoor wood surface. Depending on the type of wood and paint color, you may need additional coats to achieve your desired coverage and color depth.
• Make it Last: Maintenance and Upkeep
With your wood surface freshly painted, it’s vital to maintain it to preserve the paint job and prolong the life of the wood. Regularly clean the surface to remove dirt and grime, and consider applying a protective sealant or topcoat designed for exterior wood surfaces.
Pay attention to any signs of wear or chipping paint, and schedule a touch-up or repaint as necessary.
• Final Thoughts
The key to a successful and long-lasting outdoor wood painting project is careful preparation, high-quality paint, and appropriate application techniques. These steps, coupled with regular maintenance, will ensure your painted wood stands up to the outdoor elements for years to come.
So, choose the right paint, prepare your surface, and get ready to give your outdoor wood a stunning and durable new finish.
Step | Instructions |
|---|---|
1 | Choose the right paint: Select an exterior paint that is suitable for outdoor wood surfaces and withstands weather changes. |
2 | Prepare the surface: Thoroughly clean the wood surface, removing dirt, debris, and any loose paint. Sand the surface as needed to ensure it’s smooth and ready for the paint application. |
3 | Apply a primer: Apply a coat of exterior wood primer to provide a proper base for paint, ensuring better adhesion and longer-lasting protection. Allow the primer to dry according to the manufacturer’s instructions. |
4 | Apply the paint: Use a paintbrush or roller to evenly apply the exterior paint color. Allow the paint to dry for the recommended amount of time before applying additional coats as needed for full coverage. |
5 | Seal the paint: Apply a clear exterior wood sealant to protect and preserve the painted surface. This helps prevent peeling, cracking, and fading due to weather exposure. |
Is it Possible to Paint Wooden Furniture for Outdoor Usage?
Outdoor spaces hold a special charm, and the right furniture can make all the difference in creating a cozy, inviting ambiance. Painting wood furniture can be an excellent way to breathe new life into an old, weathered piece or to add a pop of color and style to one’s outdoor space.
Read on to learn more about how you can successfully paint wood furniture and ensure it withstands the test of time outdoors.
• Choosing the Right Paint for Outdoor Wood Furniture
One of the most crucial aspects of painting wood furniture for outdoor use is selecting the right paint. Since the furniture will be exposed to various weather elements such as sunlight, rain, wind, and humidity, it’s essential to choose a paint that stands up to these conditions.
Here are some recommended paints for exterior wood furniture:
- Water-Based Acrylic Paint: Acrylic paint forms a durable, plastic-like layer on the surface of the furniture, making it highly resistant to weather damage. It also dries quickly and adheres well to wood. You can find acrylic paint specifically formulated for outdoor use, which contains additives that help resist fading due to UV exposure.
- Oil-Based Exterior Paint: This type of paint offers excellent durability and resists water damage, making it ideal for outdoor furniture. However, it takes longer to dry compared to acrylic paint, and the cleanup process can be messy.
- Exterior Latex Paint: Like acrylic paint, latex paint also dries quickly and adheres well to wood. It offers excellent resistance against mildew and can be easily cleaned with soap and water. Look for exterior latex paint with added UV inhibitors to prevent fading.
Please note, when selecting paint for outdoor use, avoid choosing a high gloss finish as these tend to highlight imperfections in the wood.
• Prepping the Furniture for Painting
Proper preparation is key to ensuring that the paint adheres well to the furniture and lasts longer. Here are the steps for preparing the wooden furniture for painting:
- Cleaning: Clean the furniture thoroughly using a mixture of warm water and mild detergent. This step is crucial for removing dirt, grease, and other grime that may prevent the paint from adhering well. Rinse the furniture with clean water and allow it to dry completely.
- Sanding: Sand the surface of the furniture using medium-grit sandpaper (120 to 150-grit). For areas that are difficult to reach with a sanding block or an electric sander, use a folded piece of sandpaper to ensure a smooth finish. This step helps in removing any existing paint or finish on the furniture, as well as leveling out any rough spots.
- Patching: If there are any small holes, dents, or gouges in the wood, fill them with an appropriate wood filler. Allow the filler to dry, and then sand the surface smooth with fine-grit sandpaper (180 to 220-grit).
- Priming: Apply a layer of high-quality exterior primer to the furniture. This step is critical, especially for water-based paints, as it helps provide a uniform base for the paint to adhere to and ensures better paint coverage. Allow the primer to dry as per the manufacturer’s instructions before proceeding to the next step.
• Painting the Furniture
After prepping the furniture, you can move on to the actual painting process. Here is a step-by-step guide to painting your wood furniture for outdoor use:
- Applying the First Coat: Apply the first coat of paint using a brush or a roller. For best results, always start with thin coats of paint and make your strokes parallel with the wood grain. Be sure to cover all edges and crevices, as they are more susceptible to weather damage.
- Drying: Allow the first coat to dry thoroughly as per the manufacturer’s instructions. Drying times can vary depending on the type of paint you’re using, so be sure to check the product label.
- Sanding: After the first coat has dried, lightly sand the surface using fine-grit sandpaper (180 to 220-grit) to remove any brush or roller marks and create a smooth finish for the next coat.
- Applying Additional Coats: Repeat the process of applying a coat of paint, letting it dry, and sanding for at least two to three coats. Multiple thin coats will ensure a durable finish that lasts longer, as opposed to one thick coat of paint.
- Sealing: After the final coat of paint has dried, you can choose to apply a clear, water-based sealer to protect the painted furniture from weather damage, mildew, and UV rays.
• Additional Tips and Recommendations
- Always paint wood furniture in a well-ventilated area, as inhaling paint fumes can cause respiratory problems.
- If painting furniture with intricate details or a large surface area, consider using a paint sprayer for more even coverage and professional finish.
- Keep painted furniture clean using a damp cloth or soft-bristled brush to remove dirt and debris. Avoid using harsh chemicals or abrasive cleaners, as they may damage the paint.
In conclusion, painting wood furniture for outdoor use is not only possible but can achieve excellent results when done correctly. By following the steps outlined in this guide, you can transform any wood furniture piece into a charming addition to your outdoor space.
Which Type of Paint is Suitable for Outdoor Wood Applications?
Outdoor wood requires protection against moisture, sunlight, and temperature fluctuations. It’s crucial to select the right paint to maintain a beautiful appearance and prolong the life of wooden surfaces.
• Acrylic Paints
Often recommended for outdoor wood surfaces, acrylic (water-based) paints have many advantages:
– Pros
- They dry quickly and emit little odor, which makes them eco-friendly and easy to work with.
- They provide good resistance to weathering, mold, and mildew.
- They adhere well to a variety of surfaces and have improved flexibility, which ensures durability as the wood expands and contracts over time.
Some reliable brands of acrylic paint for outdoor wood include Behr Premium, PPG Timeless, and Sherwin-Williams Duration.
– Cons
- They may not be as durable as oil-based paints in harsh and changing climates.
- They are not suitable for surfaces that endure heavy foot traffic or furniture movement.
To get the most from acrylic paint, it’s essential to prepare the wooden surface correctly. Sand the wood, remove any loose paint, and clean it thoroughly before applying primer and paint. The ideal weather conditions for painting with acrylic paint are a dry day with temperatures between 50F and 85F.
You can use acrylic paint on various outdoor surfaces, such as decks, fences, playground equipment, and outdoor furniture. Be sure to apply a suitable UV-resistant sealant to provide added protection against sunlight damage.
• Oil-Based Paints
Oil-based (alkyd) paints have long been popular for exterior use, and they remain a reliable choice for outdoor wood protection.
– Pros
- They offer excellent durability and resistance to harsh weather conditions.
- They provide a high-gloss, smooth finish that many people find attractive.
- They adhere well to various surfaces and have good penetrating ability.
Some popular oil-based paint brands for outdoor wood include Benjamin Moore Arborcoat and Pratt & Lambert Pro-Hide.
– Cons
- They emit strong odors and high levels of volatile organic compounds (VOCs), which can be harmful to the environment and your health.
- They require a longer drying time compared to acrylic paints.
- They don’t expand and contract as well with temperature changes, making them more prone to cracking and chipping.
Prior to applying oil-based paint, prepare the wooden surface by sanding and cleaning it thoroughly. Oil-based paints work best in temperatures between 70F and 90F on dry days. Remember to apply a compatible oil-based primer before the paint, as this will improve adhesion and protection.
Typically, oil-based paints are most suitable for doors, window frames, and trim, but they can also be used on other outdoor wooden surfaces.
• Tips for Choosing the Best Paint for Your Outdoor Wood Project
Consider the following factors when deciding on the ideal paint for your specific needs:
- Function: Consider the intended purpose of your outdoor wooden surface. Will it endure heavy foot traffic or use by children and pets? Opt for durable paint with good resistance to wear and tear.
- Appearance: Do you want a glossy or matte finish? Oil-based paints typically provide a glossy look, while acrylic paints offer a range of finishes, including matte, satin, and semi-gloss.
- Climate: If you live in a region with harsh weather conditions or significant temperature fluctuations, acrylic paint with added UV protection and mildew resistance may be your best choice.
- Environmental and Health Impact: For a more environmentally friendly option and reduced odor, choose an acrylic paint with low VOC levels.
Whichever paint you choose, remember that preparation is key. Properly sand, clean, and prime the wooden surface to ensure long-lasting protection and an appealing finish. Don’t forget to apply a high-quality sealant to safeguard your hard work and keep your outdoor wooden surfaces looking their best.
What is the process for sealing painted wood intended for outdoor use?
Protecting painted wood surfaces in outdoor settings is a crucial aspect of maintaining their durability, aesthetic appeal, and structural integrity. Properly applying the sealant to the painted wood can greatly extend its lifespan and minimize the damaging effects of harsh weather conditions.
• Choosing the Right Sealant for Painted Wood
Selecting the appropriate sealant is a critical factor in the sealing process of painted wood. There are several types of sealants available in the market, but not all are suitable for outdoor use. Some key aspects to look for when selecting the right sealant for painted wood include the following:
- UV Resistance: Ultraviolet (UV) rays can cause significant damage to painted wood surfaces. Look for sealants that have UV inhibitors or blockers to protect the wood from sunlight exposure.
- Water Resistance: Outdoor wood is vulnerable to moisture, which can lead to rot, mold, and mildew. Opt for water-resistant or waterproof sealants that provide a robust barrier against moisture.
- Flexibility: Sealants must be flexible enough to endure expanding and contracting wood without cracking or losing adhesion.
- Breathability: A good sealant should allow the wood to breathe, enabling trapped moisture to escape and prevent rotting.
Based on the above criteria, some recommended products suitable for sealing painted wood outdoors include:
- Spar Urethane
- Acrylic Clear Coat
- Clear Epoxy Finish
• Preparing the Surface for Sealing
– Clean the Surface
The first step to sealing painted wood is to ensure the surface is clean and free of debris. Dirt, dust, and other contaminants can interfere with the adhesion of the sealant. Use a mild soap and water solution to clean the surface gently.
Rinse off any soap residue and allow the wood to dry completely before applying the sealant.
– Sand the Surface (Optional)
Sanding is an optional step, depending on the condition of the painted surface. Lightly sanding the painted wood using 220-grit sandpaper can help create a smoother finish and improve the sealant’s adhesion. Be careful not to sand too aggressively, as it may remove the paint.
After sanding, wipe the surface with a clean, damp cloth to remove any dust.
• Applying the Sealant
– Gather your materials
Some essential tools and materials required for the sealing process include:
- A high-quality paintbrush or foam brush
- The chosen sealant
- A clean, dry cloth
- Painter’s tape (for masking off areas not to be sealed)
– Application Techniques
Applying the sealant evenly and with the right technique can significantly impact the final result. Here are some tips to ensure a successful application:
- Stir the sealant: Gently stir the sealant before using it to ensure a consistent mix. Avoid vigorous shaking, which can create air bubbles in the sealant.
- Apply thin coats: Apply multiple thin coats of sealant rather than one thick coat. This allows for a smoother finish and provides better protection to the wood.
- Use long, even strokes: Apply the sealant using long, even strokes to ensure proper coverage and avoid brush marks or streaks.
- Consider the weather conditions: Application should ideally be made on a cool, dry day. High temperatures, humidity, or rain can affect the drying time and effectiveness of the sealant.
• Curing and Maintenance
– Allow Proper Drying Time
Let the sealant dry completely between coats, and avoid touching the surface during the drying process. Curing times may vary depending on the product, so follow the manufacturer’s recommendations for specific drying times.
– Inspect and Maintain Regularly
Inspect the sealed wood regularly for signs of wear, peeling, or damage. Regular maintenance, such as cleaning and inspecting, can help identify and address issues before they escalate. If necessary, re-apply the sealant as needed to maintain its protective qualities.
• Conclusion
Sealing painted wood for outdoor use is critical to prolonging its life, protecting its appearance, and preserving its structural integrity.
By selecting the right sealant, preparing the surface adequately, and applying the sealant with care and attention to detail, you can successfully safeguard your painted wood surfaces from the elements for years to come.
Step | Description |
|---|---|
1 | Clean the wood surface by removing any dirt and debris. Use a soft-bristle brush or cloth to clean the surface. |
2 | Allow the wood to dry completely before applying any sealer or paint. This may take several hours or overnight, depending on the wood and environmental conditions. |
3 | Choose a suitable wood sealer or outdoor paint. Make sure it is designed for use on wood and is rated for outdoor use. |
4 | Apply the sealer or paint using a brush, roller, or sprayer, following the manufacturer’s instructions. Be sure to cover the entire surface, paying close attention to corners and crevices. |
5 | Allow the sealer or paint to dry completely. This may take several hours or even days, depending on the product and environmental conditions. |
6 | If necessary, apply additional coats of sealer or paint following the manufacturer’s recommendations. Allow each coat to dry completely before applying the next. |
7 | Once the final coat is dry, the wood is now protected for outdoor use. Regularly inspect the wood for any signs of wear, and reapply sealer or paint as needed. |
What is the Optimal Paint Choice for Exterior Wooden Surfaces?
When it comes to protecting and beautifying outdoor wood surfaces, selecting the right paint is essential. Not all paints are created equal, and choosing the best one for your wooden surfaces will ensure maximum durability, longevity, and visual appeal.
• Quality Matters: Key Factors to Consider
There are several factors you should consider when selecting the best paint for your outdoor wood projects. These include:
– Durability
The primary purpose of painting outdoor wood is to protect it from the elements which can cause the wood to warp, rot, or decay.
Therefore, it is crucial to choose a paint that offers excellent durability and can withstand harsh weather conditions, such as rain, snow, and extreme temperatures, as well as resist fading from ultraviolet (UV) rays.
– Ease of Application
The best paint for outdoor wood should be easy to apply, going on smoothly and evenly without requiring multiple coats for proper coverage. Check the label for recommended application methods, such as using a brush, roller, or paint sprayer, and follow the manufacturer’s instructions for best results.
– Finish and Color Options
The visual appeal of your outdoor wood project is essential, so it’s essential to choose a paint that comes in a variety of finishes and colors that will complement your specific design aesthetic.
Now that we’ve discussed the factors to keep in mind while choosing paint for outdoor wood, let’s dive into the different types of paint available.
• Latex Exterior Paints: A Popular Choice
Latex exterior paints are water-based and have gained popularity over the years as a preferred choice for outdoor wood projects. Some advantages of latex exterior paints include the following:
- Easy application and clean-up with soap and water
- Low levels of volatile organic compounds (VOCs), which reduce odors and environmental impact
- Quick-drying times
- Excellent durability and resistance to cracking, peeling, and fading
- Wide range of color and finish options
I highly recommend choosing a high-quality, 100% acrylic latex exterior paint for your outdoor wood projects. While slightly more expensive, these paints offer superior adhesion, durability, and weather resistance.
Check for a paint that has been specifically formulated for exterior use and contains UV blockers and mildewcides for added protection.
• Oil-Based Exterior Paints: Traditional and Time-Tested
Oil-based exterior paints have been used for decades to protect and beautify outdoor wood surfaces. These paints offer several benefits, including:
- Excellent durability and resistance to wear and tear
- High levels of water resistance, making them suitable for high-moisture environments
- Smooth, self-leveling finish
- Superior adhesion to the wood surface
However, oil-based paints also have some drawbacks, such as longer drying times, higher levels of VOCs, and requiring the use of harsh chemicals for clean-up.
Despite this, oil-based paints remain a popular choice for outdoor wood projects, such as fences, decks, and siding, due to their durability and performance.
• Solid Stain: An Alternative Option
While not technically a paint, a solid stain is another option for protecting and enhancing outdoor wood surfaces that has its own set of benefits:
- Penetrates into the wood surface, providing added protection against moisture and decay
- Excellent durability and weather resistance, similar to high-quality latex and oil-based paints
- Available in many different colors and finishes
- Allows for more natural wood texture and grain visibility compared to paint
Solid stains, however, may not offer the same level of protection against UV rays as high-quality paints and may require more frequent maintenance and re-application.
• Expert Recommendations
Based on my experience, the best paint for outdoor wood projects is a high-quality 100% acrylic latex exterior paint. These paints offer excellent durability, ease of application, and a wide range of color and finish options, making them a versatile choice for various projects.
Before starting your project, be sure to properly clean and prepare the wood surface according to the paint manufacturer’s instructions. Using a high-quality primer may also help improve the adhesion, coverage, and overall performance of the paint.
By taking the time to research and select the best paint for your outdoor wood projects, you will ensure their longevity, durability, and visual appeal for years to come. Happy painting!
What is the Process for Ensuring Painted Wood Endures Outdoor Conditions?
Painted wood can add a touch of elegance and durability to the exterior of your home. However, it can be a challenge to make sure your beautifully painted wood lasts the test of time and harsh weather conditions.
• Choosing the Right Materials
Before you can even begin painting, it’s crucial to start with the right materials to help your wood last outside.
1. Select the Appropriate Wood
The type of wood you choose significantly impacts longevity. Some wood types endure weather conditions better than others. I recommend using hardwoods such as redwood, cedar, or teak wood, which are known for their natural resistance to decay and insect damage.
2. Quality Paint
Selecting a high-quality paint specifically designed for exterior wood applications is crucial. Look for paint that is water-resistant, UV-resistant, and able to allow wood expansion and contraction due to temperature variations.
Consider using the properties of different paints from reputable sources to make an informed decision.
• Preparing the Wood for Painting
Proper wood preparation is essential for your paint to adhere well and provide lasting protection.
1. Clean the Wood
Give your wood a thorough cleaning to remove any dirt, grease, or mildew. You can use a solution of warm water and mild detergent, then rinse the wood with clean water and let it dry completely.
2. Sand and Seal
For a smoother surface, sand the wood evenly with fine sandpaper (120-150 grit) and remove any dust residue. A smooth surface leads to better paint adhesion. Seal the wood using a sealer or exterior primer to protect it from moisture and prevent paint from peeling in the future.
• Painting the Wood
1. Select the Right Weather Conditions
Timing is everything. Painted wood needs time to dry thoroughly and adhere well to the surface. Choose a time when the temperature is between 50F and 85F, with low humidity and no rain in the immediate forecast.
2. Apply Primer
Primers create a sound base for paint to adhere to and help protect the wood from moisture. Use an exterior primer that is compatible with your chosen paint. Apply a thin and even coat using a brush or roller, and allow it to dry for the specified time on the manufacturer’s instructions.
3. Apply Paint
When the primer is dry, apply at least two thin coats of your chosen exterior paint, ensuring you cover the entire surface. Leave adequate time between coats according to the manufacturer’s instructions, as rushing this stage may hinder the paint’s adhesion and longevity.
4. Painted Wood Maintenance
Even the best paint jobs require maintenance to keep your painted wood looking fresh and protected. Check your painted wood surfaces yearly for any signs of peeling, cracking, or mildew. Clean the painted wood with a mild detergent solution, rinse it, and let it dry thoroughly.
If you notice any chipped or peeling sections, sand them down and reapply the paint as needed. Consistent maintenance can ensure the longevity of your painted wood outdoors.
• A Word on Paint Disposal
Leftover paint can cause environmental hazards if not disposed of properly. Check with your local waste management facility for guidelines and procedures on responsibly disposing of leftover paint.
– Final Thoughts
As an experienced DIY enthusiast, I can attest to the importance of choosing the right materials, proper preparation, and regular maintenance. By following these steps, you can enjoy the beauty and durability of painted wood in your home’s exterior for years to come.
What is the process for sealing and painting wood intended for outdoor use?
Wood is an incredibly versatile and renewable material, making it a popular choice for a variety of outdoor applications like decking, furniture, and fencing.
However, because it is exposed to the elements, the wood must be protected from moisture, ultraviolet radiation, and other environmental factors.
• Selecting the Right Wood for Outdoor Use
Before you begin to seal or paint, it’s important to select the right type of wood for your particular outdoor needs. Different species of wood vary in their natural resistance to decay and insect damage. Some of the more suitable choices for outdoor use include:
- Cedar
- Redwood
- Teak
- Ipe
- Pressure-treated pine
In addition, using heartwood, the dense inner section of a tree, will further enhance the wood’s natural resistance.
• Preparing the Wood Surface
Before you seal or paint your wood, you must clean and prepare the surface to ensure proper adhesion of the products. Here’s a step-by-step guide on how to prepare your wood for sealing and painting:
- Begin by giving the wood a thorough cleaning. Remove any dirt, debris, and mildew using a stiff brush or power washer. Avoid using excessive force, which may cause damage to the wood fibers.
- Allow the wood to dry completely before proceeding to the next step.
- Sand the wood surfaces smooth using medium-grit sandpaper (80-120 grit). This step helps to remove any rough spots and opens up the wood’s pores, allowing it to better absorb sealants and paint.
- Clean off any sawdust on the surface using a tack cloth or a soft, lint-free cloth.
- Inspect the wood for any defects or damage, such as splits or cracks, and fill these with a suitable wood filler. Once the filler has dried, sand it smooth.
• Sealing the Wood
A quality wood sealer is essential for protecting your outdoor wood from moisture, rot, and decay. It comes in two types: water-based and oil-based. While water-based sealers are environmentally friendly and easier to clean up, oil-based sealers tend to have better penetration and durability.
The choice is yours, based on your preferences and situation.
Here’s how to apply a sealer:
- Be sure to read the manufacturer’s instructions for the specific sealer you choose, as there may be variations in recommended application methods.
- Always work in well-ventilated conditions and use appropriate protective gear, such as gloves, goggles, and a mask.
- Use a paintbrush, roller, or sprayer to apply a thin, even coat of sealer to the wood’s surface. Avoid over-application, as this may result in a sticky or tacky finish that attracts dirt.
- Allow the sealer to dry according to the manufacturer’s instructions. This typically takes 24 to 48 hours.
- Inspect the surface and address any imperfections by sanding lightly and applying a second coat if needed.
• Choosing the Right Outdoor Paint
When selecting paint for outdoor applications, it’s crucial to choose a product specifically designed for exterior use. These paints are made to withstand the elements, resist fading, and provide long-lasting protection.
We highly recommend using 100% acrylic exterior paint since it has exceptional adhesion, durability, and resistance to cracking or peeling.
• Painting the Wood
Painting not only adds beauty and style to your outdoor project but also serves as an additional layer of protection against the elements. Here’s how to paint your sealed wood:
- Always read the paint manufacturer’s instructions for proper application and drying times.
- Use a high-quality brush or roller to apply the paint, starting with a primer if necessary. A primer is especially important for porous or rough woods and for surfaces that will be subject to heavy wear.
- Apply the first coat of paint in long, smooth strokes, working from one end to the other to ensure even coverage.
- Allow the first coat of paint to dry according to the manufacturer’s instructions. This may vary depending on the specific product and environmental conditions.
- Inspect the paint for any imperfections or coverage issues, and address them by sanding gently and applying a second coat if needed.
- Once the final coat of paint is dry, your project is ready for use and built to last in the great outdoors.
• Conclusion
Taking the time to properly seal and paint your outdoor wood projects will pay off in the long run. The protection provided by sealing and painting ensures the durability and lifespan of your investment, allowing you to enjoy the beauty of your wooden creations for years to come.
With the right preparation, selection of materials, and careful application, you can create stunning outdoor spaces that withstand the test of time.
Step | Description |
|---|---|
1. Choose the right type of wood | Select a suitable wood for outdoor use, such as cedar, redwood, or pressure-treated pine. |
2. Clean the wood | Ensure the wood surface is clean, dry, and free from dirt, grease, or any existing finish. |
3. Sand the wood | Sand the wood using a medium-grit sandpaper to remove any rough spots and to open the wood pores for better sealing. |
4. Apply a wood sealer | Apply a coat of exterior wood sealer to protect the wood from moisture, using a brush or roller, and allow it to dry. |
5. Apply a primer | Apply a coat of exterior wood primer to help the paint adhere better and provide additional protection. Allow it to dry. |
6. Paint the wood | Apply at least two coats of exterior-grade paint, allowing each coat to dry thoroughly before applying the next. |
7. Apply a top coat (optional) | If desired, apply a clear top coat for additional protection and to enhance the appearance of the painted wood. |
What Type of Paint is Best Suited for Outdoor Wooden Decorations?
Outdoor wood decorations add charm and character to your home, garden, or patio. However, selecting the right paint will not only enhance their beauty but also prolong their life.
• Why It’s Important to Choose the Right Paint
Using the incorrect paint for outdoor wood decorations can result in fading, peeling, or cracking. The right paint will not only ensure the longevity of your decorations but also protect them from harsh weather conditions, UV rays, moisture, and natural wear and tear.
Furthermore, the appropriate paint will be easy to apply and maintain.
• Types of Paint Suitable for Outdoor Wood Decorations
– Acrylic Paints
Acrylic paints are water-based and have become increasingly popular for various art projects, including outdoor wood decorations. They are quick-drying, easy to use, and can be applied with brushes, rollers, or spray cans. Most acrylic paints are water-resistant and flexible, which makes them well-suited for outdoor use.
Pros
- Quick-drying
- Easy to apply
- Water-resistant
- Low odor
- Easy to clean up with soap and water
Cons
- Not as weather-resistant as other types of paint
– Latex Paints
Latex paints are another variety of water-based paints which are highly recommended for outdoor use. They are durable and resistant to various weather conditions, making them suitable for outdoor wood decorations. Latex paints can be used on both bare and previously painted surfaces.
Pros
- Weather-resistant
- Easy to apply
- Easy to clean up with soap and water
- Dries quickly
- Low odor
Cons
- Some latex paints may not be as flexible as acrylic paints
– Oil-Based Paints
Oil-based paints provide excellent adhesion and durability, and they are generally known for their long-lasting finish on outdoor wood decorations. These paints form a hard, protective surface when cured, thus offering superior protection against harsh weather conditions, moisture, and UV rays.
Pros
- High weather resistance
- Long-lasting finish
- Good adhesion
Cons
- Can be more challenging to apply
- Longer drying time
- High odor
- Cleaning brushes and rollers requires solvents
• Important Factors When Choosing Paint for Outdoor Wood Decorations
– Weather Resistance
Ensure the paint you choose can withstand harsh weather conditions such as extreme heat, cold, and humidity. Look for paint labeled “exterior” or “outdoor” with good weather-resistant properties.
It’s worth noting that while acrylic and latex paints are weather-resistant, oil-based paints are generally more resistant to extreme weather.
– UV Resistance
Outdoor wood decorations are often exposed to direct sunlight for extended periods, and if the paint is not UV-resistant, it may fade quickly. Select paints with added UV inhibitors, which will prevent fading and discoloration. Most exterior paints come with UV protection.
– Flexibility
Wood expands and contracts according to changes in temperature and humidity. Choose a paint that provides a degree of flexibility to prevent your decorations from cracking, splitting, or peeling in fluctuating weather conditions. Acrylic and latex paints are known for their flexibility.
– Finish
The finish of the paint will determine the final appearance of your decoration. Choose from matte, semi-gloss, or glossy finishes, depending on your desired outcome. Glossy finishes tend to be more durable and easy to clean, while matte finishes may require more frequent touch-ups.
– Primer
Using a primer before applying paint to your outdoor wood decorations may improve the adhesion and longevity of the paint. Primers may also help prevent the wood from rotting and damage caused by insects. Select a primer that is compatible with your chosen paint.
• Conclusion
In conclusion, when it comes to choosing the right paint for your outdoor wood decorations, acrylic, latex, and oil-based paints are suitable options. Consider factors such as weather resistance, UV resistance, flexibility, finish, and the use of a primer to make the best choice for your project.
Based on my experience, I recommend acrylic or latex paints for their ease of use and performance. However, if you require superior weather resistance, oil-based paint may be a more suitable option.
Type of Paint | Pros | Cons |
|---|---|---|
Acrylic Latex Paint | Water-based, easy to clean up, dries quickly, resistant to fading and mildew | Not as durable as oil-based paint, may require multiple coats |
Oil-Based Paint | Highly durable, excellent adhesion, long-lasting finish | Slow drying time, difficult to clean up, may release harmful fumes |
Enamel Paint | Hard, glossy finish, durable, scratch-resistant | Requires a well-prepared surface, may take several hours to dry |
Exterior Wood Stain | Offers protection with a natural look, enhances wood grain, available in various colors | Not technically a paint, may require a sealer or topcoat for added protection |