How To Paint Outdoor Wood, 25 Things You Should Know
Painting outdoor wood can feel daunting, but with the right guidance and techniques, you can easily transform and protect your wooden surfaces. We’re here to help you confidently tackle this project and achieve professional results. The following discussion explores the essential steps and tips to master painting outdoor wood, ensuring a long-lasting and attractive finish.
How to paint outdoor wood:
To paint outdoor wood, clean the surface with a wood cleaner or water and TSP solution, then sand it with coarse to fine-grit sandpaper. Apply an appropriate primer (oil-based, latex-based, or stain-blocking) using a brush, roller, or paint sprayer. Once dry, apply at least two coats of exterior-grade acrylic latex paint, allowing each coat to dry according to instructions. Maintain the painted surface through regular inspections and touch-ups as needed.

Want to give your outdoor wood surfaces a fresh, new look? You’ve come to the right place! We’ve got the tips and tricks you need to properly paint outdoor wood for a long-lasting and beautiful finish. So, grab your brushes, and let’s get started–read on to learn more!
Contents
- 1 Guide on Painting Outdoor Wooden Surfaces
- 2 Which Type of Paint is Suitable for Outdoor Wooden Surfaces?
- 3 What is the process for preparing exterior wood surfaces for painting?
- 4 Is it Necessary to Apply Primer on Exterior Wood Surfaces Prior to Painting?
Guide on Painting Outdoor Wooden Surfaces
Painting outdoor wood can be a rewarding project when done correctly. Not only does it give a fresh new look to the wood, but it also helps protect it from the elements, extending its lifespan.
• Preparing the Surface
Before you start painting, it’s essential to properly prepare the wood’s surface. This will ensure that the paint adheres evenly and lasts longer.
– Cleaning the Wood
First, you need to clean the wood thoroughly. Remove any dirt, debris, mildew, or mold by using a wood cleaner, such as Olympic Deck Cleaner, or a solution of water and TSP (trisodium phosphate). Scrub the wood with a stiff-bristle brush and then rinse it thoroughly with water.
Allow the wood to dry completely before moving on to the next step.
– Sanding the Wood
Next, sand the wood to remove any rough edges, splinters, or loose wood fibers. Start with coarse-grit sandpaper, such as 80-grit, and move progressively to finer-grit sandpaper, such as 120-grit or 150-grit. Sand with the grain of the wood and ensure that you cover the entire surface.
After sanding, wipe the wood with a damp cloth to remove any dust and debris. This step will help the primer and paint adhere more effectively to the wood.
• Choosing the Right Primer
Priming the wood is an essential step in achieving professional results. Primer seals the wood and provides a stable foundation for the paint to adhere to. There are different types of primers available, each with its own benefits.
- Oil-based primers are durable and offer excellent adhesion, making them suitable for high-moisture areas.
- Latex-based primers are water-based, making them easy to clean up and more environmentally friendly.
- Stain-blocking primers are perfect for preventing wood tannins from bleeding through and staining the paint.
When choosing a primer, consider the type of wood you are working with, the climate, and the desired final appearance of the painted surface.
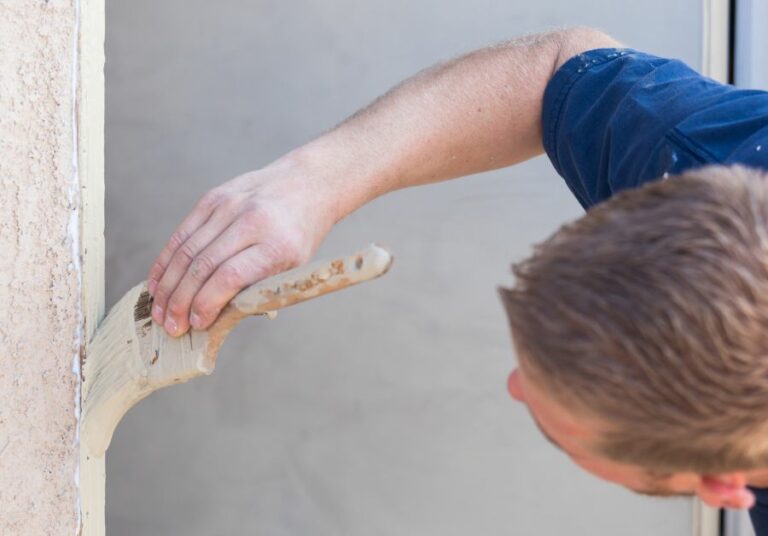
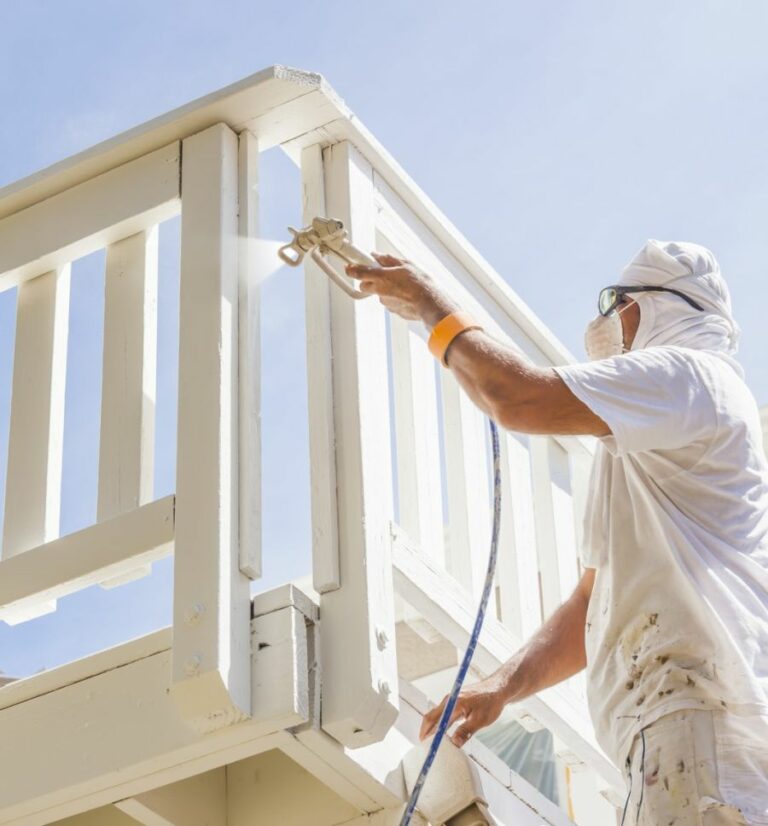
• Applying the Primer
To apply the primer, you can use a brush, roller, or paint sprayer. Each method has its advantages, so choose the one that works best for your specific project.
- Brushes are great for small or hard-to-reach areas and provide better control.
- Rollers are suitable for larger surfaces and offer a smooth, even application.
- Paint sprayers allow for quick and efficient coverage, especially on irregular surfaces or intricate woodwork.
Regardless of the method you choose, follow these tips for the best results:
- Start by stirring the primer thoroughly to ensure an even distribution of the ingredients.
- Apply the primer in thin, even coats, covering the entire surface. Be cautious of drips or runs, as they can lead to an uneven finish.
- Allow the primer to dry according to the manufacturer’s instructions. It’s essential to let the primer dry completely before applying the paint.
• Choosing the Right Paint
Selecting the appropriate paint for your outdoor wood project is crucial. Consider the type of wood, the desired appearance, and the climate in which the wood will be exposed.
Exterior-grade acrylic latex paint is an excellent choice for outdoor wood projects, as it provides exceptional durability and protection against the elements.
When selecting a paint color, it’s essential to consider the UV resistance of the paint. Some colors, such as dark blue or black, can absorb more UV rays, causing the paint to fade and degrade more quickly. Lighter shades are generally more UV resistant and maintain their appearance longer.
• Applying the Paint
Like the primer, you can use a brush, roller, or paint sprayer to apply the paint. Follow these tips for a successful application:
- Stir the paint thoroughly before starting, ensuring even distribution of the pigments and other components.
- Apply at least two coats of paint for optimal coverage and protection. Allow each coat to dry according to the manufacturer’s instructions before applying the next coat.
- Be mindful of drips or runs, and maintain a wet edge to avoid lap marks.
- When painting in hot or sunny conditions, work in sections or follow the shade to prevent the paint from drying too quickly.
• Maintaining the Painted Surface
Regular maintenance will help your painted outdoor wood last longer and maintain its appearance. Perform regular inspections for any signs of chipping, peeling, or fading, and address these issues promptly.
This may involve cleaning the surface, patching damaged areas, and applying a fresh coat of paint as needed.
By following these expert recommendations, you’ll be well on your way to creating a beautiful, long-lasting, and protective finish for your outdoor wood project.
Step | Description |
|---|---|
1 | Clean the surface: Remove dirt, debris, and mold from the wood using a stiff brush, soap, and water. Rinse well and allow the wood to dry completely before proceeding. |
2 | Sand the surface: Using medium-grit sandpaper, sand the wood surface to remove any roughness or old paint. Follow up with fine-grit sandpaper for a smooth finish. |
3 | Apply primer: If the wood is unpainted, has exposed bare spots, or you’re changing colors, apply a coat of stain-blocking primer to the entire surface. Allow it to dry according to the manufacturer’s instructions. |
4 | Paint the wood: Choose a high-quality exterior paint formulated for wood surfaces. Apply evenly using a paintbrush or roller, starting at the top of the surface and working your way down. Let it dry and apply a second coat if needed for full coverage. |
5 | Seal the paint: Protect your freshly painted wood from the elements by applying a clear, waterproof sealant. Allow it to dry according to the manufacturer’s instructions. |
Which Type of Paint is Suitable for Outdoor Wooden Surfaces?
Painting outdoor wood can not only enhance its appearance but also protect it from the elements. Choosing the right paint can be a daunting task, especially with the many options available.
• Types of Paint for Outdoor Wood
1. Acrylic Latex Paint
Acrylic latex paint is highly recommended for outdoor wooden surfaces due to its performance and durability. Being water-based, this type of paint is easy to clean, dries quickly, and has low volatile organic compounds (VOC) emissions.
Acrylic latex paint also offers excellent color retention and is resistant to fading and chipping.
Pros
- Water-based and easy to clean
- Quick drying time
- Low VOC emissions
- Excellent color retention
- Resistance to fading and chipping
Cons
- Can be sensitive to temperature during application
- Requires the surface to be well-prepped before application
2. Oil-Based Paint
Oil-based paint is another option you can consider for your outdoor wooden surfaces. It is known for its high resistance to wear and tear, making it suitable for high-traffic areas. Oil-based paint also exhibits good penetration and adhesion to the wood surface, ensuring long-lasting protection.
Pros
- Higher resistance to wear and tear
- Good penetration and adhesion to the wood
- Long-lasting protection
Cons
- Longer drying time
- Strong odor and high VOC emissions
- Difficult to clean up
3. Solid Stain
Solid stains are opaque, so they will hide the wood grain but still allow the texture to show through. This type of paint offers medium-level protection against ultraviolet (UV) rays and is usually less durable than acrylic latex paint, typically requiring more frequent reapplication.
Pros
- Hides wood grain while allowing the texture to show
- Medium-level UV protection
Cons
- Less durable compared to acrylic latex paint
- Requires more frequent reapplication
4. Semi-Transparent Stain
Semi-transparent stains offer the best of both worlds. They protect the wood from the elements while allowing the grain pattern to show through. These stains provide an excellent balance of protection, durability, and aesthetics.
However, they may not be as long-lasting as acrylic latex paint and may need more frequent maintenance.
Pros
- Allows wood grain to show
- Provides balanced protection, durability, and aesthetics
Cons
- Less durable compared to acrylic latex paint
- Requires more frequent maintenance
• Factors to Consider When Choosing Paint for Outdoor Wood
1. Durability
Since outdoor wood is exposed to the elements, durability is one of the key considerations in choosing paint. The longer-lasting the paint, the less frequently you will need to repaint the surface, thus saving time and effort.
Acrylic latex paint is considered highly durable and long-lasting, which is why it is highly recommended for outdoor wooden surfaces.
2. Resistance to Fading and Chipping
Outdoor wood often experiences fading and chipping due to exposure to the sun and other weather elements. Your chosen paint must be able to resist these phenomena to maintain its appearance for longer.
In this aspect, acrylic latex paint outperforms other options, such as solid and semi-transparent stains.
3. Ease of Application and Cleanup
Applying paint on outdoor wood can be time-consuming, so it’s important to choose a paint that is easy to apply and clean up. Water-based paints like acrylic latex are easier to use and clean, as opposed to oil-based paints, which require special thinners and solvents for cleanup.
4. Environmental Considerations
Lastly, being eco-friendly when choosing paint is always a plus. Water-based acrylic latex paint is known for its lower VOC emissions and fewer harmful chemicals, making it a more environmentally-friendly choice compared to oil-based paint.
• Additional Tips for Painting Outdoor Wood
- Before application, ensure that the surface is clean and properly prepared. Remove dirt, dust, and old paint, and make any necessary repairs to the wood.
- Choose the right primer to ensure optimal adhesion of the paint to the surface. For example, a water-based primer is recommended for acrylic latex paint.
- Follow the manufacturer’s instructions on the recommended number of coats of paint, drying time, and proper application techniques.
- To prolong the life of your paint job, regularly clean and maintain your outdoor wooden surfaces.
In conclusion, acrylic latex paint is generally considered the best paint for outdoor wood due to its durability, ease of application, low VOC emissions, and resistance to fading and chipping.
However, it’s essential to consider your specific needs and preferences when choosing the right paint for your outdoor wooden surfaces.
By following the guidelines and tips mentioned above, you will be able to select the perfect paint and achieve a professional-looking finish that will keep your outdoor wood looking great and well-protected for years to come.
Type of Paint | Advantages | Disadvantages |
|---|---|---|
Latex Paint | Water clean up, low odor, quick-drying, superior durability, remains flexible | Less resistant to mildew compared to oil-based paint, can have adhesion issues on some surfaces |
Oil-Based Paint | Highly resistant to mildew, strong adhesion, penetrates wood fibers for long-lasting protection | Slow drying, strong odor, requires mineral spirits for clean up |
Acrylic Paint | Water clean up, UV-resistant, non-toxic, retains color for a long time | Less penetration compared to oil-based paint, can have adhesion issues on some surfaces |
What is the process for preparing exterior wood surfaces for painting?
Painting exterior wood surfaces can be a challenging task, but the results are often well worth the effort. A fresh coat of paint not only enhances the beauty of your property but also protects the wood from weather elements and potential damage.
To ensure a long-lasting and flawless paint job, it is essential to prepare the wood properly before painting.
• Step 1: Cleaning the Wood Surface
Before you begin painting, it’s essential to clean the wood thoroughly to remove dirt, grime, mildew, and any loose paint that may be present. Cleaning the surface also helps the paint adhere better to the wood.
- Remove dirt and grime: Start by using a soft brush to gently remove any loose dirt and debris from the wood. Next, clean the surface with a mixture of water and mild detergent using a soft sponge or rag. Be sure to rinse the wood thoroughly to remove any soap residue.
- Tackle mildew: If you notice any mildew on your wood surface, it’s essential to address it before painting. You can use a mixture of 1 part bleach to 3 parts water to clean the affected areas. Apply the solution using a soft brush or sponge, and let it sit for about 20 minutes. Rinse the wood thoroughly to remove any residue. You can find more information on treating mildew on wood surfaces on the EPA’s website.
- Remove loose paint: Use a paint scraper or stiff brush to remove any loose or peeling paint from the wood. Be sure to work in the same direction as the wood grain to prevent damage to the wood surface.
- Let the wood dry: After cleaning, allow the wood surface to dry completely before moving on to the next steps. This is particularly important for wood that has been exposed to moisture, as damp wood can lead to paint adhesion problems.
• Step 2: Repairing Damaged Wood
If you notice any cracks, holes, or other signs of wood damage, it’s crucial to address these issues before painting.
- Fill cracks and gaps: Use a wood filler or putty to fill in any cracks, gaps, or holes in the wood surface. Be sure to follow the manufacturer’s instructions for proper application and drying time. Once the filler or putty has dried, sand the area smoothly using medium-grit sandpaper.
- Replace severely damaged wood: In some cases, wood may be too damaged to repair and will need to be replaced. Ensure that you use the correct type of wood and cutting tools to match the existing wood as closely as possible. Once the new wood piece is securely in place, sand it smoothly using medium-grit sandpaper.
• Step 3: Sanding the Wood Surface
Sanding the wood surface is crucial to ensure a smooth and even paint finish. It also helps the paint adhere better to the wood.
- Choose the right sandpaper: Use medium-grit (80-120) sandpaper for initial sanding and fine-grit (180-220) sandpaper for final sanding.
- Sand with the wood grain: Always sand in the direction of the wood grain to prevent scratches and maintain a smooth surface.
- Remove all sanding dust: After sanding, use a soft brush or cloth to remove any sanding dust from the wood surface. You can also use a vacuum cleaner with a brush attachment to remove the dust more effectively.
• Step 4: Priming the Wood Surface
Applying a high-quality primer is essential for ensuring proper paint adhesion and preventing issues like peeling, blistering, and staining.
- Choose the right primer: Use a high-quality, exterior-grade primer that is designed for use on wood surfaces. Consult a paint store professional or read the primer’s label to ensure it’s suitable for your specific wood type and paint.
- Apply the primer: Use a brush, roller, or paint sprayer to apply the primer to the wood surface. Be sure to follow the manufacturer’s instructions for proper application, drying time, and coverage.
- Inspect the surface: After the primer has dried, examine the wood surface for any imperfections, such as bubbles, ripples, or debris. If you notice any issues, sand the area smoothly with fine-grit sandpaper and reapply the primer.
• Step 5: Painting the Exterior Wood
After your wood surface has been properly cleaned, repaired, sanded, and primed, it’s finally time to apply the paint.
- Choose the right paint: Select a high-quality, exterior-grade paint that is designed for use on wood surfaces. Be sure to consult a paint store professional or read the paint’s label to ensure it’s appropriate for your specific wood type and project.
- Apply the paint: Use a brush, roller, or paint sprayer to apply the paint to the wood surface, following the manufacturer’s instructions for proper application, drying time, and coverage. It is often recommended to apply two coats of paint for the best durability and finish.
With proper preparation, high-quality materials, and attention to detail, you can achieve a beautiful and long-lasting paint job on your exterior wood surfaces. Taking the time to follow each step in this guide will help you protect your wood and enhance your property’s curb appeal.
Step | Description |
|---|---|
1. Inspect the wood. | Examine the surface of the wood for any damage, decay, or rot. Repair or replace any damaged areas before proceeding. |
2. Clean the wood. | Remove dirt, dust, and any loose paint or debris from the surface of the wood using a stiff-bristle brush or a pressure washer. |
3. Sand the wood. | Sand the surface of the wood to remove any remaining old paint, rough spots, or splinters. Start with coarse-grit sandpaper and progress to finer-grit sandpaper for a smooth finish. |
4. Fill any holes or cracks. | Use an exterior-grade wood filler to fill any holes or cracks in the wood. Allow the filler to dry, and then sand the filled areas smoothly. |
5. Apply a primer. | Choose an appropriate exterior-grade primer for your type of wood, and apply a coat to the surface. Allow the primer to dry completely before proceeding. |
6. Caulk any gaps. | Use exterior-grade caulk to fill any gaps or seams between the wood and other materials, such as windows or doors. This will help to create a watertight seal and prevent moisture from entering the wood. |
7. Mask off any areas. | Use painter’s tape to mask off any areas that you do not want to be painted, such as trim, windows, or doors. Cover nearby plants or features with drop cloths to protect them from paint splatters. |
Is it Necessary to Apply Primer on Exterior Wood Surfaces Prior to Painting?
Priming exterior wood is an important step in the painting process that should not be overlooked. It’s essential for ensuring proper adhesion of the paint to the wood and enhancing durability.
• Importance of Priming Exterior Wood
Priming wood has several important benefits, including:
- Enhancing paint adhesion: Priming creates a bond between the wood surface and the paint, ensuring that the paint sticks to the wood properly. This is particularly important for exterior wood, which is exposed to various weather conditions and needs a strong bond to withstand those elements.
- Increasing paint durability: A good primer will also extend the life of the paint, ultimately protecting the wood better and for a longer period of time.
- Preventing wood stains: Exterior wood can be prone to staining from various sources, such as tannins released from the wood, mildew, or rust from nearby metalwork. A primer can help block these stains, ensuring your paint job remains clean and even.
- Evening out surface imperfections: Applying primer can also help smooth out any surface imperfections, providing a more uniform base for the paint and resulting in a cleaner finish.
• Types of Wood Primers
When it comes to priming exterior wood, there are several types of primers available to choose from. Each type has its strengths and weaknesses, so it is important to consider the specifics of your project when making a decision.
– Oil-Based Primers
Oil-based primers are traditional wood primers that have been used for decades. These primers are known for their excellent adhesion and stain-blocking capabilities.
They are particularly well-suited for high-tannin woods like cedar, redwood, or mahogany, as they effectively prevent tannins from bleeding through the paint.
The main drawback of oil-based primers is that they take longer to dry and emit strong fumes during application.
The Environmental Protection Agency also regulates the use of oil-based primers due to their high levels of volatile organic compounds (VOCs), which can contribute to air pollution and cause health issues.
– Latex-Based Primers
Latex-based or water-based primers have become increasingly popular due to their low VOC content and quicker drying times. They are generally easy to clean up with water and soap, making them a more user-friendly option.
These primers offer good adhesion and are suitable for most types of wood, except for high-tannin woods, where the risk of stains bleeding through is higher. Additionally, latex-based primers generally perform better with latex-based topcoats, while oil-based primers pair better with oil-based topcoats.
– Alkyd-Based Primers
Alkyd-based wood primers offer excellent adhesion, stain-blocking capabilities, and durability. They are particularly recommended for exterior wood surfaces exposed to extreme weather conditions, as they withstand harsh environments well.
The main drawbacks of alkyd-based primers are their slow drying time and higher VOC content, which may cause environmental and health concerns.
• Tips for Selecting the Right Primer
To choose the right primer for your exterior wood project, consider the following tips:
- Identify the wood type: Determine the type of wood you’re working with, and consider its specific needs. If you’re dealing with high-tannin wood, oil-based or alkyd-based primers would be the most suitable.
- Consider your topcoat: It’s best to use a primer and topcoat that are compatible with one another. Latex-based primers work well with latex-based paints, while oil-based primers are best paired with oil-based paints.
- Think about the environment: Consider the local climate and the wood’s exposure to the elements. If the wood is exposed to harsh conditions, an alkyd-based primer may offer better protection.
- Keep health and environmental concerns in mind: If you’re concerned about VOCs and their impact on your health and the environment, opt for a low-VOC, latex-based primer.
• Conclusion
In summary, priming exterior wood is a crucial step in ensuring a successful and long-lasting paint job. Different types of wood and project requirements may call for different types of primers.
By considering the factors mentioned above, you can determine the best primer for your specific needs and achieve a beautiful and durable result for your exterior wood project.