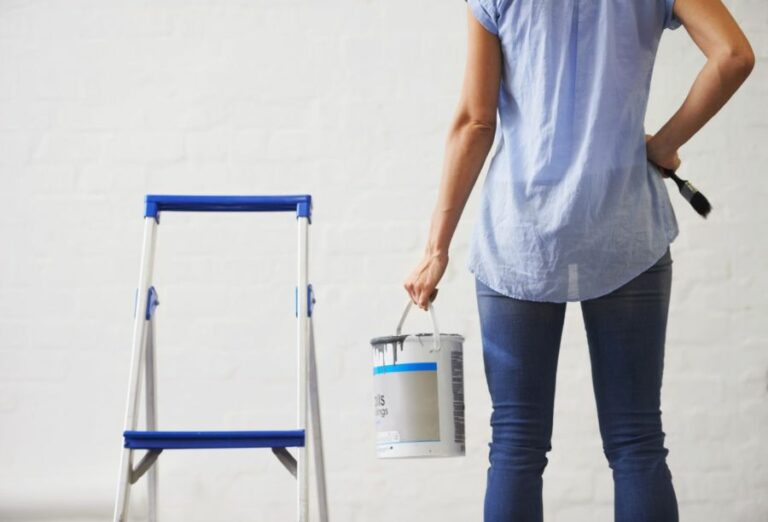
Outdoor Wood Color Paint, 25 Things You Should Know
Whether you’re looking to revamp your backyard oasis, transform your favorite furniture, or give your exterior a stylish update, I’m here to guide you through every step. This comprehensive blog will explore high-quality paint options, expert application tips, and inspiring design ideas tailored to your unique taste.
Outdoor wood color paint:
Outdoor wood color paint is an ideal solution to protect and enhance the appearance of wooden structures and surfaces exposed to harsh elements. Choosing between water-based and oil-based paints depends on drying time, durability, and environmental conditions. Proper surface preparation, correct application techniques, and regular maintenance are crucial for achieving a beautiful, long-lasting finish that withstands wear and tear and maintains vibrancy over time.

Discover the perfect outdoor wood color paint to revitalize and protect your wooden surfaces! Explore expert recommendations, trending shades, and top brands while learning essential tips to ensure lasting durability and eye-catching results. Transform your outdoor space with these paint picks.
Contents
- 1 Exterior Wooden Surface Color Paint
- 1.1 • Why Choose Outdoor Wood Color Paint
- 1.2 • Types of Outdoor Wood Color Paint
- 1.3 • Key Factors to Consider When Choosing an Outdoor Wood Color Paint
- 1.4 • How to Prep Outdoor Wood Surfaces for Painting
- 1.5 • Best Application Techniques for Outdoor Wood Color Paint
- 1.6 • Essential Outdoor Wood Color Paint Maintenance Tips
- 2 Is It Possible to Find Paint Colors That Resemble Wood?
- 3 What is the Optimal Paint Choice for Exterior Wooden Surfaces?
- 4 What is the Optimal Paint Choice for Achieving a Natural Wood Color?
- 5 How can you create a wood-like appearance using paint?
Exterior Wooden Surface Color Paint
• Why Choose Outdoor Wood Color Paint
Outdoor wood color paint is an excellent option for those looking to protect and enhance the appearance of their wooden structures, furniture, and surfaces exposed to the elements.
The paint is specifically designed to withstand outdoor conditions such as UV rays, moisture, and temperature changes. This helps maintain the vividness and beauty of the original color over time.
• Types of Outdoor Wood Color Paint
– Water-Based Paint
Water-based paints, also known as latex or acrylic paints, are a popular choice for outdoor wood surfaces due to their ease of application and cleanup. They typically have a low-VOC content and can be quickly dried, which minimizes the likelihood of attracting dust and bugs during the drying process.
I recommend using water-based paint for outdoor wood surfaces that are subject to frequent rainfall or moisture exposure, as they are less prone to swelling and cracking compared to oil-based alternatives.
– Oil-Based Paint
Oil-based paints, also known as alkyd paints, provide a durable and long-lasting finish that is highly resistant to weathering and fading.
They take longer to dry compared to water-based paints, but their adhesion properties make them highly suitable for outdoor wood surfaces that are subject to constant wear and tear.
I recommend using oil-based paint for outdoor wood surfaces such as decks and railings, where increased durability and resistance to wear are desired.
• Key Factors to Consider When Choosing an Outdoor Wood Color Paint
– Drying Time
Drying time is a critical consideration when selecting outdoor wood color paint. Water-based paints generally dry much faster than oil-based paints but can be more prone to streaking and brush marks if not applied with the correct technique.
On the other hand, oil-based paints take longer to dry, which can be advantageous if you require additional time to blend and smooth the paint to achieve a perfect finish.
– Durability
When choosing outdoor wood color paint, selecting a product that offers excellent durability to withstand the test of time is crucial. Oil-based paints are highly resistant to wear and tear, making them ideal for heavy-traffic areas like decks and railings.
In contrast, water-based paints may require more frequent recoating to maintain their vibrancy but typically provide a more flexible finish that can better accommodate the natural expansion and contraction of the wood due to temperature fluctuations.
– Environmental Factors
Consider the environmental conditions specific to the area where the paint will be applied. If the outdoor wood surface is exposed to constant sunlight, choose a paint with strong UV protection properties to prevent fading and discoloration.
Similarly, if the area is prone to high humidity or heavy rainfall, opt for a paint designed to withstand moisture intrusion and resist mold and mildew growth.
• How to Prep Outdoor Wood Surfaces for Painting
Proper surface preparation is a crucial step in achieving a beautiful and long-lasting result with outdoor wood color paint. Some key steps to note include the following:
- Clean the surface: Remove dust, dirt, and debris using a stiff-bristled brush or pressure washer, and allow the surface to dry completely.
- Sand the surface: Sand the wood with medium-grit sandpaper to remove any old stain or paint, and vacuum any residue. Follow up with a fine-grit sandpaper to smooth the surface and ensure even paint adherence.
- Repair any damage: Fill in any holes, cracks, or imperfections with a high-quality wood filler, and sand the area once the filler is dry.
- Apply primer: Use an appropriate primer to seal the wood and provide a stable base for the paint to adhere. Allow the primer to dry according to the manufacturer’s instructions before applying the paint.
• Best Application Techniques for Outdoor Wood Color Paint
To achieve a professional-looking finish with outdoor wood color paint, follow these expert application tips:
- Choose the right applicator: Use a high-quality brush, roller, or paint sprayer suitable for the type of paint being used (water-based or oil-based).
- Apply thin, even coats: It’s better to apply multiple thin coats of paint rather than a single heavy coat. This ensures proper coverage and prevents issues like sagging, drips, and overall unevenness.
- Follow the grain: When painting wood, always follow the direction of the wood grain to achieve a smooth, natural-looking finish.
- Allow each coat to dry: Allow the paint to dry according to the manufacturer’s instructions before applying additional coats. This ensures proper adhesion and reduces the risk of issues such as peeling or bubbling.
• Essential Outdoor Wood Color Paint Maintenance Tips
Following these maintenance tips will help keep your outdoor wood surfaces looking fresh and vibrant:
- Use a soft-bristled brush or pressure washer to clean the surface to remove dirt, debris, and algae.
- Inspect the surface for signs of wear or damage, such as peeling, chipping, or cracking, and address these issues promptly.
- Reapply a protective sealant, if necessary, to maintain the durability and longevity of the paint finish.
- Consider recoating the paint as needed to ensure continued protection and vibrant color for your outdoor wood surfaces.
In conclusion, outdoor wood color paint is an excellent solution for protecting and enhancing the appearance of your outdoor wooden structures and surfaces.
By choosing the right type of paint, adequately preparing the surface, and using proper application techniques, you can achieve a beautiful and long-lasting finish that can withstand the elements for years.
Is It Possible to Find Paint Colors That Resemble Wood?
The short answer to the question, “Are there paint colors that look like wood?” is yes. Over the years, paint manufacturers have made great strides in ensuring that homeowners and designers are able to recreate the natural appearance of wood finishes using paint.
• Paint Types That Mimic Wood
When it comes to paint colors that look like wood, there are several types and brands to choose from. The most common paint types used for replicating wood finish include:
– Acrylic Paints
Acrylic paints are water-based and can be easily thinned and manipulated to achieve a wide range of wood colors and effects. These paints dry quickly and can be easily cleaned up with water. Most acrylic paints available in the market have a wide range of wood-like colors to choose from.
– Oil-Based Paints
Oil-based paints are also used for creating a wood-like finish, but they have longer drying times and require the use of solvents for clean-up. Oil-based paints typically offer a more durable finish compared to water-based paints, often making them a preferred option for high-quality furniture and cabinetry.
– Gel Stains
Gel stains are thick, pigmented coatings designed specifically for creating a wood-like finish on surfaces that are not made of wood. Gel stains can be applied with a brush or cloth, offering more control over the final appearance. Gel stains usually require a clear topcoat for added protection.
– Chalk Paint
Chalk paint, although typically not used to mimic the appearance of wood specifically, offers a more textured and matte finish that can create a distressed and aged look. Chalk paint can be combined with wax or glazes to achieve a more realistic, multi-tonal wood appearance.
• Techniques for Applying Wood-Like Paint Finishes
Using the right techniques when applying paint is important to achieve a realistic wood-like appearance. Some popular application techniques include:
– Faux Graining
Faux graining is a painting technique used to mimic the natural grain patterns found in wood.
This technique involves using a specialized graining tool to create grooves and lines on the painted surface that resemble the texture of the real wood grain. Faux graining can be as simple or as detailed as you like, depending on the desired final appearance.
Faux graining techniques can be used with both acrylic and oil-based paints.
– Layering
Layering involves the application of multiple thin layers of paint or stains to create depth and dimension in the final finish. Layering is especially effective when combining lighter and darker colors to mimic the natural variation in real wood.
Begin with a base layer of the lightest color and gradually build up layers using increasingly darker colors. Each layer should be completely dry before applying the next one.
– Dry Brushing
Dry brushing is a technique that uses a brush with very little paint on it to create subtle highlights and texture in the final finish. Gently brushing a slightly lighter color over the base color can create the illusion of texture and depth.
This technique works well with a variety of paint types, including acrylics, oil-based paints, and chalk paints.
– Glazing
Glazing involves applying a semi-transparent layer of paint or stain over a base color to create a rich, multi-tonal appearance. A glaze can be applied using a brush, sponge, or cloth and can be used to create subtle variations in color, deepen the overall tone, or add depth to the final finish.
Glazes can be used with both acrylic and oil-based paints, as well as gel stains.
• Tips for Choosing the Right Paint Color for a Wood-Like Finish
When selecting a paint color to create a wood-like finish, there are several factors to consider:
- Determine the desired final appearance, whether you want a light, medium, or dark finish
- Consider the type of wood you are trying to replicate, such as oak, maple, or cherry, and choose colors that best represent the natural color variations found in those woods
- Select a base color and additional colors for layering, glazing, or dry brushing
- For a more natural, rustic appearance, choose matte or low-gloss paint finishes
- Always test your chosen colors on a small, inconspicuous area or a sample board before applying to a larger surface
In conclusion, numerous paint colors and techniques allow homeowners and designers to achieve a realistic wood-like finish on various surfaces.
By selecting the right paint type, using a combination of application techniques, and experimenting with different colors, it is possible to create a unique, custom finish that closely resembles the natural beauty of wood.
What is the Optimal Paint Choice for Exterior Wooden Surfaces?
Choosing the right paint for outdoor wood can be challenging, as several factors must be considered. From durability and weather resistance to color retention and ease of application, understanding the differences between the various types of paint is key to making an informed decision.
• Acrylic Latex Paint: The Popular Choice
Acrylic latex paint is a popular choice for outdoor wood, and for good reason. It has proven to be one of the most durable and long-lasting options, providing excellent protection against weather, UV light, and mildew.
In addition, acrylic latex paint is flexible, allowing it to expand and contract with the wood, preventing cracking and peeling.
– Pros of Acrylic Latex Paint
- Excellent durability and weather resistance
- Flexibility to prevent cracking and peeling
- Good adhesion to both primed and unprimed wood surfaces
- Low VOC emissions, making it an environmentally friendly choice
- Water-based formula allows for easy cleanup with soap and water
- Quick-drying properties
– Cons of Acrylic Latex Paint
- Not as breathable as other paint types, which may lead to trapped moisture
- May require multiple coats for optimal coverage
Based on my experience, I recommend using acrylic latex paint for outdoor wood surfaces requiring high protection and durability.
• Oil-Based Paint: Classic and Durable
Oil-based paint is a classic choice for outdoor wood and continues to be favored by many due to its long-lasting finish and excellent adhesion properties. It penetrates the wood’s surface, forming a durable barrier that provides protection against moisture, sun, and harsh weather conditions.
– Pros of Oil-Based Paint
- Exceptional durability and long-lasting finish
- Excellent adhesion to wood surfaces, even if slightly weathered or unprimed
- Forms a barrier that protects against harsh weather conditions
- Offers a smooth and glossy finish
– Cons of Oil-Based Paint
- Longer drying time compared to water-based paints
- Strong odor during application, requiring proper ventilation
- Delicate disposal of paint thinner or turpentine needed for cleanup
- Higher VOC emissions compared to acrylic latex paints
For those who prefer oil-based paint’s classic look and feel, I recommend selecting a high-quality product to ensure maximum durability and longevity.
• Enamel Paint: Aesthetics and Protection Combined
Enamel paint is a popular option for outdoor wood surfaces that require a hard and glossy finish. While often associated with metal surfaces, enamel paint can also be applied to wood, providing a durable and protective finish that resists fading, chipping, and scratching.
– Pros of Enamel Paint
- Provides a hard and glossy finish that resists fading, chipping, and scratching
- Resistant to moisture, making it suitable for humid or wet environments
- Available in both oil-based and water-based formulas
– Cons of Enamel Paint
- May not adhere as well to uneven or heavily weathered wood surfaces
- May require multiple coats for optimal coverage and protection
Enamel paint can be an excellent choice for those looking for a combination of aesthetics and protection for their outdoor wood surfaces.
• Deck and Wood Stain: Enhanced Natural Beauty
For those who prefer the natural beauty of the wood grain to show through, deck and wood stains are ideal options. These products are designed to enhance the wood’s color and texture while providing protection against moisture, sun damage, and aging.
– Pros of Deck and Wood Stain
- Enhances the wood’s color and texture, allowing the natural grain to show through
- Offers protection against moisture, sun damage, and aging
- Available in both opaque and semi-transparent finishes
– Cons of Deck and Wood Stain
- May not provide the same level of durability as paint
- Requires more frequent maintenance and reapplication
For outdoor wood surfaces where showcasing the wood’s natural appearance is a priority, I recommend using a high-quality deck or wood stain in combination with a protective sealant.
• Final Thoughts: Choosing the Right Paint for Your Outdoor Wood
When deciding on the best paint for outdoor wood, it’s essential to consider factors such as durability, weather resistance, adhesion, and desired appearance. Acrylic latex paint is a strong all-around choice, offering excellent protection, flexibility, and ease of application.
If you prefer a classic oil-based paint or the glossy finish of enamel paint, be sure to select a high-quality product for optimal durability.
Finally, if showcasing the wood’s natural beauty is your priority, deck and wood stains can be suitable for protection, coupled with a sealant for added longevity.
No matter which type of paint or stain you choose, proper surface preparation and regular maintenance are key to ensuring the best possible results for your outdoor wood project.
What is the Optimal Paint Choice for Achieving a Natural Wood Color?
When it comes to painting wood, the options can be overwhelming. There are a variety of colors, finishes, and types to choose from, and it’s essential to select the right one for your project.
• Types of Paint for Wood
Several types of paint are available, all designed to meet the specific needs of wood projects. The most commonly used types of paint for wood are as follows:
– Acrylic Paints
Acrylic paints are water-based and are known for their easy application and quick drying time. They are available in a wide range of colors and finishes, making them a popular choice for various wood projects.
Acrylic paints are also flexible, meaning they will not crack or peel as wood expands and contracts over time.
– Oil-Based Paints
Oil-based paints have a slower drying time than acrylics, which allows for a smoother and more even application. These paints are considerably more durable than acrylics and are less likely to chip or peel.
Oil-based paints are ideal for high-traffic areas and exterior surfaces. Moreover, they tend to be more colorfast, meaning the colors will not fade over time.
– Stain & Varnish
Wood stains penetrate the wood surface and are available in a range of colors, from transparent to opaque. They often enhance the natural wood grain and provide protection from moisture and weather. Varnish and clear coats can be applied over a wood stain to offer additional protection and durability.
– Chalk Paint
Chalk paint is a unique type of paint featuring a matte, chalk-like finish. It adheres well to wood and requires minimal surface preparation, making it an attractive option for furniture makeovers and DIY projects.
Chalk paint is available in a variety of colors and can be sealed with wax or a clear coat for added durability.
• Selecting the Right Paint for Your Wood Project
When choosing the best paint for wood color, keeping your project’s specific requirements and desired outcome in mind is essential. Here are some questions to ask yourself before selecting the paint:
- What type of wood are you painting?
- Will the wood be exposed to moisture or varying temperatures?
- Is the wood located in a high-traffic area?
- What color and finish do you want for your wood project?
- Do you want the wood grain to show through the paint?
Once you’ve established your project goals, you can use the following recommendations to select the best paint for wood color:
– For Interior Wood Projects
I recommend using acrylic paint or chalk paint for interior wood projects, such as furniture, doors, and woodwork. Both types of paint offer a range of colors and finishes and easy application and clean-up.
Acrylic paint is suitable for wood projects that require a flexible, durable finish. If you want a unique matte finish, chalk paint is an excellent choice, particularly for furniture makeovers.
– For Exterior Wood Projects
Exterior wood surfaces, such as decks, fences, and siding, require a paint that can withstand weather and moisture exposure.
I recommend using an oil-based paint or wood stain combined with a protective varnish or clear coat for these projects. These options provide a durable finish and protect the wood from the elements.
– For Wood Projects with Visible Grain
If you want to enhance the appearance of the wood grain or maintain a natural wood look, opt for a wood stain. Wood stains are available in various colors and transparencies, allowing you to control how much of the wood grain is visible.
If you choose a wood stain, don’t forget to apply a protective varnish or clear coat to increase durability and protect the wood.
• Tips for Painting Wood
Before you begin painting your wood project, consider these tips to achieve a professional-looking result:
- Prepare the wood by sanding the surface and removing any existing finish, dirt, or grease. This step ensures that the paint adheres properly to the wood.
- Apply a primer if necessary. Primers create an even surface for paint application and enhance paint adhesion.
- Choose the right paintbrush for your chosen paint type. For example, natural bristle brushes are best for oil-based paints, while synthetic brushes are ideal for acrylics.
- Apply thin, even coats of paint, allowing each coat to dry before applying the next.
- After the final coat, allow the paint to cure fully before using or handling the wood item.
By paying close attention to the type of wood project and the desired outcome and following proper painting techniques, you can ensure that you select the best paint for wood color to bring your project to life. Happy painting!
How can you create a wood-like appearance using paint?
Making paint look like wood is an impressive art form that can transform ordinary surfaces into a realistic wood grain appearance. This technique, known as faux wood painting or wood graining, is not only visually appealing but also cost-effective and durable.
Anyone can achieve this stunning look with patience, practice, and the right tools. This comprehensive guide will go through the steps to make the paint look like wood, tips for achieving the best results and recommendations based on personal experience.
• The Necessary Tools and Materials
Before diving into the actual process of making paint look like wood, gathering all the necessary tools and materials is essential. Here’s a list of items you’ll need:
- Primer
- Base coat paint (the lighter color of the wood grain)
- Top coat paint (the darker color of the wood grain)
- Clear sealer or varnish (optional)
- Paintbrushes
- Paint roller
- Paint tray
- Faux wood graining tool or graining comb (can be purchased at most home improvement stores or online)
- Disposable gloves
- Drop cloth or plastic sheeting (to protect surfaces)
• Preparing the Surface
For best results, preparing the surface properly before painting is vital. You want the surface to be clean, dry, and in good condition. Follow these steps to prepare your surface:
1. Clean the surface: Remove any dirt, dust, or grease from the surface using mild soap and water. Allow it to dry completely.
2. Sand the surface: For a smooth finish, sand the surface lightly to remove any imperfections or rough spots.
3. Apply primer: Apply a coat of primer to the surface with a brush or roller. This will ensure a strong bond between the paint and the surface. Allow the primer to dry according to the manufacturer’s instructions.
• Applying the Base Coat
After the surface has been prepared and the primer is dry, it’s time to apply the base coat. This lighter color will serve as the foundation for the wood grain effect. Follow these steps to apply the base coat:
1. Pour the paint: Pour your base coat paint into a paint tray.
2. Apply the paint: Using a paint roller, apply an even coat of the base color to the surface. Work in sections and use long, smooth strokes.
3. Allow to dry: Following the paint manufacturer’s recommendations, let the base coat dry completely. It’s essential that the base coat is completely dry before moving on to the next step.
• Creating the Wood Grain Effect
Once the base coat is dry, it’s time to create the wood grain effect using the top coat color and faux wood graining tool. Follow these steps to achieve the desired wood finish:
1. Mix and apply the top coat: Mix the top coat paint with a small amount of water in a paint tray, creating a slightly thinner consistency. Apply this mixture to a small section of the surface using a brush. Working in small sections is essential until you gain more confidence and speed.
2. Use the graining tool: While the top coat paint is still wet, place the faux wood graining tool on the surface and gently rock it back and forth to create a wood grain pattern. Experiment with different angles and pressure to achieve the desired effect.
3. Blend and feather the edges: Use a clean, dry brush to blend and feather the edges of the wood grain pattern for a more natural appearance.
4. Repeat the process: Continue applying the top coat paint and using the graining tool to create the wood grain effect on the entire surface. Remember to work in small sections and blend the edges as you go.
5. Allow to dry: Once you’ve achieved the desired wood grain effect, allow the paint to dry completely.
• Finishing Touches and Sealing
For added durability and protection, applying a clear sealer or varnish over the painted surface is recommended. Follow these steps to apply the sealer:
1. Choose a sealer: Choose a clear sealer or varnish based on your preferences and the surface you are working on.
2. Apply the sealer: Using a clean brush, apply a thin, even coat of sealer over the surface. Allow it to dry according to the manufacturer’s instructions.
3. Add additional coats (optional): If desired, apply additional coats of sealer for added protection and durability.
• Tips for Success
Based on personal experience, here are a few recommendations to achieve the best results when making paint look like wood:
- Practice first: Before applying the technique on a large or important surface, practice on a scrap piece of wood or cardboard to perfect your skills and gain confidence.
- Be patient: Faux wood painting is a skill that takes time and patience to master. Don’t be discouraged if your first attempt isn’t perfect; with practice, you’ll improve.
- Experiment: Don’t be afraid to experiment with different base and top coat combinations, graining tools, and techniques to achieve a unique, customized look.
- Maintain your tools: Clean your faux wood graining tool and brushes between uses to prevent paint build-up and ensure consistent results.
By following this comprehensive guide and with patience, practice, and proper techniques, anyone can make the paint look like wood, transforming ordinary surfaces into beautiful, realistic wood grain finishes.
Step | Description |
|---|---|
1 | Choose a base color for your faux wood. This color should be similar to the lightest color found in the type of wood you want to imitate. |
2 | Paint the entire surface with the base color and allow it to dry completely. |
3 | Mix a glaze by combining a darker color paint (similar to the darkest color found in the wood) with a glaze medium according to the manufacturer’s instructions. |
4 | Apply the glaze mixture onto the surface using a paintbrush, working in small sections. |
5 | Drag a wood-graining rocker tool through the glaze, following the natural wood grain patterns. Rotate and rock the tool as you go to create a more realistic wood grain effect. |
6 | Use a dry brush to soften the wood grain pattern and blend it into the surrounding area. |
7 | Allow the glaze to dry completely. |
8 | Optionally, apply a clear topcoat to protect the faux wood finish from wear and tear. |