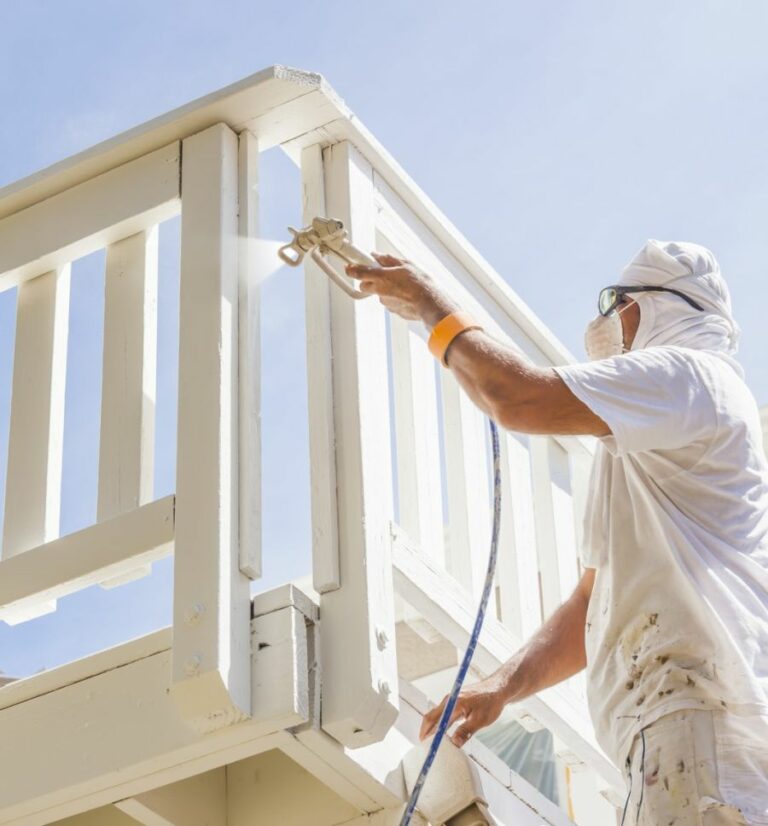
How To Seal Chalk Paint For Outdoor Use, 25 Things You Should Know
Discover the secret to long-lasting, weather-resistant chalk paint on outdoor projects with our comprehensive guide on sealing chalk paint for outdoor use. Unravel the best practices, materials, and techniques professionals use to protect your vibrant colors and intricate designs from harsh weather, sun damage, and premature fading.
How to seal chalk paint for outdoor use:
This comprehensive guide on sealing chalk paint for outdoor applications highlights the importance of using the right sealant to ensure durability and longevity. Popular sealant options include clear wax, water-based polyurethane, and polycrylic. The guide also discusses preparing the surface, applying the sealant, and maintaining sealed chalk paint projects. By following these steps, DIY enthusiasts can create stunning and long-lasting outdoor chalk-painted masterpieces resistant to environmental factors.

Discover essential steps for sealing chalk paint effectively, ensuring lasting protection and durability for your outdoor projects. Uncover expert tips, product recommendations, and application techniques to guarantee the perfect finish for your chalk-painted surfaces.
Contents
- 1 A Comprehensive Guide on Sealing Chalk Paint for Outdoor Applications
- 2 What materials can be applied to chalk paint to enhance its waterproof properties?
- 3 Is Chalk Paint Suitable for Outdoor Use?
- 4 Is Applying Wax or Polyurethane a Better Choice Over Chalk Paint for Protective Finishes?
- 5 Is it Possible to Apply Polyurethane Over Chalk Paint: A Professional Inquiry
A Comprehensive Guide on Sealing Chalk Paint for Outdoor Applications
Chalk paint is a versatile and increasingly popular choice for DIY enthusiasts who want to give their outdoor furniture and decor a unique and personalized look.
However, to ensure that your beautiful chalk paint projects stand up to the elements and last for years to come, it’s crucial to seal and protect them properly.
• Step 1: Choose the Right Sealant for Your Chalk Paint Project
Selecting the right sealant for your outdoor chalk paint project is essential to ensure durability and longevity. Here are some of the most popular sealant options to choose from:
– Clear Wax
Wax is a commonly recommended sealant for indoor chalk paint projects, as it provides a beautiful finish and excellent protection against scuffing and stains.
However, it may not provide sufficient protection against moisture and UV rays for outdoor use, so it’s essential to choose a high-quality, water-resistant wax created specifically for outdoor projects.
– Water-Based Polyurethane
Water-based polyurethane is an excellent choice for sealing outdoor chalk paint, as it provides a durable, clear finish that is resistant to moisture and UV rays. Additionally, it does not yellow over time, ensuring that your projects maintain their original color and appearance.
– Polycrylic
Polycrylic is another water-based sealant option that offers excellent UV resistance and a clear, non-yellowing finish. It’s particularly suitable for outdoor projects with lighter chalk paint colors, as it protects the paint without altering the color or appearance of your piece.
• Step 2: Prep Your Chalk Paint Surface for Sealing
Before applying your chosen sealant, it’s important to ensure that your chalk paint surface is clean, dry, and free of dust and debris. Follow these steps to prep your surface:
- Allow the chalk paint to dry thoroughly for at least 24 hours or according to the manufacturer’s instructions.
- Lightly sand the chalk paint surface using fine-grit sandpaper (220-320 grit) to ensure a smooth, even finish.
- Wipe the surface clean with a lint-free or tack cloth to remove any dust or debris.
- If your project requires additional protection against staining or moisture, consider applying a coat of primer specifically designed for outdoor use before sealing.
• Step 3: Apply the Sealant
Once your chalk paint surface is prepped, follow these steps to apply your chosen sealant:
- Shake or stir the sealant according to the manufacturer’s instructions.
- Using a clean, high-quality brush or foam applicator, apply a thin, even coat of sealant to your chalk paint surface.
- Allow the sealant to dry according to the manufacturer’s instructions.
- Lightly sand the sealed surface with fine-grit sandpaper to ensure a smooth, even finish.
- Wipe the surface clean with a lint-free cloth or tack cloth.
- Repeat steps 2-5 to apply a second coat of sealant for added protection and durability.
• Step 4: Care for Your Sealed Chalk Paint Projects
To maintain the beauty and longevity of your sealed outdoor chalk paint projects, follow these care and maintenance tips:
- Clean sealed surfaces with a damp cloth or gentle soap and water. Avoid using harsh chemicals or abrasives that may damage the sealant and paint.
- Inspect your sealed chalk paint projects regularly for signs of wear or damage, such as peeling or flaking paint, cracks, or fading. Touch up your chalk paint and sealant as needed to maintain their appearance and protection.
- Protect your sealed chalk paint surfaces from extreme weather conditions, such as direct sunlight, heavy rain, or snow, by sheltering them under a patio cover or storing them indoors during inclement weather.
• Final Thoughts
By following this comprehensive guide and selecting the right products, prep methods, and sealing techniques, you can confidently create stunning and durable outdoor chalk paint projects that stand up to the elements and capture your personal style. Happy painting!
Step | Description |
|---|---|
1 | Clean the surface: Ensure the surface of the outdoor furniture or item is clean and dry before you begin. |
2 | Apply chalk paint: Using a brush, apply the chalk paint evenly on the surface. Let it dry for a minimum of 24 hours. |
3 | Distress (optional): If you desire a distressed look, use fine-grit sandpaper to gently rub off the paint at the edges and corners of your item. |
4 | Select a sealer: Opt for a clear, water-based, UV-resistant sealer or varnish that is suitable for outdoor use. Avoid oil-based products, which may cause the chalk paint to turn yellow. |
5 | Apply the sealer: Follow the manufacturer’s instructions to apply the sealer evenly over the chalk paint. Normally, 2-3 thin coats should be sufficient, with a drying time of at least 1-2 hours between coats. |
6 | Cure: Allow the sealed item to dry and cure for at least 72 hours before placing it outdoors. |
What materials can be applied to chalk paint to enhance its waterproof properties?
Chalk paint is a popular choice for DIY enthusiasts and professional decorators alike, thanks to its easy application and the rich, matte finish it gives to furniture and walls. However, as chalk paint is porous by nature, it can be prone to water damage if not properly treated.
• Sealing Chalk Paint with Wax
A clear wax sealant is one of the most popular and effective ways of waterproofing chalk paint. Wax is a natural and eco-friendly solution that provides a protective layer against water and moisture, making it perfect for preserving your chalk-painted surfaces.
– Applying Wax to Chalk Paint
- Choose a clear wax: To ensure your chalk-painted surface remains true to its original color, use a clear or light-colored wax. Darker waxes can alter the appearance of the paint, causing it to look darker or more aged than intended.
- Clean the surface: Before starting, make sure the chalk paint is fully dry, and the surface is free of dust and debris.
- Use a wax brush or lint-free cloth: When applying wax to your chalk-painted surface, use a wax brush or lint-free cloth. These tools will allow you to apply the wax evenly without leaving streaks or marks.
- Apply the wax in thin layers: Work in small sections, applying the wax in thin layers to avoid a patchy finish. Make sure to push the wax into the pores of the paint to achieve maximum water resistance.
- Wait for the wax to dry: Allow the wax to dry for around 24 hours before subjecting the surface to any moisture. This will give the wax ample time to harden and form a protective seal.
- Buff the wax: After the wax has dried, use a clean, lint-free cloth to buff the surface to a subtle sheen. This step is optional but can help create a smoother, more polished finish.
• Using a Water-Resistant Topcoat
Applying a water-resistant topcoat is another effective way to make chalk paint waterproof. These clear, durable coatings bond closely with the chalk paint, providing lasting protection against water damage and wear.
– Selecting the Right Topcoat
When selecting a topcoat, opt for one that is water-based and designed specifically for use with chalk paint. The following are some popular topcoat options:
- Polycrylic: A clear, water-based topcoat with excellent adhesion and resistance to water and abrasion.
- Clear varnish: A transparent, hard-wearing topcoat that creates a strong barrier against water and wear.
- Decorative glazes: These specialty products are designed to add a water-resistant layer to chalk paint and can be tinted to match your chosen color.
– Applying the Topcoat
- Ensure the paint is dry: Before applying the topcoat, make sure your chalk paint surface is fully dry and free of dust and debris.
- Choose the right applicator: Using the correct tool for applying your chosen topcoat is important. A quality synthetic brush or foam roller can ensure a smooth, even application.
- Apply in thin, even layers: Apply the topcoat in thin strokes, working quickly to avoid any visible lines. It’s typically best to apply multiple thin coats, allowing each layer to dry before applying the next.
- Allow to cure: Like any protective coating, your topcoat will need sufficient time to cure and harden. Follow the manufacturer’s recommended drying and curing times to achieve the best results.
• Considerations for Outdoor Furniture and Surfaces
When it comes to waterproofing chalk paint for outdoor use, extra precautions should be taken to ensure maximum protection against the elements.
- Choose an outdoor-specific topcoat: Look for a topcoat that has been designed specifically for outdoor use, as these will offer the greatest resistance to weather and moisture.
- Reapply topcoat regularly: Outdoor surfaces are prone to more wear and tear than indoor furniture, which may require more frequent reapplication of a topcoat to maintain water resistance.
- Opt for a marine varnish: If your painted surface is exposed to extreme weather and water, consider using a marine varnish designed for use on boats. These tough varnishes offer excellent water resistance and are made to withstand harsh conditions.
In conclusion, properly sealing your chalk paint with a wax or topcoat will provide the necessary protection against water damage, ensuring your furniture and surfaces remain beautiful and functional for years to come.
By following the steps and recommendations in this article, you can ensure that your chalk-painted creations stay looking their best, regardless of their exposure to moisture.
Is Chalk Paint Suitable for Outdoor Use?
Chalk paint is popular for many DIY enthusiasts and professional painters who love its unique finish, easy application, and versatility. Most people associate chalk paint with revitalizing furniture and home decor inside, but the question arises: Can chalk paint go outside as well?
• Chalk Paint: A Suitable Outdoor Solution
Chalk paint is not designed explicitly for outdoor use. However, it can still provide an excellent finish and lasting results when adequately applied, sealed, and maintained. The following factors contribute to the suitability of chalk paint for exterior applications:
– Durability
One of the main concerns when using chalk paint outdoors is how it will hold up against harsh weather conditions such as rain, sun, and fluctuating temperatures. When properly sealed with a suitable topcoat, high-quality chalk paint can withstand these conditions and exhibit excellent durability.
However, it is vital to note that chalk paint’s performance will still not be as effective as outdoor-specific paint products designed to resist moisture, UV rays, and harsher impacts.
Nevertheless, chalk paint is an excellent option for outdoor projects requiring minimal wear-and-tear or more frequent touch-ups.
– Porosity
Chalk paint is known for its porous nature, which is excellent for adhesion to various surfaces without much intensive preparation.
However, this same porosity becomes a challenge in outdoor applications, as the paint is more susceptible to absorbing moisture and contaminants, ultimately leading to potential damage over time.
To overcome this challenge, the application of a high-quality sealant or topcoat is crucial to provide added protection against moisture and other external elements. A suitable topcoat will also enhance chalk paint’s inherent durability, ensuring a longer-lasting finish for your outdoor projects.
– Flexibility & Adhesion
Chalk paint adheres well to various surfaces, making it ideal for outdoor projects that involve different materials, such as wood, metal, or stone. It does not require intensive surface preparation like sanding or priming, resulting in a straightforward, time-saving application process.
The flexibility of chalk paint allows it to expand and contract with the surface, reducing the risk of cracking, chipping, or peeling.
• Recommended Outdoor Applications for Chalk Paint
Chalk paint works best in specific outdoor scenarios, such as:
- Refreshing the finish of outdoor furniture like chairs, benches, or planters. Provided these items are not exposed to extreme weather conditions or harsh daily wear and constant indoor adherence, chalk paint followed by a suitable sealant can provide an attractive, long-lasting finish.
- Enhancing the appearance of decorative items and ornaments that do not encounter a large extent of wear or environmental impact. Examples include outdoor mirrors, picture frames, or vintage signs.
- Creating unique art or decorative displays on fences, walls, or other surfaces that are sheltered from the worst weather conditions.
In all scenarios, it is essential to ensure proper preparation, application, and aftercare of chalk paint to prolong its lifespan and maintain its appearance.
• Preparing Your Outdoor Surface for Chalk Paint
- Clean the surface thoroughly with a mild soap solution and a suitable brush or cloth to remove dirt, dust, and other contaminants. Rinse well and allow it to dry completely before applying paint.
- For surfaces with existing paint or varnish, lightly sand it to create a smoother, more adhesive surface. This can also help in removing peeling or flaking paint. Dust off the surface after sanding.
- In the case of metal surfaces, remove any rust and prime it with a rust-inhibiting primer before applying chalk paint.
• Choosing the Right Sealant or Topcoat
To achieve the best performance of chalk paint outdoors, it is crucial to seal it with a suitable topcoat. Options include:
- Water-based polyurethane sealants that provide a durable, hardwearing finish while maintaining the paint’s matte look.
- Exterior-grade clear waxes or varnishes that not only protect the paint but also enrich its texture and tone.
Make sure to follow the manufacturer’s instructions for the chosen topcoat, including recommended drying times and the number of coats. In addition, be prepared to reapply the topcoat as required, ensuring your outdoor chalk paint project retains its excellent appearance for years to come.
• Proper Maintenance and Care
While well-applied chalk paint with a topcoat can withstand outdoor conditions, it will require regular maintenance and care to maintain its appearance and durability.
Regular inspections to identify signs of wear, such as chipping or fading, are essential. In case of any damage or wear, clean the area and reapply paint and topcoat as necessary.
In conclusion, while not explicitly designed for outdoor use, chalk paint can still provide satisfactory results on exterior projects when applied and maintained correctly.
By following the necessary preparation steps, choosing an appropriate topcoat, and ensuring ongoing care, your chalk paint project will both look great and stand up to the outdoor elements.
Is Applying Wax or Polyurethane a Better Choice Over Chalk Paint for Protective Finishes?
When it comes to finishing a chalk paint project, the final step is often sealing the paint for added durability and protection. Two popular options for this purpose are wax and polyurethane, but which one is the better choice?
• Wax: A Traditional Choice for Chalk Paint
Wax is the traditional choice for sealing chalk paint and is known for its ability to create a beautiful, protective finish.
– Advantages of Wax
- Ease of Application: One of the primary advantages of using wax over chalk paint is its ease of application. It is typically applied with a cloth or brush, and a thin coat is all that’s needed. This makes it an ideal choice for beginners or those who aren’t as experienced with painting techniques.
- Aesthetic Appeal: Wax also provides a nice, soft finish that enhances the distressed look of chalk paint. It can be buffed to a smooth, matte or satin finish, depending on your preference, giving your piece a unique appearance.
- Reversibility: Unlike polyurethane, wax can be removed if you decide you don’t like the finish or want to change your piece’s color. This makes it a more flexible option for those who enjoy frequent furniture makeovers.
– Disadvantages of Wax
- Not Heat Resistant: Wax doesn’t hold up well to heat; hot items placed on a waxed surface can cause the wax to melt, which leaves a mark or even removes the finish. This is essential for high-traffic areas or pieces such as dining tables, where hot objects may be placed.
- Requires Reapplication: Wax isn’t as durable as polyurethane and needs to be reapplied periodically to maintain its protective qualities. The frequency of reapplication varies depending on use but can be as often as every few months for heavily used items.
- Susceptible to Water Damage: Wax isn’t entirely waterproof, making it more susceptible to water damage or rings from drinks. This may be an issue for items in areas where moisture is likely to be an issue, such as bathrooms or kitchens.
• Polyurethane: A Modern and Durable Finish
Polyurethane is a synthetic finish available in various sheens, from high gloss to matte, and provides a more durable and protective coating over chalk paint.
– Advantages of Polyurethane
- High Durability: Polyurethane is much tougher and more durable than wax, making it a better choice for high-traffic or heavily used furniture items. A properly applied coat of polyurethane will last for years without the need for reapplication.
- Water and Heat Resistance: Unlike wax, polyurethane offers excellent water and heat resistance, making it suitable for furniture that will be regularly exposed to moisture or high heat.
- Control of Sheen: Polyurethane is available in various sheens, from high gloss to matte, allowing you to choose the level of shine you want for your project. It’s also possible to mix different levels of sheens to create a custom finish.
– Disadvantages of Polyurethane
- Difficulty in Application: Applying polyurethane can be more challenging than wax, particularly when trying to achieve a smooth finish. Brush strokes may be visible if not carefully applied, and some types of polyurethane may require sanding between coats. This can be intimidating for beginners or those inexperienced with painting techniques.
- Longer Drying Time: Polyurethane takes longer to dry thoroughly than wax, which can be inconvenient during the finishing process. Additionally, some types of polyurethane may need multiple coats for optimal protection, further extending the drying time.
- Chemical Odor: Polyurethane tends to have a strong chemical odor, which can be unpleasant during application and may require additional ventilation. It’s important to consider this when working on indoor projects or if you’re sensitive to strong smells.
• Choosing Between Wax and Polyurethane for Chalk Paint
When deciding between wax and polyurethane for your chalk paint project, consider the following factors:
- Durability Requirements: If your piece will be exposed to high traffic or heavy use, polyurethane is likely the better choice for its increased durability.
- Environmental Factors: Polyurethane is a better option for projects with high moisture or heat exposure due to its water and heat-resistant qualities.
- Experience Level and Comfort with Application Techniques: Wax may be the best choice if you’re new to finishing techniques or prefer a more straightforward application process.
- Aesthetics: Wax provides a more traditional, soft finish that enhances the distressed look of chalk paint, whereas polyurethane has a broader range of sheens and can create a more modern appearance.
In the end, the decision between wax and polyurethane will depend on your specific project needs and preferences. Both finishes have advantages and disadvantages, and carefully considering these factors will ensure you choose the best finish for your chalk paint masterpiece.
Is it Possible to Apply Polyurethane Over Chalk Paint: A Professional Inquiry
Chalk paint has gained popularity in recent years due to its versatility and ease of use. It creates a matte, chalky finish that can be easily distressed to achieve a vintage look.
However, many people wonder if it is possible to apply polyurethane over chalk paint to add an extra layer of protection and durability. The answer is yes. You can apply polyurethane over chalk paint.
• Why Applying Polyurethane Over Chalk Paint Works
Applying polyurethane over chalk paint can greatly enhance the durability and longevity of your painted surface.
While beautiful and versatile, chalk paint does not provide the same level of protection from wear and tear as other types of paint. It is fairly soft and susceptible to scratches, nicks, and other damage.
Polyurethane is a clear, protective finish that can be applied over paint to seal and protect the surface. It is available in a variety of sheens, including satin, semi-gloss, and high-gloss.
Applying a coat of polyurethane over your chalk paint can add an extra layer of protection to your project and ensure that it lasts for years to come.
• Preparation Before Applying Polyurethane Over Chalk Paint
Before you begin applying polyurethane over your chalk paint, there are a few important steps to take:
– Clean the Painted Surface
First, it is essential to clean the surface thoroughly, as dirt, dust, and other contaminants can interfere with the adhesion of the polyurethane. Use a clean, damp cloth to wipe down the surface and be sure to allow the chalk paint to dry completely after cleaning.
– Choose the Right Polyurethane
There are several types of polyurethane available, including oil-based and water-based products. Water-based polyurethane is recommended for use over chalk paint because it dries clear and will not be yellow over time.
Additionally, water-based polyurethanes are low in odor and easier to clean up, making them a more user-friendly option.
– Test a Small Area
Before you apply polyurethane to your entire project, testing it on a small, inconspicuous area is a good idea to ensure you are happy with the final result. This will allow you to see how the polyurethane will affect the color and finish of your chalk paint and how the two products adhere to one another.
• Step-by-Step Guide to Applying Polyurethane Over Chalk Paint
– Step 1: Stir the Polyurethane
Before you begin, it is essential to stir your polyurethane well to ensure an even consistency. Avoid shaking the can, as this can cause air bubbles to form in the finish.
– Step 2: Apply a Thin Coat
Using a high-quality synthetic brush, apply a thin, even coat of polyurethane over your chalk paint. Always use long, even brush strokes in the direction of the grain, and avoid overworking the finish.
– Step 3: Allow the First Coat to Dry
Allow the first coat of polyurethane to dry, following the manufacturer’s recommendations on the drying time. Letting the polyurethane cure completely is essential, as applying a second coat too soon can cause adhesion issues.
– Step 4: Lightly Sand the Surface
Once the first coat of polyurethane has dried, lightly sand the surface with fine-grit sandpaper (220 grit or higher) to remove any imperfections or dust particles. Be sure to sand in the direction of the grain and use a light touch to avoid damaging the painted surface beneath the polyurethane.
– Step 5: Wipe Away Dust
After sanding, use a clean, damp cloth to wipe away any sanding dust. This is an important step to ensure that the dust does not become trapped in the next coat of polyurethane.
– Step 6: Apply Additional Coats
Apply additional coats of polyurethane as needed, following the same process as in Steps 2-5. Typically, two to three coats are sufficient for thorough protection.
– Step 7: Allow the Final Coat to Cure
Once you have applied the final coat of polyurethane, allow it to cure completely before using the painted surface. Depending on the specific product and environmental conditions, this can take anywhere from a few days to a week.
By following these steps, you can successfully apply polyurethane over chalk paint and achieve a durable, protective finish for your project. With proper care and maintenance, your chalk-painted surface will remain beautiful and functional for years to come.

