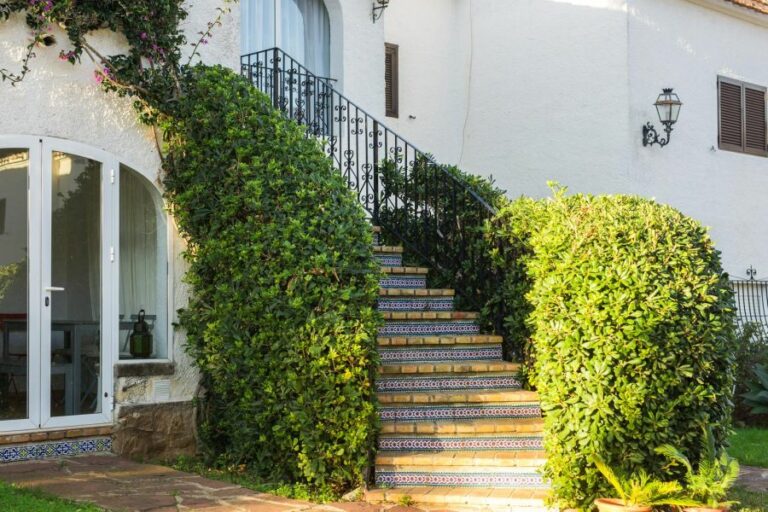
Outdoor Paint Sealer, 25 Things You Should Know
Admit it; you’ve put hours of love and labor into your dream outdoor paint job only to see it face the wrath of pesky weather conditions. Enter the hero your masterpiece needs: outdoor paint sealer. Our blog post will discuss how applying this protective shield will gracefully ensure your carefully chosen paint ages, resisting the onslaught of rain, wind, sun, and more.
Outdoor paint sealer:
Outdoor paint sealers protect and maintain exterior surfaces, such as wood, metal, concrete, and brick. They shield surfaces from weather, moisture, and UV rays. Different sealers include water-, solvent-based, and penetrating, each designed to work best with specific materials. Choosing the right sealer involves considering the surface material, finish, and durability. Proper surface preparation, application, and ongoing maintenance are essential to achieve a long-lasting, protective coating that maintains the aesthetic of your outdoor space.

Discover the ideal outdoor paint sealer for your next project. Learn about top products, key benefits, and crucial factors to consider. Unlock the secret to long-lasting protection with our in-depth guide, expert tips, and recommendations for all surfaces.
Contents
- 1 Exterior Paint Sealant
- 2 Is Sealing Necessary for Outdoor Paint Applications?
- 3 What is the Most Effective Sealant for Exterior Paint Applications?
- 4 Is it Possible to Apply Sealer Over Painted Surfaces?
- 5 Is it Possible to Apply Paint over Exterior Surface Sealers?
Exterior Paint Sealant
Outdoor paint sealers, also known as exterior paint sealers, are essential for maintaining and protecting various surfaces in and around your home or property.
Whether it’s wood, metal, concrete, or brick, these coatings provide a durable, protective layer that helps shield surfaces from the deteriorating effects of weather, moisture, and UV rays.
• Types of Outdoor Paint Sealers
– Water-Based Sealers
Water-based sealers are popular due to their ease of application, quick drying time, and low odor. They’re generally more environmentally friendly compared to solvent-based sealers because they contain fewer volatile organic compounds (VOCs).
Water-based sealers provide great resistance to UV rays and moisture, making them an ideal choice for outdoor surfaces.
– Solvent-Based Sealers
Solvent-based sealers offer superior durability, and they penetrate deeper into the surface for better protection. These sealers usually have a higher VOC content, resulting in strong fumes during application.
Solvent-based sealers may take longer to dry but can resist harsher conditions than their water-based counterparts. They’re often recommended for heavy traffic areas or surfaces exposed to intense weather conditions.
– Penetrating Sealers
Penetrating sealers work by soaking into the surface and sealing it from within rather than creating a protective film on top.
They’re best suited for porous surfaces like concrete, brick, and natural stone, where they can help prevent water intrusion and resist efflorescence (the white residue that forms when minerals leach from the surface). Penetrating sealers typically offer a matte finish, maintaining the natural look of the surface.
• Choosing the Right Sealer for Your Outdoor Project
When selecting the best outdoor paint sealer for your project, consider the following factors:
– Surface Material
Different sealers are designed to work best with specific surface materials. Make sure to select a sealer that’s compatible with the surface you’re treating. For example, choose a sealer specifically formulated for concrete if you’re sealing a concrete patio.
– Finish
Sealers are available in various finishes, from matte to high-gloss. Select a finish that complements the intended look of your outdoor space. Keep in mind that high-gloss sealers can sometimes be slippery when wet, so consider a matte or satin finish for areas with heavy foot traffic.
– Durability
Consider the level of durability you need based on factors like weather exposure, foot traffic, and the potential for staining. High-traffic areas or surfaces exposed to harsh conditions may require a more durable sealer like a solvent-based product.
• Preparing the Surface
Before applying an outdoor paint sealer, follow these steps to ensure the surface is well-prepared:
- Remove any dirt, debris, or loose paint from the surface with a broom or brush.
- Clean the surface using a mild detergent and water or a specialized cleaner if recommended by the sealer manufacturer.
- For stubborn stains, consider using a pressure washer or stiff brush to improve cleaning results.
- Allow the surface to dry completely before applying the sealer. Moisture in the surface can interfere with the sealer’s ability to bond.
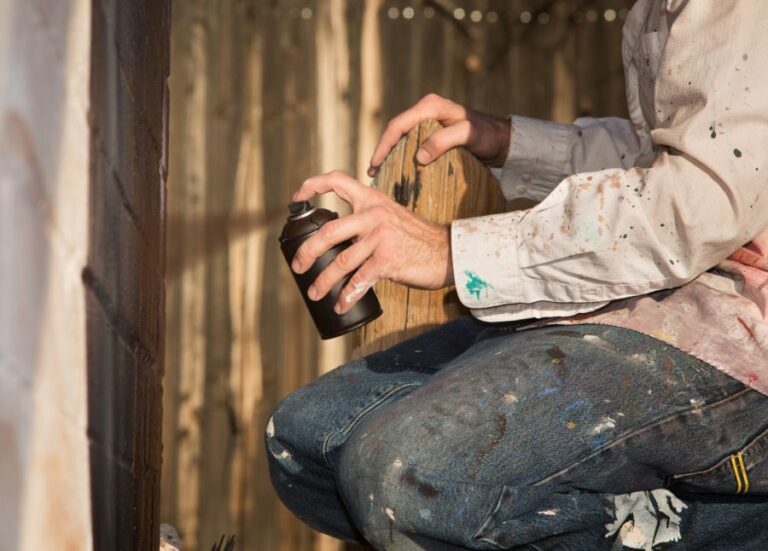
• Applying the Outdoor Paint Sealer
Proper application is essential for ensuring the best results and performance from your outdoor paint sealer:
- Read the manufacturer’s instructions carefully for guidance on application techniques and drying times.
- Stir the sealer thoroughly before using, and periodically stir during application to maintain consistency.
- Apply the sealer using a brush, roller, or sprayer, depending on the surface and the sealer’s recommended application method.
- Use even strokes and avoid over-applying, which can result in an uneven finish and reduce the sealer’s effectiveness.
- Allow the sealer to dry according to the manufacturer’s instructions before applying additional coats if necessary or before exposing the surface to foot traffic or other use.
• Maintenance and Reapplication
To keep your outdoor surfaces protected and looking their best, periodic maintenance and reapplication of the sealer is necessary. Follow these tips for maintaining your outdoor paint sealer:
- Clean the surface periodically to remove dirt and debris, which can wear away at the sealer over time.
- Attend to stains promptly to prevent them from becoming permanent or causing damage.
- Inspect the surface regularly for signs of wear or deterioration, like chipping, flaking, or fading. Address any issues promptly to prevent further damage.
- Reapply the sealer as recommended by the manufacturer, typically every few years, depending on the product and the conditions to which the surface is exposed.
In conclusion, outdoor paint sealers are vital for protecting your exterior surfaces and extending their lifespan.
By choosing the right sealer for your project, preparing the surface, and following proper application techniques, you can achieve a long-lasting, durable finish that will safeguard your surfaces against the elements and maintain their appearance.
Remember to stay vigilant about maintenance and reapplication to ensure ongoing protection and a great-looking outdoor space.
Is Sealing Necessary for Outdoor Paint Applications?
Outdoor paint, in particular, faces harsh weather conditions, sunlight, and moisture that can affect its durability and appearance. A common question that often arises is whether outdoor paint needs to be sealed or not.
• Understanding The Purpose of Sealants
Sealants, in general, serve a protective function. They can prevent moisture, dust, and other harmful elements from seeping into the surface, ensuring the longevity and vibrancy of the paint. There are different types of sealants available in the market, each offering varying degrees of protection and finish.
– Types of Sealants
- Acrylic Sealants: These sealants are water-based and offer excellent durability and resistance to UV rays. They are often preferred for their ease of application and ease of cleanup.
- Polyurethane Sealants: These sealants are known for their flexible and durable properties. They can resist water, chemicals, and UV radiation, making them suitable for various outdoor applications.
- Epoxy Sealants: These sealants are incredibly strong and resistant to chemicals and abrasion. However, they can be more challenging to apply and tend to be more expensive compared to other sealants.
• Factors to Consider in Sealing Outdoor Paint
Before deciding whether or not to seal outdoor paint, consider the following factors:
– The Type of Paint
The intrinsic properties of the paint in use will determine whether additional protection is needed. Some high-quality outdoor paints contain additives that help them resist the effects of the weather, thereby reducing the need for a separate sealant.
It is vital to choose the right paint with sufficient durability and check the manufacturer’s recommendations.
– The Surface Material
Different surfaces may require different levels of protection. For instance, wood and concrete surfaces are more porous and may need sealing to prevent moisture penetration which could lead to rot, mold, and mildew.
On the other hand, metal surfaces may not necessarily require a sealant because they are less susceptible to moisture absorption. However, they might still benefit from sealing to prevent rust and corrosion.
– The Environmental Conditions
The surrounding environment plays a significant role in the need for sealing outdoor paint. If the area is prone to high humidity, extreme temperatures, or abundant precipitation, sealing the paint might become more of a necessity.
Moreover, consider the level of exposure to direct sunlight, as UV rays can cause paint to fade over time.
• Pros and Cons of Sealing Outdoor Paint
Before deciding whether to seal outdoor paint or not, it is essential to weigh the benefits and drawbacks.
– Pros
- Enhanced Protection: Sealants provide a barrier against moisture, dirt, and UV rays, preserving the paint’s appearance and durability.
- Easy Maintenance: By sealing outdoor paint, the surface becomes easier to clean as dirt and debris are less likely to stick to it.
- Extended Lifespan: A sealed surface can prolong the life of the paint, reducing the need for frequent repainting and minimizing maintenance costs.
– Cons
- Additional Cost: Using a sealant adds extra expenses to the painting project, both in terms of the sealant itself and the labor required for its application.
- Possibility of Trapped Moisture: If moisture is present on the surface before sealing, it can become trapped underneath the sealant, leading to undesirable outcomes like blistering or peeling.
- Change in Aesthetics: Applying a sealant may alter the initial appearance of the paint, giving it a glossy or matte finish that might not be desirable.
• Expert Recommendations
Based on my experience, I recommend sealing outdoor paint in certain situations, such as:
- Very harsh environmental conditions where the paint would benefit from added protection.
- Porous surfaces like wood and concrete require additional protection from moisture and potential damage.
- Cases where it is crucial to maintain the appearance of the painted surface, such as in high-visibility public spaces.
In conclusion, whether or not to seal outdoor paint depends on several factors, including the type of paint used, the surface material, and environmental conditions.
Sealing outdoor paint has advantages and disadvantages, and it is essential to consider them carefully before deciding. Ultimately, proper preparation and choosing high-quality materials can play a significant role in any outdoor painting project’s long-term success and appearance.
What is the Most Effective Sealant for Exterior Paint Applications?
Exterior paint not only adds curb appeal to your home but also serves as a protective layer against environmental factors, such as rain, snow, and UV damage. To ensure the longevity of your paint job and the protection of your siding, it’s crucial to choose and apply the correct sealant.
• The Importance of Sealant in Exterior Paint
Sealants are essential for exterior paint as they provide an extra layer of protection, ensuring the paint looks fresh and vibrant for years to come. Choosing the right sealant can significantly extend the life of your paint job, prevent mold and mildew growth, and mitigate damage from UV rays, moisture, and temperature fluctuations.
• Top Sealants for Exterior Paint
Here are some top recommended sealants for exterior paint based on their features, compatibility, and ease of application:
– Acrylic Sealants
Acrylic sealants are water-based and known for their durability and flexibility. They’re suitable for a wide range of surfaces, including wood, metal, and masonry. Acrylic sealants offer excellent UV resistance, adhesion, and color retention, ensuring your paint job remains vibrant and fresh for years.
- Ideal for: Wood, Metal, and Masonry
- Pros: Excellent UV resistance, Strong adhesion, Easy application
- Cons: May require a primer for optimal performance
Recommendation: One of the best acrylic sealants on the market is Sherwin-Williams’ Loxon. This high-performance, flexible sealant is specifically designed for use on exterior masonry and concrete surfaces.
– Silicone Sealants
Silicone sealants are known for their strong water resistance and flexibility. They form a durable, rubber-like seal that expands and contracts with temperature fluctuations, making them ideal for areas susceptible to freeze-thaw cycles.
Silicone sealants are also UV resistant and won’t discolor or crack over time.
- Ideal for: Masonry, Concrete, and Stucco
- Pros: Exceptional water resistance, Flexible, UV resistant
- Cons: Not typically paintable, Harder to clean up
Recommendation: GE Silicone All-Weather Sealant is an excellent choice for exterior paint projects due to its long-lasting performance and ease of application.
– Polyurethane Sealants
Polyurethane sealants provide an incredibly strong bond and are highly resistant to both water and weather damage. They are known for their excellent adhesion to a variety of surfaces, including wood, metal, and masonry.
These sealants also have excellent flexibility, allowing them to accommodate structural movement.
- Ideal for: Wood, Metal, Masonry, and Concrete
- Pros: Exceptionally strong bond, Highly water and weather resistant, Flexible
- Cons: Requires proper surface preparation, Longer curing time
Recommendation: 3M Polyurethane Sealant 540 is a high-quality and versatile choice for exterior paint jobs, offering superior adhesion and long-lasting protection.
• Tips for Applying Sealants
Proper application of exterior sealants is crucial to ensure the longevity of your paint job and the protection of your siding. Keep in mind the following tips for a successful sealant application:
– Surface Preparation
Thoroughly clean the surface of dirt, debris, and any loose, peeling paint. In some cases, a primer may be necessary to ensure optimal adhesion and performance.
– Proper Tools
Use a high-quality caulking gun for an even, controlled application. Opt for a brush or roller designed for sealant application to ensure a smooth, even finish.
– Weather Conditions
Avoid applying sealants in extreme temperatures or humid conditions to ensure proper curing and adhesion. Consult the manufacturer’s recommendations for optimal weather conditions during application.
– Curing Time
Allow adequate curing time before painting, as recommended by the sealant manufacturer. Applying paint too soon can result in poor adhesion and a compromised finish.
• Conclusion
Choosing the best sealant for your exterior paint project can significantly extend the life of your paint job, enhance protection against environmental factors, and maintain the aesthetic appeal of your home.
Acrylic, silicone, and polyurethane sealants all offer unique advantages depending on your project’s specific needs. Take the time to research the best sealant for your project, and remember that proper surface preparation and application are key to achieving long-lasting results.
Armed with this knowledge, you’ll be ready to tackle your next exterior paint project with confidence.
Sealant | Description |
|---|---|
Acrylic Sealant | Water-based, ideal for paint surfaces and provides durability. |
Silicone Sealant | Flexible and waterproof, ideal for outdoor surfaces. |
Polyurethane Sealant | Heavy-duty, offers high resistance against UV rays and moisture. |
Polysulfide Sealant | Chemical resistant and suited for exterior surfaces exposed to harsh conditions. |
Hybrid Sealant | Combination of two or more types of sealants to provide best performance. |
Is it Possible to Apply Sealer Over Painted Surfaces?
• Introduction
A common question asked by DIY enthusiasts and professional painters alike is, “Can you put sealer over paint?”
The answer is not as simple as a straightforward yes or no, as there are various factors to consider before determining if applying a sealer over paint is the right course of action for a particular project.
• Benefits of Applying Sealer Over Paint
There are several reasons why one might choose to apply a sealer over a painted surface. Some of the benefits include:
- Protection: Sealers can provide additional protection to painted surfaces by forming a durable, clear barrier that safeguards against moisture, chemicals, and UV rays.
- Durability: Sealing a painted surface can increase its lifespan by preventing peeling, fading, cracking, and other signs of wear-and-tear.
- Aesthetics: Some sealers can enhance the natural beauty of a painted surface, such as adding a glossy or satin finish.
- Easy Maintenance: Many sealers make painted surfaces more resistant to staining, allowing for easier cleaning and reduced maintenance efforts.
• Types of Sealers for Painted Surfaces
When deciding to apply a sealer over paint, it is crucial to choose the right type of sealer to ensure compatibility and desired results. There are two primary types of sealers suitable for use over painted surfaces:
– Acrylic Sealers
Acrylic sealers are water-based and form a transparent, non-yellowing, and breathable protective film on the painted surface. They are an excellent option for both interior and exterior projects, as they have excellent UV resistance and prevent moisture penetration.
Acrylic sealers are available in a range of sheens, including gloss, semi-gloss, and matte finishes.
– Polyurethane Sealers
Polyurethane sealers are more durable than acrylic sealers and provide a higher level of protection against chemicals and abrasions. They are available in water-based and solvent-based formulations, with the former being more eco-friendly and easier to clean up.
Polyurethane sealers are suitable for both interior and exterior projects, but it is essential to check the compatibility with the type of paint used before application.
• When to Use Sealer Over Paint
There are specific scenarios where applying a sealer over paint may be appropriate, including:
- Exterior painted surfaces: Sealing exterior painted surfaces, such as wooden decks, fences, or siding, can offer extra protection from weathering, UV rays, and moisture damage.
- High-traffic areas: In areas where painted surfaces endure heavy use, such as floors and countertops, a sealer can provide additional durability and resistance to wear and tear.
- Artwork and decorative finishes: Applying a sealer over painted decorative finishes or artwork can protect the surface from dust, smudging, and fading.
However, not all painted surfaces require a sealer, and applying a sealer unnecessarily might cause issues such as pooling, cracking, or cloudiness. It is essential to assess each project individually and choose the best course of action accordingly.
• Steps to Apply Sealer Over Paint
Before applying a sealer over a painted surface, follow these steps to ensure a successful application:
- Preparation: Firstly, ensure the painted surface is clean, dry, and free of dust, dirt, and grease. If necessary, use a mild detergent and water to clean the surface and allow it to dry completely.
- Testing: Perform a compatibility test by applying a small amount of the chosen sealer to an inconspicuous area of the painted surface. Observe the test area after the recommended drying time to ensure there are no adverse reactions such as discoloration or poor adhesion.
- Application: If the test area shows no issues, apply the sealer according to the manufacturer’s instructions. Many sealers can be applied using a brush, roller, or sprayer. Achieve an even coat by applying the sealer in thin, overlapping layers.
- Drying: Allow the sealer to dry according to the recommended drying time on the product packaging. Some sealers might require multiple coats for optimal results, so ensure each coat is fully dry before applying the next.
- Curing: Finally, allow the sealed surface to cure completely before using it or exposing it to potential hazards. The curing time may vary depending on the type of sealer and environmental conditions.
• Conclusion
Applying a sealer over paint can provide multiple benefits, such as increased protection, durability, and enhanced aesthetics. However, it is crucial to choose the appropriate type of sealer and follow proper application techniques to achieve the desired results.
By assessing each project individually and carefully considering the factors discussed in this guide, you can decide if sealing over paint is the right course of action for your specific needs.
Question | Answer |
|---|---|
Can you put sealer over paint? | Yes, you can put sealer over paint, but it is important to choose the right type of sealer and ensure the paint is fully dried before applying the sealer. Make sure both the paint and sealer are compatible, and follow the manufacturer’s instructions for best results. |
Is it Possible to Apply Paint over Exterior Surface Sealers?
Painting over an exterior sealer can be a tricky task. While it is possible, it’s essential to understand the factors that can affect the result and the steps to follow to ensure a successful outcome.
• The Importance of Surface Preparation
Before considering painting over exterior sealer, the surface must be adequately prepared. Preparing the surface is vital for ensuring the paint adheres correctly and results in a long-lasting finish. Follow these steps to prepare your surface for painting:
– Cleaning the Surface
Before any painting can begin, it’s essential to clean the surface thoroughly. Removing any dirt, dust, grease, or mildew will help the paint bond effectively to the surface. Use a pressure washer or a brush with a solution of mild detergent and water to clean the surface.
For stubborn areas, a stiff brush or scraper may be needed. Once the surface is clean, allow it to dry completely before proceeding with any painting.
– Sanding and Smoothing
After cleaning, inspect the surface for any rough or uneven areas. Sand down any protruding areas with medium-grit sandpaper to create a smooth surface. After sanding, lightly go over the surface with fine-grit sandpaper to ensure a smooth finish.
Remember to remove any sanding dust by sweeping or wiping the surface with a damp cloth.
– Repairing Damaged Areas
In some cases, the surface may have cracks, holes, or other blemishes that need repairing. Use an exterior filler or caulk to fill any gaps, and allow it to dry as per the product’s instructions. Once the filler is dry, sand it down to match the surrounding surface and remove any excess filler.
• Choosing the Right Paint and Sealer
Not all paints and sealers are compatible, so it’s crucial to consider the types of products used on the surface. It’s generally best to stick with products from the same manufacturer or those explicitly designed to be used together.
– Compatibility with the Existing Sealer
Exterior sealers are available in various types, such as acrylic, silicone, or polyurethane. To paint over an existing sealer, it’s essential to identify the type of sealer used previously. Some paints may not adhere well to specific sealers, causing issues such as peeling or blistering.
Consult the manufacturer’s instructions or seek professional advice to determine the compatibility of your existing sealer and the paint you plan to use.
– Paint Types
When selecting paint, it’s crucial to choose one specifically designed for exterior use. Exterior paints are formulated to withstand weathering and exposure to the elements. Two primary types of exterior paint are available: water-based (latex) and oil-based (alkyd). Each has its pros and cons:
- Water-based (latex) paints are easy to clean up, dry relatively quickly, and have lower levels of volatile organic compounds (VOCs). They are also more flexible, allowing them to expand and contract with the surface, resulting in better durability.
- Oil-based (alkyd) paints offer a more durable, harder finish but emit higher levels of VOCs and require a longer drying time.
Consider factors such as the existing sealer, the exposure to weather conditions, and the desired finished appearance when selecting the type of paint to use.
• Application Tips and Techniques
Following a few essential tips and techniques during the painting process can help ensure a professional, long-lasting finish:
- Stir the paint thoroughly before use and during application to maintain a consistent color and finish.
- Use a high-quality brush or roller for even coverage and to avoid brush marks or stippling.
- Apply the paint in thin, even coats, allowing each coat to dry as per the manufacturer’s instructions before applying the next.
- When using a brush, apply the paint by brushing in the direction of the wood grain or other surface texture. This will help create a smooth, even finish.
- Keep an eye on weather conditions when applying paint. Avoid painting in direct sunlight, if possible, and postpone painting on rainy or excessively humid days.
• In Conclusion: Go For It, But Be Cautious
Yes, you can paint over exterior sealers, provided you’ve adequately prepared the surface, chosen compatible paint and sealer products, and followed proper application techniques.
Following these guidelines will help you achieve a professional, durable finish that stands up to the elements and keeps your home looking its best for years to come.
Question | Answer |
|---|---|
Can you paint over exterior sealer? | Yes, you can paint over exterior sealer, but it depends on the type of sealer and the type of paint. It is important to choose the appropriate paint that adheres to the sealer and allows proper coverage. Always follow the manufacturer’s recommendations for compatibility and surface preparation for best results. |