Outdoor Paint Sprayer, 25 Things You Should Know
Are you tired of spending hours on end painting your exteriors with a brush or roller? Stay tuned as we bring you the ultimate solution, the outdoor paint sprayer! With the ability to cover large areas at lightning speed and achieve a flawless, professional finish, outdoor paint sprayers have transformed how we approach painting projects.
Outdoor paint sprayer:
The three primary types are airless, High Volume, Low Pressure (HVLP), and compressed air paint sprayers. Each type has pros and cons, and selecting the appropriate one depends on the specific task. Proper surface preparation, using appropriate paint, masking off areas, and following proper spray techniques will ensure a smooth and professional-looking finish. Graco, Wagner, and Fuji Spray are some recommended paint sprayer brands.

Continue reading to explore the benefits of outdoor paint sprayers, various types and features, and top recommendations to help you find the ideal product for an efficient, time-saving, and professional-quality paint job on your exterior projects.
Contents
- 1 Exterior Paint Spraying Equipment
- 2 Which Kind of Paint Sprayer is Most Suitable for Exterior Applications?
- 3 Is it Possible to Utilize a Paint Sprayer Outdoors?
- 4 Is Applying Exterior Paint with a Brush or Sprayer More Effective?
- 5 Is It Necessary to Thin Exterior Paint for Use in a Sprayer?
- 6 Determining the Superior Method: Rolling versus Spraying Exterior House Paint
Exterior Paint Spraying Equipment
• Choosing the Right Paint Sprayer
When it comes to outdoor paint projects, a sprayer can make quick work of what could be a time-consuming job. But with various types of paint sprayers available, choosing the right one for your specific tasks is essential.
The three primary types of paint sprayers are airless, High Volume Low Pressure (HVLP), and compressed air.
– Airless Paint Sprayers
These paint sprayers work by pumping out paint at high pressure, resulting in an even, consistent application. Airless sprayers are known for their speed and efficiency, making them perfect for large-scale outdoor projects, such as painting fences, decks, or entire exteriors.
Pros
- Thorough coverage: ideal for textured or uneven surfaces
- Speed and efficiency: great for large outdoor projects
Cons
- Can be challenging to control: may result in overspray
- Expensive purchase, especially for occasional use
– High Volume Low Pressure (HVLP) Paint Sprayers
HVLP paint sprayers rely on a steady stream of air to carry paint droplets onto the project surface. They have a reputation for precision and tend to produce a smoother finish than airless sprayers.
Pros
- Precision and control: minimal overspray
- Better suited for smaller projects, such as outdoor furniture
Cons
- Not ideal for large projects: takes longer to cover a broad area
- May require multiple coats for complete coverage
– Compressed Air Paint Sprayers
These sprayers use compressed air to atomize the paint and apply it to the surface. They are most commonly associated with automotive work but can also be effective for painting outdoor objects.
Pros
- Affordable compared to the other types of sprayers
- Can provide a flawless finish, especially on smooth surfaces
Cons
- Can be quite messy and use more paint compared to other sprayer types
- Require a separate air compressor, adding to the cost
• Preparing for Your Outdoor Paint Job
– Proper Surface Preparation
Before using your outdoor paint sprayer, it is essential to prepare the surface carefully. Pressure washing and scraping off any loose paint will ensure a smooth and even finish. Additionally, sanding may be required, especially on rough or previously painted surfaces.
– Choose the Right Paint
Choosing the right paint for your project is an important element to consider. Exterior paint is specifically formulated to withstand the elements without peeling, cracking, or fading. Using low-quality or interior paint could result in an undesirable final result and poor durability.
Additionally, consider whether a primer is necessary based on the surface material and condition.
– Mask Off Areas
To avoid any overspray or unintended paint application, be sure to mask or cover windows, doors, and any other areas that should remain paint-free. Make sure you use painter’s tape and drop cloths or plastic sheeting, and avoid painting on windy days.
• Tips for Using Your Outdoor Paint Sprayer
– Practice First
If you are new to using a paint sprayer, it is highly recommended to practice your technique before starting your actual project. This way, you can get a better understanding of the spray pattern, speed, and how much paint to use.
– Maintain A Consistent Distance and Angle
While using your paint sprayer, try to maintain a consistent distance of about 12 inches from the surface. Also, keep the sprayer at a 90-degree angle relative to the project surface. This helps ensure even coverage and reduces the chances of drips or runs.
– Proper Spray Technique
For the best results, overlap each pass by about 50%. Move your arm rather than your wrist to control the sprayer, and release the trigger at the end of each pass to avoid excessive paint buildup in one spot.
– Clean Your Sprayer
After completing your project, it is essential to clean your paint sprayer thoroughly. Refer to the manufacturer’s instructions for proper cleaning procedures, taking care to clean all of the components correctly, and avoiding damage to the unit.
• Recommended Outdoor Paint Sprayer Brands
– Graco
Known for their high-quality airless paint sprayers, Graco is a reliable and popular brand frequently used by professionals and DIY enthusiasts alike.
– Wagner
Wagner offers a range of paint sprayers, including both airless and HVLP models, making them a versatile choice for various outdoor projects.
– Fuji Spray
Specializing in HVLP paint sprayers, Fuji Spray is a reliable option for those looking for a sprayer with precision and control.
• Final Thoughts
An outdoor paint sprayer can be an invaluable tool for achieving a quick and professional-looking paint job.
By choosing the right type of sprayer for your needs, adequately preparing the surface, and following these helpful tips, you can dramatically improve the efficiency and results of your outdoor paint projects.
Which Kind of Paint Sprayer is Most Suitable for Exterior Applications?
Painting the exterior of your house or any large outdoor structure can be a daunting task. Choosing the right type of paint sprayer can make all the difference in both the quality of the finish and the ease of the job.
• Airless Paint Sprayers
Airless paint sprayers are one of the most popular options on the market for exterior projects. These sprayers work by using a high-pressure pump to force paint through a small nozzle or tip, creating an even and consistent spray of paint.
– Benefits of Airless Paint Sprayers
- Speed and Efficiency: Airless sprayers apply an even, unbroken coating of paint quickly and easily, allowing you to cover large areas in a short amount of time.
- Uniform Finish: The high-pressure spray of an airless sprayer ensures that paint is evenly distributed on the surface, leading to a professional-looking finish.
- Ease of Use: With less overspray and less clogging, airless sprayers are generally easy to use, making them suitable even for beginners.
– Drawbacks of Airless Paint Sprayers
- Cost: Airless paint sprayers can be more expensive than other types of sprayers, so if you’re working with a tight budget, this may not be the best option for you.
- Noise: Due to their powerful motor and high-pressure pump, airless sprayers can be quite noisy. While this may not be a problem for outdoor projects, it’s something to consider if you’re sensitive to noise.
I recommend the Graco Magnum X5 or the Wagner Control Pro 170 for homeowners looking for a durable and reliable airless paint sprayer.
• High-Volume Low-Pressure (HVLP) Paint Sprayers
HVLP paint sprayers operate by using a high volume of air with low pressure. This causes the paint to atomize and creates a fine mist that is applied to the surface. HVLP sprayers are known for producing a smooth and even finish while minimizing paint waste due to overspray.
– Benefits of HVLP Paint Sprayers
- Smooth Finish: HVLP sprayers provide a high-quality, smooth finish that is ideal for painting detailed or intricate surfaces.
- Less Overspray: The low-pressure system of HVLP sprayers helps to minimize overspray, which means less wasted paint and easier clean-up.
- Easy to Control: With less paint wasted due to overspray, it becomes easier to control the paint flow and achieve precise results.
– Drawbacks of HVLP Paint Sprayers
- Slower Application: HVLP paint sprayers tend to apply paint more slowly than airless or other types of sprayers, which could be a downside for large exterior projects.
- Limited Paint Compatibility: HVLP sprayers are often incompatible with thick paints or primers, which may require thinning before use, adding an extra step to your painting process.
The Fuji Semi-PRO 2 or the Wagner Flexio 590 are excellent choices for homeowners who want precise control and a smooth finish, albeit at a slower pace.
• Pneumatic (Air) Paint Sprayers
Pneumatic paint sprayers use compressed air to atomize the paint, creating a high-pressure spray that can be adjusted based on the air pressure and paint viscosity. These sprayers require an air compressor, which may be an additional expense if you don’t already own one.
– Benefits of Pneumatic Paint Sprayers
- Adjustable Pressure: By adjusting the air pressure, you can easily control the spray of paint, allowing for greater versatility in your painting techniques.
- Affordable: Pneumatic sprayers are generally less expensive than both airless and HVLP sprayers, making them a budget-friendly option for exterior projects.
– Drawbacks of Pneumatic Paint Sprayers
- Requires an Air Compressor: If you don’t already own an air compressor, you will need to purchase or rent one, which can be an additional expense.
- Less Control: Pneumatic sprayers generally offer less control over the paint flow compared to airless and HVLP sprayers, which can make achieving a consistent and smooth finish more difficult.
For those with access to an air compressor, the Campbell Hausfeld General Purpose Paint Spray Gun or the Astro Pneumatic Tool 4008 Spray Gun are cost-effective options.
• Conclusion
Ultimately, the best type of paint sprayer for exterior projects depends on your specific needs, desired finish quality, and budget. Airless paint sprayers are great for large projects and offer a uniform finish, while HVLP sprayers excel at producing a smooth finish with less overspray.
Pneumatic paint sprayers may be the most affordable option, but they require an air compressor and offer less control over the paint flow.
Before making a decision, it is important to weigh the pros and cons of each type of paint sprayer, as well as consider your experience level and the requirements of your specific project. By doing so, you can ensure that you are investing in the right paint sprayer for your exterior painting needs.
Is it Possible to Utilize a Paint Sprayer Outdoors?
Paint sprayers are versatile tools that allow you to quickly and efficiently apply paint to various surfaces. They can be a great time-saver for small and large projects alike, but can you use a paint sprayer outside?
• Benefits of Using a Paint Sprayer Outside
There are several advantages to using a paint sprayer for exterior projects, including:
– Speed and Efficiency
Paint sprayers apply paint much faster than traditional methods, such as brushing or rolling. This is particularly useful for large outdoor projects, like painting a house, fence, or deck.
– Even and Smooth Finish
A paint sprayer can provide an even, smooth finish on surfaces that may be difficult to achieve with traditional painting methods. Irregular or textured surfaces, such as stucco, brick or wood siding, are much easier to paint using a paint sprayer than with a brush or roller.
– Reduced Paint Waste
By evenly distributing paint across the surface, paint sprayers can help to reduce the amount of paint wasted during your project. This is not only beneficial for your budget but also for the environment.
• Selecting the Right Paint Sprayer for Outdoor Use
Choosing the appropriate paint sprayer for your project is crucial to ensure efficient and effective results when painting outdoors. There are several factors to consider when selecting a paint sprayer, including:
– Type of Paint Sprayer
There are two main types of paint sprayers that can be used outdoors: airless and high-volume low-pressure (HVLP) sprayers.
Airless Paint Sprayers
Airless paint sprayers are the most common type of sprayer for exterior projects. They use high pressure to force paint through a small nozzle, providing a uniform and even coat of paint.
Airless sprayers are suitable for large exterior projects, such as painting a house, fence, or deck, as they are fast and efficient. However, they may create overspray, which could lead to wasted paint and mess.
HVLP Paint Sprayers
HVLP paint sprayers use a large volume of low-pressure air to atomize paint and produce a fine spray. These systems are known for providing a smooth, high-quality finish with minimal overspray.
However, they typically have a slower application speed than airless sprayers and may not be ideal for large projects.
– Portability
Considering the size and weight of the paint sprayer is also important, as you will need to move it around your outdoor project. Look for a sprayer that is easy to transport, with features such as a wheeled design, a lightweight construction, or a backpack-style system.
• Preparing Your Work Area for Outdoor Paint Spraying
Before starting your outdoor paint spraying project, it’s important to prepare the work area to ensure a safe and efficient process. Consider the following tips:
– Cover Nearby Plants and Objects
Protect nearby plants, shrubs, or any other objects that you do not want to paint. You can use plastic drop cloths or tarps to shield the area from any potential paint overspray.
– Check Weather Conditions
Check the local weather forecast before starting your project. Ideally, you’ll want to paint when the temperature is between 50 and 85F and with a humidity level between 40% and 70%.
Additionally, it’s best to avoid painting in windy conditions as this can cause overspray to drift and create an uneven finish.
– Prepare the Surface
Thoroughly clean the surface prior to painting, removing dirt, dust, or any loose paint. For surfaces like decks or fences, pressure washing can be a fast and effective cleaning method. Ensure the surface is completely dry before applying paint.
• Best Practices for Using a Paint Sprayer Outside
To achieve the best results when using a paint sprayer outdoors, consider the following tips:
– Choose the Right Paint and Thinning
When using a paint sprayer, you may need to thin your paint to achieve the correct consistency. Always refer to the manufacturer’s instructions for guidance on thinning and mixing paint.
– Test Your Sprayer and Spray Pattern
Before tackling your project, test the sprayer on a piece of cardboard or scrap material to ensure the paint flows evenly and with the desired spray pattern. You can typically adjust the pressure and nozzle size to control the paint flow and pattern.
– Use Proper Spraying Technique
For a consistent paint application, hold the sprayer perpendicular to the surface at a distance of 10 to 12 inches. Use a sweeping motion, overlapping each pass by about 50% to ensure even coverage.
– Clean Your Paint Sprayer
Properly cleaning and maintaining your paint sprayer is essential for optimal performance and longevity. Always follow the manufacturer’s guidelines for cleaning and storing your sprayer.
In conclusion, using a paint sprayer outdoors can be an efficient and effective method for tackling a variety of exterior projects. Choosing the right sprayer, adequately preparing your work area, and following the best practices for painting will ensure a successful outcome for your outdoor project.
Question | Answer |
|---|---|
Can you use a paint sprayer outside? | Yes |
Is Applying Exterior Paint with a Brush or Sprayer More Effective?
When it comes to painting the exterior of a house or building, choosing the right application method can be just as important as selecting the perfect shade of paint.
The two most common application methods are brushing and spraying. Both methods have their advantages and disadvantages, so it’s essential to understand the best choice for your specific project.
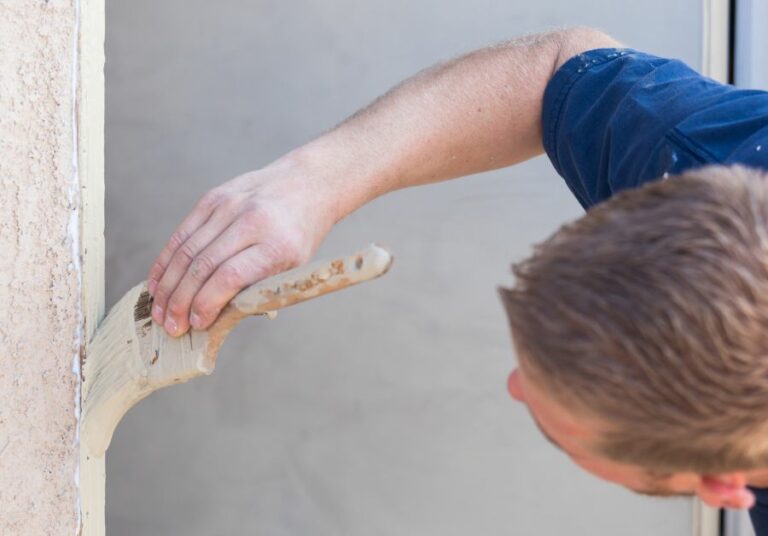
• Brushing Exterior Paint: The Classic Method
Brushing is the most traditional way of applying paint to a surface. It typically involves using a paintbrush and manually applying the paint in smooth, even strokes. This method can be time-consuming, labor-intensive, and may require multiple coats for coverage, but it has its benefits as well.
– Advantages of Brushing Exterior Paint
- Control: Brushing paint allows for more control over the application, making it easier to apply paint evenly and avoid drips, runs, and other imperfections. It’s also perfect for smaller or intricate spaces that require precision.
- Adherence: When brushed, paint can penetrate deeper into the surface material, resulting in better adherence and durability. This benefit can be particularly useful for older homes with rough or weathered surfaces.
- Cost-Effective: Brushes are cheaper than paint sprayers, making brushing a more affordable option for those on a tight budget. It’s also ideal for smaller-scale touch-ups and repairs where renting or purchasing a sprayer may not be cost-effective.
– Disadvantages of Brushing Exterior Paint
- Time-Consuming: Brushing paint is significantly slower than spraying, making it less ideal for large-scale projects. Multiple coats may also be necessary for adequate coverage, further increasing the time investment.
- Labor Intensive: Manually applying paint to a large area can be physically tiring and may lead to muscle fatigue, making it undesirable for older individuals or those with limited mobility.
• Spraying Exterior Paint: The Modern Approach
Spray painting involves using an airless sprayer to apply the paint evenly to a surface. This method has gained popularity for its speed and efficiency, although it does require more equipment and preparation than brushing.
– Advantages of Spraying Exterior Paint
- Speed: Spraying paint is considerably faster than brushing, making it an ideal choice for painting entire exteriors, particularly large buildings or homes. The speed of the application also saves time on projects requiring multiple layers of paint.
- Even Coverage: The spray application method allows for smooth, even coverage with minimal effort, significantly reducing potential imperfections caused by overlapping brush strokes. This even coverage can improve the overall appearance of the finished paint job.
- Less Physical Effort: Since spraying paint involves holding and operating a spray gun, physical exertion is reduced compared to the demanding task of brushing paint. This advantage makes spraying a more comfortable and accessible option for varied age groups and physical abilities.
– Disadvantages of Spraying Exterior Paint
- Cost: Spraying paint can be more expensive than brushing due to the cost of renting or purchasing an airless sprayer, as well as the required additional protective equipment, such as respirators and goggles.
- Preparation: Spraying paint requires extensive preparation to protect surrounding surfaces from overspray, such as taping off windows, doors, and other nearby areas. This extra preparation time may negate the time savings of a faster application method.
- Difficulty in Tight Spaces: Spraying paint can be challenging to control in tight or intricate spaces, making it less suitable for detailed work compared to brushing.
• So, Is It Better to Brush or Spray Exterior Paint?
Based on the advantages and disadvantages of each method, the choice of whether to brush or spray exterior paint depends on the specific needs of your project:
- For small-scale touch-ups, repairs, or intricate spaces, brushing may be the better option for increased control and precision.
- For older homes with rough, weathered surfaces, brushing can provide better adherence and durability.
- For large-scale projects or entire exterior repaints, spraying provides a faster and more efficient application process with even coverage.
- For those on a budget or without access to professional equipment, brushing may be more cost-effective.
Ultimately, the choice of whether to brush or spray exterior paint depends on the size of your project, budget, type of surface, and personal preference.
By evaluating the advantages and disadvantages of each method, you can make an informed decision to achieve the best possible outcome for your paint job.
Is It Necessary to Thin Exterior Paint for Use in a Sprayer?
Using a paint sprayer is a quick and efficient way to apply exterior paint to your home, fence, shed, or other outdoor surfaces. However, not all paint is created equally, so you may be wondering if you need to thin the paint before using it in a sprayer.
• The Importance of Thinning Paint for Sprayers
When it comes to painting with a sprayer, the consistency of the paint is crucial. Thick, heavy paint can lead to poor coverage, uneven application, and can even clog your paint sprayer, which could damage the device or require time-consuming clean-up.
Thinning the paint ensures a smooth, even application and helps prevent potential problems during the painting process.
Additionally, thinned paint is better able to reach into small cracks and crevices on the surface, ensuring better coverage and durability of the paint job.
• Types of Paint Sprayers and Compatibility with Thinned Paint
There are three main types of paint sprayers: airless, high volume, low pressure (HVLP), and compressed air sprayers. Each of these has different requirements for paint viscosity, so you should consider the type of sprayer you’re using before deciding if you need to thin your paint.
- Airless Sprayers: These sprayers work by forcing paint through a small nozzle at high pressure. They are ideal for large jobs and can handle thicker paint without issue. However, for some thicker paints like latex or acrylic, thinning might still be required to avoid clogging the nozzle.
- HVLP Sprayers: High volume, low pressure (HVLP) sprayers use a large volume of air at low pressure to atomize the paint. This results in less overspray and a finer finish compared to other sprayers. HVLP sprayers are more sensitive to paint viscosity, so you’ll likely need to thin your paint for optimal results.
- Compressed Air Sprayers: These sprayers use compressed air to atomize the paint and apply it to the surface. Like HVLP sprayers, they require thinner paint to work effectively.
• Identifying the Need to Thin Your Paint
Before thinning your paint, you should first consult the paint manufacturer’s guidelines for the specific product you’re using. These guidelines should indicate if thinning is necessary and, if so, the recommended thinning ratio for your paint.
If the guidelines are unclear or unavailable, a simple test you can perform is the viscosity test. To do this, take a stir stick and dip it into the paint.
Watch how the paint drips. If the paint drips in a steady, consistent stream (think the consistency of heavy cream), your paint is likely a suitable consistency for your sprayer. If it’s thicker, you may need to thin the paint.
• How to Thin Exterior Paint for a Sprayer
When thinning paint for a sprayer, you will need the following materials:
- Paint (latex, acrylic, or oil-based)
- Paint thinner suitable for the type of paint you’re using (water for latex paint, mineral spirits for oil-based paint, or a specific paint-thinning product for acrylic paint)
- A mixing container
- A paint stir stick or mixing paddle
- A strainer or mesh filter
Follow these steps to thin your paint correctly:
- Pour the paint into the mixing container. First, ensure your mixing container is clean and free of any debris. Pour the amount of paint needed for your project into the container.
- Determine the appropriate amount of thinner. Based on the manufacturer’s guidelines, calculate the correct ratio of paint to thinner. Always start with a conservative amount of thinner, as you can always add more if necessary, but you cannot remove thinner once it’s mixed.
- Add the thinner to the paint. Slowly pour the measured thinner into the paint, mixing the two components gently with the stir stick or mixing paddle.
- Mix the paint and thinner thoroughly. To achieve uniform consistency, mix the paint and thinner together using smooth, circular motions, fully incorporating the thinner into the paint. This process can take several minutes.
- Perform a viscosity test. Dip your stir stick into the thinned paint and observe the way it drips. Adjust the viscosity by adding more thinner, a little at a time, if necessary.
- Strain the paint. Before pouring the thinned paint into your paint sprayer, strain it through a mesh filter or strainer to catch any clumps or debris that could clog the sprayer.
• In Conclusion
While not every painting project may require the thinning of paint for a sprayer, it’s crucial to assess the specific needs of your job and the requirements of your paint sprayer.
By familiarizing yourself with the importance of thinning paint, the different types of sprayers, and the thinning process, you can ensure a successful and efficient exterior painting project. Happy painting!
Exterior Paint Type | Need to Thin | Description |
|---|---|---|
Latex Paint | Yes, sometimes | Latex paints might need to be thinned for use in a paint sprayer, depending on the viscosity of the paint and the specifications of the sprayer being used. |
Oil-Based Paint | Yes, usually | Oil-based paints are typically thicker and need to be thinned with a suitable solvent (e.g., mineral spirits) before being used in a paint sprayer. |
Acrylic Paint | Yes, sometimes | Acrylic paints might require thinning for use in a paint sprayer, particularly if they are high-viscosity or heavy-bodied paints. |
Alkyd Paint | Yes, usually | Alkyd paints are generally quite thick and require thinning with a suitable solvent (e.g., mineral spirits) before being used in a paint sprayer. |
Determining the Superior Method: Rolling versus Spraying Exterior House Paint
When it comes to painting the exterior of your house, you have two main application methods to choose from: rolling or spraying. Both techniques have their advantages and disadvantages, depending on factors such as the size of your house, the type of siding, and the paint you choose.
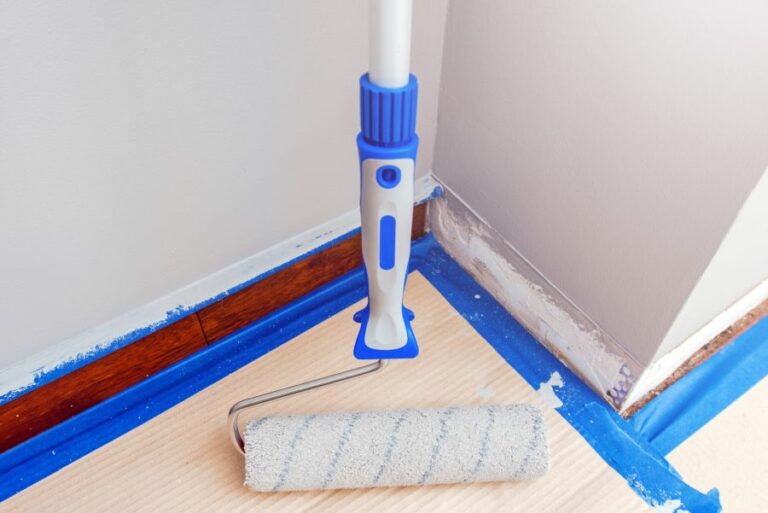
• Pros and Cons of Rolling Exterior House Paint
– Advantages of Rolling
1. Control and Precision
Rolling the paint onto the surface allows for greater control over the application process. With a roller, you can get more even coverage and adjust the pressure applied to the surface to achieve the desired finish. This is especially beneficial when working on detailed or textured surfaces where precision is key.
2. Less Overspray and Waste
Rolling results in less paint waste and overspray compared to spraying. This means fewer paint droplets will end up on nearby surfaces or plants, making cleanup much easier. Additionally, you will use less paint overall, which can lead to cost savings in the long run.
3. No Need for Special Equipment
Rolling doesn’t require any specialized equipment beyond a good-quality roller, an extension pole if needed, and a paint tray. This makes it an accessible and affordable option for many homeowners who want to tackle the task themselves.
– Disadvantages of Rolling
1. Time-Consuming
Rolling can be quite labor-intensive and time-consuming, especially when working on large surfaces or multi-story homes. It requires multiple passes to achieve full coverage, and you may need to apply more coats of paint compared to spraying.
2. Difficulty With Certain Surfaces
Rolling can be challenging on some types of exterior surfaces, such as stucco, brick, or other porous materials that can absorb the paint unevenly. In these situations, spraying may be a better option to ensure proper coverage.
• Pros and Cons of Spraying Exterior House Paint
– Advantages of Spraying
1. Speed and Efficiency
Spraying is typically much faster than rolling, which is a significant advantage when working on large projects or if you have a limited time frame. A paint sprayer can cover vast surfaces in a short period, making it a more efficient method overall.
2. Even Coverage on Textured Surfaces
Spraying is an excellent choice for textured or uneven surfaces, such as stucco or brick, where it can be challenging to achieve an even coat with a roller. The paint is atomized and distributed evenly across the surface, providing a smooth and consistent finish.
3. Fewer Coats Needed
With a proper spraying technique, you can achieve full coverage in fewer coats than with rolling. This means less time spent on the project and the potential for cost savings on paint.
– Disadvantages of Spraying
1. Overspray and Cleanup
Spraying can result in more paint waste and overspray compared to rolling. This means that some paint will end up on surrounding surfaces or plants, requiring more time for cleanup.
It’s crucial to take the necessary precautions, such as masking off windows and doors and covering nearby items with protective sheeting to minimize the mess.
2. Need for Special Equipment
Using a paint sprayer requires renting or investing in specialized equipment, which can be expensive for some homeowners. Additionally, there is a learning curve to using a paint sprayer effectively, and it may require some practice to achieve the desired results.
• Recommendations: Rolling Vs. Spraying Exterior House Paint
Based on the pros and cons discussed, the best method for painting your home’s exterior will depend on your specific situation and preferences. Here are some general guidelines to help you decide:
- Rolling is recommended for smaller or more detailed projects, where precision and control are essential. If you are working on a DIY project and have limited experience with paint sprayers, a roller might be a more practical and accessible option.
- Spraying is recommended for larger homes or surfaces with textures, such as stucco or brick, where achieving even coverage with a roller can be challenging. If you are working on a multi-story house or have a tight deadline, the speed and efficiency of a paint sprayer could save you valuable time.
Regardless of the method you choose, it’s essential to use high-quality paint and equipment to achieve the best results. Proper preparation, such as washing and repairing your home’s exterior, masking off windows and doors, and protecting nearby surfaces, is crucial for a successful paint job.
In conclusion, carefully consider the specific requirements of your home’s exterior and your painting skills when choosing between rolling and spraying.
Both application methods can achieve impressive results when done correctly, and ultimately, the right choice will depend on your individual needs and preferences.