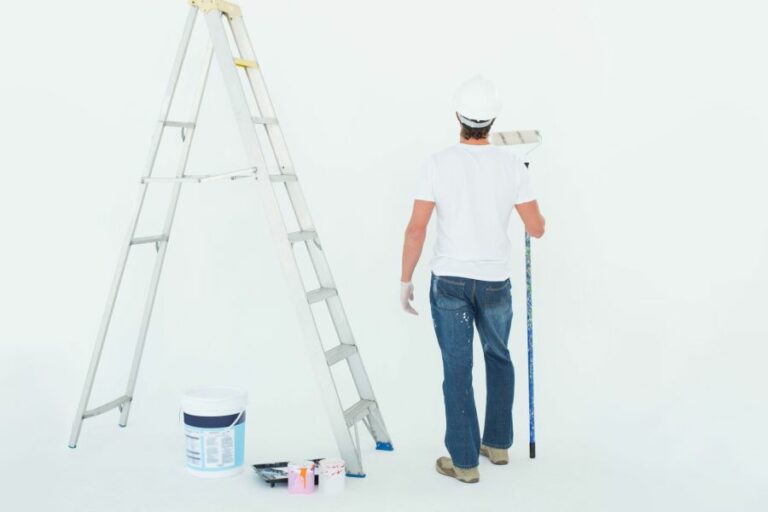
Outdoor Trim Paint, 25 Things You Should Know
Discover the transformative power of outdoor trim paint in our latest blog post! We dive into the world of exterior paint, exploring how the right shades and application techniques can elevate your home’s curb appeal to a whole new level. Perfect for homeowners looking for a cost-effective way to revamp their property’s exterior or DIY enthusiasts ready for their next project, this post promises valuable tips, inspirations, and more.
Outdoor trim paint:
Choosing the right outdoor trim paint involves considering factors such as durability, climate, surface material, and color retention. Latex (water-based) paint is popular for its ease of use and durability, while oil-based paint offers a smooth finish but takes longer to dry. Low-VOC options are available for those with sensitivities to paint fumes. Proper preparation, using a primer, and applying multiple thin coats are crucial for achieving a professional, long-lasting finish. Select paint based on factors like regional climate and surface material for the best results.

Discover the ultimate guide to choosing the perfect outdoor trim paint for your home. Explore factors like durability, color, and finish while learning application tips and techniques from professionals. Transform your home’s exterior with confidence and ease.
Contents
- 1 Exterior Trim Paint for Outdoors
- 2 What Type of Paint Should You Utilize for Outdoor Trim?
- 3 What is the Most Suitable Paint Finish for Exterior Trim Applications?
- 4 Is It Preferable to Use Flat or Satin Paint for Exterior Trim?
- 5 What are the Steps to Paint Exterior Wooden Door Trim?
- 6 What is the Optimal Choice for Exterior Trim?
- 7 Is Primer Necessary for Exterior Trim Painting?
Exterior Trim Paint for Outdoors
• Introduction
Choosing the right outdoor trim paint can be daunting for homeowners and professionals. With so many options available on the market, knowing which type will best suit your needs and preferences is essential.
• Types of Outdoor Trim Pai
– Water-Based (Latex) Paint
Latex paint is among the most popular types of outdoor trim paint due to its ease of use, quick-drying time, and excellent durability. It is also environmentally friendly, as it has low levels of volatile organic compounds (VOCs).
Latex paint offers excellent adhesion to various surfaces, and it is resistant to fading, cracking, and peeling.
– Oil-Based (Alkyd) Paint
Oil-based trim paint offers excellent durability and a smooth, hard finish. It is less susceptible to weather and less likely to fade or crack over time. However, oil-based paints take longer to dry and release a higher level of VOCs, which may pose concerns regarding air quality and health.
Additionally, oil-based paint requires mineral spirits for cleanup.
– Low-VOC Paint
Low-VOC paint has become more popular due to its reduced impact on air quality and personal health. These types of paint have a lower concentration of volatile organic compounds, making them better for the environment and people with allergies or sensitivities to strong paint fumes.
• Factors to Consider When Choosing Outdoor Trim Paint
– Durability
When selecting outdoor trim paint, prioritize durability. The paint should withstand harsh weather conditions, such as extreme temperatures, sunlight, and moisture. High-quality paint with excellent durability will save you time and money by reducing the need for frequent touch-ups and repaints.
– Climate
The climate in your region plays a crucial role in the choice of outdoor trim paint. For example, if you live in an area with frequent temperature fluctuations, consider a paint that can withstand expansion and contraction of the surfaces.
Additionally, people living in areas with high humidity should opt for paint designed to resist mildew and mold growth.
– Surface Material
The type of surface you are painting will influence the kind of paint you choose. Latex paint is ideal for wood and vinyl surfaces, whereas oil-based paint may work better on metal surfaces. Always refer to the manufacturer’s recommendations for the best results.
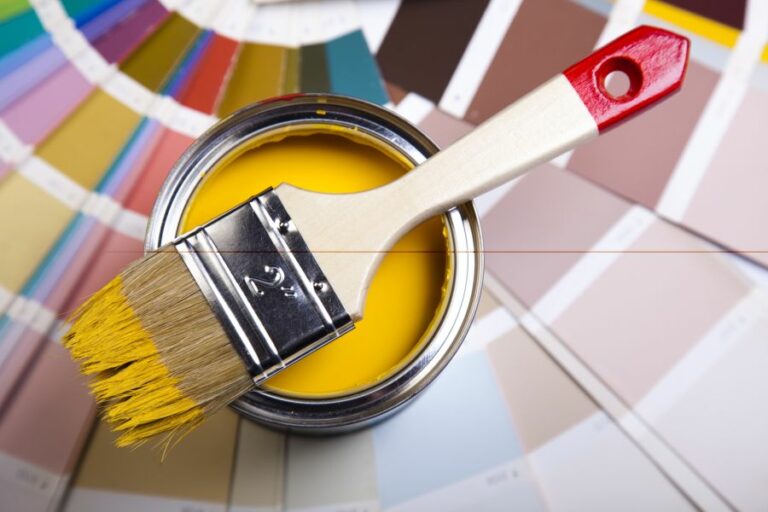
– Color Retention and Fade Resistance
Opt for paints that provide long-lasting color retention and fade resistance, ensuring your outdoor trim stays looking fresh and vibrant for an extended period. High-quality, UV-resistant paints will be better at preventing fading due to prolonged sun exposure.
• Tips for Applying Outdoor Trim Paint
– Proper Preparation
To achieve a professional-looking and long-lasting paint job, ensure that the surface is clean and free from dirt, grease, and loose or peeling paint. Sand down any rough or glossy surfaces to create an even base for the paint to adhere to effectively.
– Use a Primer
Applying a primer before painting your outdoor trim will enhance adhesion and ensure an even and long-lasting finish. It is particularly important when painting surfaces that have never been painted or those with a significant color change.
– Quality Brushes and Rollers
Invest in high-quality brushes and rollers for a smooth and even application. Choose brushes with soft bristles for water-based paints and natural bristle brushes for oil-based paints. Rollers with a finer nap are suitable for trim work.
– Multiple Thin Coats
For a durable and consistent finish, apply multiple thin coats of paint, allowing adequate drying time between each coat. Avoid applying thick coats, as this can lead to uneven coverage, dripping, and an ultimately less durable finish.
– Choose the Right Time
Selecting the right time to paint your trim can significantly affect the final outcome. Opt for days with mild temperatures, low humidity, and little to no wind. This will allow the paint to dry correctly and maintain a consistent finish.
• Conclusion
In summary, the key factors to consider when selecting the appropriate outdoor trim paint include the type of paint, climate, surface material, and durability requirements.
By carefully considering these aspects and following the tips provided in this article, you can achieve a professional and long-lasting finish on your home’s exterior trim.
Invest in high-quality products and take the time to prepare and plan; your outdoor trim paint job will be beautiful and long-lasting.
What Type of Paint Should You Utilize for Outdoor Trim?
Painting the outdoor trim of your home not only boosts its aesthetic appeal but also serves as a protective barrier against weather-related wear and tear. Choosing the right kind of paint is essential to ensure longevity and ease of maintenance.
• Types of Paint for Outdoor Trim
There are two main types of paint used for outdoor trim: latex and oil-based. Each of these has its benefits and drawbacks, so it is essential to understand their characteristics to determine the best choice for your specific needs.
– Latex Paint
Latex paint, also known as water-based paint, is a popular choice for outdoor trim because it is easy to work with, fast-drying, and has low levels of toxic emissions. Some of the advantages of using latex paint for outdoor trim include:
- Easy cleanup with soap and water
- Good color retention and resistance to fading
- Resistant to cracking and peeling
- Low odor and lower volatile organic compounds (VOCs)
However, latex paint may not adhere well to surfaces previously painted with oil-based paint. In this case, it is crucial to prime the surface before applying latex paint to ensure proper adhesion and avoid peeling.
– Oil-Based Paint
Oil-based or alkyd paint is an alternative to latex paint for outdoor trim. Oil-based paint has several benefits that make it suitable for outdoor trim, such as:
- Excellent adhesion, even on surfaces previously painted with oil-based paint
- Superior durability and resistance to wear and tear
- Resistant to mildew and rot
Despite these advantages, oil-based paint has some downsides. It has a strong odor and high VOCs, requires solvents for cleanup, and takes longer to dry than latex paint.
• Factors to Consider When Selecting Paint for Outdoor Trim
Several factors should be taken into account when choosing paint for your outdoor trim to ensure the best performance and longevity.
– Climate and Weather Conditions
Climate and weather conditions play a significant role in the durability of outdoor trim paint. High humidity, excess sunlight, and temperature fluctuations can cause paint to fade, crack, or peel. Choosing a paint specifically formulated for exterior use that can withstand these conditions is essential.
– Surface Material and Condition
The material and condition of your outdoor trim will also influence your paint choice. For example, latex paint is generally more flexible and can expand and contract with wood better than oil-based paint, making it a better choice for wooden trim.
An oil-based paint with good adhesion properties may be more suitable for surfaces like metal or plastic.
Before painting, it’s crucial to prepare the surface properly. If the trim is peeling or flaking, remove all loose paint using a scraper, wire brush, or sandpaper. Additionally, clean any dirt, mildew, or other debris from the surface to promote better adhesion.
– Paint Finish
There are different finishes available for exterior paints, including flat, matte, eggshell, satin, semi-gloss, and high-gloss. For outdoor trim, semi-gloss or high-gloss paints are recommended due to their durability and ease of maintenance.
A glossy finish is easier to clean and resists dirt and mildew better than a flat finish, making it ideal for trim.
• Proper Application Techniques for Outdoor Trim Paint
To achieve a professional and long-lasting finish on your outdoor trim, it is essential to follow proper application techniques. Some recommended steps include:
- Priming: To ensure proper adhesion and coverage, apply a high-quality exterior primer to the surface before painting. This is especially important if you are painting over oil-based paint with latex paint or if the surface is heavily stained or weathered.
- Brush Selection: Choose a high-quality brush with synthetic bristles for latex paint or natural bristles for oil-based paint. A 2 to 2.5-inch angled brush is ideal for trim work.
- Paint Application: Apply the paint with even, overlapping strokes. For best results, work on one section of the trim at a time, maintaining a wet edge to minimize brush marks and ensure a smooth finish.
- Multiple Coats: When painting outdoor trim, it is recommended to apply at least two coats for optimal durability and protection.
In conclusion, the choice between latex and oil-based paint for outdoor trim depends on factors such as climate, surface material, and condition.
Proper surface preparation, paint application techniques, and using paint specifically formulated for exterior use will guarantee a professional, long-lasting finish for your outdoor trim.
Type of Paint | Features |
|---|---|
Latex (Water-based) Paint | Durable, easy cleanup, quick-drying, low odor, and environmentally friendly. |
Acrylic Latex Paint | Provides longer-lasting protection and better adhesion compared to regular latex paint. |
Oil-based Paint | Higher durability, glossier finish, smoother application, and better protection for wooden trim. |
Alkyd Paint | A type of oil-based paint that offers better leveling, quicker drying time, and easy cleanup with water. |
What is the Most Suitable Paint Finish for Exterior Trim Applications?
Selecting the right paint finish for your exterior trim can significantly enhance the overall appearance of your home. With a wide range of finishes available in the market, choosing the best one can be a daunting task.
• Types of Paint Finishes
There are various types of paint finishes in the market, each with its distinct characteristics. Some common types include:
– Flat/Matte
Flat paint has a non-reflective surface with a low sheen level. It is ideal for disguising surface imperfections and provides an even, smooth finish. However, it is not highly durable and does not withstand frequent cleaning or harsh weather conditions, making it unsuitable for exterior trim.
– Eggshell
Eggshell has a soft, velvety appearance with a low to medium sheen level. It is more durable than flat paint but is not the best option for exterior trim since it does not hold up well against dirt, grime, and harsh weather conditions.
– Satin
With a medium sheen level, the satin paint finish has a slightly glossy appearance. It is more durable and easier to clean compared to eggshell and flat paint finishes. Satin paint can withstand moderate weather conditions and repel dirt and moisture, making it a more suitable option for exterior trim.
– Semi-gloss
The semi-gloss paint finish has a higher sheen level, creating a subtle shine on the surface. It is highly durable, easy to clean, and resists staining and mildew. Semi-gloss paint is an excellent choice for exterior trim because it can withstand harsh weather conditions.
– Gloss
Featuring the highest sheen level, the gloss paint finish has a reflective, mirror-like appearance. It is highly durable, stain-resistant, and easy to clean, making it an ideal choice for high-traffic areas and surfaces exposed to harsh weather conditions.
Gloss paint has excellent adhesion and color retention properties, perfect for exterior trim.
• Factors to Consider when Choosing Exterior Trim Paint Finish
– Durability
Exterior trim is exposed to various elements like sun, rain, dirt, and other harsh conditions. Therefore, you need to select a paint finish that is highly durable and can withstand these factors for an extended period.
Semi-gloss and gloss paint finishes are ideal choices due to their high durability and resistance to dirt, moisture, and stains.
– Ease of Maintenance
The exterior trim requires regular maintenance to keep it in good condition. Choosing a paint finish that is easy to clean and maintain should be a priority. Semi-gloss and gloss paint finishes are easy to clean and maintain compared to flat, eggshell, or satin finishes.
– Aesthetic Appeal
Selecting a paint finish that complements your home’s exterior design and enhances its overall appearance is also essential. While a gloss paint finish can add a modern, sleek touch to your home’s exterior trim, semi-gloss paint provides a more classic, subtle look.
– Surface Imperfections
If your exterior trim has imperfections or blemishes, choosing a paint finish that can hide or minimize the visibility of these flaws is critical. Flat and eggshell finishes can conceal small imperfections well, but their low durability makes them unsuitable for exterior trim.
Alternatively, a satin paint finish can strike a balance between hiding imperfections and ensuring durability.
• Recommendations
Based on durability, maintenance, and aesthetics, I recommend using either semi-gloss or gloss paint finishes for your exterior trim. These finishes provide excellent durability and ease of maintenance and add elegance to your home’s overall appearance.
While a gloss paint finish can create a bold, modern look, a semi-gloss paint finish can achieve a more subtle, classic style. Ultimately, the choice between semi-gloss and gloss paint finishes will depend on your personal preference, design goals, and the specific needs of your exterior trim.
In conclusion, selecting the best paint finish for your exterior trim involves considering factors such as durability, maintenance requirements, aesthetic appeal, and surface imperfections.
By evaluating these factors and understanding the different types of paint finishes available, you can make an informed decision and choose the best paint finish to enhance your home’s exterior trim, protect it from harsh weather conditions, and boost your home’s curb appeal.
Finish Type | Description | Advantages |
|---|---|---|
Satin | A satin finish has a slight shine and is also referred to as eggshell or low luster. It is a versatile finish that works well on various surfaces, including wood trim, metal, and masonry. | |
Semi-gloss | A semi-gloss finish has a higher shine than satin and typically reflects more light. It is a popular choice for exterior trim work because it offers a durable and easy-to-clean surface. | |
Gloss | A gloss finish has the highest level of shine and is often used for applications that require a high degree of durability and protection. It reflects the most light, which can help bring attention to architectural details like trim work. |
Is It Preferable to Use Flat or Satin Paint for Exterior Trim?
When it comes to choosing the right paint finish for your home’s exterior trim, it might be confusing to decide between flat and satin. Both finishes have their merits, but which one is the best for your specific needs?
• A Brief Overview of Paint Finishes
Before diving into the details of flat and satin finishes, let’s briefly look at the hierarchy of paint finishes. All paint finishes can be classified into five categories based on their sheen level:
- Flat (or Matte)
- Eggshell
- Satin
- Semi-Gloss
- Gloss
The sheen level ranges from no sheen in flat paint to a high sheen in gloss paint. The sheen level is significant when it comes to factors like durability, stain resistance, and washability.
• Flat Paint Finish: A Closer Look
Flat paint, also known as matte paint, has the least amount of sheen. This finish is known for its ability to conceal surface imperfections and distribute light evenly. Some key features of flat paint finishes are:
- Excellent for hiding surface imperfections
- Non-reflective, making it perfect for uneven surfaces
- Provides a uniform, smooth appearance
- Less stain resistance and washability compared to other finishes
– Pros
- Hides imperfections and blemishes
- Absorbs sunlight and minimizes glare
- Offers a classic, subtle appearance
– Cons
- Less durable compared to higher sheen finishes
- Not as easy to clean, resulting in more frequent repainting
- Can appear chalky over time, especially on surfaces exposed to sunlight
• Satin Paint Finish: A Closer Look
Satin paint finishes are a popular choice for exterior trim. These paints have a subtle sheen, making them a perfect middle ground between flat and glossier options. Some key features of satin paint finishes are:
- Offers a slight sheen, adding depth to colors
- Balance of durability and subtlety
- Easier to clean and maintain than flat paint finishes
- Provides sufficient stain and moisture resistance
– Pros
- Durable and long-lasting
- Easier to clean and maintain
- Provides a subtle sheen, adding dimension to your home’s exterior
- Better resistance to weather and environmental elements compared to flat finishes
– Cons
- Not as effective as flat paint in hiding surface imperfections
- Slightly more reflective, which can draw attention to uneven surfaces
• Choosing the Right Finish for Your Exterior Trim
– Factors to Consider
When deciding on the ideal paint finish for your exterior trim, consider the following factors:
- The type and condition of your home’s exterior siding
- The architectural style of your home
- The climate and weather exposure your home faces
- The desired aesthetic appearance and maintenance preferences
– Recommendations
Based on the factors mentioned above and personal experience, a satin paint finish is generally recommended for exterior trim. It provides the right balance of durability, aesthetics, and ease of maintenance.
However, if concealing surface imperfections is a primary concern for your project or if you prefer a more subtle, matte appearance, a flat paint finish can also be an appropriate choice.
• Conclusion
Choosing the right paint finish for your home’s exterior trim is important. Both flat and satin finishes have their pros and cons, and the ideal choice will depend on your specific needs and preferences.
By considering factors such as your home’s architecture, siding, weather exposure, and desired aesthetic and maintenance preferences, you’ll be well-equipped to select the perfect paint finish for your exterior trim.
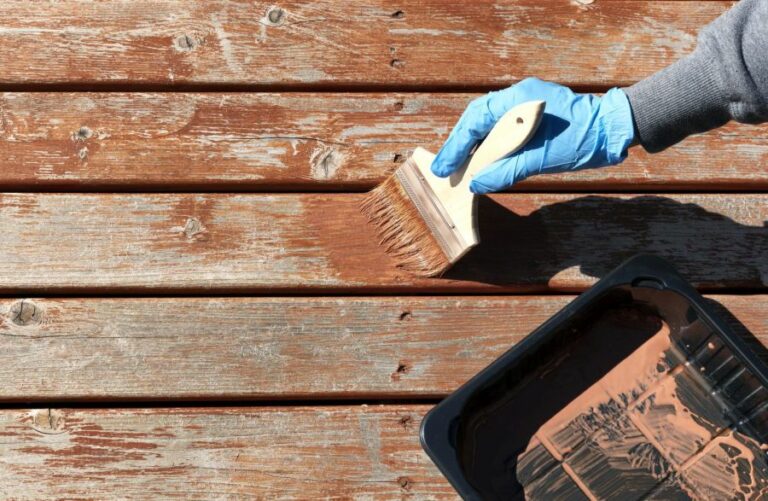
What are the Steps to Paint Exterior Wooden Door Trim?
Painting exterior wood door trim is an excellent way to enhance the curb appeal of your home and protect your trim from the elements.
• Preparing the Surface
– Cleaning the Trim
Before you begin, clean the door trim thoroughly to remove any dirt, debris, and mildew. To do this, mix a solution of mild detergent and water in a bucket, then use a sponge or soft-bristle brush to scrub the trim gently.
Rinse with clean water and allow the trim to dry completely before moving on to the next step.
– Sanding and Repairing
If you notice any rough spots, peeling paint, or surface imperfections on the door trim, smooth these out using medium-grit sandpaper.
Be sure to sand in the direction of the wood grain to avoid damaging the wood fibers. Pay particular attention to areas with peeling paint, ensuring that you remove all loose material.
If there are any cracks, holes, or gaps in the wood, fill them with an exterior wood filler designed for outdoor use. Apply the filler according to the manufacturer’s instructions and allow it to dry completely. Once it has dried, sand the filled areas smoothly to blend them with the surrounding wood.
Finally, wipe down the trim with a clean, damp cloth to remove any sanding dust.
– Taping and Protecting Adjacent Surfaces
To protect surfaces next to the door trim, such as windows or the siding of your house, apply painter’s tape along the edges. Additionally, lay down drop cloths or plastic sheeting to shield the ground and nearby items from paint.
• Selecting the Right Paint and Supplies
– Choosing a Primer
A primer is essential when painting exterior wood door trim, as it helps create a smooth, even surface for the paint to adhere to and increases its durability. Opt for an oil-based primer, which offers superior adhesion, sealing, and stain-blocking capabilities compared to latex-based primers.
Ensure that the primer you choose is suitable for exterior wood surfaces.
– Picking a Topcoat
When selecting the paint for your door trim, use high-quality exterior paint, either water-based acrylic-latex or oil-based. These paints provide excellent adhesion, coverage, and durability against the elements.
Be sure to select a sheen based on your desired look and the maintenance you’re willing to undertake. Gloss and semi-gloss sheens are more forgiving of imperfections and easier to clean, while satin and matte finishes offer a softer, more subtle appearance.
– Gathering Appropriate Tools
Equip yourself with high-quality painting supplies for a professional finish. Obtain a paintbrush with synthetic bristles for acrylic-latex paint or natural bristles for oil-based paint.
A 2-inch angled sash brush is ideal for painting door trim, as it allows for precise cutting in and easy maneuverability. Additionally, you’ll need a paint tray or small bucket, a stirring stick, and a paint can opener.
• Painting the Door Trim
– Applying the Primer
Stir the primer well before use, and pour a small amount into the paint tray or bucket. Starting at the top of the door trim and working your way down, apply a thin, even coat of primer using the brush.
Use long, smooth brush strokes in the direction of the wood grain, and avoid overloading the brush to prevent drips and buildup.
Allow the primer to dry according to the manufacturer’s recommended time, typically a minimum of four hours.
– Painting the Topcoat
Once the primer has fully dried, stir your chosen paint thoroughly and pour a small amount into the painting tray. Starting at the top of the door trim and working your way down, apply the first coat using the same technique as with the primer, long, smooth brush strokes in the direction of the wood grain.
Allow the first coat to dry for the amount of time specified by the manufacturer, usually between two to four hours.
If the trim is dark and you’re painting it a lighter shade, you may need to apply a second coat of paint. Allow the first coat to dry completely before applying the second coat in the same manner.
– Cleaning Up and Removing the Tape
Once the final coat of paint is dry, carefully remove the painter’s tape from the edges. If any paint has seeped under the tape, use a utility knife to score along the edge before peeling it away to avoid damaging the paint job or the adjacent surfaces.
Clean your painting tools and dispose of any paint containers and debris according to your local regulations.
• Final Thoughts
Achieving a professional-looking paint job on your exterior wood door trim is possible if you follow these detailed steps.
By taking the time to prepare the surface, choosing the right paint and tools, and applying the paint with care, you can enhance the curb appeal of your home while protecting your door trim from the elements.
Step | Description |
|---|---|
1 | Remove any hardware or fixtures from the trim to prevent paint from getting on them. |
2 | Clean the door trim thoroughly using a mild soap and water mixture, and then allow it to dry completely. |
3 | Repair any damages, such as cracks or holes in the trim, using wood filler. Sand the repaired areas until smooth once the filler has dried. |
4 | Sand the entire door trim with fine-grit sandpaper to promote paint adhesion. |
5 | Wipe the trim with a tack cloth to remove any dust created by sanding. |
6 | Apply a coat of exterior primer to the trim with a high-quality paintbrush, and allow it to dry for the recommended time. |
7 | Apply the first coat of exterior paint to the trim using a paintbrush, making sure to follow the direction of the wood grain. |
8 | Allow the first coat of paint to dry for the recommended time, and then apply a second coat if necessary. |
9 | Allow the paint to dry completely before reinstalling any hardware or fixtures on the door trim. |
What is the Optimal Choice for Exterior Trim?
Exterior trim is a vital element in home design, providing both aesthetics and functional benefits. It is the finishing touch that ties together a home’s overall appearance while also serving as a protective barrier against harsh weather.
• Common Exterior Trim Materials
When it comes to choosing the best material for your exterior trim, there are several options to consider. Below, we explore the most popular materials, their advantages, and disadvantages.
– Wood Trim
Wood is a traditional choice for exterior trim and remains a popular choice among homeowners. It can be easily cut and shaped to fit any architectural style, offering a timeless, classic look.
Advantages:
- Versatile and easy to work with
- Desired by homeowners for its traditional look
- Can be painted or stained to match the home’s exterior
Disadvantages:
- Requires regular maintenance to prevent rot and decay
- Can be susceptible to insects, such as termites
- Can be costly, depending on the type of wood and availability
– Vinyl Trim
Vinyl trim is a popular, low-maintenance option for homeowners seeking an affordable and durable solution. It is made from PVC (polyvinyl chloride), a type of plastic that resists fading, rotting, and insect damage.
Advantages:
- Low maintenance and durable
- Resistant to fading, rot, and insects
- Cost-effective compared to some other materials
- Available in a variety of colors and styles
Disadvantages:
- Can look less natural than wood
- May become brittle in extreme cold or heat
- Limited in terms of customization and intricate design options
– Fiber Cement Trim
Fiber cement combines the durability of cement with the flexibility of wood fibers, creating a strong and stable material. This type of trim is designed to mimic the appearance of wood without the susceptibility to rot and insects.
Advantages:
- Durable against rot and insects
- Can be painted or stained to match the home’s exterior
- Resistant to fire and extreme temperature changes
Disadvantages:
- Can be heavy and more challenging to install
- Requires repainting or staining every few years
- May require professional installation due to its weight
– Engineered Wood Trim
Engineered wood trim is made from wood fibers bonded with resin, resulting in a lightweight yet strong material. This type of trim can be treated to resist rot and insects, making it a more stable alternative to traditional wood.
Advantages:
- Lightweight and easy to work with
- Resistant to rot and insects
- Can be painted or stained to match the home’s exterior
Disadvantages:
- May still require regular maintenance and painting
- Not as durable as some other materials, with a tendency to warp or split over time
• Tips on Maintaining Exterior Trim
Regardless of the material you choose for your home’s exterior trim, proper maintenance is essential to ensure its longevity and appearance. Here are some tips to help you care for your trim:
- Inspect Regularly: Regularly inspect your trim for signs of damage, such as cracks, peeling paint, or rot. Address any issues promptly to prevent further deterioration.
- Clean and Repair: Keep your trim clean by washing it with a mild soap and water solution. Repair any cracks or damaged areas to prevent moisture intrusion and further degradation.
- Paint and Seal: For wood, fiber cement, and engineered wood trim, ensure that it is properly painted or stained to protect it from moisture, UV radiation, and other environmental factors. Periodically repaint or re-stain the trim as needed, typically every few years.
- Consider Professional Help: If you are not comfortable performing maintenance tasks or if your trim requires significant repairs, consider hiring a professional contractor to ensure your trim is properly maintained.
• Final Thoughts on Choosing the Best Exterior Trim
Ultimately, the best exterior trim material for your home depends on your personal preferences, budget, and maintenance expectations. Each material has its unique advantages and disadvantages, but with proper care and maintenance, all can contribute to a beautifully finished, well-protected home.
Material | Advantages | Disadvantages |
|---|---|---|
Wood | Natural look, easy to work with, many species available | Prone to rot, requires regular maintenance, can be expensive |
Vinyl | Low cost, low maintenance, easy to install | Can look cheaper, susceptible to warping and cracking, not as durable as other options |
Fiber Cement | Low maintenance, durable, rot resistant, fire resistant | Heavier, more difficult to install, can be more expensive |
Aluminum | Low maintenance, durable, rot resistant | Can be easily dented, not suitable for DIY, color can fade over time |
Is Primer Necessary for Exterior Trim Painting?
Exterior trim paint is an essential component of any home maintenance plan. Whether you are looking to make your home’s exterior more visually appealing or want to protect your trim from weathering and damage, a fresh coat of paint can go a long way. But is primer necessary for exterior trim paint?
• Understanding the Role of Primer
Before we dive into whether or not you need a primer for your exterior trim paint, it’s important first to understand what a primer is and its role in the painting process.
Simply put, primer is a preparatory coating applied to surfaces to ensure better adhesion of paint, increase durability, and provide additional protection for the underlying material. Primers come in various types, such as oil-based, latex, and shellac-based, each with its own unique characteristics.
– Improved Adhesion
One of the key benefits of using a primer is that it enhances adhesion between the trim material and the paint. By preparing the surface and creating a uniform base for the paint to adhere to, primer reduces the likelihood of the paint peeling or flaking over time.
– Enhanced Durability
Primer serves as a protective barrier between the trim material and the paint. By sealing any porous surfaces, the primer helps prevent moisture from seeping into the trim material. This ultimately helps prolong the life of both the paint and the trim.
– Additional Protection
Besides improving adhesion and durability, primer also provides additional protection to the trim material. For instance, specialized primers can help prevent knots, tannins, or resins from bleeding through the paint or prevent rust formation on metal surfaces.
• When to Use Primer on Exterior Trim
Now that we have established the importance of primer, let’s discuss when you should use it for painting your exterior trim.
– New or Bare Trim
If you are painting new or bare trim, it is highly recommended that you use a primer. This is because new materials, especially porous ones like wood or fiber cement, need to be sealed to create an even surface for paint application.
Additionally, a primer will help prevent the paint from being absorbed into the material, which could result in an uneven finish.
– Damaged or Weathered Trim
In cases where the trim exhibits extensive damage, such as chipping, flaking, or weathering, a primer is essential to restore a smooth surface for paint application. By filling in any cracks, gaps, or imperfections, the primer creates a uniform surface that will ultimately result in a better final appearance.
– Change in Color
If you plan to make a significant color change, a primer can be instrumental in ensuring the new paint color appears true and vibrant. For instance, if you want to paint a dark trim with a lighter color, using a primer will prevent the dark color from showing through the new paint.
– Variety in Trim Material
If your exterior trim is composed of different materials, such as wood and metal or composite materials, a primer can help ensure consistent adhesion and finish, regardless of the underlying surface.
• Choosing the Right Primer
Selecting the appropriate primer for your exterior trim paint job is crucial in achieving the desired results. Here are some factors to consider when selecting a primer:
- Trim Material: Be sure to choose a primer designed to work with your specific trim material, as the compatibility of primer and trim may affect adhesion and performance.
- Paint Compatibility: Ensure that the primer you choose is compatible with the type of paint you intend to use, as some types of primer may not work well with specific paint formulations.
- Moisture Resistance: Select a primer that offers moisture resistance if your exterior trim is exposed to high levels of humidity or water exposure.
- Stain Blocking: If you have concerns about stains, knots, or resins bleeding through, opt for a primer with stain-blocking properties.
• Wrapping Up
In conclusion, while it may be tempting to skip the primer to save time and money, it is a vital step for achieving a long-lasting and high-quality exterior trim paint job.
From improving adhesion and durability to providing additional protection, a primer can make all the difference in the final appearance and longevity of your painted trim.
As a professional with experience in painting exterior trims, I recommend always using a primer for the best results. Remember to take into consideration the trim material, paint compatibility, moisture resistance, and stain-blocking properties when selecting your primer.
By following these guidelines, you are sure to have a successful exterior trim paint project that will stand the test of time.
Exterior Trim Material | Need Primer | Reasoning |
|---|---|---|
Wood | Yes | Primer provides a good base for paint by sealing porous surfaces and provides better paint adhesion. |
Metal | Yes | Primer prevents rust and corrosion on metals and also helps the paint to adhere better. |
Vinyl | Yes | Primer enhances paint adhesion on vinyl trim, which can be difficult to paint due to its plastic-like surface. |
Fiber Cement | Yes | Primer provides a consistent, smooth surface for paint, preventing it from being absorbed into the fiber cement substrate. |
Previously Painted Surface | Depends | If the existing paint is in good condition, primer may not be necessary; however, if the paint is cracked, peeling, or has multiple layers, primer is recommended for better adhesion and finish. |